This project was built and designed by Jodee from Inspire Woodcraft.
It’s a low-cost, high-impact upgrade that helps keep your bandsaw station clean by catching offcuts and sawdust before they hit the floor.
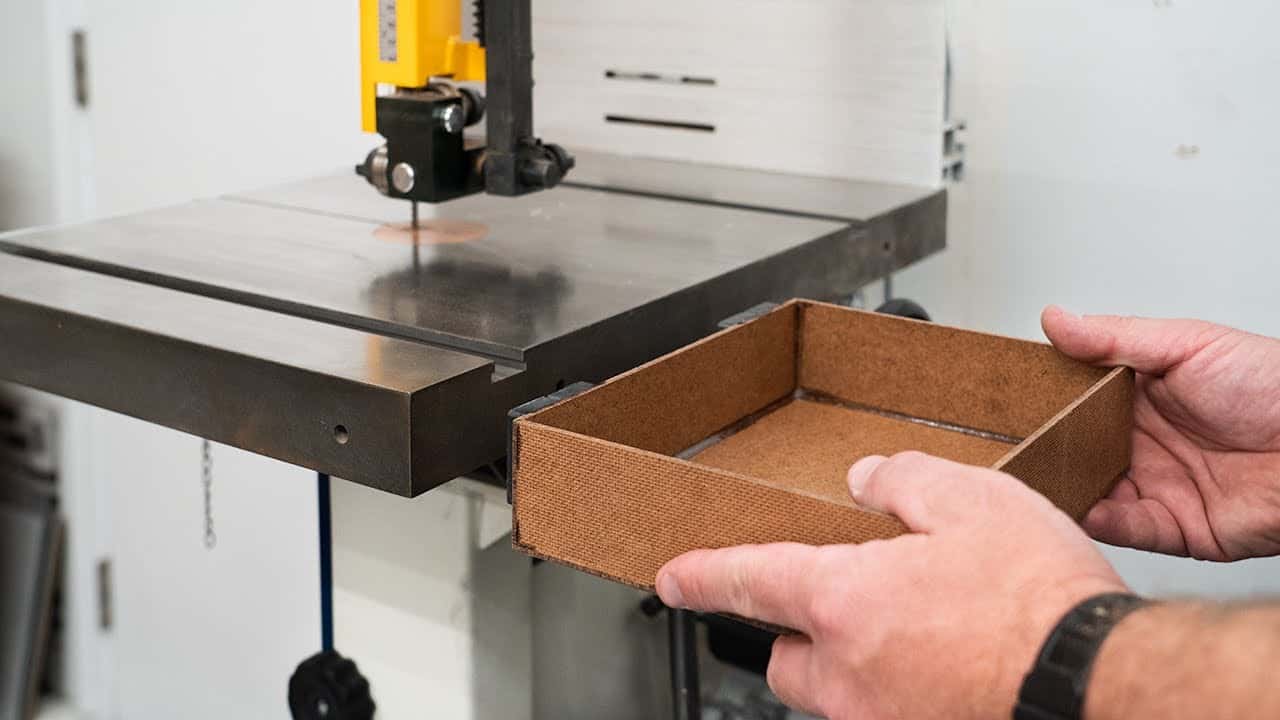
Instead of sweeping up a pile behind the bandsaw every day, this removable tray mounts with magnets and collects scraps directly from the back of the table. It’s quick to build, lightweight, and doesn’t require any permanent modifications to your saw.
Watch the full video and subscribe to Jodee’s channel:
Why a Cutoff Tray Makes a Big Difference
The area behind a bandsaw table tends to collect offcuts, dust, and debris. Over time, this mess becomes more than just annoying—it can hide hardware, create slipping hazards, and slow down your workflow.
Jodee’s tray addresses that problem with a design that’s easy to replicate. It’s simple, removable, and completely non-invasive to the tool itself. It adds utility without getting in the way, which makes it a smart upgrade for any shop.
Materials and Mounting Strategy
The tray is made from thin, rigid sheet material that’s easy to cut and glue. It’s durable enough to handle daily use but light enough for magnetic mounting without slipping or shifting.
Rather than screwing anything into the saw or clamping it awkwardly in place, magnets are used to hold the tray. This keeps things simple—just press the tray into place under the back edge of the saw table and you’re done.
Overall Construction Concept
Jodee’s approach avoids fussing with detailed joinery. Instead, he focuses on speed and strength using fast-curing adhesives.
The tray consists of four walls and a bottom panel. The bottom is cut slightly oversized at first, then trimmed flush after assembly to ensure a clean fit.
Magnets are attached to the outer surface of the tray where they make contact with the metal underside of the table. This allows the entire tray to pop off easily when it needs to be emptied and snap right back into place without tools.
Building the Tray: Step by Step Overview
The process begins by cutting the side panels and bottom from the sheet stock. Exact dimensions aren’t critical as long as the tray fits under your specific saw table.
The side pieces are glued together using a thin CA adhesive. Corners are aligned and bonded quickly with the help of an accelerator to speed up the process.
Once the walls are assembled, the bottom is glued on next. Any overhang is trimmed later, either by hand or using a router table with a flush-trim bit.
Magnets are glued to the back face of the tray using a thicker adhesive. This helps ensure the glue doesn’t absorb into the material and weaken the bond. Jodee recommends letting these dry fully before attempting to mount the tray to avoid premature failure.
Helpful Build Tips
Jodee shares several techniques to improve the build and help the tray last longer:
- Use the smooth side of the sheet material for all joints. This creates a stronger bond and cleaner seams.
- Protect your work surface from glue by laying down parchment paper or a sacrificial sheet underneath.
- Always allow adhesives to cure fully before applying pressure, especially where magnets are concerned.
- Leave the bottom panel slightly oversized so you can trim it flush after the tray is fully assembled.
Mounting and Emptying
Once built, the tray mounts directly under the bandsaw table using the magnets. It holds snugly but is easy to remove when full.
Emptying is simple: just lift it off, dump the contents into a waste bin, and pop it back into place. No tools or adjustments are needed, and it keeps the bandsaw area much cleaner during repeated use.
Safety and Material Notes
Jodee also offers some smart safety considerations:
- If your saw has electronic braking or sensors, make sure magnet placement doesn’t interfere with its operation.
- Keep magnets away from electronics or pacemakers—rare earth magnets can be surprisingly strong.
- If your sheet material generates dust or sparks under friction, be cautious with powered sanding or cutting tools.
Adaptability and Customization
One of the strengths of this tray design is how easy it is to adapt. You can make it deeper, wider, or even taller depending on the size of your saw and the volume of material you typically cut.
You can also modify the mounting method—Jodee uses magnets for flexibility, but permanent mounting options are available if your setup never changes.
Clear sheet stock is another option if you want to see inside the tray more easily, though it may require different adhesives or bonding techniques.
A Clean, Simple Upgrade
This cutoff tray doesn’t take long to build, doesn’t cost much, and solves a real workshop problem. Jodee’s method shows how a smart solution doesn’t have to be complicated—it just has to work.
Whether you’re in a small garage shop or a larger workspace, this little addition can save time and effort during every bandsaw session.
Support Jodee by visiting his online store here: https://inspirewoodcraft.com/collections/all.

Matt’s Take
These are my personal thoughts and tips based on my own experience in the shop. This section is not written, reviewed, or endorsed by the original creator of this project.
This type of magnetic mounting system is brilliant for shop accessories because it gives you the best of both worlds — secure attachment when you need it, but instant removal for cleaning or storage. The key with rare earth magnets is getting the right strength for the weight of your tray. Too weak and it’ll slide around or fall off when loaded with scraps. Too strong and you’ll struggle to remove it when it’s time to empty.
CA glue and accelerator is a solid choice for this kind of quick assembly work, but keep in mind that CA can get brittle over time, especially in temperature swings. If you’re building this for heavy daily use, consider backing up critical joints with a few small screws or switching to a structural adhesive like epoxy for the corners. The magnet attachment points are especially important — those need to hold under the dynamic loading of scraps hitting the tray.
One thing I really appreciate about this design is how it doesn’t interfere with the saw’s operation at all. Some shop-made accessories can create vibration issues or limit access to adjustment points, but this stays completely out of the way. Just make sure your magnets are positioned so they don’t interfere with any fence systems or dust collection hookups you might have under the table.