Clinton from Specific Love Creations built and designed the project featured in this video.
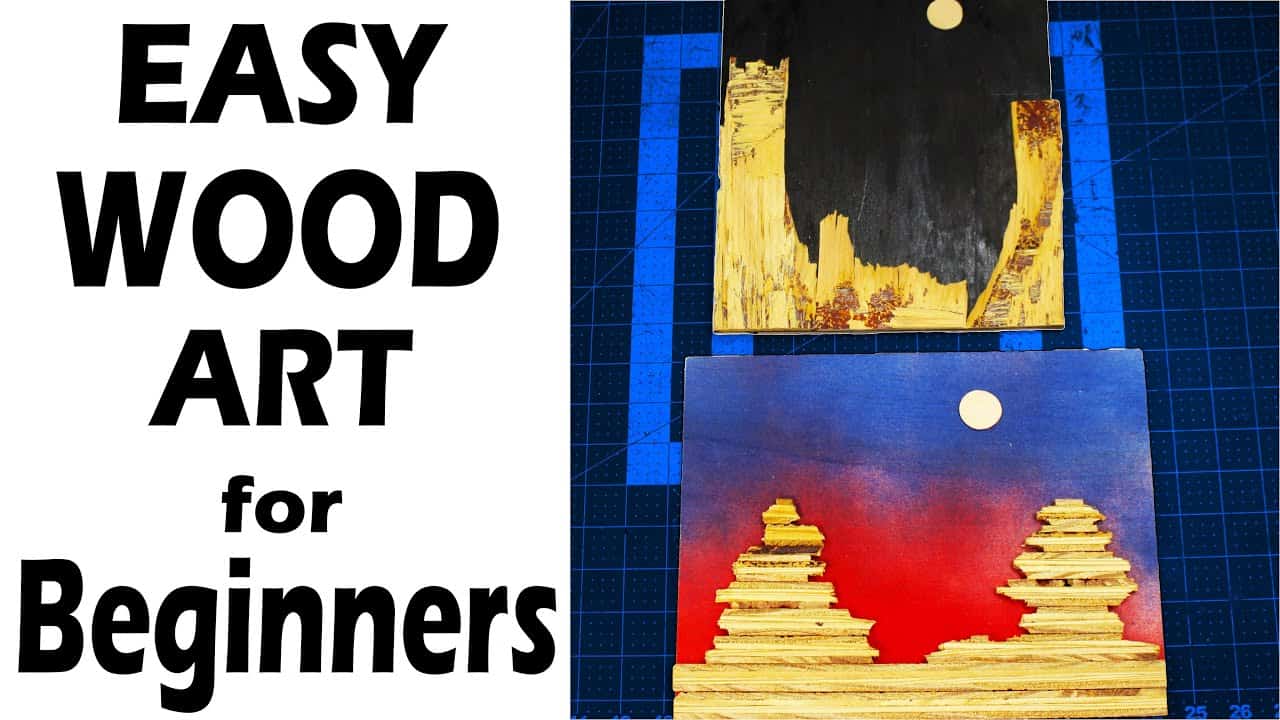
The video demonstrates how to repurpose weathered, stained, or otherwise rejected plywood into textured, layered wall art that reads like rocky mountain scenes or abstract landscapes.
Watch the full video and subscribe to Specific Love Creations:
Design and Visual Approach
The core idea is to use narrow strips and broken edges of plywood to suggest rocky textures and landscape layers without carving or painting detailed forms.
Clinton favors an organic, asymmetrical look that mimics natural formations by varying strip widths, leaving irregular breaks, and arranging pieces to create depth and contrast.
Lumber Prep and Sourcing
The project starts with old or damaged plywood that would normally be discarded, including pieces with peeling veneer, voids, or water stains, which become visual assets in the finished piece.
Clinton suggests checking local home improvement stores for heavily flawed sheets and asking for a discount to acquire material cheaply, then cutting those sheets into uneven strips rather than precise repeating sizes.
Sorting and Pre-Assembly
After cutting, the strips are sorted into three piles: clean-looking pieces, heavily marked or voided pieces, and pieces broken during cutting, with all categories used intentionally in the composition.
Using a thin backing board as a canvas, Clinton places a nicer-looking strip at the base to act as foreground and then builds upward, integrating rougher pieces so the imperfections read as natural texture.
Edge Treatment and Texture
Rather than sanding everything smooth, the process embraces broken edges and roughness to reproduce the irregularity of stone, using pliers to pinch and break strips for varied profiles.
Clinton cautions to remove any large, unnatural splinters for safety and aesthetics, while keeping smaller jagged edges that contribute to the rock-like appearance.
Using Split Plywood for Color and Grain
Splitting thicker plywood sections with a chisel and mallet exposes inner veneers and contrasting layers that create tonal accents and grain variety when placed against a dark backdrop.
These split pieces add striking, unexpected patterns and can be glued to the backing after sanding the rear surface for a secure bond, though the process does produce splinters and uneven backs that may need attention.
Backgrounds, Accents, and Presentation
Simple painted backdrops—black for night scenes or layered colors for sunrise and sunset effects—enhance the plywood layers and make the textures pop without competing with them.
Small accents like a circular “moon” cut from thin plywood or craft sticks can be added to suggest sky elements, and the finished panel is glued and hung like any framed artwork.
Material Considerations and Safety
Clinton recommends sticking to plywood for the best combination of predictable layers and random grain; MDF lacks visible layers while OSB offers inconsistent strand patterns that behave differently.
Safety notes include watching for splinters when breaking and splitting pieces, and sanding the backs of split sections to ensure proper adhesion to the backing board.
Adaptations and Community Uses
The technique scales well for group activities and creative settings such as paint-and-sip nights, stained-glass alternative workshops, quilling groups, or supervised kids’ craft sessions with prepared materials.
Because the method relies on variety and chance, organizers can pre-cut and sort supplies so participants focus on composition and color choices rather than complex cutting or joinery.
Overall Takeaways
This approach shows how reclaimed or flawed materials can become the centerpiece of an art piece by emphasizing texture, contrast, and composition rather than perfection.
Clinton’s method is flexible, accessible to beginners, and adaptable to different aesthetic goals—from stark monochrome scenes to warm, layered sunsets—making it a useful technique for makers looking to repurpose scrap wood creatively.
Watch the full video and subscribe to Specific Love Creations:

Matt’s Take
These are my personal thoughts and tips based on my own experience in the shop. This section is not written, reviewed, or endorsed by the original creator of this project.
This is such a clever way to look at “defective” plywood with fresh eyes. I love how Clinton reframes all those voids, splits, and stains as texture rather than flaws. It’s a perfect reminder that sometimes the best creative solutions come from working with what you have instead of against it.
The splitting technique with a chisel is particularly smart for exposing those inner veneer layers. When you’re doing this, work on a solid surface and keep your hands well clear of the chisel path. Those inner plies can have surprising grain directions that might cause the split to jump unexpectedly. Also, eye protection is definitely worth wearing since small chips can fly when you’re breaking pieces with pliers.
From a practical standpoint, this project is great for shop cleanup too. Instead of letting those oddball scraps pile up in the corner, you’ve got a systematic way to turn them into something displayable. The sorting approach Clinton uses – clean, weathered, and broken pieces – gives you a logical framework for composition without overthinking it.
The group workshop angle is brilliant. Pre-cutting materials takes away the intimidation factor for beginners while still giving them plenty of creative control over the final look. Plus, everyone walks away with something unique since no two pieces of damaged plywood are exactly alike.