This project was built and designed by Billy from Newton Makes.
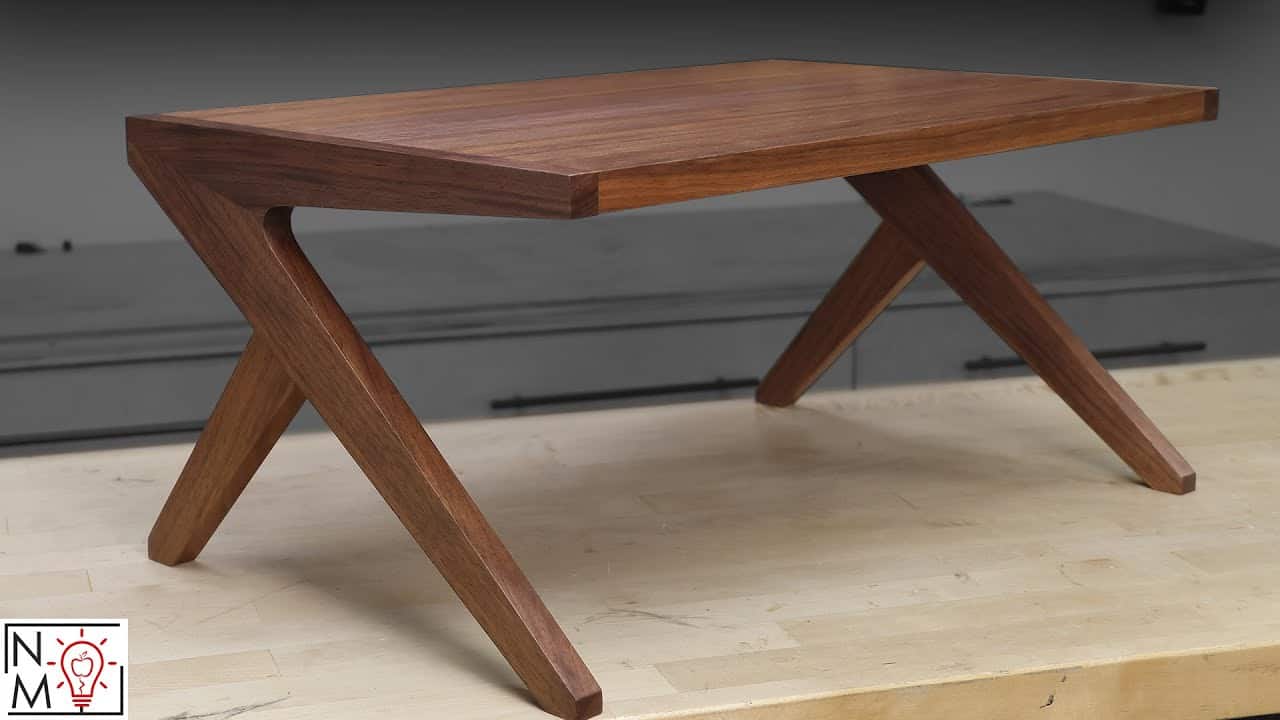
It’s a compact, stylish bed tray built with mid-century modern proportions, using minimal joinery and careful grain matching to achieve a professional look that’s still approachable in a home shop.
With thoughtful techniques like floating tenons, pine wedge clamping, and matched board layouts, this project packs a lot of woodworking fundamentals into a small footprint. It’s a great build for anyone looking to practice clean layout, template use, and subtle shaping without getting overly complex.
Watch the full video and subscribe to Billy’s channel:
Design Philosophy and Layout Approach
Billy’s design leans heavily on simplicity and good proportions. Instead of adding decorative accents, the tray uses long, uninterrupted grain, soft curves, and tapered components to create a sense of movement and warmth.
The aesthetic is distinctly mid-century: flat tray surface, tapered legs, and rails that join with the legs at subtle angles. Every part of the design was chosen to be repeatable, making it easy to build multiples or create templates for batch production.
Templates are used throughout the layout phase to keep parts consistent. After cutting rough shapes from boards using temporary adhesive and a bandsaw, each component is cleaned up and sanded to its final profile using a spindle sander or hand sanding blocks.
Lumber Prep and the Importance of Acclimation
Before layout begins, boards are milled and allowed to acclimate. Once the boards are flattened, planed, and ripped to rough width, they’re left to sit until moisture content stabilizes across all faces.
Billy emphasizes this step because once thick boards are broken down, the interior moisture content can differ from the outside. Letting the boards rest helps avoid warping or twisting after parts are shaped or joined.
For this project, matched grain is a major focus. Adjacent pieces—like legs and side rails—are cut from sequential boards so the grain flows smoothly across corners and transitions. Labels and layout marks are used to keep the sequence organized during shaping.
Joinery That Allows for Wood Movement
Joinery between the rails and legs is done with loose tenons using a Festool Domino, though the method is easily adapted to dowels or biscuits. The approach here isn’t just about strength—it’s also about respecting seasonal wood movement.
The tenons are glued into the legs, but in some locations, they’re left unglued in the tabletop to allow for slight movement. A small dowel, glued into the tabletop and pressed against the tenon, keeps the tenon in place without locking the joint entirely.
This technique prevents seasonal stress and keeps the tray flat and crack-free over time. It’s a subtle design decision that reflects Billy’s attention to detail and long-term durability.
A Smart Solution for Clamping Angled Joints
One of the trickier aspects of this build is clamping the rails to the angled legs. Because standard clamps want to slide off angled surfaces, Billy creates small wedges from soft pine and temporarily glues them to the base of the legs.
These sacrificial wedges give the clamps a stable surface to grip. After the glue sets, the wedges are popped off and the surface is sanded clean. It’s a simple trick that solves a common clamping problem and works for many angled assemblies.
Shaping and Sanding for a Smooth Finish
The tray features subtle curves and edge profiles that are smoothed out using a spindle sander. For flat areas and long curves, a drum sander and orbital sander are used.
To prevent snipe when using the drum sander, Billy tapes small sacrificial blocks to the ends of the parts. These help distribute pressure and eliminate uneven spots at the entry or exit of the machine.
The goal is to achieve a refined finish without flattening out the organic curves. Each edge is gently softened to improve comfort while still maintaining the clean lines of the design.
Building the Top and Final Fit
The tray top is glued from multiple boards with attention to color matching and grain flow. Once cured, the panel is trimmed to final size and the legs are shortened so the tray sits flat.
Edge treatments help define the look and feel. A small radius on each corner keeps the tray safe and comfortable to carry, while a light chamfer or roundover on the top edge adds refinement.
Once everything is sanded and test-fit, the tray is assembled and ready for finishing.
Durable Finish for Everyday Use
Billy applies a wipe-on polyurethane to seal and protect the wood. It’s a practical choice for a tray that may see drinks, phones, and everyday wear.
Multiple thin coats are applied, with light sanding between each. This helps the finish build up smoothly and keeps the surface durable without looking heavy or overly glossy.
Extra attention is paid to cross-grain areas and end grain, which absorb finish differently. A consistent, light application helps prevent blotchiness and keeps the finish even.
A Compact Project with Lots to Learn
This bed tray is more than just a functional object—it’s a showcase of clean layout, smart joinery, and problem-solving. Billy’s use of templates, grain alignment, and thoughtful clamping methods makes this a strong learning project for any intermediate builder.
With simple tools and a few helpful shop tricks, the project can be adapted to different wood types, edge profiles, or even scaled up into a coffee table or laptop stand.
Get Billy’s plans here: https://www.newtonmakes.com/shop/p/bed-tray-plans.

Matt’s Take
These are my personal thoughts and tips based on my own experience in the shop. This section is not written, reviewed, or endorsed by the original creator of this project.
This project really showcases how thoughtful grain selection can elevate a simple design. The way Billy matched sequential boards for the legs and rails creates that continuous flow that makes mid-century pieces so appealing. It’s one of those details that separates hobby work from furniture that looks intentional and refined.
The pine wedge clamping trick is brilliant for anyone dealing with angled assemblies. I’ve used similar sacrificial blocks for odd-shaped glue-ups, and they’re a game-changer when standard clamps just won’t cooperate. The key is using soft wood that pops off cleanly without damaging your project. Keep some pine scraps around specifically for this purpose.
That loose tenon approach with the partial glue-up is smart engineering. Wood movement is real, especially on wider panels, and allowing for some seasonal flex prevents those heartbreaking cracks down the road. The small dowel detail shows Billy’s thinking beyond just assembly strength to long-term durability.
For finishing, wipe-on poly is a solid choice for something that’ll see daily use. The key with any wipe-on finish is patience—thin coats and proper cure time between applications. It takes longer than rushing with thick coats, but you’ll get a much more professional result that actually protects the wood.