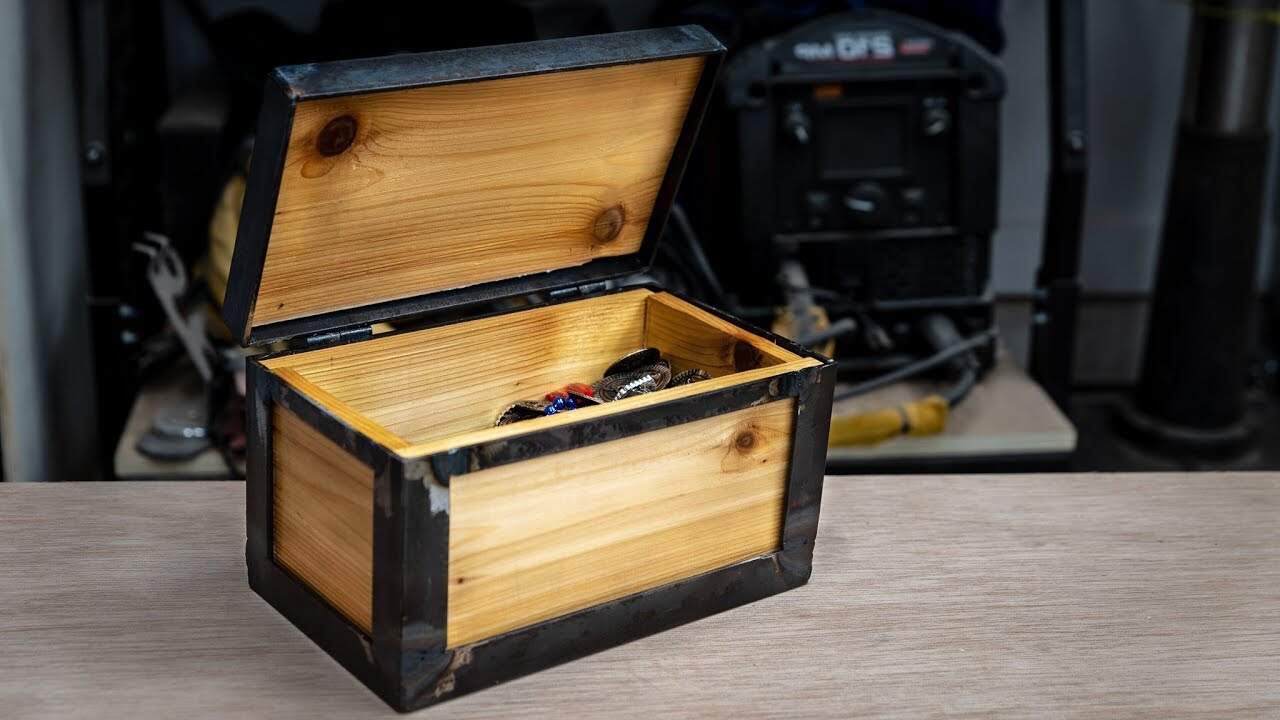
This project was built and designed by Caleb from YouCanMakeThisToo. It’s a handmade treasure chest featuring a welded steel frame and cedar wood panels—built as a Christmas gift for Caleb’s son, who’s currently on a treasure-hunting kick.
The project combines beginner-friendly welding with basic woodworking, resulting in a fun and meaningful build. With a small footprint and straightforward materials, it’s a practical project that delivers both charm and functionality.
Watch the full video and subscribe to Caleb’s channel:
Starting with Materials and Planning
The main structure of the chest is built from one-inch angle iron. For small-scale projects like this, sourcing steel from a big-box store is convenient enough, even if it’s not the cheapest option.
Caleb uses a metal-cutting blade on a circular saw to handle the steel cuts. This setup creates cleaner results than a standard wood blade and helps ensure better accuracy. As always, using the right tools for the material makes the job safer and more efficient.
Cutting and Prepping the Steel
Once the materials are on hand, Caleb cuts the steel to size and bevels the ends to prepare for welding. To keep the frame square during the tack welding process, he uses magnets to hold pieces in place.
Tack welding is essential at this stage. By securing each corner with small tacks before laying full beads, Caleb avoids major warping and keeps the structure aligned during the welding process.
Assembling the Frame
With the base welded, vertical uprights are added to give the chest structure. These are also held with magnets and tacked in place before full welding begins.
A top frame is then fabricated to support the lid. Getting this part square is especially important, since a misaligned lid will throw off the whole build. Caleb takes extra care to make sure the top fits flush and will operate smoothly once the hinges are added.
Tips for Better Welds
Caleb uses a TIG welder for this project, which requires patience and a steady hand. One key takeaway is to wait long enough for a puddle to form before feeding filler metal into the joint. Rushing this step weakens the weld and affects the overall quality.
He also removes the mill scale from the steel before welding. This layer can prevent good adhesion and reduce strength. While ultimate strength isn’t critical for a decorative project like this, clean metal still leads to better-looking results.
Mounting the Hinges
To attach the lid, Caleb uses low-cost weldable hinges that can be found online. Before welding them to the frame, he grinds away any mill scale at the attachment points to ensure a solid connection.
The hinges are positioned to allow smooth operation and to keep the lid properly aligned. This step adds a lot to the final feel and usability of the chest.
Preparing and Fitting the Wood Panels
For the side panels and lid surface, Caleb chooses cedar fence pickets. Cedar is lightweight, stable, and visually appealing, making it a great match for the metal frame.
The boards are run through a planer to clean up the faces, then cut to fit the frame. Even without adhesive, the panels fit snugly—but Caleb adds CA glue for added security.
On the lid, a construction-grade polyurethane adhesive is used to bond the wood to the metal frame. Because the panels are small and well-supported, Caleb isn’t concerned about seasonal wood movement affecting performance.
Sealing and Finishing
To protect both wood and metal, Caleb applies three coats of clear enamel spray. This gives the project a unified look and adds some weather resistance.
The finish enhances the contrast between the cedar and dark steel, giving the chest a slightly rustic, well-worn look. While the welds and cuts may not be perfect, the imperfections give the piece a handmade charm.
A Project That Combines Learning and Fun
This treasure chest wasn’t just a gift—it was also a chance to practice welding skills and experiment with new techniques. For Caleb, it was a reminder that not every build needs to be flawless to be meaningful.
The project came together quickly and left room for personal expression, which is exactly what makes it such a great choice for woodworkers and welders alike.
Please support Caleb by visiting his website: https://www.ycmt2.com/.

Matt’s Take
These are my personal thoughts and tips based on my own experience in the shop. This section is not written, reviewed, or endorsed by the original creator of this project.
This kind of mixed-material project is a great way to expand your skillset beyond just woodworking. The combination of angle iron and cedar creates that perfect rustic look while keeping the build relatively simple. Using fence pickets is smart here—they’re affordable, already dimensioned close to what you need, and cedar’s natural properties make it ideal for a project that might see some outdoor use.
The welding approach Caleb uses is spot-on for beginners. Those magnets are absolute lifesavers for keeping everything square during tack welding. If you’re new to welding, that patience with the puddle formation he mentions is crucial—it’s tempting to rush, but taking time to let the metal properly heat makes all the difference in weld strength and appearance.
One thing I really appreciate about this build is how forgiving it is. Small imperfections in the welds or cuts actually add to the handmade character rather than detract from it. The clear enamel finish is a practical choice too—it protects both materials while letting the natural contrast between the dark steel and light cedar really pop.
This is exactly the kind of project that builds confidence with new tools and techniques while creating something genuinely useful and meaningful. Sometimes the best builds are the ones that push you just slightly outside your comfort zone.