

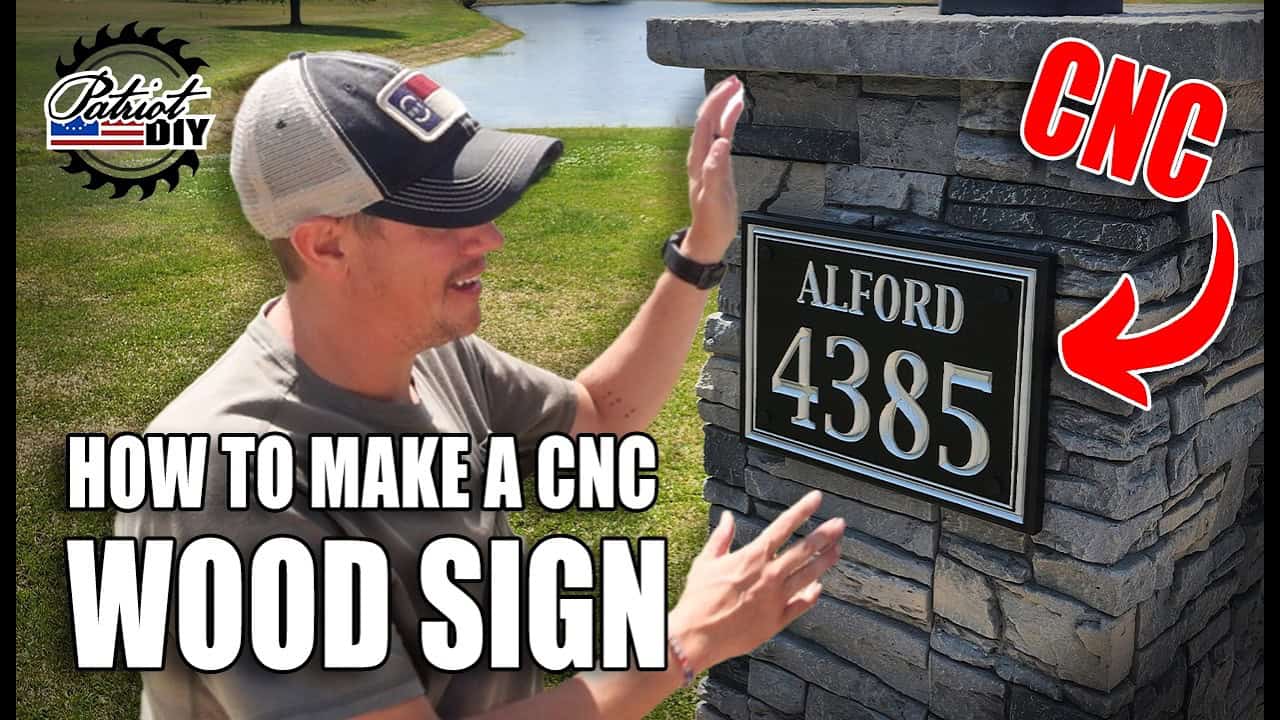
This project was built and designed by Jason from PatriotDIY.
Jason creates an outdoor driveway plaque using cedar wood and a CNC machine, featuring two-tone lettering with black background and metallic silver text.
Watch the full video and subscribe to PatriotDIY:
Creating the Cedar Panel
Jason starts by preparing the wood panel using cedar boards for their natural rot resistance in outdoor applications. He cuts the boards to rough length and creates clean glue edges using a table saw.
To ensure proper alignment during glue-up, he uses a biscuit joiner to cut slots in both pieces before joining them with wood glue and clamps. After the glue cures, he scrapes off excess adhesive and sands the panel smooth.
The panel gets trimmed to final dimensions on the table saw, then Jason adds character by routing a chamfer around the entire perimeter using a palm router with a degree chamfer bit.
Base Paint and Masking
The painting process begins with primer application on both sides, followed by three coats of satin black paint as the background color. Jason uses spray paint with an adjustable nozzle that provides different spray patterns similar to a professional spray gun.
After the base coat cures, he applies Aura Mask vinyl over the entire surface. This masking material will protect the black paint during engraving and allow for easy application of the contrasting letter color later.
The masking process involves cutting the vinyl slightly larger than the panel, carefully removing the backing paper in sections, and using a squeegee to ensure good adhesion without air bubbles.
CNC Design and Engraving
Jason creates his design in Adobe Illustrator before importing it into Carbide Create, the software that comes with his CNC machine. The software allows him to set tool paths, engraving depth, feed rates, and generate previews of the finished piece.
The engraving process uses two different router bits. A degree V-carve bit creates dimensional letters, while an flat end mill cleans up the bottoms of larger characters to eliminate ridges.
The entire engraving process takes about twenty minutes, with the CNC automatically following the programmed tool paths to create precise lettering in the cedar panel.
Two-Color Finishing
After engraving, Jason cleans out all dust and debris from the carved areas. He tapes off exposed edges and applies primer to the engraved sections, followed by two coats of metallic silver paint.
The Aura Mask removal reveals crisp, clean lines between the black background and silver lettering. This masking technique eliminates the need for hand-painting detailed letters with small brushes.
Jason completes the finish with three coats of spar urethane for outdoor protection and pre-drills mounting holes before allowing the pieces to cure for at least twenty-four hours.
Installation on Driveway Columns
The signs mount to existing stone-veneer columns at the end of Jason’s driveway. He carefully measures and levels the placement, using a clamped level as a temporary shelf to support the sign during installation.
Exterior-grade pan head screws secure the signs, with decorative screw caps hiding the fastener heads for a clean appearance. The wooden structure behind the stone veneer provides solid attachment points.
Solar lights mounted above each sign provide illumination at night, completing the professional-looking installation that should help with address visibility for deliveries and visitors.
This project demonstrates how CNC technology can create professional signage with precise lettering and clean paint lines. The masking technique makes two-color finishing achievable for woodworkers without extensive painting experience, while the cedar construction ensures durability in outdoor conditions.
Watch the full video and subscribe to PatriotDIY:

Matt’s Take
These are my personal thoughts and tips based on my own experience in the shop. This section is not written, reviewed, or endorsed by the original creator of this project.
The masking technique Jason uses here is a game-changer for two-tone finishes. That Aura Mask vinyl creates razor-sharp paint lines that would be nearly impossible to achieve by hand, especially with detailed lettering. For anyone considering a similar project, the key is really in that squeegee work — getting all the air bubbles out during application prevents paint from bleeding under the edges.
Cedar’s an excellent choice for outdoor signage, but don’t skip that spar urethane finish. Even naturally rot-resistant wood needs protection from UV rays, which can cause fading and surface checking over time. Three coats might seem like overkill, but exterior pieces take a beating from weather cycles.
The biscuit joiner alignment method is solid for panel glue-ups, though pocket screws from the back would work too if you don’t have a biscuit joiner. Either way, getting those glue edges perfectly straight on the table saw is crucial — any gaps will show up as weak spots or unsightly glue lines in the final piece.
One safety note on the CNC work: always double-check your workholding before hitting start. Cedar can be pretty soft, and if a piece shifts during carving, you’ll have a ruined sign and potentially a dangerous situation with the router bit.