This project was built and designed by John Dolechek. It’s a simple, efficient shelf that also doubles as a workbench—ideal for home use, especially in smaller spaces.
John set out to create a functional solution without wasting materials or taking up too much room. The project was also a surprise build for his wife, completed quickly and cleanly.
Watch the full video and subscribe to John’s channel:
Setting Up the Workspace
John begins by moving his tools and lumber outside to avoid dust indoors. He selects four sturdy two-by-eights to form the top surface of the shelf.
Using a pocket hole jig, he joins two boards together at a time. This creates a strong tabletop without needing cross braces underneath.
Prepping the Materials
Each board is lightly sanded to round the corners and prevent splinters. Since this is meant to be a quick, functional piece, there’s no need for a detailed finish.
The focus is entirely on utility. Smooth edges and tight joints keep things clean and comfortable for daily use.
Assembling the Top and Frame
John uses long bar clamps to keep the tabletop square and level during glue-up. Once that’s set, he cuts additional two-by-fours for the legs and shelf supports.
The design is efficient, using every bit of material with nothing left over. Each part is cut, sanded, and prepped for final assembly.
Building the Base
After cutting the legs to the right height, John rounds their corners to avoid sharp edges. Cross pieces are attached to support the lower shelves, giving the structure added stability.
All holes are pre-drilled to speed up assembly and prevent splitting. This small step makes a big difference when working with soft lumber.
Final Prep Before Assembly
John cleans his work area and brushes off dust before bringing the project indoors. A quick spray of bug repellent keeps the work environment clean as he finishes outside.
The top is brought in first, followed by the legs and cross pieces. Everything is assembled using clamps and screws to keep the structure square and level.
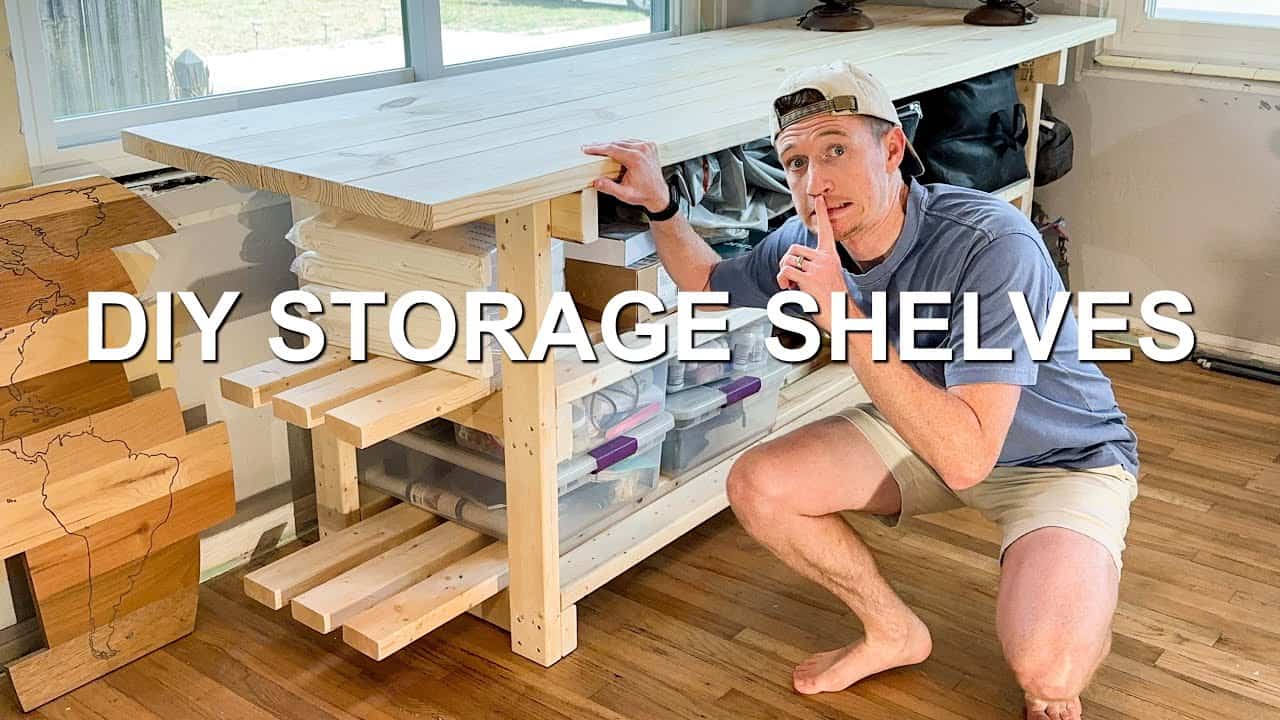
Adding the Storage Shelves
The final shelves are fitted snugly between the legs and cross supports. Each shelf is flush and level, offering plenty of room for bins, boxes, or tools.
Felt pads are placed under the legs to make the shelf easier to move. They also help protect flooring from scuffs or pressure marks.
A Functional Finish
The finished shelf adds useful storage without taking up extra room. It also works well as a small workbench, making it versatile in any space.
John finishes the build before his wife returns home, completing the surprise. The best part? No leftover scraps, and everything has a place.
Want to See the Full Build?
Please support John by visiting his website here: https://johndolechek.myportfolio.com/.

Matt’s Take
These are my personal thoughts and tips based on my own experience in the shop. This section is not written, reviewed, or endorsed by the original creator of this project.
This type of dual-purpose furniture is brilliant for smaller shops or home spaces. The pocket hole joinery creates a really solid tabletop connection, and using bar clamps during glue-up ensures everything stays flat and square. That’s crucial when you’re planning to use it as a work surface later.
Pre-drilling every screw hole is one of those simple steps that saves a ton of headaches. Construction lumber can split unpredictably, especially near the ends, and taking that extra minute with the drill bit prevents having to back out and start over with a new board. Plus, the screws seat much cleaner.
The felt pads underneath are a nice touch that a lot of people skip. They make moving the bench around so much easier, and they’ll save your floors from getting dinged up. For anyone building something similar, those little furniture pads are usually under $5 at any hardware store and worth every penny.
Using every bit of material with zero waste shows good planning. When you’re working with standard lumber dimensions, laying out all your cuts beforehand really pays off both in efficiency and keeping costs down.