This project was built and designed by Clinton from Specific Love Creations.
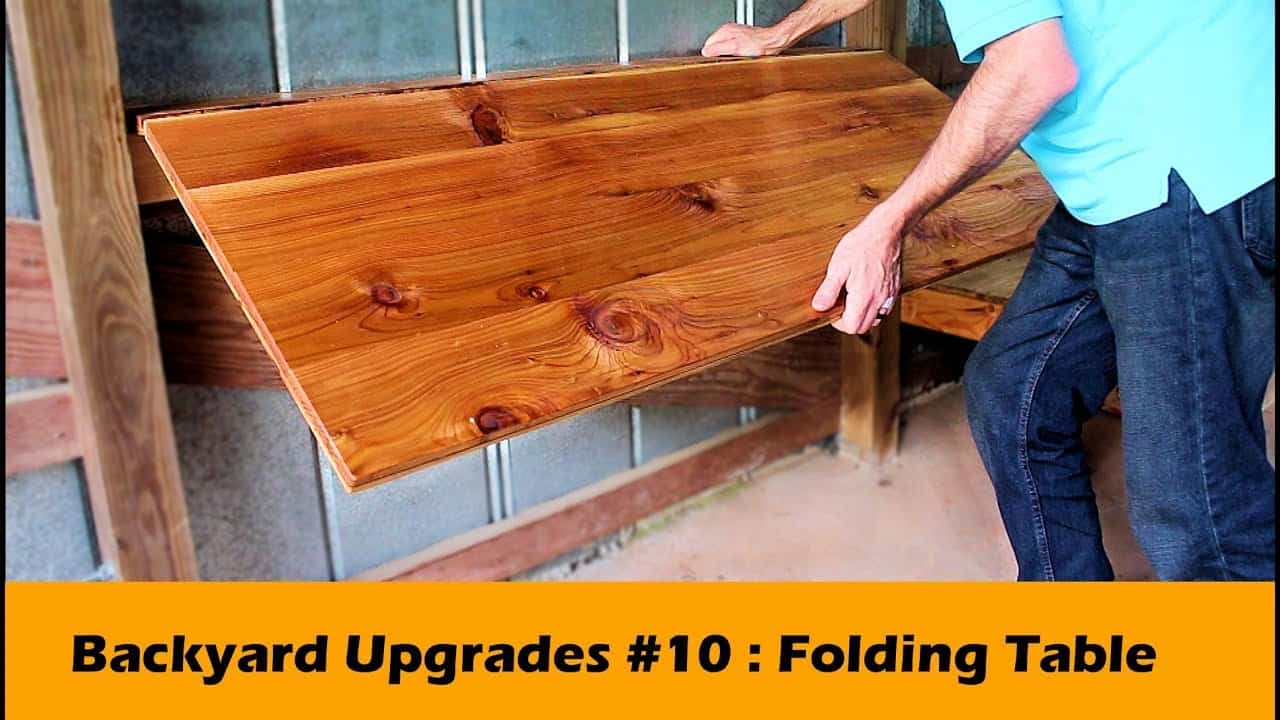
It’s a smart fold-down table designed to mount on an exterior wall, offering a compact, space-saving solution that folds out when needed and tucks away when not in use.
Perfect for sheds, patio walls, or outdoor workspaces, this build focuses on stability, reclaimed materials, and a simple hinge system that makes the table easy to use and sturdy enough for everyday tasks.
Watch the full video and subscribe to Clinton’s channel:
Why Choose a Fold-Down Table?
Fold-down tables are great for tight spaces or for anyone who needs occasional workspace that doesn’t permanently take up room. Whether you’re hosting a backyard party, need a serving station, or want an outdoor spot for small repairs or planting tasks, this design gives you flexibility.
The added bonus? Clinton uses reclaimed fence posts to build the tabletop, turning old, rough lumber into a polished surface with visible grain and character. It’s a great example of getting high-end results with low-cost materials.
Wall-Mounting for Strength and Stability
The key to this build is attaching the table securely to an exterior wall without compromising the structure. Clinton begins by adding a layer of reinforcement directly to the surface of the shed or wall. This creates a new mounting plane that ties into the wall framing and spreads out the load.
Rather than cutting into existing framing, the reinforcement is added on top—secured with screws and glue—to act as an extension of the structure. Pocket holes and long screws are used to make sure the wall backing is stiff and won’t flex when the table is folded down and under load.
Reclaimed Wood for the Tabletop
Clinton creates the tabletop using a sandwich-style build. He planes down several rough fence posts to a uniform thickness, squares up the edges, and glues them onto a lightweight backing board.
This creates the look and feel of a solid wood top without the weight. The planed cedar boards reveal beautiful grain and texture, giving the tabletop a warm, natural finish that looks right at home in any outdoor space.
Once glued, the boards are clamped tightly and left to cure. Clinton notes that you can use dead weight, like books or bricks, if clamps are limited—but even pressure is key to avoiding gaps or uneven surfaces.
Adding Decorative Cuts and Trimming the Table
To dress up the appearance, Clinton cuts the ends of the tabletop and the support arms with angled miter cuts.
These small design choices help the table look finished and refined while also removing sharp corners.
Each board is sanded to smooth out roughness and round off the edges. A guide board helps ensure straight edge cuts when trimming the tabletop to final size, and the corners are eased to prevent snags or splinters.
Building and Installing the Folding Support Arms
The table’s fold-down functionality comes from two sturdy support arms, which pivot down from the wall and lock into place when the table is in use. Clinton builds these arms from thick lumber and reinforces the hinge area to keep everything solid.
Standard door hinges are used to attach the arms, and care is taken to align them properly so the arms swing out without binding. The pivot points are backed by multiple layers of wood, glued and screwed together, to create a wide surface that resists twisting and wear.
Final Assembly and Hardware
Once the tabletop and support arms are complete, they are fastened to the wall-mounted backing board using strong screws and wood glue. The hinges are set so the tabletop folds down evenly and rests securely on the support arms when in use.
To make the hinge area stronger, Clinton uses a layered approach, adding wood where needed to increase contact area. This reduces flex and gives the arms more stability under pressure.
The table itself is split into two connected panels with additional hinges underneath. This allows the top to fold compactly and reduces the amount of space it occupies when stored vertically.
Finishing and Weather Protection
After assembly, the table is given a final sanding to soften all the corners and prepare the surface for finishing. A clear exterior-rated finish is applied to highlight the grain and protect the table from moisture.
To keep parts from sticking during the finishing process, wax paper can be placed between folding sections.
This also protects the hardware until the finish fully cures.
Tips and Things to Watch For
Clinton shares several smart tips throughout the project:
- Always attach hinges into solid material, not thin siding or softwood backing.
- Take your time clamping glue-ups—gaps at joints reduce both strength and appearance.
- Test the fold-down mechanism before applying finish to make sure there’s no binding.
- Reinforce support arms thoroughly to prevent unexpected sagging or failure.
A Smart Backyard Upgrade
This wall-mounted table is both practical and attractive. It adds a functional surface where you need it, saves space when folded, and shows how reclaimed wood can be turned into something eye-catching.
It’s a great weekend project that doesn’t require advanced tools but rewards careful planning and attention to detail.
For anyone looking to improve their backyard setup, this fold-down table is an efficient and satisfying solution.
Watch the full video and subscribe to Clinton’s channel:

Matt’s Take
These are my personal thoughts and tips based on my own experience in the shop. This section is not written, reviewed, or endorsed by the original creator of this project.
Wall-mounted fold-down tables are brilliant space savers, and this design hits all the right notes. The reinforcement layer approach is smart — it’s much easier than trying to hit wall studs perfectly, and it distributes the load way better than just screwing into siding. When you’re dealing with outdoor mounting, that extra backing really makes a difference in long-term stability.
Using reclaimed fence posts for the tabletop is a great call. Cedar weathers beautifully and has natural rot resistance, plus you get that character that’s hard to find in new lumber. The sandwich construction with a lightweight backing is clever too — gives you the solid wood look without the weight that would stress the hinges over time. Just make sure your exterior finish gets into all those grain lines where moisture likes to hide.
The hinge reinforcement approach Clinton uses is key to this whole build. Standard door hinges work fine, but they need solid backing to handle the leverage forces when the table’s loaded. That layered wood approach at the pivot points spreads the stress and prevents the kind of gradual loosening you’d get with thinner material. Worth taking the extra time to get those alignments right during assembly.
For anyone considering this build, test your folding mechanism thoroughly before finishing. Nothing’s worse than discovering binding issues after you’ve applied your topcoat. And definitely use an exterior-rated finish — even under a roof overhang, outdoor furniture takes a beating from temperature swings and humidity.