This project was built and designed by Tyler from DIYTyler.
Tyler shows how a professional-grade base cabinet comes together, from cutting plywood parts to assembling a flush face-frame and mounting cabinets for an island.
The approach emphasizes repeatable processes, solid joinery, and practical shop tips that scale to kitchens, bathrooms, or laundry rooms.
Watch the full video and subscribe to DIYTyler:
Design
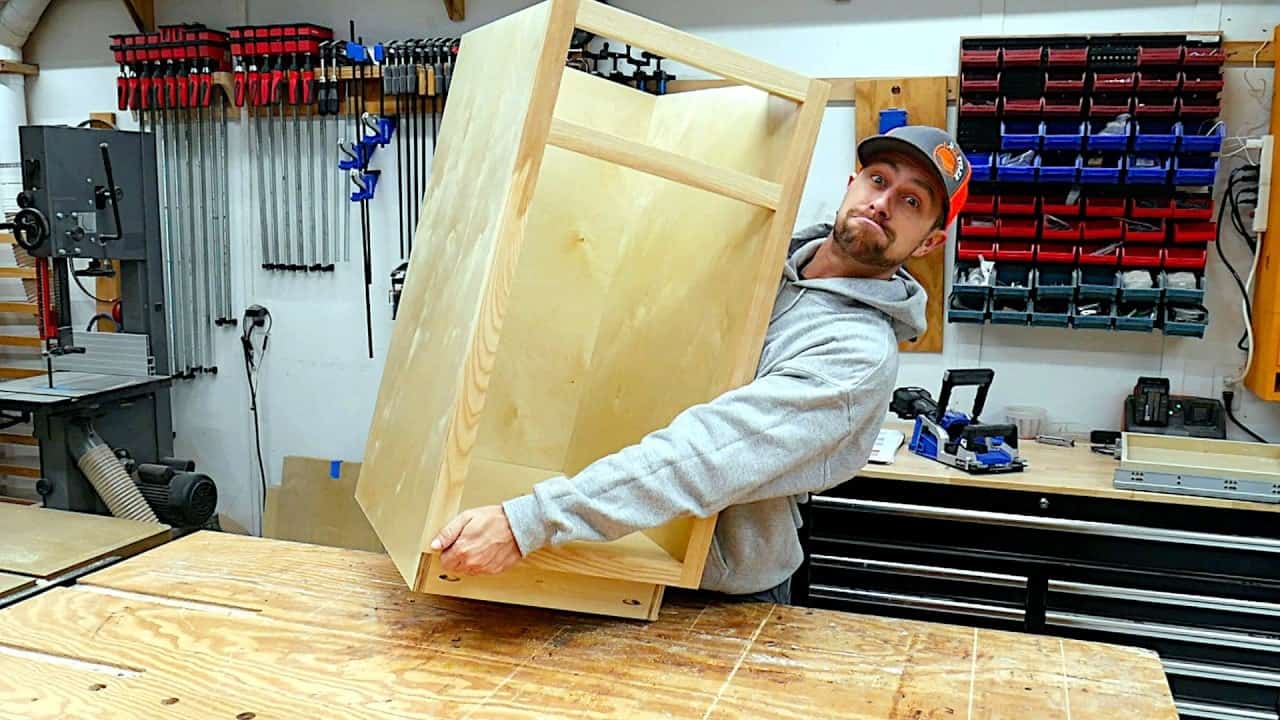
The cabinet is laid out as a classic base unit with sides, bottom, back panel, and crossmembers to support drawers and doors. Tyler prefers a flush face-frame aesthetic that behaves structurally like a frameless cabinet while keeping the appearance of a framed build.
That choice influences hinge selection, drawer-slide mounting, and how the face frame meets surrounding cabinets or furniture details. Planning these decisions up front prevents surprises during installation and makes subsequent fits and finishes smoother.
Lumber prep and part breakdown
Preparation begins with milling plywood and solid face-frame stock to consistent thickness and then breaking parts down to length at the table saw and miter saw. Tyler highlights the practical benefit of staging plywood outside of the main shop area to keep the workflow moving while avoiding weather issues.
Small adjustments at the rip fence and careful attention to nominal panel thicknesses are part of the routine, especially when cutting shallow back panels or dados that accept the bottom panel. Getting these reference cuts right reduces fiddly shims during assembly and speeds up repeatable production.
Joinery and internal structure
Crossmembers are fastened with pocket holes and glue to create a rigid internal framework that resists racking and supports drawers. Dados in the sides and bottom provide clean, mechanical locating for the back panel and base, which adds a lot of durability to the finished box.
Using a reliable glue and coarse pocket screws for the main joints, then brad-nailing the back panel, yields a cabinet that is both square and serviceable. Tyler also demonstrates how drilling pocket holes in less-visible orientations helps keep faces clean while still allowing strong connections.
Face frame milling and assembly
Face frames in this project are milled from raw ash to achieve a premium look that matches the doors and trim. Milling solid stock to the desired thickness and squaring components before pocket-hole joinery is time consuming but results in a tight, professional frame.
Tyler stresses clamping against a known-square reference and using glue to fill minor gaps; mixing a little sawdust with glue can make small defects vanish after sanding. Pocket screws secure the frame to the carcass while a few brads through the back add extra hold where needed.
Clamping, squaring, and small-shop tricks
Clamping strategy is a recurring theme: faster, higher-travel clamps speed up assembly while a flat assembly table provides a reliable 90° reference for squaring assemblies. Temporary wedges, sacrificial blocks, and quick-release clamps are practical shop tricks that save time on repetitive tasks.
Filling small gaps with glue-and-sawdust and then sanding blends repairs into the surrounding wood, which reduces finish prep. Keeping pockets and visible faces clean during the assembly also reduces final touch-up work.
Hinges, drawers, and installation considerations
Flush face-frame construction alters hardware choices: long-arm European hinges are appropriate when the door needs to clear the flush face, while traditional face-frame hinges suit reveals where the frame sits proud of the cabinet box. Selecting hinge types based on face-frame reveal simplifies door geometry and installation.
For drawers, mounting slides to the cabinet sides provides a sturdy attachment that avoids suspending the drawer from the face frame alone. Tyler also shows an island installation approach that uses blocking attached to the floor structure so cabinets fasten to a level substructure without exposed fasteners.
Finishing touches and adaptability
Finishing begins with careful sanding and attention to grain match between face-frame parts and doors to maintain a cohesive aesthetic. A clear or colored topcoat can then be applied; thin, even coats build protection without obscuring wood character.
The workflow Tyler demonstrates is adaptable: the same methods apply to bathroom and laundry cabinets or to custom island banks, and the design choices can be tuned to different hardware and reveal preferences. The emphasis on repeatable cuts, reliable joinery, and mindful planning makes the method useful for small runs or one-off custom work.
Overall takeaways
The project highlights how thoughtful part prep, mechanical joinery, and a clear assembly sequence combine to produce durable, attractive base cabinets. Prioritizing square references, appropriate hardware choices, and clean face-frame work reduces headaches during installation and finishing.
For anyone interested in making custom cabinetry without buying stock units, the approach shown here balances shop efficiency with a level of finish and durability expected in a kitchen setting. The principles are transferable and help builders scale the process for multiple cabinets or different room types.
Please support Tyler by visiting his website here: diytyler.com

Matt’s Take
These are my personal thoughts and tips based on my own experience in the shop. This section is not written, reviewed, or endorsed by the original creator of this project.
Tyler’s flush face-frame approach is really clever – you get the clean lines of frameless construction while keeping the traditional look that many clients prefer. This detail matters more than you might think, especially when choosing hinges. Those long-arm European hinges he mentions are essential for flush frames, and getting that selection right early saves a lot of headaches during door installation.
The pocket hole and dado combination creates incredibly strong joints that resist the daily abuse cabinets take. I particularly appreciate his emphasis on using a flat assembly surface and reliable square references – these fundamentals make the difference between cabinets that install easily and ones that fight you every step of the way. That glue-and-sawdust trick for filling small gaps is gold, especially on visible areas where you want seamless repairs.
One thing I always stress is taking time with that initial lumber prep. Those consistent thicknesses and square cuts cascade through the entire build. If your parts are off from the start, you’ll be compensating with shims and adjustments that add up quickly. Tyler’s staging approach for handling sheet goods is smart too – keeping workflow moving while protecting materials from weather is a real consideration in smaller shops.
The island mounting method using floor blocking is particularly solid for anyone doing kitchen work. It creates a much more stable attachment point than trying to hit floor joists, and the cabinets end up perfectly level without visible fasteners showing.