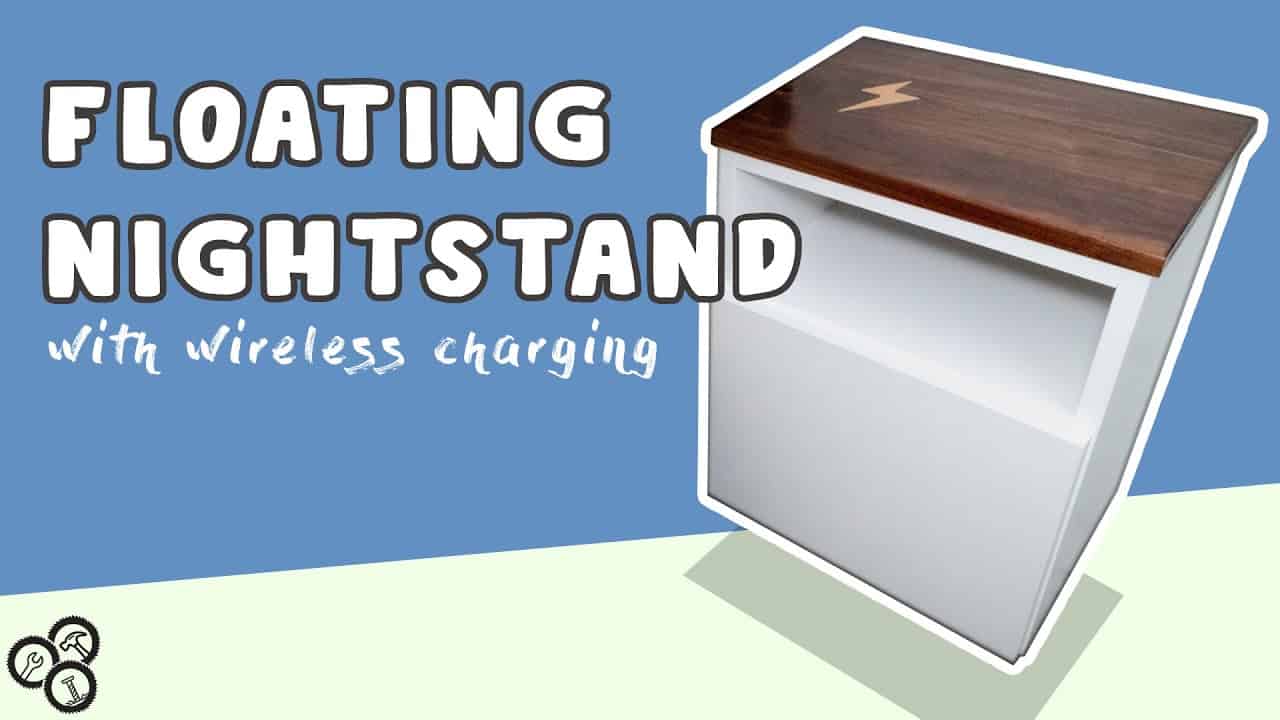
This project was built and designed by Tim from Casual Builds. It’s a modern, wall-mounted nightstand that offers clean storage and wireless charging—perfect for reducing bedside clutter while adding style and function to the room.
The build combines classic woodworking techniques with modern tech integration, resulting in a piece that’s both elegant and practical. Tim walks through the process step-by-step, with smart joinery and thoughtful design elements throughout.
Watch the full video and subscribe to Tim’s channel:
A Sleek and Functional Design
This floating nightstand adds convenience without taking up floor space, making it ideal for smaller bedrooms or minimalist setups. It includes a soft-close cabinet for hidden storage and a top that supports wireless phone charging—built right into the surface.
The mix of plywood and hardwood gives the nightstand a sturdy structure and refined look. It also allows for easy customization through paint, stains, or additional hardware.
Prepping Materials and Tools
Tim uses plywood for the main cabinet body and a hardwood panel for the top. These materials offer a balance of strength and clean grain patterns, making them great for a painted or natural finish.
The project requires common tools like a circular saw, jointer, planer, and a pocket hole jig. Additional tools like a crosscut sled and CNC machine are used for precision inlays, but alternative methods are possible if those tools aren’t available.
Cutting and Organizing Parts
The plywood is broken down into labeled panels using a table saw and crosscut sled. Each piece is marked clearly to keep the build organized during assembly.
Tim also cuts a French cleat system into matching angles. This cleat mounts the nightstand to the wall securely while allowing easy removal if needed—ideal for renters or anyone wanting a clean install without bulky hardware.
Cabinet Assembly and Edge Banding
Assembly starts with pocket hole joinery to keep the panels aligned and minimize visible fasteners. The edges of the plywood are sanded lightly before joining to prevent veneer damage during clamping.
To hide the exposed plywood edges, Tim applies edge banding using a household iron. After cooling, the banding is trimmed with a block plane for a seamless, professional finish. This step elevates the overall look and protects the panels from wear.
Building the Hardwood Top
The top of the nightstand is cut from a hardwood slab and planed to a smooth surface. Minor cracks are filled with clear epoxy, reinforcing the top and preserving its natural character.
Once the surface is sanded flat, it’s sized to fit the cabinet. A CNC machine is used to carve a lightning bolt inlay that marks the wireless charging area—a creative detail that adds personality without distracting from the clean design.
Hidden Wireless Charging Integration
To integrate the wireless charger, Tim routes out a cavity underneath the hardwood top. He emphasizes the importance of testing material thickness to ensure reliable charging. Scrap wood is used during this step to find the sweet spot for signal strength.
The charger is installed flush with the bottom of the top panel, hidden from view but fully functional. This eliminates the need for visible cords and lets users charge their devices by simply setting them down.
Cabinet Hardware and Painting
Soft-close hinges are installed for a smooth and quiet opening experience. A hinge jig helps ensure accurate placement, especially for first-time builders working with inset doors.
Once everything is fitted, the cabinet is primed and painted. Tim opts for a white eggshell finish, but the color can easily be adjusted to match any bedroom decor. The paint protects the surface and complements the nightstand’s minimalist design.
Mounting with a French Cleat
For mounting, Tim installs one half of the French cleat on the back of the nightstand and the other directly into wall studs. A drywall anchor is used for extra support on the opposite side when a stud isn’t available.
The cleat system allows the nightstand to sit flush against the wall while remaining easy to remove for cleaning or adjustments. It’s a secure, professional approach that fits the floating aesthetic perfectly.
Clean Cord Management and Final Details
To keep charging cables organized, a power strip is mounted inside the cabinet. This keeps everything hidden from view while allowing multiple devices to charge through one central outlet.
After mounting, the only visible part of the setup is the smooth hardwood top with its subtle inlay—a modern solution that blends woodworking skill with everyday convenience.
A Smart, Stylish Bedroom Upgrade
This floating nightstand is more than just a place to put your phone. With integrated charging, smooth hardware, and clever mounting, it combines form and function beautifully.
Tim’s design shows how woodworking projects can enhance your space without overwhelming it. It’s a great build for anyone looking to add a touch of tech to traditional techniques.
Please support Tim by visiting his website: https://www.casualbuilds.com/.

Matt’s Take
These are my personal thoughts and tips based on my own experience in the shop. This section is not written, reviewed, or endorsed by the original creator of this project.
The French cleat mounting system Tim uses here is really smart for floating furniture. It distributes weight evenly across the wall and makes installation much cleaner than trying to hit multiple studs with traditional brackets. When mounting any wall-hung cabinet, I always recommend finding at least one solid stud and using quality drywall anchors rated for the load on the other side.
That wireless charging integration is clever, but testing the material thickness is absolutely critical. Different phone cases and charging pads have varying tolerances, so spending time with scrap wood to dial in that sweet spot will save you from having a beautiful nightstand that doesn’t actually charge your phone. Keep those test pieces around too—they’re handy references for future projects.
Edge banding with a household iron is one of those techniques that seems simple but makes a huge difference in the final look. The key is getting the temperature just right—too hot and you’ll scorch the veneer, too cool and it won’t bond properly. Take your time with the trimming too. A sharp block plane or trimming knife will give you much cleaner results than trying to sand flush.
For anyone considering this build, that soft-close hardware is worth the extra cost. It transforms the feel of the piece and adds that premium touch that really elevates a project from DIY to professional-looking furniture.