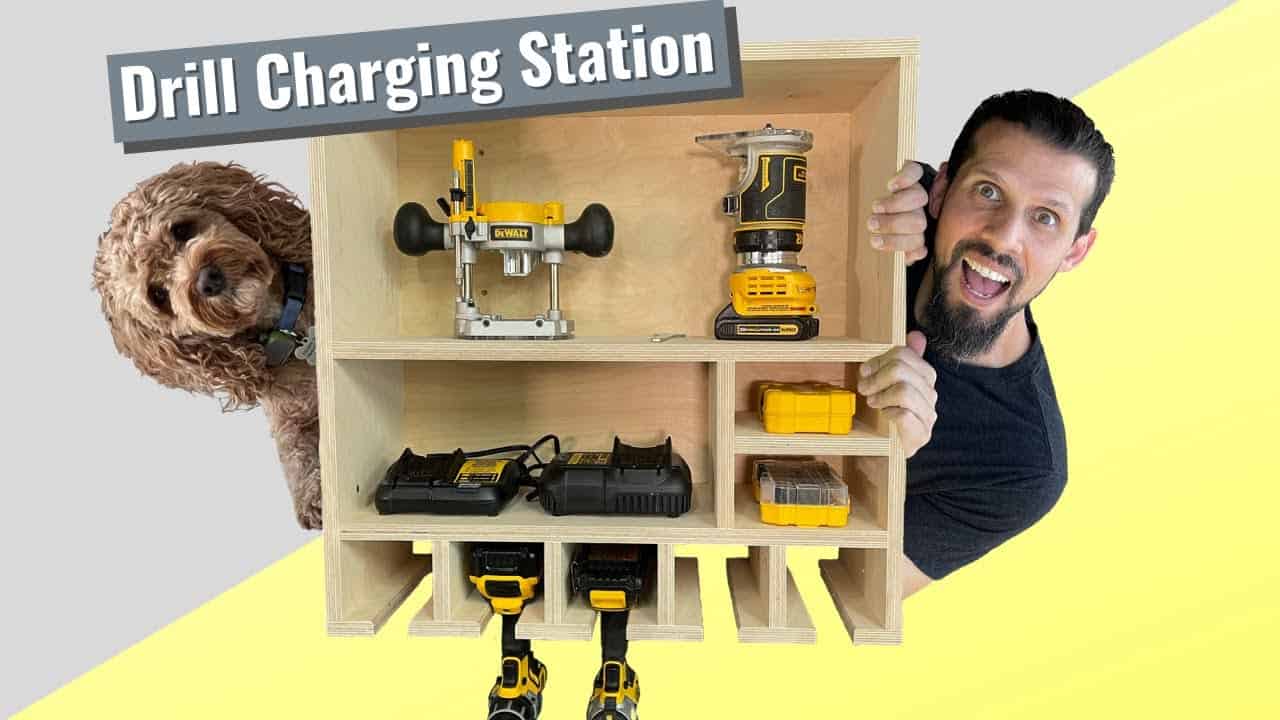
This project was built and designed by Anthony from Wood Pack DIY, with his loyal shop assistant Bob Barker keeping a watchful eye nearby. It’s a wall-mounted drill charging and storage station made from plywood, designed to organize your tools and chargers without taking up valuable bench space.
Simple, effective, and fully customizable, this station is a great addition to any workshop. It uses common joinery, thoughtful layout planning, and smart accessory storage to help keep your workspace clean and efficient.
Watch the full video and subscribe to Anthony’s channel:
Planning the Charging Station
Anthony begins by measuring the exact wall space where the station will be mounted. This step ensures the unit fits neatly and doesn’t interfere with other shop tools or storage systems.
He uses ¾-inch Baltic birch plywood for the build, which provides a clean look and dependable strength. Scrap pieces can also be incorporated to save on materials and reduce waste—something Bob Barker always approves of.
Cutting the Plywood to Size
All panels are cut down using a table saw sled, which provides smooth, square cuts and improves safety during repetitive sizing. While a circular saw can also get the job done, Anthony prefers the sled for better control and faster workflow.
Each piece is labeled and stacked for easy identification later in the build. Staying organized during the prep phase pays off when it’s time to assemble.
Using Pocket Hole Joinery
To keep the project beginner-friendly and efficient, Anthony uses pocket hole screws for most of the joinery. Pre-marking drill locations ensures consistent spacing and avoids splitting.
Wood glue is applied along each joint before driving in the screws. The combination of glue and pocket holes offers a surprisingly strong connection and keeps the frame square under load.
Assembling the Main Frame
The build starts by attaching the back panel to the side walls. Clamps are used to hold the structure in place while the pocket hole screws are added, keeping everything aligned during the assembly.
Once the outer frame is secure, Anthony begins installing the internal shelves. Spacers make this step easier by ensuring that shelf heights are even, and drill compartments remain consistent in size.
Adding Functional Features
With the shelves in place, Anthony adds optional dividers to store accessories like drill bits, batteries, or even safety glasses. These additions keep everything within reach and make the station feel like a fully integrated part of the workshop.
This is also a great opportunity to customize the layout depending on what types of tools you use. Whether it’s for drills, impact drivers, or battery-powered saws, the shelving can be adjusted to fit.
Routing the Edges and Final Sanding
To clean up the look, Anthony uses a router to break sharp edges and give the station a smooth profile. This not only makes the unit look more polished but also prevents chipping along the exposed plywood faces.
A quick sanding pass ensures the surfaces are smooth and splinter-free. Bob Barker, ever vigilant, oversees this part of the process—though he tends to stay away from the sawdust.
Mounting to the Wall
The completed charging station is mounted directly to wall studs for maximum support. Anthony uses screws driven into stud locations to make sure the unit is firmly secured, especially since it will carry the weight of several drills and chargers.
Proper anchoring is key here—if you’re mounting on drywall or concrete, different fasteners will be required. Regardless of method, make sure it’s strong enough to hold everything safely.
Integrating a Power Strip
To avoid tangled cords or overloaded outlets, a power strip is installed inside the cabinet. This allows multiple chargers to plug into one spot, streamlining the power supply and keeping the bench area clutter-free.
Routing a cord path or cutting a notch into the back panel ensures the power strip can be plugged in without interference. Anthony keeps the strip accessible so it’s easy to reset or reconfigure if needed.
A Customizable and Useful Shop Upgrade
What’s great about this project is how adaptable it is. You can expand it to hold more tools, add doors to hide clutter, or scale it down for tight workshop spaces.
Whether you’re just starting to build out your shop or you’re looking for a project to tidy things up, this drill station is both functional and rewarding to build. With Bob Barker by his side, Anthony shows that even a small project can have a big impact on your daily workflow.
Please support Anthony (and Bob Barker) by visiting their website (he sells awesome plans): https://www.woodpackdiy.com/.

Matt’s Take
These are my personal thoughts and tips based on my own experience in the shop. This section is not written, reviewed, or endorsed by the original creator of this project.
This type of charging station is one of those projects that seems simple until you realize how much thought goes into the details. The wall-mounted approach is smart because it keeps your bench clear while putting everything at eye level where you can actually see what needs charging. I like how Anthony sized everything based on his actual wall space first—measuring twice really does save you from headaches later.
Pocket holes are perfect for a utility project like this. They’re fast, strong enough for the job, and you don’t need to worry about fancy joinery when the focus is on function. The key is getting your drill depth set correctly on the pocket hole jig so you don’t blow through the face of your plywood. Baltic birch is a solid choice here too—it’s stable, looks clean, and handles pocket screws well without splitting.
The power strip integration is probably my favorite detail. Having dealt with the tangle of charger cords myself, anything that centralizes the power supply is a win. Just make sure your strip has a good surge protector built in—battery chargers can be sensitive to power spikes. Also worth considering is leaving some extra space around the chargers for airflow, especially if you’re charging multiple batteries at once.
The beauty of this design is how easily you can adapt it to your specific tool collection. Different drill brands have different charger sizes, so measuring your gear first and maybe even making a quick cardboard template can save you from having to modify shelves later.