This project was built and designed by Mike Montgomery from Modern Builds.
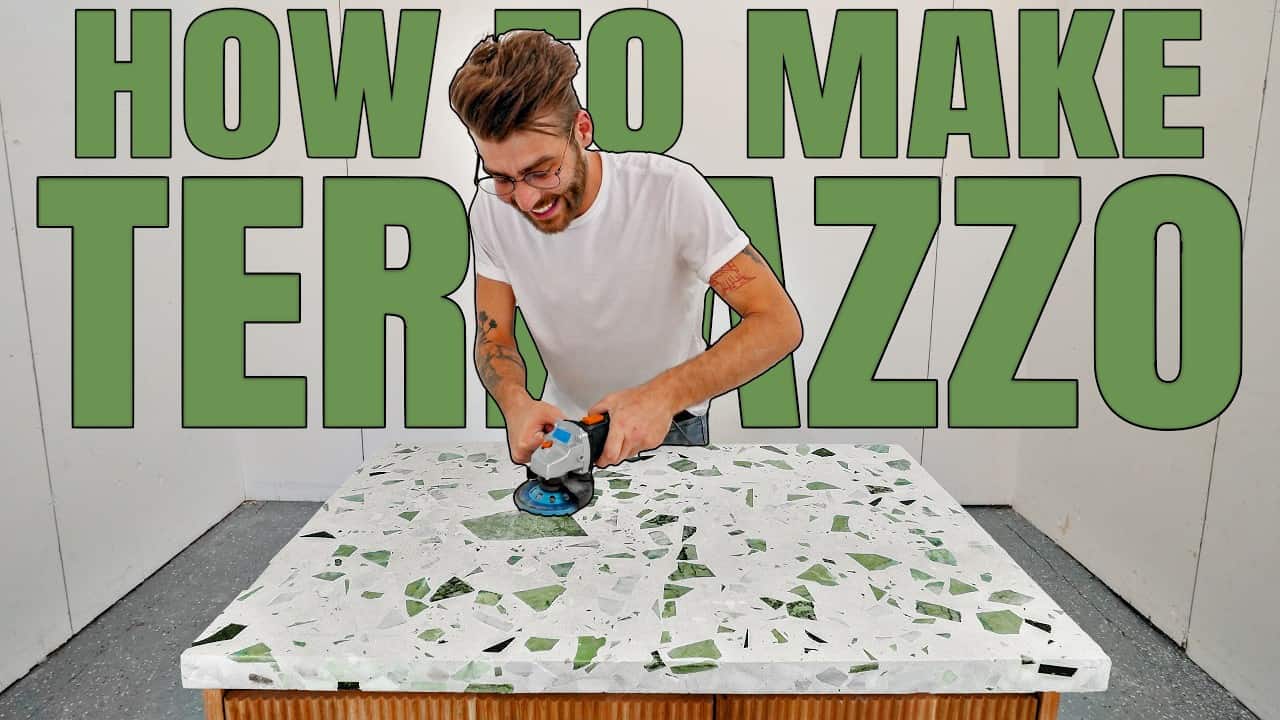
Mike creates a custom terrazzo countertop for his bathroom vanity using broken green marble tiles and white Portland cement. The project demonstrates how to transform discarded tile pieces into an elegant countertop surface through careful molding, grinding, and polishing techniques.
Watch the full video and subscribe to Modern Builds:
Building the Mold
Mike starts by constructing a wooden mold slightly larger than his final countertop dimensions. He uses thin strips for the walls, creating a form that will produce a thick, durable slab.
The mold construction requires careful attention to corner joints and screw placement. Pre-drilling prevents wood splitting, while trim head screws provide a clean connection without excessive bulk.
A generous coat of paste wax serves as the release agent, ensuring the cured concrete separates cleanly from the wooden form. Working the wax into all corners creates a complete barrier against adhesion.
Concrete Mix and Aggregate Preparation
The terrazzo mixture follows a basic concrete ratio of three parts aggregate, two parts sand, and one part Portland cement. Mike combines broken green marble tiles with white marble landscaping chips as the primary aggregate.
Snow white play sand replaces standard concrete sand to maintain the bright appearance of the white cement. This specialized sand helps achieve the clean aesthetic Mike wants for the finished surface.
Before mixing, Mike separates some of the larger, more attractive marble pieces to place individually. The remaining tiles get broken down further with a hammer to achieve optimal aggregate size for the concrete matrix.
Pouring and Initial Setup
Mike mixes the dry ingredients thoroughly before adding water gradually. The concrete should hold together on a trowel without sliding off, indicating proper consistency for the pour.
After filling the mold with the base concrete mix, he adds rebar reinforcement in the center of the slab. The flat marble tiles create challenges during screeding, as they tend to create trenches rather than settling like traditional round aggregate.
The decorative marble pieces get scattered across the surface for random distribution, then individually adjusted for optimal visual impact. Tamping and vibration help seat the tiles properly while eliminating air bubbles that could weaken the final surface.
Grinding and Surface Preparation
After a 48-hour cure period, Mike begins the grinding process using diamond-embedded concrete grinding discs. He tests two different disc types to determine which provides the best balance of material removal and surface quality.
The spiral disc proves too aggressive, causing tearout in the concrete surface. The standard grinding disc offers better control and produces more consistent results across the slab.
During grinding, Mike accidentally exposes some rebar near the surface. This common issue gets addressed later in the process through patching and additional surface work.
Diamond Polishing Progression
The polishing process begins with coarse 50-grit diamond pads and progresses through increasingly fine grits up to 6000. The lower grits can be used dry, while higher grits require water to prevent heat buildup.
Mike works systematically across the surface using back-and-forth motions similar to CNC machining. This approach helps identify high and low spots while ensuring even material removal.
Deep scratches from the initial grinding require a specialized cutting and grinding disc that bridges the gap between the coarse grinding wheel and fine diamond pads. This intermediate step eliminates scratches that resist removal by diamond pads alone.
Slurry Coating and Repair
A slurry coat mixture of Portland cement and sand fills voids and covers any exposed rebar. Mike applies this paste-like mixture across the wet surface, working it into all the gaps and negative spaces.
The initial slurry application requires refinement, leading to a second coat with different proportions. A higher cement content provides better flow and filling characteristics for the remaining small voids.
Wet sanding with progressively finer grits removes excess slurry material while maintaining the filled repair areas. This process requires careful attention to avoid removing too much material from the patch areas.
Final Finishing
Mike trims the edges square using a fence system that guides his angle grinder for precise 90-degree cuts. Multiple passes ensure clean edges without chipping or tearout.
The final surface receives wet sanding up to 6000 grit before applying a penetrating sealer. This Glazin Seal product provides both stain protection and water resistance while enhancing the natural colors of the marble aggregate.
The completed terrazzo countertop showcases the beauty of repurposed materials while demonstrating advanced concrete finishing techniques. Mike’s systematic approach to grinding and polishing creates a professional-quality surface that rivals commercial terrazzo installations. The combination of white cement with green marble creates a unique aesthetic that would be difficult to achieve with standard countertop materials.
Watch the full video and subscribe to Modern Builds:

Matt’s Take
These are my personal thoughts and tips based on my own experience in the shop. This section is not written, reviewed, or endorsed by the original creator of this project.
Terrazzo work is one of those projects that looks intimidating but really comes down to patience and methodical progression. The key insight here is understanding that concrete and aggregate behave differently than wood — you can’t rush the process, and each step builds on the previous one. That progression from 50-grit all the way up to 6000-grit is absolutely critical for achieving that mirror-like finish.
From a safety standpoint, concrete grinding generates serious amounts of silica dust, so proper respiratory protection isn’t optional — it’s essential. I always recommend wet grinding when possible and running dust collection even when working outside. The diamond pads can also load up quickly with concrete residue, so keeping them clean with a diamond dresser or coarse stone helps maintain their cutting ability.
The slurry coat technique is brilliant for dealing with those inevitable voids and surface imperfections. Mixing your own repair compound ensures color matching, and that higher cement ratio makes sense for better flow characteristics. One thing I’ve found helpful with similar repair work is keeping the surrounding surface damp during application — it prevents the existing concrete from drawing moisture out of your patch too quickly.
The edge trimming approach using a fence system is smart thinking. Freehand grinding almost always leads to wavy edges, and building that guide takes the guesswork out of achieving clean, square cuts. This kind of jig-making mindset translates well from woodworking into concrete work.