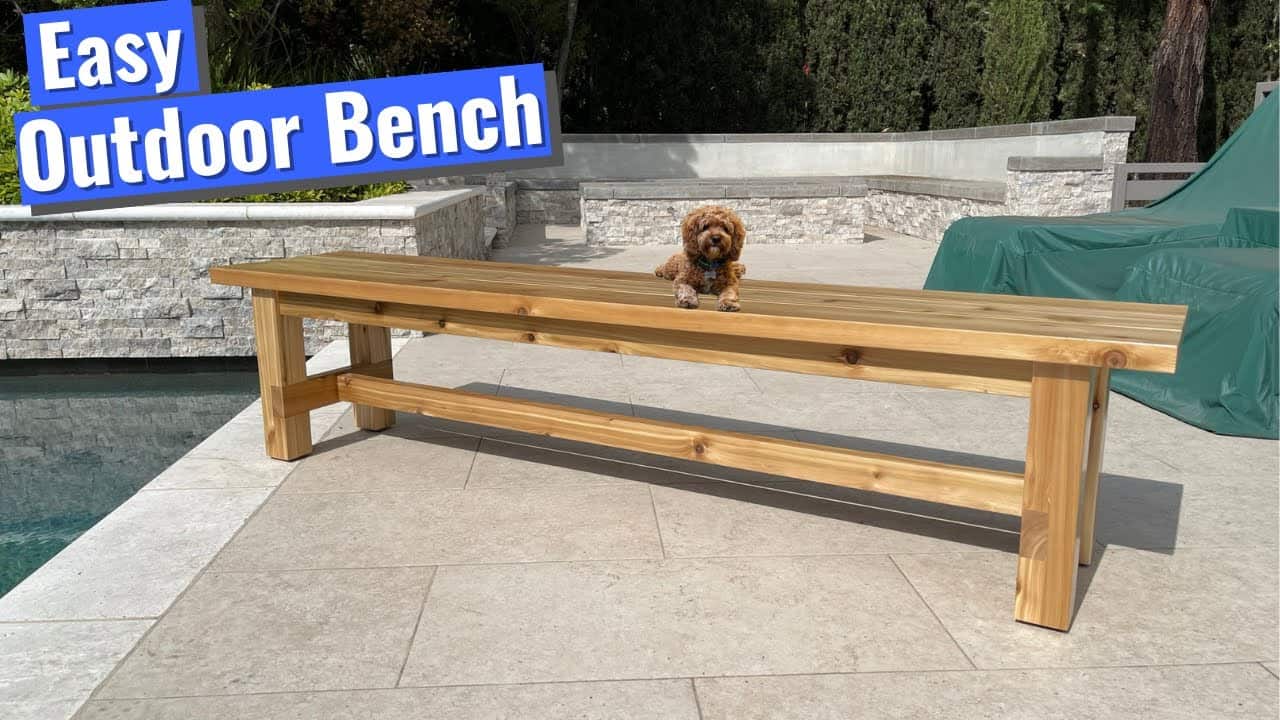
This project was built and designed by Anthony from Wood Pack DIY, with his loyal shop dog Bob Barker watching every step. These benches were created to match a previously built patio table and offer a sturdy, weather-resistant seating option for any outdoor space.
Made primarily from cedar deck boards, the benches combine solid construction with clean lines and thoughtful joinery. The build is approachable, durable, and designed with both function and style in mind.
Watch the full video and subscribe to Anthony’s channel:
Choosing Durable Materials for the Outdoors
Anthony selects 2×6 cedar decking boards for this build—a great choice for outdoor furniture thanks to cedar’s natural resistance to moisture and insects. These boards are also lightweight enough to handle easily, yet strong enough to support regular use.
Using a miter saw and stop block setup, each piece is cut down to length before being further processed. Bob Barker keeps an eye on the workflow, offering encouragement (and maybe the occasional distraction).
Squaring the Edges for Better Joinery
After cutting the boards to length, Anthony rips them down to the needed width using a table saw. This step removes the rounded factory edges, allowing for tighter seams and a more refined final appearance.
Taking the time to square the edges helps everything line up more precisely during assembly. It’s a small step that adds up to a more professional-looking project in the end.
Laminating the Bench Legs
Instead of using bulky 4×4 posts, Anthony glues together pairs of cedar boards to mimic that same look with a more streamlined approach. This also allows for greater control over the finished size and strength.
During clamping, shim blocks are used to protect the cedar from clamp pressure marks. This attention to surface quality ensures the final product will look clean and well-built.
Cleaning Up and Shaping the Leg Blanks
Once dry, the laminated leg blanks are trimmed down and cleaned up with a hand plane. Anthony follows up with sanding to smooth the surfaces and remove any remaining glue residue.
Each bench will have four legs, and since two benches are being built, this step is repeated eight times. It’s a good example of how batch-building techniques can save time and keep your workflow organized.
Strong Joinery with a Beadlock Jig
To join the legs and crosspieces, Anthony uses a beadlock jig—a tool that allows him to drill accurate mortise-style holes for floating tenons. This type of joinery is excellent for furniture that needs to handle weight and outdoor exposure.
The layout process involves careful marking, clamping, and drilling. With everything aligned and secure, the beadlock system creates rock-solid joints that are both functional and invisible once assembled.
Adding Pocket Holes for Extra Strength
After the leg assemblies are dry-fitted, Anthony reinforces them with pocket holes. This step not only makes assembly easier but adds extra stability—especially important for furniture exposed to movement, shifting, and the occasional wet weather.
He uses outdoor-rated pocket screws that are less prone to rust and corrosion. It’s another detail that contributes to the longevity of the finished benches.
Final Assembly and Structural Reinforcement
The leg assemblies are connected using crosspieces, again secured with glue and pocket hole screws. Once everything is assembled and clamped, Anthony checks for squareness and lets the glue cure fully before moving on.
Each bench also includes stretchers between the legs for added strength. These are attached using the same joinery method and bring even more rigidity to the design.
Smoothing, Rounding, and Prepping for Finish
All edges are sanded thoroughly to eliminate splinters and sharp transitions. A slight round-over is applied to every corner using a router, giving the benches a soft, comfortable profile.
Anthony and Bob Barker take their time on this part, knowing that smooth edges and a clean finish will make the benches more enjoyable to use and easier to maintain.
Sealing with Marine-Grade Varnish
For long-lasting outdoor protection, Anthony uses TotalBoat marine varnish. This finish offers UV resistance, moisture protection, and a beautiful, warm tone that enhances the cedar’s natural color.
Several coats are applied to fully seal the wood, with light sanding between layers for maximum adhesion. This step ensures that the benches will remain attractive and protected even after years outside.
Finishing Touches and Leveling the Legs
Once the finish is dry, Anthony installs leg levelers on the bottom of each bench. These make a big difference in overall comfort, especially when placed on uneven patios or decks.
The result is two sturdy, great-looking benches that perfectly complement his outdoor table build. Bob Barker gives them a sniff of approval before they’re moved into place.
Please support Anthony (and Bob Barker) by visiting their website (he sells awesome plans): https://www.woodpackdiy.com/.

Matt’s Take
These are my personal thoughts and tips based on my own experience in the shop. This section is not written, reviewed, or endorsed by the original creator of this project.
Cedar is such a smart choice for outdoor projects like this. The natural oils that make it rot and insect resistant also give it that great smell when you’re working with it. One thing I really appreciate about Anthony’s approach is taking the time to rip those deck boards and square up the edges. Most people would skip that step, but it makes such a difference in how tight your joints come together and how professional the final piece looks.
That beadlock jig is a really slick way to handle the joinery here. For anyone who hasn’t used one, it’s basically a foolproof method for creating floating tenon joints that are incredibly strong. The beauty is in the precision – once you get your setup dialed in, every joint comes out identical. Just make sure your drill bit stays sharp and clear the chips frequently to avoid tearout in that cedar.
The marine varnish finish is worth the extra cost for outdoor pieces. I’ve seen too many projects fail because someone used interior polyurethane thinking it would hold up outside. That UV protection is crucial – without it, even cedar will start to gray and check over time. Anthony’s right to put on multiple coats and sand between them. It’s tedious work, but that’s what separates furniture that lasts decades from stuff that falls apart in a few seasons.