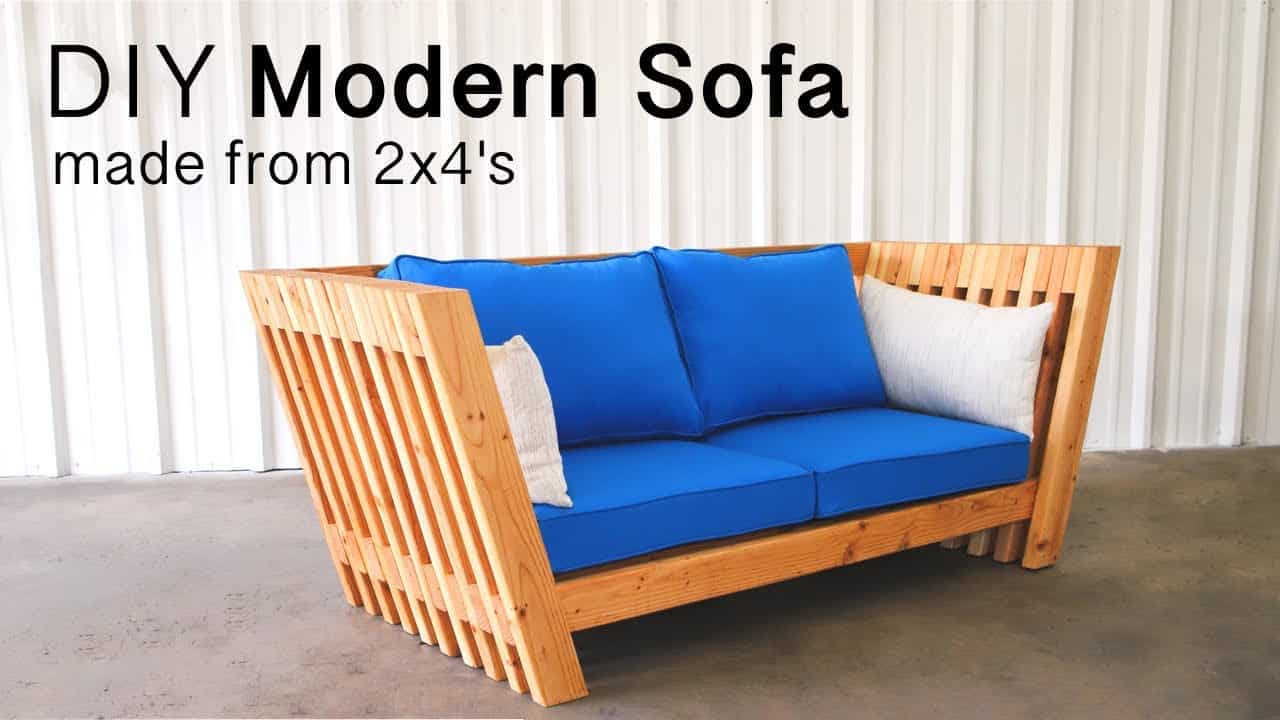
This project was built and designed by Jonny from Jonny Builds. It’s a modern, space-friendly sofa made entirely from 2x4s and a few essential tools.
With a clean look and angled design, it works well both indoors and outdoors. If you’re interested in making your own furniture, this is a straightforward and rewarding build.
Watch the full video and subscribe to Jonny’s channel:
Why This Sofa Is Worth Making
A well-built sofa brings comfort, style, and functionality to any space. This version does all that while using affordable materials and simple joinery.
It’s ideal for patios, porches, or a minimal indoor setting. The angled structure gives it a modern edge without complicating the process.
Materials and Planning
Jonny starts with 16 straight 2x4s. Choosing straight, knot-free boards makes a huge difference in how easily the sofa comes together.
Before making any cuts, Jonny lays out his plans to keep track of how each board will be used. Careful planning up front saves time later.
Cutting the Angled Pieces
Most of the cuts for this sofa are made at a 15-degree angle. The seat stretchers are cut into trapezoidal shapes that set the angle of the seat.
Jonny uses the first piece as a template for the others to ensure consistency. Repeatability is key for keeping the frame aligned and stable.
The vertical supports and armrests are cut into parallelograms. A stop block on the miter saw helps with making these pieces uniform.
Sanding and Pre-Finishing
Before any pieces are assembled, everything is sanded smooth. It’s easier to sand while the pieces are loose than after assembly.
A few coats of Danish oil protect the wood and bring out its natural grain. Pre-finishing also helps seal areas that will be hard to reach later.
Assembling the Sofa Frame
Jonny starts by positioning the armrests at the correct angle, using seat stretchers to check alignment. He attaches each layer using two-inch screws.
To avoid overlapping screw paths, he alternates the entry points at each joint. This small detail prevents cracking and makes the joints more solid.
Pre-drilling the holes keeps the ends of the boards from splitting. Each screw is carefully placed to keep the frame secure and square.
Final Layers and Structural Details
The top layer of boards is finished off with wooden plugs to hide screw heads. Each plug is glued, cut flush, and sanded smooth for a seamless finish.
Back stretchers are added to support the cushions. These pieces are cut to fit snugly and provide structure for the final look.
Adding Cushions
Once the sofa frame is complete, it’s ready for cushions. You can buy pre-made cushions or make your own to suit your space.
Because the frame is solid and the design is universal, it works in a wide variety of indoor and outdoor settings. The angled back and wide seat provide real comfort.
Time and Cost
This project can be completed in a weekend, even with a limited tool setup. The estimated material cost is around $70, not including cushions.
If you’re on a tighter budget, used cushions from local marketplaces are a great option. It’s a cost-effective build with a high-end look.
See the Full Build in Action
Watch the full video and subscribe to Jonny’s channel:
(Embed YouTube video here)
ir space.
Video
Get the plans here: https://www.jonny-builds.com/diy-builds/2020/2/19/diy-2×4-sofa.

Matt’s Take
These are my personal thoughts and tips based on my own experience in the shop. This section is not written, reviewed, or endorsed by the original creator of this project.
Building furniture from 2x4s is one of my favorite ways to create solid, functional pieces without breaking the bank. The beauty of construction lumber is that it’s readily available, affordable, and surprisingly versatile when you put some thought into the design. This angled approach gives the sofa a contemporary feel that you’d expect to pay serious money for in a store.
That 15-degree angle is what makes this whole project work visually, but it also means every cut needs to be spot-on. When you’re working with angles like this, I always recommend making test cuts on scrap pieces first to dial in your miter saw settings. A degree or two off might not seem like much, but it compounds quickly across multiple joints. Taking time to get that first piece perfect as a template is absolutely the right move.
Pre-finishing before assembly is something I wish more woodworkers would embrace. Getting finish into all those nooks and crannies after everything’s screwed together is a real pain, and you’ll always end up with spots you can’t quite reach. Danish oil is a solid choice here too – it penetrates well, gives good protection for outdoor use, and won’t build up a thick film that might crack over time.
For around $70 in materials plus cushions, this is hard to beat. Even if you ended up spending $150 total with decent outdoor cushions, you’re still looking at a fraction of what a comparable piece would cost retail.