This project was built and designed by Jason from PatriotDIY. It’s a simple yet highly functional shelving unit designed to keep your garage or workshop organized and flexible.
Jason’s mobile storage shelves are built for durability, convenience, and ease of use—especially in a small or changing workspace. With sturdy construction and rolling casters, they’re ideal for woodworkers who need both storage and mobility in one build.
Watch the full video and subscribe to Jason’s channel:
Why Go Mobile?
One of the biggest challenges in a shop or garage is flexibility. Mobile shelves offer the ability to reconfigure your workspace on the fly, moving tools or supplies exactly where you need them.
Jason highlights how this design allows for better access, less clutter, and a more productive work environment. Instead of working around piles of tools, you can roll your storage system to where the work is happening.
Materials and Tools
The frame is built with common dimensional lumber, chosen for its strength and affordability. Plywood panels are used for the shelf surfaces, ensuring they can hold weight without bowing.
Key hardware includes locking casters for mobility and control. Basic tools like a circular saw or track saw, drill, and framing nailer (or screws) are all that’s needed to complete this build.
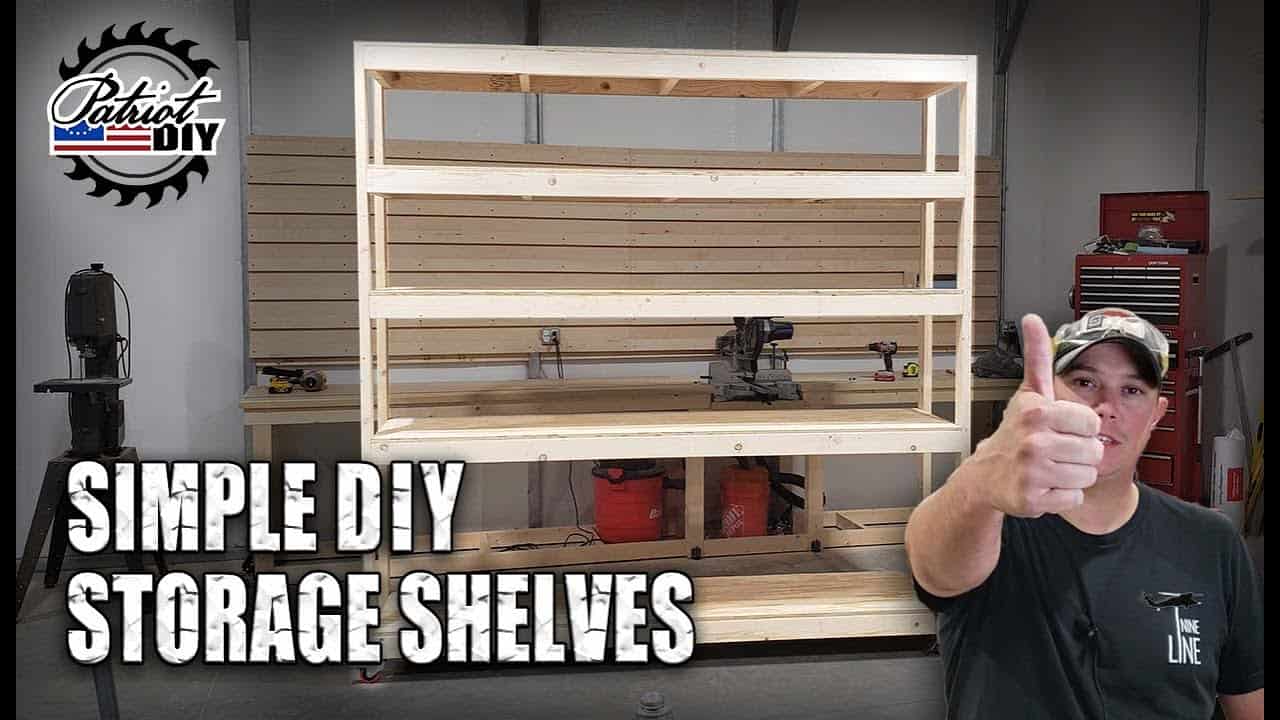
Framing the Structure
Jason begins by cutting all lumber to length, tailoring the dimensions of the unit to fit his garage. While his version is roughly eight feet long, the height and depth can be adjusted to fit your space.
The frame is laid out directly on the floor before assembly begins. This approach helps ensure accuracy and makes it easier to check for square corners before fastening anything in place.
Shelf Layout and Spacing
The vertical uprights are marked at equal intervals based on how many shelves are needed. Jason spaces them for larger bins and bulkier tools, but the setup is fully customizable depending on what you plan to store.
Each upright is then fastened to the top and bottom stretchers. Jason uses a framing nailer to secure the frame quickly, but switches to screws when attaching the plywood shelves—making it easier to remove or adjust them later if needed.
Adding Casters for Movement
Once the main frame is complete, it’s flipped over to install locking casters on the bottom. These provide the mobility that makes this project stand out from fixed shelving units.
Jason recommends checking the weight rating of your casters before installation. With heavy-duty materials loaded onto the shelves, it’s important they can support the full weight without deforming or rolling poorly.
Cutting and Installing the Plywood Shelves
The shelves themselves are cut from plywood using a track saw for clean, accurate cuts. Each piece is test-fit and then secured with screws to the frame.
Jason makes sure the shelves sit flush on all sides and evenly spaced, preventing tipping or uneven loading. Taking time to pre-measure everything ensures a polished result.
Smoothing and Optional Finish
Before putting the unit into use, Jason sands all edges and surfaces to remove splinters and rough spots. While this step may seem minor, it makes a big difference in safety and overall appearance.
If you want a more finished look, this is the time to apply paint, stain, or a protective finish. Jason leaves his raw for a workshop look, but notes that sealing the wood can extend its life and keep dust from settling into the grain.
Customization Possibilities
What makes this project especially useful is how adaptable it is. Jason suggests using the basic frame to experiment with drawer units, pegboard panels, or storage bins.
You could also size the shelves to fit specific tool cases, scrap wood bins, or fastener containers. It’s a blank canvas that can evolve with your workspace over time.
A Great First Step Toward Shop Organization
Whether your garage is cluttered or your shop needs a flexible layout, mobile storage shelves are a great project. Jason’s design is straightforward and budget-friendly, and it can be scaled up or down to fit nearly any space.
The ability to roll tools or supplies wherever you need them makes day-to-day tasks easier. And with just a few basic materials and tools, you’ll end up with a rugged, long-lasting solution.
Please support Jason by visiting his Etsy Store: https://www.etsy.com/shop/patriotdiy.

Matt’s Take
These are my personal thoughts and tips based on my own experience in the shop. This section is not written, reviewed, or endorsed by the original creator of this project.
Mobile storage really is a game-changer in the shop. I’ve found that being able to roll supplies right to your work area cuts down on so much back-and-forth walking, especially during longer projects. The flexibility to reconfigure your space based on what you’re building is huge.
Jason’s approach of laying everything out on the floor before assembly is smart workshop practice. It’s much easier to check measurements and square things up when you’re not fighting gravity or trying to hold pieces in awkward positions. That extra few minutes of planning saves headaches later.
One thing worth noting about casters — don’t cheap out on them if you’re planning to load these shelves heavy. Good locking casters that actually lock solid are worth the extra $20-30. Nothing’s more frustrating than shelves that creep around the shop when you’re trying to grab something. Also, consider the floor surface where you’ll be rolling these. Rough concrete can eat up lighter-duty wheels pretty quickly.
The customization potential here is really what makes this build shine. Starting with a solid rolling frame gives you endless options to add drawers, bins, or specialized storage as your needs change. It’s basically building the bones first, then adding the organs later.