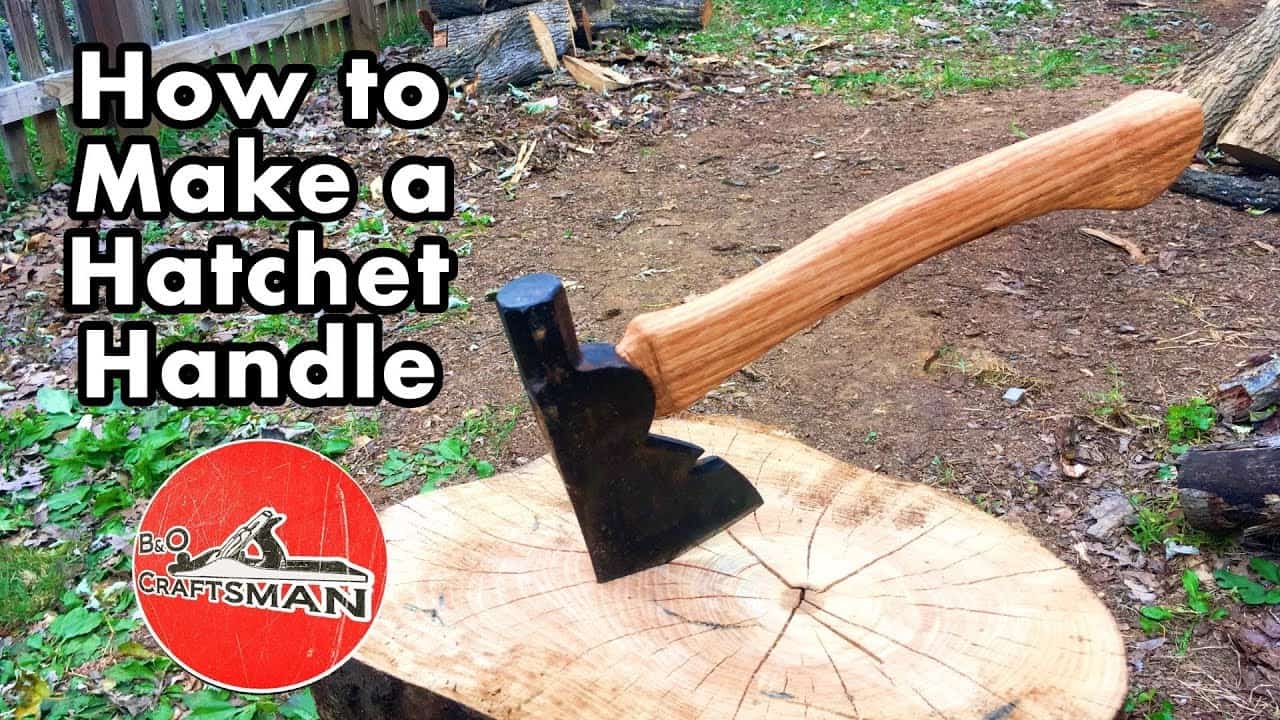
This project was built and designed by Chris from B&O Craftsman. It’s a thoughtful restoration project that focuses on making a custom wooden handle for an old hatchet using solid oak and careful hand shaping.
Restoring a tool doesn’t just bring it back to life—it gives it new purpose and often new meaning. This build shows how simple materials and a little patience can result in a handle that improves both the function and feel of an old axe.
Watch the full video and subscribe to Chris’s channel:
Selecting the Right Material
The foundation of any reliable hatchet handle is the wood you choose. In this case, Chris works with oak, which is strong, durable, and widely available. It’s a go-to hardwood for tool handles because of its ability to absorb shock and withstand repeated use.
Grain direction matters a lot here. Straight grain ensures that the handle won’t easily split or weaken under pressure, and selecting a clean board without knots or irregularities helps improve both strength and workability.
Creating the Handle Blank
To start the process, Chris traces a rough outline of the handle shape onto the board. This shape is based on the size and curve needed to match the hatchet head and provide a comfortable grip.
Instead of relying on a thick board, Chris glues two thinner boards together to create the right thickness. This approach allows more flexibility when working with scrap material and gives the option to orient the grain in the same direction across both pieces.
Rough Cutting and Shaping
Once the blank is dry, the basic shape is cut out using saws and sanding tools. Chris refines the outline and begins sculpting the handle’s profile, tapering the end that will receive the axe head and rounding out the grip area.
This shaping is done gradually, ensuring the handle fits comfortably in hand while still leaving enough material for strength. It’s a balance between ergonomics and durability, with special care taken not to remove too much material too early.
Fitting the Axe Head
The most critical part of the build is fitting the axe head to the handle. Chris sets the head onto the tapered end of the handle and outlines the shape of the eye, marking exactly where to remove wood.
Using chisels, rasps, or a rotary tool, he carefully removes material until the head fits snugly. It should sit firmly with minimal gaps and no wobble. This part requires patience and repeated test fits to avoid going too far.
Installing the Wedge
With the axe head properly seated, a kerf is cut into the top of the handle to accept a wedge. Chris uses walnut for contrast and strength, giving the finished piece a nice touch of visual interest as well as function.
The wedge is tapped into the kerf, spreading the top of the handle slightly and locking the head in place. This method has been used for generations and is one of the simplest yet most effective ways to secure an axe head.
Smoothing and Finishing
After final sanding and blending, Chris applies several coats of boiled linseed oil. This type of finish penetrates deep into the wood, protecting it from moisture and wear while also enhancing the natural grain.
Boiled linseed oil is an ideal finish for tool handles because it’s easy to maintain and can be reapplied over time. It gives the handle a warm tone and slightly tacky feel that helps with grip.
Functional and Personalized
By the end of the build, the new handle is both functional and personal. It revives the hatchet, giving it a longer life and a handmade upgrade that looks and feels great.
The project doesn’t require a lot of expensive tools or exotic materials, but it does take careful planning and attention to detail. The end result is a tool that works better and carries a story with it.
Why This Project Stands Out
Custom tool handles aren’t just about function—they’re about making something you’ll use for years. Chris’s approach to this project emphasizes craftsmanship and care, turning a worn-out hatchet into something useful and beautiful.
It’s also a great example of how woodworking skills can cross into tool restoration. Whether you’re reviving heirloom tools or improving a flea market find, learning to make a handle is a valuable skill in any workshop.
Please support Chris by visiting his website here: https://bo-craftsman-shop.creator-spring.com/.

Matt’s Take
These are my personal thoughts and tips based on my own experience in the shop. This section is not written, reviewed, or endorsed by the original creator of this project.
There’s something deeply satisfying about breathing new life into an old tool. Oak really is the gold standard for axe handles — it’s tough enough to handle the shock loads but still workable enough that you won’t burn through chisels shaping it. When you’re selecting your stock, spend extra time looking at that grain direction. You want those growth rings running straight down the length of the handle, not diagonal across it.
The glue-up approach Chris uses is smart, especially if you’re working with thinner stock. Just make sure you get good grain alignment between the pieces and give that joint plenty of cure time before you start heavy shaping. When it comes to fitting the eye, work slow and check often — it’s much easier to remove a little more wood than it is to fix a loose fit.
That walnut wedge isn’t just for looks, though it does add a nice touch. The contrast wood actually makes it easier to see if the wedge is seating evenly when you drive it home. And boiled linseed oil is perfect for this application — it builds up that slightly tacky surface that really helps with grip when your hands get sweaty during use.
Tool restoration projects like this are great skill builders. You get practice with hand shaping, fitting, and finishing all in one project, plus you end up with something you’ll actually reach for in the shop.