This project was built and designed by Sam Macy. It’s a creative use of leftover materials that results in a warm, rustic addition to any fireplace.
A wooden mantel adds charm and personality to a room while also serving a functional purpose. This project uses reclaimed wood to create a piece that blends seamlessly with its surroundings.
Watch the full video and subscribe to Sam’s channel:
Planning the Mantel
Sam starts by assessing the area above the fireplace where the mantel will be installed. The goal is to find dimensions that balance the space while enhancing the look of the existing faux beam setup.
Using leftover wood from a previous project adds both character and efficiency to the build. Repurposing these materials helps maintain design consistency throughout the room.
Measuring and Making the Cuts
Before cutting begins, accurate measurements are taken to ensure the mantel fits the space without looking oversized. A clean, centered placement over the fireplace keeps the room feeling balanced.
The top piece of the mantel is trimmed to length, and adjustments are made to suit the exact width of the wall. It’s always better to cut slightly long and trim down as needed.
Dealing with Wall Gaps
When placing a mantel, gaps between the wood and the wall are common. Sam solves this by shaping the back edge of the wood to fit the wall more closely.
In one section, a half-moon cut is made to match the contours of the surface behind it. This simple modification helps the mantel sit flush and gives the final piece a more refined look.
Adding Support with a Spacer
To further stabilize the mantel, a small spacer strip is added behind it. Sam rips this piece from trim stock and installs it between the wall and the mantel.
This keeps the structure level and helps secure it firmly to the fireplace surround. The spacer also fills any remaining gaps and adds subtle visual depth.
Applying the Finish
With the mantel mounted, it’s time to bring out the wood’s natural grain with a clear finish. Sam uses spar urethane, which adds durability and a slight sheen.
The finish protects the wood while preserving its rustic character. It also ties the new piece into the rest of the room’s design.
Final Results and Style
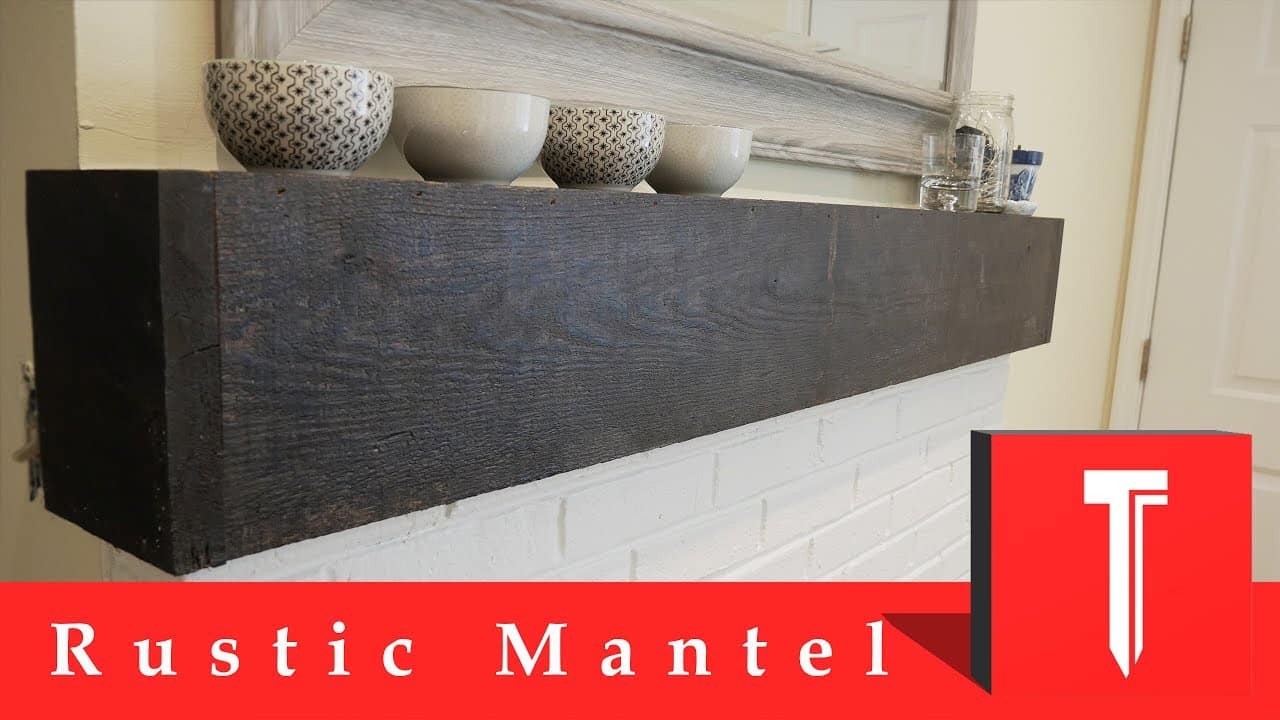
The completed mantel fits perfectly into the existing fireplace layout. It adds warmth and style without overpowering the other elements in the room.
Using salvaged wood from a previous project adds an extra layer of meaning to the build. The piece feels both intentional and timeless.
See the Full Project
Please support Sam by visiting his website here: https://sammacydesigns.com/

Matt’s Take
These are my personal thoughts and tips based on my own experience in the shop. This section is not written, reviewed, or endorsed by the original creator of this project.
Working with reclaimed wood always feels rewarding, but it does come with its own challenges. The character marks and imperfections that make salvaged lumber so appealing can also make fitting and finishing trickier. Taking time to really study each board before making cuts helps you work with the wood’s natural quirks rather than against them.
That half-moon cut technique Sam used is a great example of practical problem-solving. Walls are rarely perfectly straight, especially around fireplaces where settling and multiple materials meet. A simple coping cut like that can save you from having to use excessive amounts of caulk or filler later. I keep a few different profile tools handy for exactly these situations – sometimes a rasp works better than a saw for fine-tuning these custom fits.
The choice of spar urethane makes a lot of sense for a mantel. It’s designed to handle temperature changes and humidity better than regular polyurethane, which matters when you’re dealing with a fireplace environment. Even if you’re not burning fires regularly, that area still sees more temperature variation than most parts of the house.
One thing I really appreciate about this project is how it shows that sometimes the best approach is the simple one. No complex joinery or fancy hardware – just good measurements, careful fitting, and solid mounting. That’s often what separates a piece that looks built-in from one that looks tacked on.