This project was built and designed by Sam Macy. It’s a clean and elegant sliding barn door that combines function with timeless design.
Sliding doors are a practical solution for areas where traditional doors take up too much space. This build adds a custom, handmade touch to any room while maximizing floor space.
Watch the full video and subscribe to Sam’s channel:
Choosing Materials
Sam selected dimensional cherry lumber to give the door both strength and visual appeal. Sourcing quality boards from a local hardwood dealer ensured minimal defects and a smoother build process.
Using solid cherry creates a warm, refined look that works well in both modern and rustic spaces. The consistent grain and color variations of cherry also give the finished piece extra depth.
Cutting and Laying Out the Frame
The boards were cut to length with an inch of overlap on all sides of the door opening. This ensures the final door has a snug fit and clean coverage around the frame.
Once cut, the vertical boards were laid flat to determine the best grain orientation. Each board was arranged so the most attractive face would be visible on the finished door.
Adding Edge Detail
An eighth-inch chamfer was added along the inside edges of the vertical boards. This small detail creates visual interest and helps conceal small alignment imperfections.
Using a palm router made the process efficient while allowing for consistent depth and smooth edges. The chamfer detail also adds a sense of depth to an otherwise flat panel.
Building the Horizontal Supports
Three horizontal pieces were added at the top, bottom, and center of the frame. Rather than using dowels, the boards were dry-fit and clamped together to allow for natural wood movement.
An 18-gauge brad nailer secured the horizontal sections from the back. This method kept the front of the door free of visible fasteners for a clean appearance.
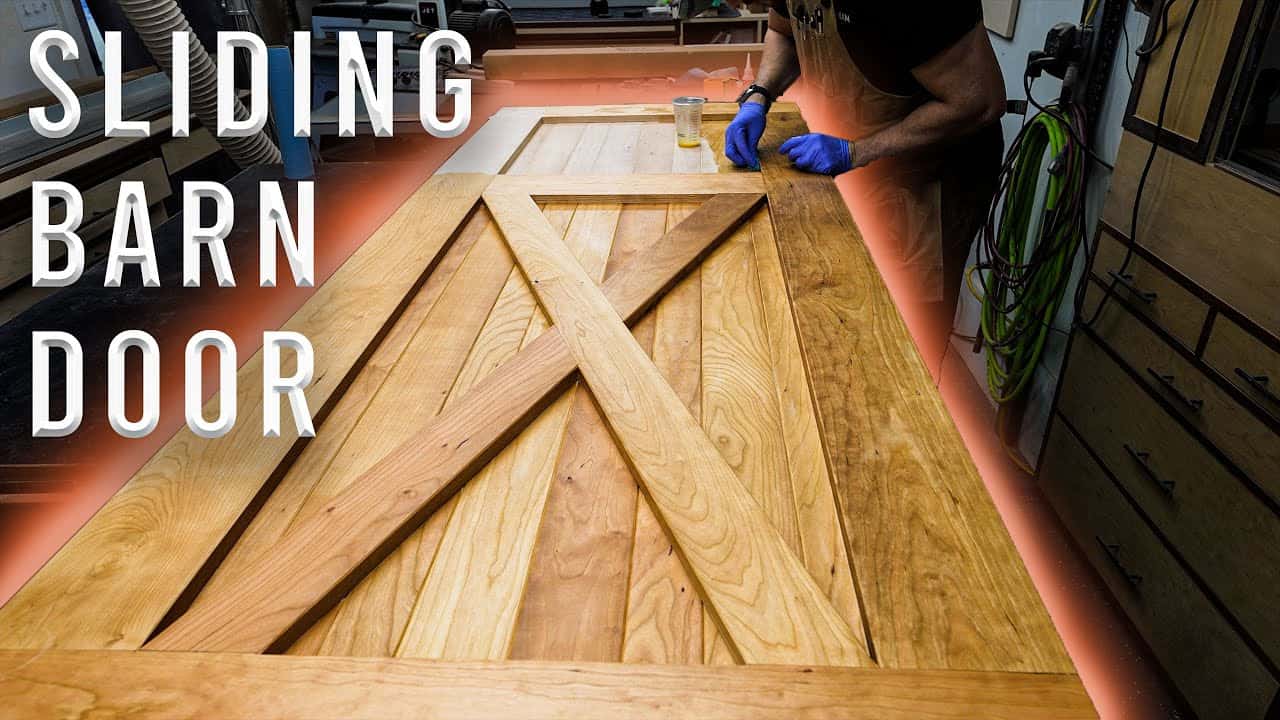
Crafting the Barn Door X
The iconic X brace design required careful measuring and angle cuts. Each diagonal piece was marked in place and adjusted until the fit was as tight as possible.
A laser guide on the miter saw helped maintain precision through the angled cuts. Minor gaps were corrected during the fitting process to ensure a visually balanced result.
Sanding and Finishing
After all components were in place, the door was sanded smooth using a variety of grits. The final sanding pass prepared the surface for finishing and removed any tool marks or glue residue.
Rubio Monocoat was applied as the finish, offering a durable, matte sheen that enhances the cherry’s natural color. This finish also protects the wood without adding a heavy gloss.
Mounting the Hardware
The sliding hardware was installed using a standard rail kit with evenly spaced pre-drilled holes. Studs were located in the wall to ensure the mounting rail was properly secured.
Once the rail was level and attached, the rollers were installed on the door. The hardware installation was straightforward and required only a few adjustments to get the door gliding smoothly.
Final Installation and Function
The completed door was mounted on the rail and tested for alignment. After a few small tweaks, the door rolled effortlessly across the opening.
The final result is a functional and attractive barn door that adds warmth and character to the room. Its solid construction and clean joinery make it a standout piece in any interior.
Want to See the Full Build?
Please support Sam by visiting his website here: https://sammacydesigns.com/