This project was built and designed by John Dolechek. It’s a clean, affordable dining table made from dimensional lumber that delivers a high-end look without the high-end price.
With thoughtful planning and efficient use of materials, John shows how to make a table that looks polished and performs well. It’s a great reminder that budget builds can still look and feel premium.
Watch the full video and subscribe to John’s channel:
Planning the Build
Before cutting any wood, John carefully measures the space to make sure the table will fit comfortably. Allowing at least three feet around all sides helps maintain room for chairs and easy movement.
Using a laser measuring tool simplifies the layout and improves accuracy. With clear dimensions in place, John begins planning his cut list.
Choosing and Prepping Materials
John selects dimensional construction lumber, which offers plenty of strength at a lower cost. Each board is inspected for straightness and surface condition before being brought into the shop.
He removes any rounded edges on the boards to create flat glue surfaces. This step improves the fit and appearance of the final tabletop.
Cutting and Assembly
The tabletop boards are cut to length and sanded before assembly. John uses a pocket hole jig to attach the boards from below, hiding the fasteners for a cleaner look.
Glue is added to each joint, and the boards are clamped tightly together. Excess glue is wiped away right away to prevent issues during finishing.
Filling and Refining
Once the glue has dried, John fills small gaps or imperfections with wood filler. He gives the tabletop a thorough sanding after the filler dries, using multiple grits to achieve a smooth surface.
For the table legs, John glues and clamps together offcut pieces, making good use of leftover materials. He arranges the boards so the best sides face outward.
Strengthening the Frame
To reinforce the structure, John adds a support frame under the tabletop using 2x3s. This not only adds stability but also gives the table a more solid, professional look.
The under-frame is attached with pocket screws and wood glue. It’s carefully aligned to keep the tabletop flat and supported.
Surface Preparation and Staining
With the base and top complete, John sands the entire table again to ensure a consistent finish. All surfaces and edges are smoothed for comfort and appearance.
He applies a pre-stain conditioner to help the wood absorb the stain evenly. This step helps reduce blotchiness and brings out a rich, even tone.
Applying the Finish
Stain is applied with care, starting from the underside and working upward. John takes his time to ensure full coverage and no visible streaks.
After the stain dries, several coats of polyurethane are brushed on for durability. Each coat is sanded lightly before the next is applied for a smooth, protective finish.
Final Details and Setup
With the finish cured, felt pads are added to the bottom of each leg to protect flooring. The table is then brought inside and positioned in the dining space.
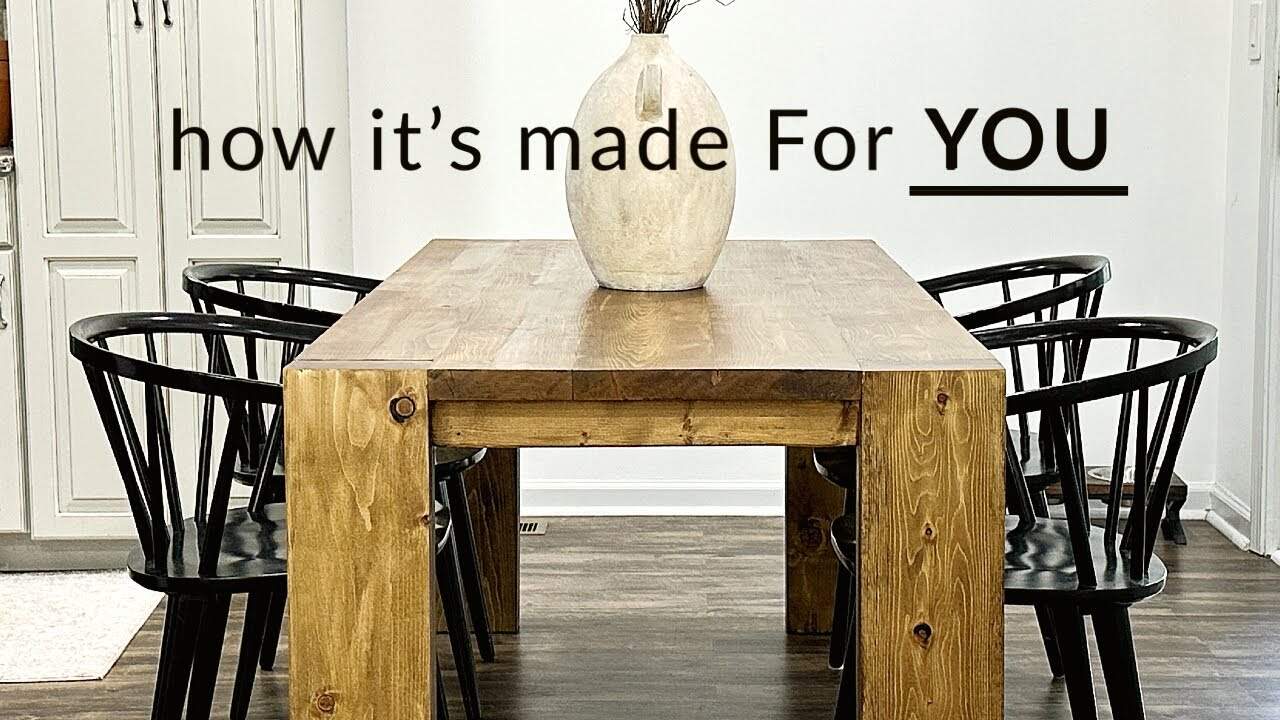
Paired with thrifted chairs and a simple centerpiece, the result is a polished dining setup that looks far more expensive than it is.
Want to See the Full Build?
Please support John by visiting his website here: https://johndolechek.myportfolio.com/.

Matt’s Take
These are my personal thoughts and tips based on my own experience in the shop. This section is not written, reviewed, or endorsed by the original creator of this project.
This build really showcases how thoughtful material selection and solid technique can transform basic lumber into something that looks much more expensive. Construction-grade lumber gets a bad rap sometimes, but when you take the time to properly prep it — removing those rounded edges and carefully selecting boards — you can achieve results that rival much pricier hardwoods.
The pocket hole approach for the tabletop is smart for a project like this. It keeps the joinery hidden while still providing plenty of strength. Just remember to drill your pilot holes at the right depth — too shallow and you risk splitting, too deep and you might break through the face. A good test piece always helps dial in those settings.
Pre-stain conditioner is absolutely worth the extra step, especially with softer woods that tend to get blotchy. It’s one of those simple things that separates a good finish from a great one. And that under-frame support John added? That’s the kind of detail that makes a table feel solid and substantial rather than lightweight and wobbly.
The felt pads are a nice finishing touch that protects both the table and your floors. For a dining table that’ll see daily use, taking care of those small details really pays off in the long run.