Zach from Bear Mountain Builds designed a versatile and space-saving modular workbench that is perfect for small workshops. This project provides a sturdy and flexible work surface while remaining compact enough for limited spaces. If you enjoy woodworking and DIY projects, be sure to check out Zach’s YouTube channel for more great builds.
Watch the full video and subscribe to Zach’s channel:
Why Choose a Modular Workbench?
A large, stationary workbench isn’t always ideal, especially in smaller workshops. A modular workbench offers the flexibility to be used as a miter saw station, an assembly table, or split into two separate surfaces when needed.
This design is both efficient and cost-effective, requiring just one sheet of plywood and a few 2x4s. It’s a great beginner-friendly project that enhances any workspace without taking up too much room.
How Zach Built His Workbench
The build begins with cutting a sheet of plywood into sections that will form the top and bottom of the workbench. The plywood grain runs lengthwise to provide strength and stability for the surface.
For the frame, Zach uses 2x4s, which he planes for a cleaner finish. While planing isn’t necessary, it improves the final appearance and ensures a smooth surface for assembly.
Choosing the Right Height
Workbench height is an important factor in comfort and usability. Zach builds his workbench to match an existing assembly table, ensuring a seamless workspace when the benches are used together.
For those adjusting the design, a height of around 41 inches works well for taller individuals, though this can be modified based on preference. Keeping all benches at the same height allows them to function together as one larger surface.
Constructing the Frame
Zach constructs the legs using lap joints, which provide strong and simple connections. Glue is applied to the joint surfaces, and spacers help keep everything even during assembly. Pre-drilling holes prevents splitting when screws are inserted.
Clamps ensure the frame remains square as everything is tightened into place. This step is key for maintaining alignment and stability as the workbench comes together.
Reinforcing the Frame
Cross pieces are added next to improve structural integrity. Zach drills pocket holes into these pieces before attaching them to the frame. This technique adds extra strength while keeping fasteners hidden.
A pocket hole jig makes this process easier, and there are budget-friendly options available for those just starting out. Keeping hole positions consistent ensures a cleaner and more secure build.
Final Assembly and Mobility
With the frame assembled, Zach installs casters to make the workbench mobile. Proper positioning of the casters ensures they don’t interfere with the pocket screws inside the frame.
Before securing the plywood top, he checks for squareness by measuring diagonally across the frame. This step helps ensure everything is properly aligned before final assembly. Once confirmed, the plywood tops are attached using pocket screws for a clean and professional finish.
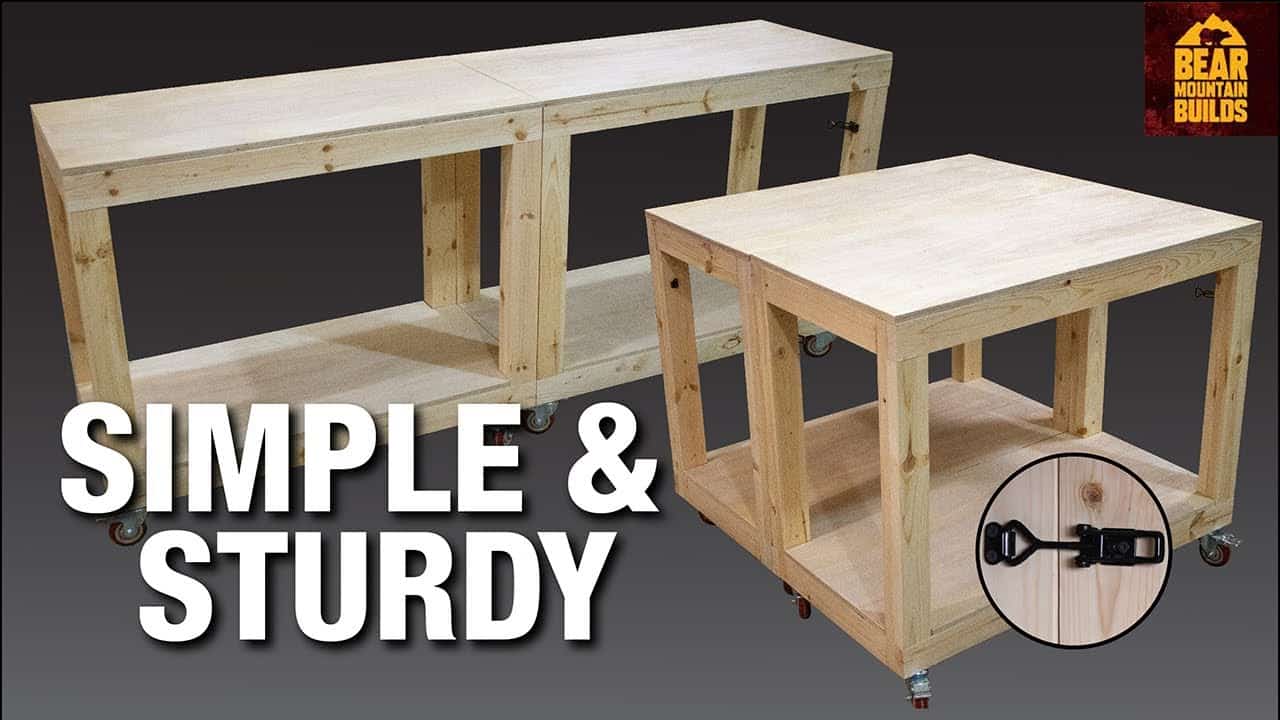
Creating a Versatile Work Surface
The completed workbenches can be used separately or latched together to form a larger workspace. By adding latches, Zach creates a solid surface that doesn’t require clamps to hold the benches in place.
This modular design makes it easy to adjust the workspace as needed. Whether used for woodworking, assembly, or as a dedicated tool station, this workbench provides flexibility and efficiency.
Ready to Build Your Own?
Zach’s modular workbench is a great solution for beginners and experienced woodworkers alike. Its sturdy construction and adaptable design make it a valuable addition to any workshop.

Matt’s Take
These are my personal thoughts and tips based on my own experience in the shop. This section is not written, reviewed, or endorsed by the original creator of this project.
This modular approach is brilliant for smaller shops where every square foot counts. I’ve found that mobile workbenches completely change how you work — being able to roll storage and work surfaces exactly where you need them makes even cramped spaces feel bigger. The ability to latch two units together is especially clever since it gives you that large assembly surface when you need it without permanently eating up floor space.
The lap joint construction for the legs is a smart choice here. It’s strong, straightforward to cut, and forgiving for beginners who might not have their joinery dialed in perfectly yet. Just remember to take your time with the layout — measure twice, cut once definitely applies. A sharp chisel makes cleaning up these joints much easier, and don’t rush the glue-up. Those spacers Zach uses are key for keeping everything aligned while the glue sets.
One thing worth considering is caster selection. Heavy-duty locking casters are worth the extra cost, especially if you’ll be doing any hand planing or heavy assembly work on these benches. The last thing you want is your workbench rolling away mid-project. Also, think about your shop floor — softer wheels work better on concrete, while harder wheels roll easier on smooth surfaces but can be noisy.