Jon Peters – Longview Woodworking built and designed this project.
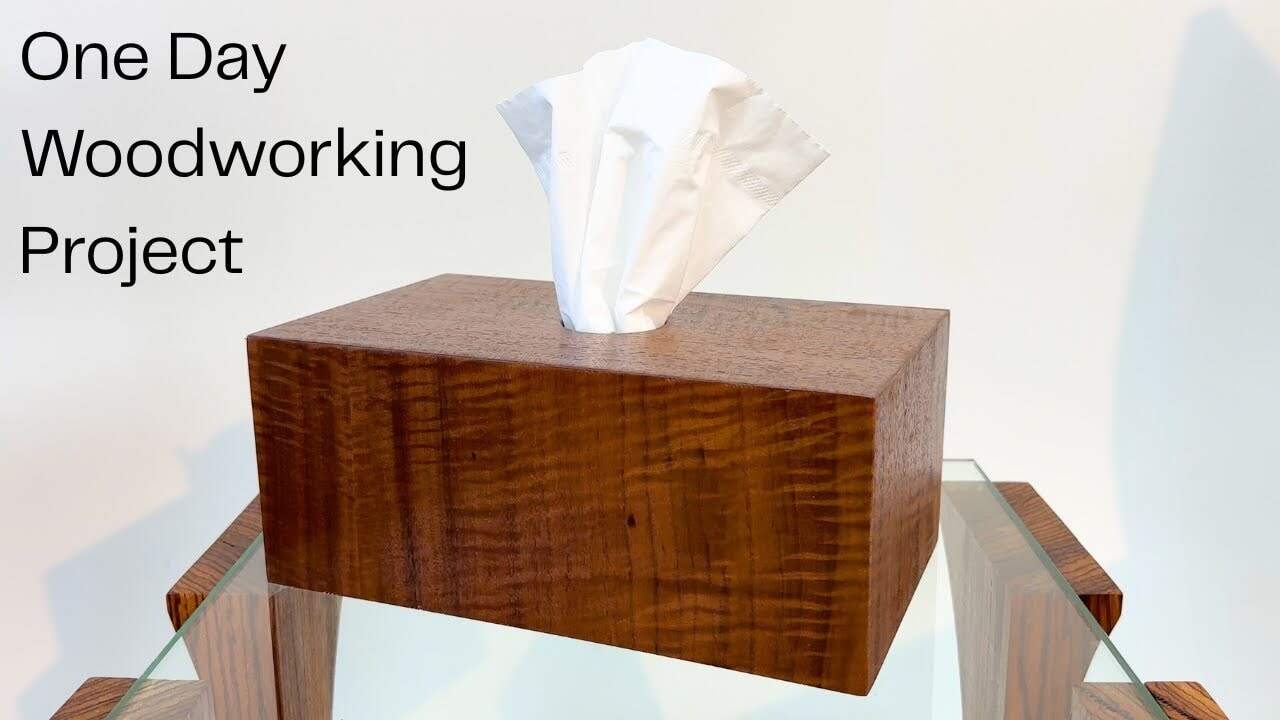
This is a small, five-sided veneered tissue box cover made from simple plywood parts, assembled with glue and a few nails to keep the build approachable for beginners while focusing on fundamental veneering techniques.
Design
The piece keeps the design simple: clean lines and a single opening for tissues, which keeps attention on the veneer rather than complex joinery.
The compact scale makes it a great exercise in proportion, edge reveals, and matching veneer grain across small faces.
Lumber Prep
Plywood provides a stable substrate for veneer, but the faces need to be smooth and free of voids for a professional result.
Filling small voids and sealing interior surfaces before veneering helps with adhesion and prevents uneven finish absorption later on.
Joinery & Assembly
The box is assembled with basic butt joints, glue, and a handful of nails—an accessible approach that keeps setup and cleanup minimal.
Practical shop tips used during assembly include clamping small parts for safe drilling and holding the nail gun squarely to reduce nail blowouts.
Veneering & Glue-Up
The veneer is applied in stages to make placement easier: start with the sides, then the front and back, and finish with the top to maintain control and alignment.
Contact cement works well for small projects when applied to both surfaces and allowed to dry to the touch; alignment sticks and a roller (or a plywood block with a rounded edge) help burnish the veneer without trapping bubbles.
Trim excess veneer with a flush-trim router bit, then sand the edges gently—push into the veneer rather than pulling to avoid tearing—and clean up the hole with a trim bit to maintain crisp openings.
Finishing & Final Tips
Light sanding before finish prevents sanding through the veneer while smoothing any filler or edge transitions for a seamless look.
A clear, water-compatible finish will bring out the veneer’s grain and provide a durable surface; solvent-based adhesives and finishes call for proper ventilation or a respirator during application.
Small projects like this are ideal for practicing techniques—layout, adhesive work, trimming, and finishing—without a large time or material commitment, and the same workflow scales to larger veneered panels.
Why This Build Matters
This tissue box cover is a compact lesson in veneering fundamentals that blends basic assembly with careful surface prep and trimming techniques useful on almost any veneering project.
Mastering these steps builds confidence for more ambitious veneered furniture, and the methods shown are adaptable to different substrates, veneer species, and finish choices.
Shop all of Jon’s plans here: https://jonpeters.com/collections/plans

Matt’s Take
These are my personal thoughts and tips based on my own experience in the shop. This section is not written, reviewed, or endorsed by the original creator of this project.
Contact cement can be tricky for first-time users, so here’s what I’ve learned works well: make sure both surfaces are completely dry to the touch before joining — it should feel tacky but not wet. Once those surfaces touch, you’re committed, so take your time with alignment. Those alignment sticks Jon mentions are game-changers for positioning veneer accurately.
The flush-trim bit approach for cleanup is solid, but keep that router moving steadily to avoid burn marks on the veneer. I like to take light passes rather than trying to remove everything in one go. When hand-sanding the edges, 220-grit is usually plenty — anything coarser risks tearing the veneer fibers.
This scale of project is perfect for building confidence with veneering without the pressure of working on a big piece of furniture. The techniques you’ll practice here — substrate prep, adhesive application, trimming, and finishing — are exactly what you’ll use on larger panels. Plus, if something goes wrong, you’re only out a small piece of veneer rather than an expensive sheet.
One safety note: contact cement fumes are no joke. Even for a small project like this, work in a well-ventilated space or outdoors when possible. Your lungs will thank you later.