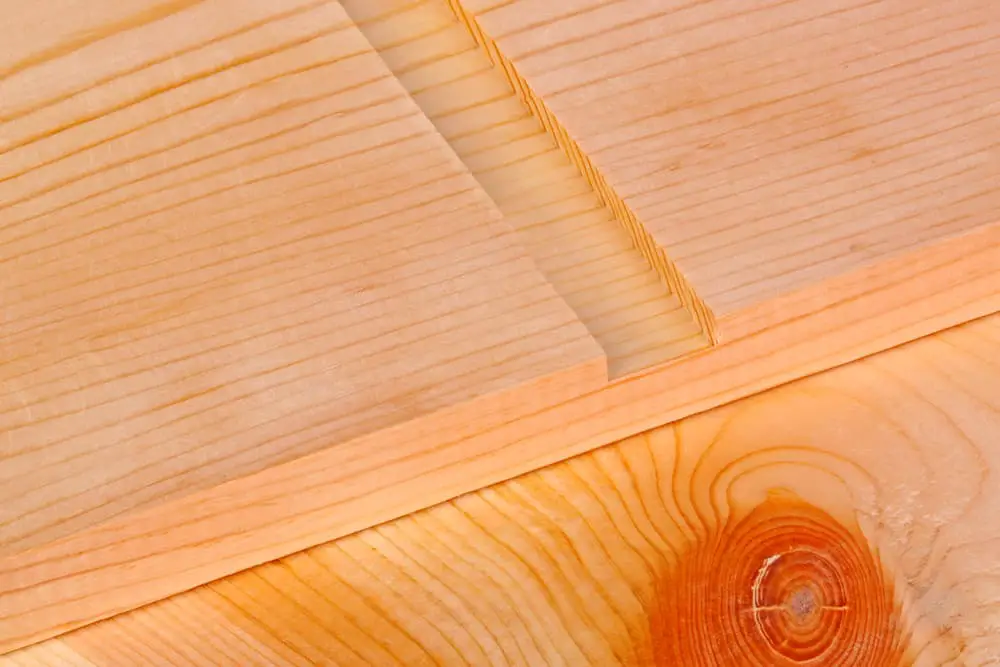
Starting a woodworking project can mean needing special cuts in the wood, like grooves.
Usually, a router does this job. But what if you don’t have one? No problem! There are other ways to get it done.
This guide shows you 3 different methods to make those cuts without a router (plus a bonus section). You’ll learn how other common tools can do the router’s job. It’s all about being creative and using what you have to keep your project going.
QUICK ANSWER:
To cut a groove in wood without a router, you can use a circular saw with a guide, a table saw with a dado stack, or a rotary tool with a router bit. These 3 methods offer precision and versatility for your woodworking projects.
Circular Saw with a Straight Edge Guide
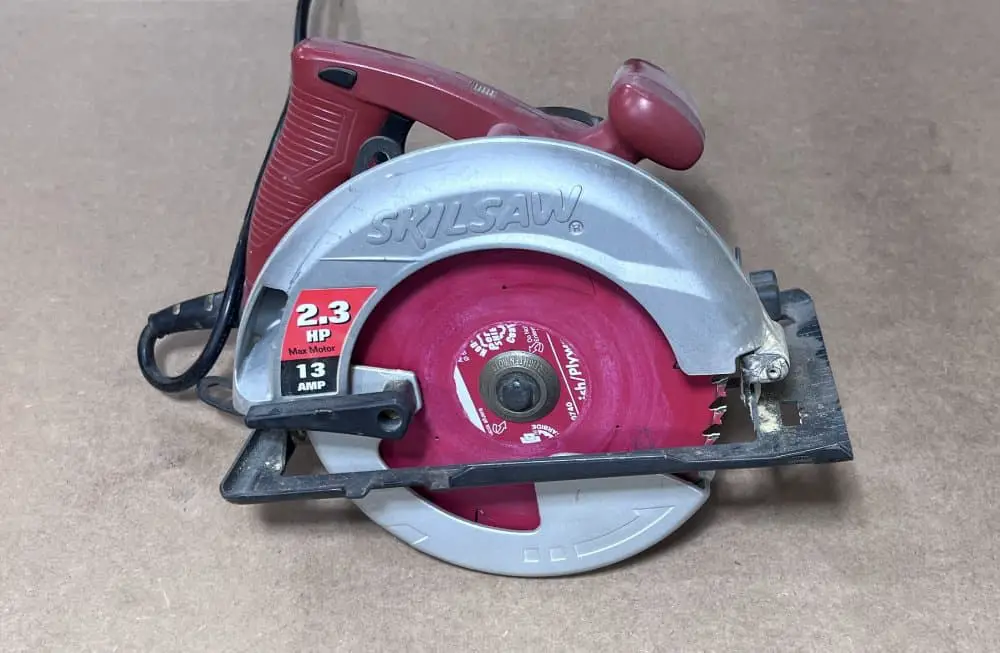
When you’re looking to cut precise grooves in a piece of wood and don’t have access to a router, a circular saw paired with a straight-edge guide can be an excellent alternative.
Here’s how to do it:
Materials Needed:
- Circular saw
- Straight edge guide (a straight piece of lumber or metal will work)
- Clamps
- Safety glasses
- Ear protection
- Dust mask
- Pencil
- Tape measure or ruler
Step-by-Step Guide:
- Safety First: Before beginning, put on your safety glasses, ear protection, and dust mask. Safety should always be your top priority when working with power tools.
- Mark the Groove: Use a pencil and a tape measure or ruler to mark the start and end points of the groove on your wood piece. Draw a straight line to connect these points, indicating where you’ll cut.
- Set Up the Straight Edge: Align your straight edge guide with the pencil marks you’ve made on the wood. The guide should be parallel to the line and positioned so the saw will cut along the line when pressed against the guide. Clamp the guide securely to the wood.
- Prepare the Saw: Set the cutting depth of your circular saw to correspond with the depth you want for your groove. Ensure the saw is unplugged while you’re making these adjustments.
- Make the Cut: Plug in the saw, and position it at the end of the guide with the blade lined up with your pencil mark. Holding the saw firmly against the guide, power it on and slowly push it along the guide, following your line until you reach the end of the groove.
- Widen the Groove (if necessary): If you need a wider groove, reposition the guide, and make additional passes with the saw until you’ve achieved the desired width. Remember to keep the saw unplugged while adjusting the guide.
- Clean Up: After making your cuts, use a shop vac or a brush to clean up any sawdust or debris. Inspect your groove to ensure it meets your specifications, and sand down any rough edges if necessary.
[quiz-cat id=”15971″]
Tips for Success:
- Always double-check your measurements before cutting.
- Ensure your work area is well-lit and free of any obstacles.
- Keep your movements steady and apply consistent pressure while cutting.
- Practice on scrap wood if you’re new to using a circular saw for this purpose.
Troubleshooting:
- If your cut isn’t straight, ensure your straight edge guide hasn’t shifted and that you’re maintaining constant pressure against it throughout the cut.
- If cutting feels unusually difficult, ensure your blade is sharp, properly aligned, and clean from any resin build-up.
- If the wood splinters excessively, use a finer-toothed blade or apply painter’s tape along the cut line to reduce tear-out.
The key lies in the preparation: accurate measurements and a firmly clamped straight edge are crucial to your success.
Table Saw with a Dado Blade Set (Or Standard Blade)

While a dado blade set is ideal for cutting grooves, a standard table saw blade can still accomplish this cut- it will just take longer (more passes).
Here’s how to use both:
Materials Needed:
- Table saw
- Dado blade set (optional)
- Standard table saw blade (if you don’t have a dado set)
- Safety glasses
- Ear protection
- Dust mask
- Push stick or push block
- Pencil
- Tape measure or ruler
- Wood clamps
Step-by-Step Guide:
- Safety Precautions: Put on your safety glasses, ear protection, and dust mask.
- Marking the Wood: Clearly mark the area where you want to cut the groove using a pencil and ruler or tape measure. Accurate markings are crucial for precision.
- Setting Up the Blade:
- If you have a dado blade set, install it according to the manufacturer’s instructions, and adjust it to the width and depth of your desired groove.
- Without a dado set, you’ll use your standard table saw blade. Set the blade height to the depth you want for your groove.
- Making the Cut:
- For those with a dado set, you’ll likely achieve your desired groove in one pass due to the blade’s width. Ensure your wood is firmly against the rip fence or miter gauge for stability, and push it through the blade with a push stick or push block.
- You’ll make multiple passes without a dado set to create your groove. Start with the blade aligned to one side of your marked groove and make your first pass. Then, adjust the rip fence to make subsequent passes, gradually widening the groove until it reaches your desired width.
- Finishing Up: Once you’ve cut your groove, turn off the table saw and wait for the blade to stop completely. Remove any debris and inspect your work. You can use sandpaper or a small file to smooth out any rough edges within the groove if necessary.
Tips for Success:
- Always use a push stick or push block to keep your hands safe while you guide the wood through the saw.
- Make sure the wood is secure and stable before you start cutting.
- If you’re using a standard blade, be patient and make slight adjustments for each pass to ensure a smooth, even groove.
- Practice on scrap wood if you’re new to this method.
Troubleshooting:
- If your groove isn’t as straight as you’d like, double-check that your wood is flush against your fence and that your fence is secure.
- If the groove’s bottom isn’t flat, ensure your blade height is consistent and your table saw is level. You may also need a flat bottom blade.
With a little patience and precision, you can create clean, professional-looking grooves in your woodworking projects with a table saw.
Rotary Tool (Dremel) with a Router Bit

Rotary tools, often referred to by the brand name Dremel, are incredibly versatile and handy for detailed work in smaller woodworking projects. While they’re not a traditional choice for cutting grooves, they can certainly get the job done with the right attachment.
Here’s how:
Materials Needed:
- Rotary tool (Dremel or any other brand)
- Router bit compatible with your rotary tool
- Straight edge guide (commercial or homemade)
- Clamps
- Safety glasses
- Ear protection
- Dust mask
- Pencil
- Tape measure or ruler
Step-by-Step Guide:
- Safety First: As always, safety comes first. Before starting, put your safety glasses, ear protection, and dust mask on. The high-speed rotation of rotary tools can produce a lot of dust and debris.
- Mark Your Wood: With a pencil and ruler or tape measure, mark the section of wood where you intend to cut the groove. Clear and precise markings will guide your cuts and help ensure accuracy.
- Attach the Router Bit: Securely attach a router bit to your rotary tool. Make sure it’s designed for cutting grooves and that it’s firmly tightened to prevent it from coming loose during operation.
- Set Up Your Guide: Position your straight-edge guide along the line you’ve marked for your groove. Clamp it down securely to ensure it doesn’t shift while you’re cutting.
- Adjust the Depth: Set the cutting depth on your rotary tool. Start with a shallow depth for the first pass; you can always go deeper in subsequent passes.
- Cut the Groove: Turn on your rotary tool and guide the router bit along the line, using the straight edge as a guide. It’s important to move slowly and steadily, letting the tool do the work. If your groove needs to be deeper, make multiple passes, adjusting the depth as needed.
- Clean and Finish: Once you’ve achieved the desired depth and width, turn off your rotary tool and clean the groove and work area of any debris. You may need a small piece of sandpaper to smooth out the groove if there are any rough spots.
Tips for Success:
- Don’t rush the cutting process. Rotary tools work best at their own pace, and forcing them can result in uneven cuts or damage to the bit.
- Ensure your rotary tool is fully charged (if cordless) or securely plugged in (if corded) before starting.
- Practice on a scrap piece of wood to get a feel for the cutting process, especially if you’re new to using a rotary tool in this way.
Troubleshooting:
- If the groove isn’t straight, check your straight-edge guide to ensure it’s clamped down securely and hasn’t moved during the cutting process.
- If you find the groove’s edges are rough, a slower cutting speed or a pass with sandpaper can help smooth things out.
Using a rotary tool (Dremel) with a router bit for cutting grooves might not be the first method that comes to mind, but it’s an effective solution, especially for smaller projects or finer details.
You can achieve precise, clean grooves with patience and a steady hand.
Comparative Analysis of Groove-Cutting Methods
| Power Tool Method | Speed | Accuracy | Time Required | Safety |
|---|---|---|---|---|
| Circular Saw with Straight Edge Guide | Medium | High | Moderate | High |
| Table Saw (Dado Blade) | Fast (with Dado) | Very High | Short (with Dado) | Medium to High |
| Table Saw (Standard Blade) | Medium (without) | High | Moderate (without) | |
| Rotary Tool with Router Bit | Slow | Medium to High | Long | Very High |
Notes:
- Speed: Refers to the cutting speed. The table saw is the fastest, especially with a dado set, while the rotary tool is slower due to its size.
- Accuracy: Involves the tool’s precision in cutting grooves. The table saw with a dado blade set is the most precise, while the rotary tool ranks slightly lower, requiring a steadier hand.
- Time Required: Total time from setup to completion. The table saw is the quickest, especially with the dado set, while the rotary tool takes longer due to its nature for detailed work.
- Safety: Pertain to the general safety level while operating the tools. The rotary tool is considered very safe due to its low power and slow speed, while the table saw, especially with a dado blade, requires more caution due to its high power and sharp, fast-spinning blade. When used with a guide, the circular saw is secure but still demands attention to safety practices.
Bonus: Cutting Slots in Wood Using Hand Tools
While our main discussion revolves around using alternative power tools instead of a router, here, we briefly explore how to achieve similar results with hand tools.
The Rabbeting Plane:
This classic tool, equal in width to its blade, offers precision for cutting with or against the grain. Begin by marking your wood carefully, using a knife for a sharp line. Like a metal level, a straight edge can guide your initial strokes.
Once your groove starts to form, the plane’s design keeps you on track.
The Trusty Chisel:
Before power tools, chisels were the go-to for detailed cuts.
Start by marking your wood and using a back saw (known for control and precision) to establish your cut’s depth. Then, carefully remove the wood between your cuts with a sharp chisel.
Choose a chisel width close to your desired slot size, and work patiently to avoid mistakes.
Pin For Later Use

Comments are closed.