This project was built and designed by Mike Montgomery from Modern Builds. It’s a clever jig that turns a standard circular saw into a track saw—perfect for woodworkers who want cleaner, straighter cuts without investing in expensive tools.
With just a few affordable materials and some careful layout, Mike shows how to improve cutting accuracy when working with plywood and sheet goods. This project is especially helpful for small-shop woodworkers working with limited space or equipment.
Watch the full video and subscribe to Mike’s channel:
Why Build a Track Saw Jig?
Track saws are known for their ability to make long, precise cuts. They’re often used in cabinetmaking, panel breakdown, and other tasks where clean edges are important. But full track saw systems can be pricey, putting them out of reach for many hobbyists and part-time woodworkers.
Mike’s DIY version gives the same accuracy and convenience by turning a regular circular saw into a guided cutting tool. The jig is reusable, easy to build, and doesn’t alter the saw permanently—so it’s a great weekend upgrade for your shop.
What You’ll Need
While exact measurements aren’t provided in the summary, the materials include:
- A full sheet of MDF for the main track
- A smaller sheet of MDF for the saw base
- Wood glue for secure joins
- Spring clamps for holding pieces during assembly
- A brad nailer for quick fastening
- A tap and die set for threaded holes
- Basic layout tools like a speed square and straightedge
These materials are common and relatively inexpensive, making the project approachable for woodworkers at all skill levels.
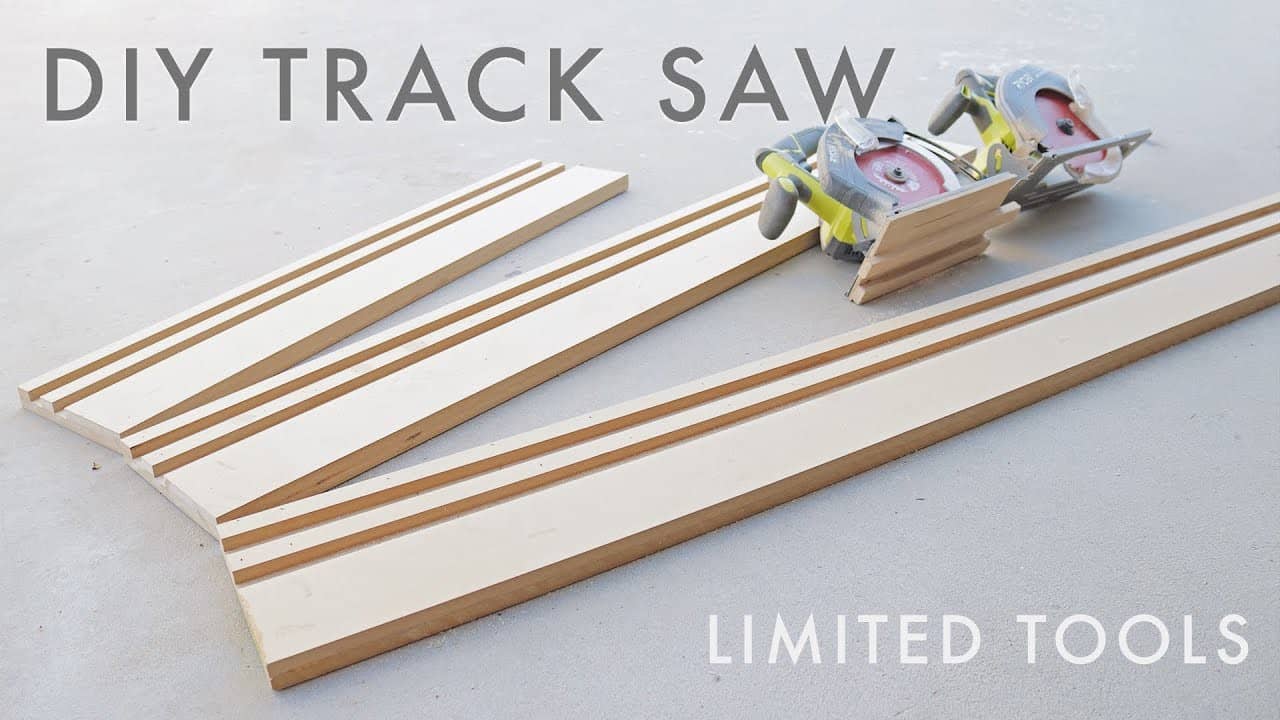
Cutting the Main Track
Mike begins by using a piece of foam insulation as a cutting surface to protect his workbench. He cuts the MDF into long strips, which will form the core of the track.
One piece becomes the guide rail, while the other provides the structure underneath. This lower base supports the saw as it slides through the cut, and the width is set based on the saw’s base dimensions.
Once these strips are ready, the top edge of the track is trimmed using the actual saw. This creates a zero-clearance edge, meaning you’ll always know exactly where your cut will go.
Adding the Runners
With the main track in place, the next step is to add runners that will guide the saw. These are attached to a separate base plate, which gets mounted to the saw itself.
Mike uses his saw blade as a reference point to make sure the runners align correctly. This step ensures that the saw travels straight and square down the track every time.
Making a Removable Base Plate
The base plate is a key part of this jig and allows the circular saw to ride the track accurately. To make one, Mike traces the outline of his saw’s factory base onto a piece of MDF.
He then cuts the MDF to shape and attaches it to the saw temporarily using hot glue. This lets him drill clean holes through the MDF and the saw’s base at once, ensuring alignment.
A tap and die set is used to thread these holes so that machine screws can later attach the MDF base securely. This makes the plate removable, so the circular saw can still be used as normal outside the jig.
Final Adjustments and Calibration
After the base plate and runners are attached, the final setup involves trimming the track to its exact working width. With the saw lowered and positioned on the jig, Mike makes a full-length cut along the edge of the track.
This clean edge marks exactly where the saw will cut in future uses. From now on, you simply align the track to your cut line—no guesswork, and no measuring from the blade.
Testing the Jig
With everything assembled, Mike tests the jig by cutting down a large sheet of plywood. The saw glides smoothly along the track, and the result is a straight, chip-free edge.
This kind of jig can be reused for multiple projects and adjusted later if needed. It’s a practical solution for accurate cuts when you don’t have a table saw or track saw available.
Key Advantages of the Design
There are a few clear benefits to this build:
- Affordable: Uses basic MDF and simple tools
- Precise: Delivers clean, repeatable cuts without expensive gear
- Reversible: The base plate can be removed when needed
- Customizable: Easy to resize or tweak for different saws or setups
For a small investment in time and materials, this jig adds a lot of capability to a standard circular saw setup.
Safety Tips
Mike reminds viewers to wear proper protection while cutting, especially when working with MDF. Dust masks, safety glasses, and hearing protection are all recommended.
Keeping the work area clean and stable also helps ensure accurate, safe results—especially when making long cuts on sheet goods.
A Worthwhile Upgrade for Any Shop
This DIY track saw jig is a smart addition to any workshop. Whether you’re just starting out or looking to get more precision out of your circular saw, it’s a project that pays off right away.
Mike’s detailed approach and thoughtful design make it easy to follow, even for woodworkers with limited tools or experience.
Please support Mike by visiting his website: https://www.modernbuilds.com/.

Matt’s Take
These are my personal thoughts and tips based on my own experience in the shop. This section is not written, reviewed, or endorsed by the original creator of this project.
This type of jig is a game-changer for anyone working with sheet goods regularly. The beauty of Mike’s approach is that it solves the biggest challenge with circular saws—keeping them tracking perfectly straight over long cuts. That zero-clearance edge he creates by trimming with the actual saw is brilliant because it eliminates all the guesswork about where your cut line will actually fall.
One thing I really appreciate about this design is the removable base plate concept. Too many shop-made jigs require permanent modifications to your tools, but this keeps your circular saw fully functional for regular use. The threaded hole approach with the tap and die set might seem like extra work, but it’s so much more reliable than just screwing into the base—especially if you plan to remove and reinstall the plate frequently.
When working with MDF for a project like this, definitely take Mike’s dust protection advice seriously. MDF creates incredibly fine dust that gets everywhere, and it’s not something you want to breathe. I’d also suggest taking your time with the initial setup and calibration cuts. Getting those runners perfectly aligned is critical—any slop there will show up in every cut you make with the jig.
For around $30 in materials, you’re getting functionality that rivals track saws costing ten times that amount. It’s one of those projects that immediately improves the quality of your work while keeping your tool budget in check.