
This project was built and designed by Tom from Alley Picked.
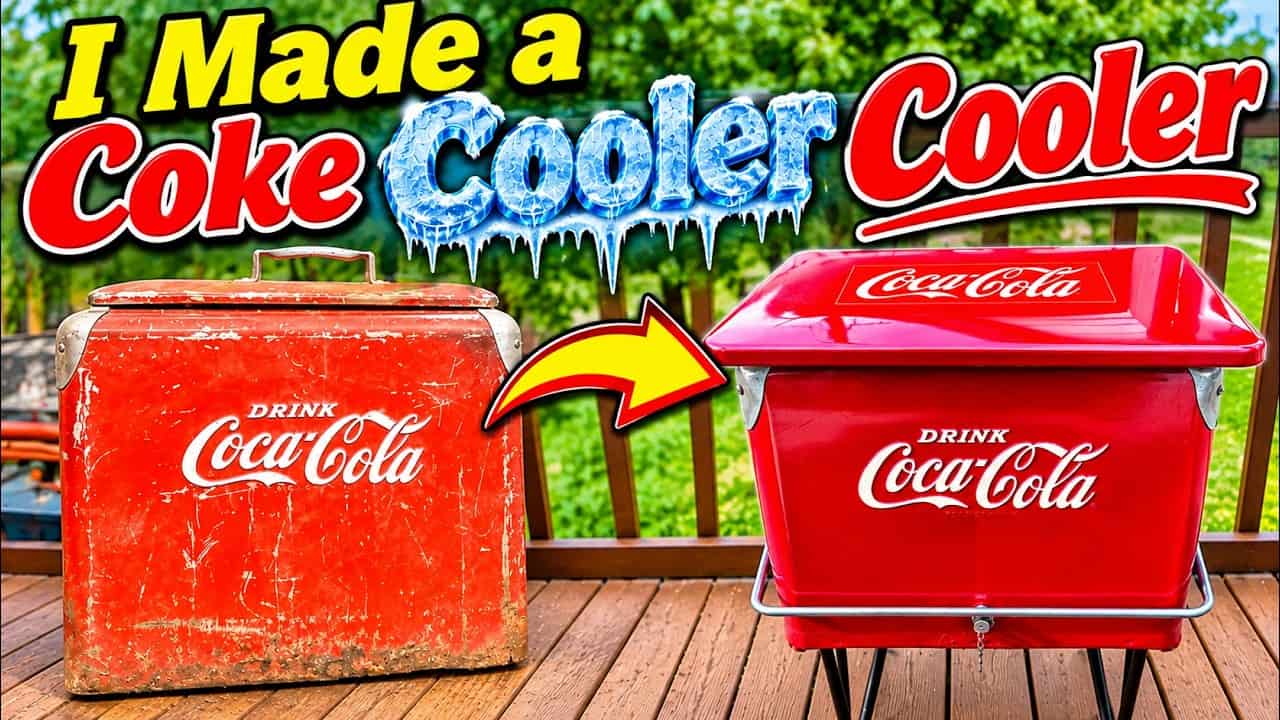
Tom took on the challenge of repurposing a rusty, 75-year-old Coca-Cola cooler into a one-of-a-kind storage table. What started as a beat-up metal shell with a dented lid and heavily rusted base ended up as a functional piece of furniture with a custom hardwood top, an embedded logo, and a glass-like epoxy finish.
Watch the full video and subscribe to Alley Picked:


Assessing the Damage
The cooler arrived in rough shape, with a thoroughly rusted base, dents across the body, and a top that looked like it had survived a collision. Tom recognized that a full restoration wasn’t realistic given the extent of the corrosion, so he reframed the project as a recycle-and-upgrade rather than a true restoration.
His plan focused on reinforcing the weak points rather than trying to erase every sign of age. He accepted that some wear would remain visible, which actually adds character to a piece this old.
Treating the Rust and Rebuilding the Base
To address the corrosion, Tom removed the worst sections of rusted metal and treated the remaining surface with a rust-converting treatment. This chemical process stabilizes rust by converting it into a more stable form, which helps slow further deterioration even when the metal underneath is far from perfect.
Because the base was too compromised to support new hardware on its own, he cut a wood insert to fit inside it. This gave him a solid mounting point for a set of slim metal legs, essentially using wood as structural backup for metal that could no longer do the job alone.
Once the base was reinforced, Tom refreshed the paint with a colonial red that closely matched the original factory color. Securing the wood insert from the inside with screws allowed him to firmly attach the new legs, giving the cooler a stable, sturdy stance.
Building a New Tabletop
For the top, Tom sourced a thick piece of solid oak that had been salvaged from a discarded wardrobe. Repurposing material like this is a great way to get high quality hardwood without buying new lumber, and it adds another layer of reclaimed history to the piece.
Midway through the build, he landed on the idea of embedding a Coca-Cola logo directly into the tabletop. Rather than carving it by hand, he laser-cut the design from red acrylic so it could be inlaid flush with the wood surface.
Using a router, Tom carved out a precise recess so the acrylic logo would sit level with the surrounding oak rather than protruding above it. He used the same router to cut a channel on the underside of the top so it would fit snugly over the cooler’s original opening.
Finishing with Epoxy
Before applying any coating, Tom repainted the recessed area in the same colonial red to make the logo pop against the wood grain. He then moved on to epoxy, a finish he describes as always feeling a bit like a gamble no matter how much experience you have with it.
Unlike polyurethane, where the results are fairly predictable, epoxy behaves differently depending on humidity, pour thickness, and even the type of epoxy used. Tom applied the first coat using about half of his supply, planning to evaluate the results before committing to a second pour.
After the first layer cured, the table looked great overall, but small air bubbles had left minor pitting across the surface. This is a common issue with epoxy over wood, since trapped air inside the grain can continue escaping even after multiple coats of sealer.
To fix the imperfections, Tom sanded the surface to give the next coat something to grip, then applied a second layer of epoxy. Even after that, a few flaws remained, so the final step was extensive sanding using an orbital sander, working through fine grits to smooth everything out.
Polishing for a Glass-Like Shine
Despite all the sanding, Tom still felt the finish looked dull rather than truly glossy. Wanting a mirror-like shine, he picked up a dual-action polisher, a tool he had never used before on a project like this.
Working with polishing compound and a buffing pad, he experimented until the surface achieved the deep, reflective shine he was after. This final polishing stage made a noticeable difference, turning a merely good-looking tabletop into one with a genuinely eye-catching finish.
A Fresh Life for an Old Cooler
What began as a rusted relic ended up as a striking storage table that blends vintage character with a modern, polished tabletop. The combination of stabilized metal, reclaimed oak, and an embedded logo under glass-smooth epoxy shows how much potential lies in old, worn-out pieces that most people would simply discard.
This project is a good reminder that restoration doesn’t always mean returning something to its original state. Sometimes the best outcome comes from accepting the wear, reinforcing what’s weak, and building something new on top of what remains.
Watch the full video and subscribe to Alley Picked:

Matt’s Take
These are my personal thoughts and tips based on my own experience in the shop. This section is not written, reviewed, or endorsed by the original creator of this project.
Rust-converting treatments are worth having in any shop that deals with old metal pieces. They chemically turn active rust into a stable compound, but it’s important to remember that’s not the same as removing it. The metal underneath is still compromised, so building in extra support, like the wood insert Tom used here, is a smart call whenever you’re not sure the original material can carry a load on its own.
On the epoxy side, pitting from trapped air is one of the most common headaches people run into, especially when pouring over wood. Using a torch or heat gun right after pouring can help pop a lot of those bubbles before the epoxy kicks off, which can save you a round of sanding and recoating later. It’s also worth sealing porous wood with a thin coat first, since raw grain tends to keep releasing air long after you think it’s settled.
If you’re newer to epoxy work, doing a test pour on a scrap piece from the same wood is a good habit. It lets you see how that particular grain behaves before committing to the real top. And a dual-action polisher is genuinely one of the most underrated tools for finishing work. It’s not just for cars, it can take an epoxy or even a film finish from flat-looking to glass-like with the right compound and a little patience.
Always wear a respirator when sanding epoxy, since the dust from cured epoxy isn’t something you want to breathe in repeatedly.