

Take a moment at your kitchen counter. Reach for a cabinet door and let it fall shut.
That thin rattle, the tacky pull under your fingers, the oak gone amber and dull since the ’90s — not one of those signs means the cabinets themselves have failed.
A full replacement lands somewhere between $8,000 and $30,000 or higher, and that’s before demolition, installation, and the countertop that tends to snap the moment you wrestle the old boxes free. You could buy a decent used car for that. All for a room that mainly needs a different look, not a different structure.
The carcasses are almost always sound. What actually reads as worn out is the coating, the pulls, and the sluggish way the doors swing.
What follows are 22 approaches to freshen up your kitchen cabinets for a sliver of what a teardown costs — a few as cheap as takeout, a few worth a full weekend of sweat.
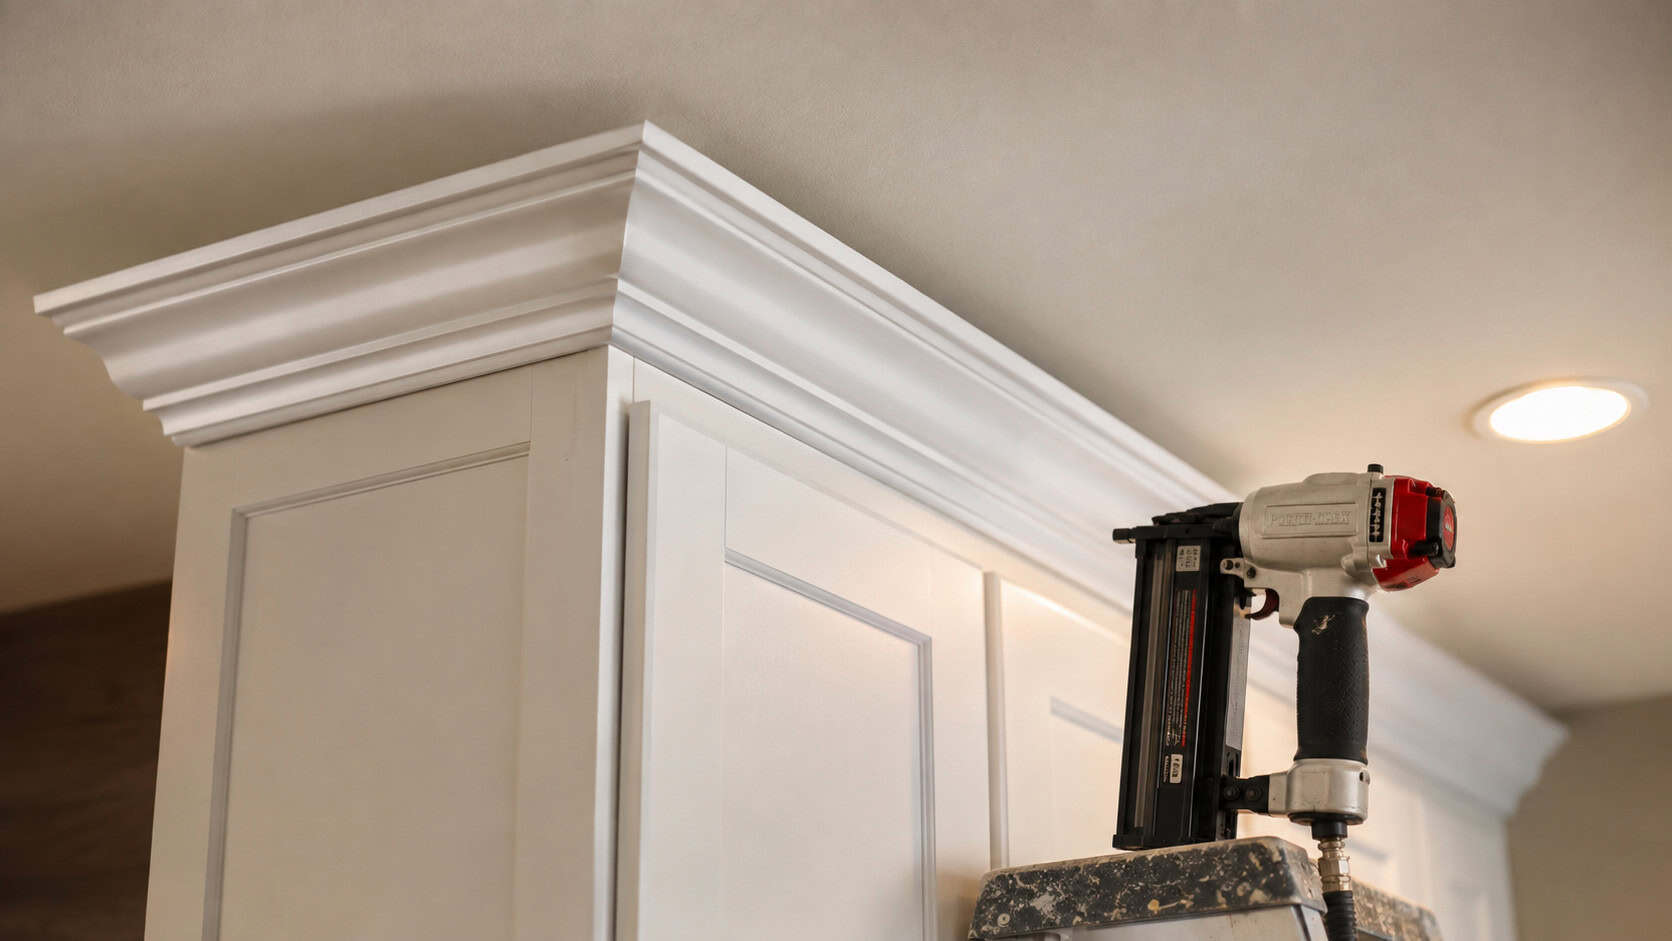
1. Top the Cabinets With Crown Molding
This is the timeless trick that reads as costly without being so.
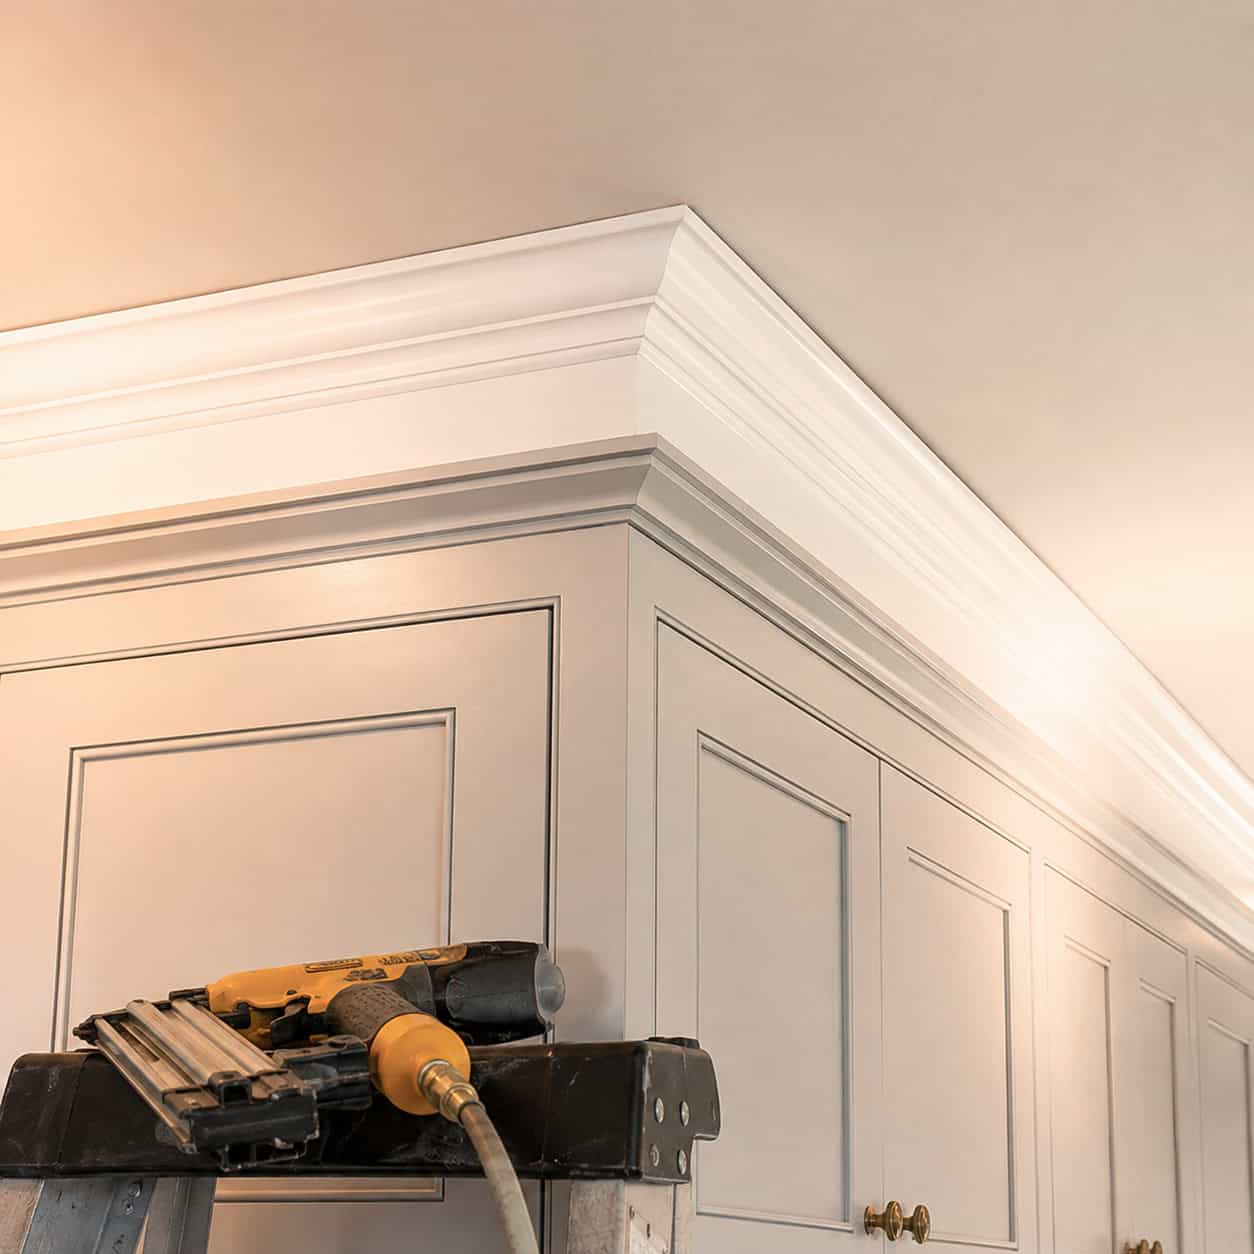
Off-the-shelf uppers tend to end in a bare, flat top edge. Add crown molding along that line and the cabinetry reads as built-in and complete, spanning the clumsy space up toward the ceiling.
You’ll be cutting inside and outside miters, nailing into a mounting strip up top, then filling and painting. Budget a day plus the price of the molding.
This is the touch that divides a kitchen that looks put-together from one that looks intentional. Identical boxes. Nicer crown.
2. Give the Cabinets a Coat of Paint
Dollar for dollar, nothing else transforms a kitchen like a fresh color.
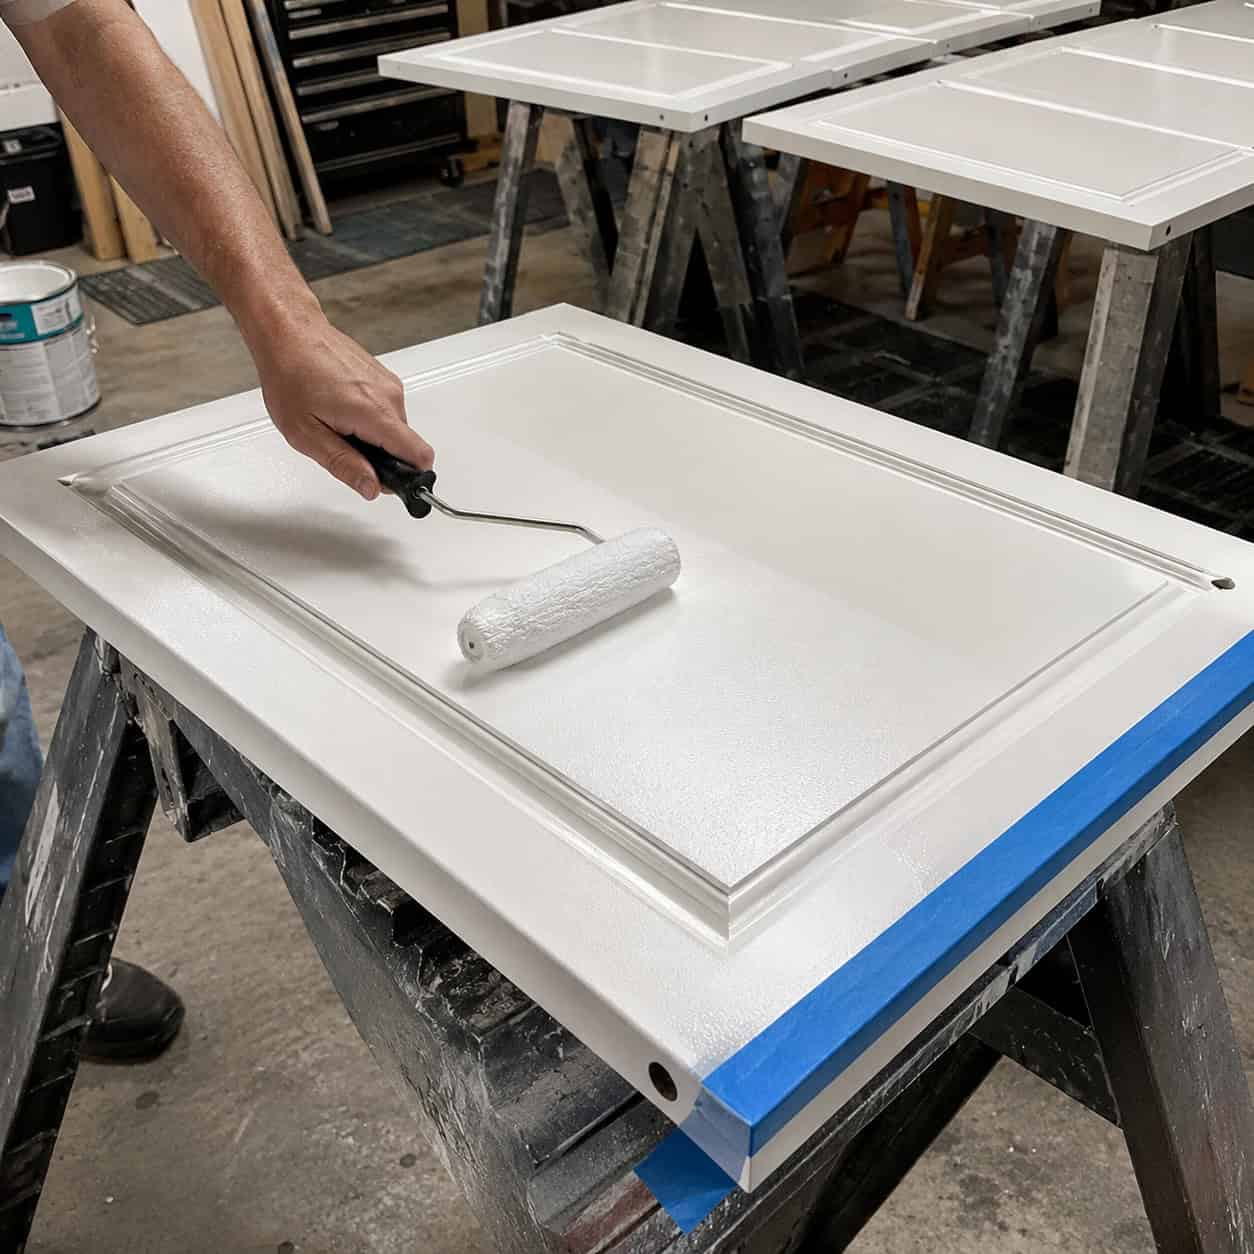
Doing it yourself costs $200 to $650 in supplies versus $8,000-plus to swap the cabinets out. That’s a 70 to 85 percent saving in exchange for a weekend-plus of your effort.
Paint, though, is unforgiving of corners cut, and oak is even harsher. Its open grain bleeds through skimpy coats, so prep is essentially the entire job. Strip the grease off every surface — cabinets hold years of invisible cooking residue. Then scuff-sand, prime, and give each coat time to fully harden before rehanging.
Reach for a cabinet-grade enamel rather than wall paint. Wall paint never fully hardens and picks up every fingerprint. The Home Depot lays out the entire sequence if you want the steps in order.
Undecided on color? A stack of kitchen cabinet colors people can’t stop talking about will help you settle it quickly.
Mark each door and its hinge cup as you remove them. Reassembly day will be much kinder.
3. Set Glass Panels Into the Upper Doors
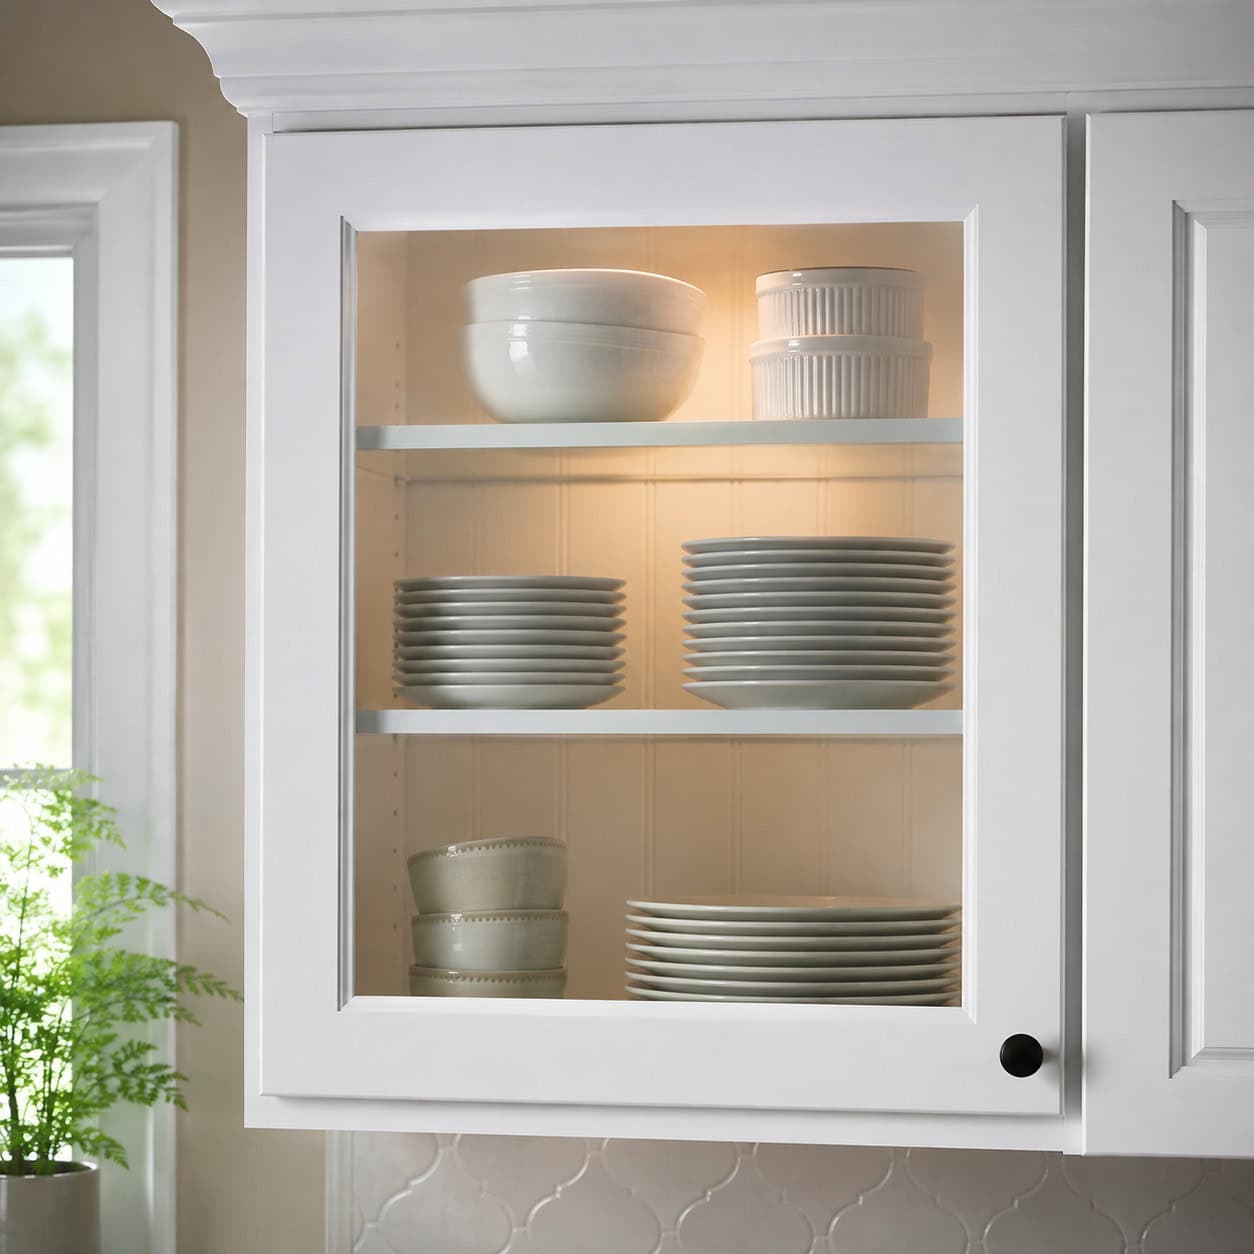
Pick one or two of the upper doors and trade the wood panel for glass.
Right away the door bounces light around, the room feels more open, and a dull box turns into a feature. Skip the whole run — just the doors on either side of a window or the range make the accent register.
With a rail-and-stile door you push the panel out from the back, set the glass in, and lock it with retainer strips. It’s friendlier than it sounds, and adding glass to cabinet doors is simpler than most people expect.
Frosted or reeded glass masks a cluttered shelf. Clear glass, on the other hand, commits you to keeping those dishes neat — consider yourself warned.
4. Run a Light Rail or Valance Beneath the Uppers
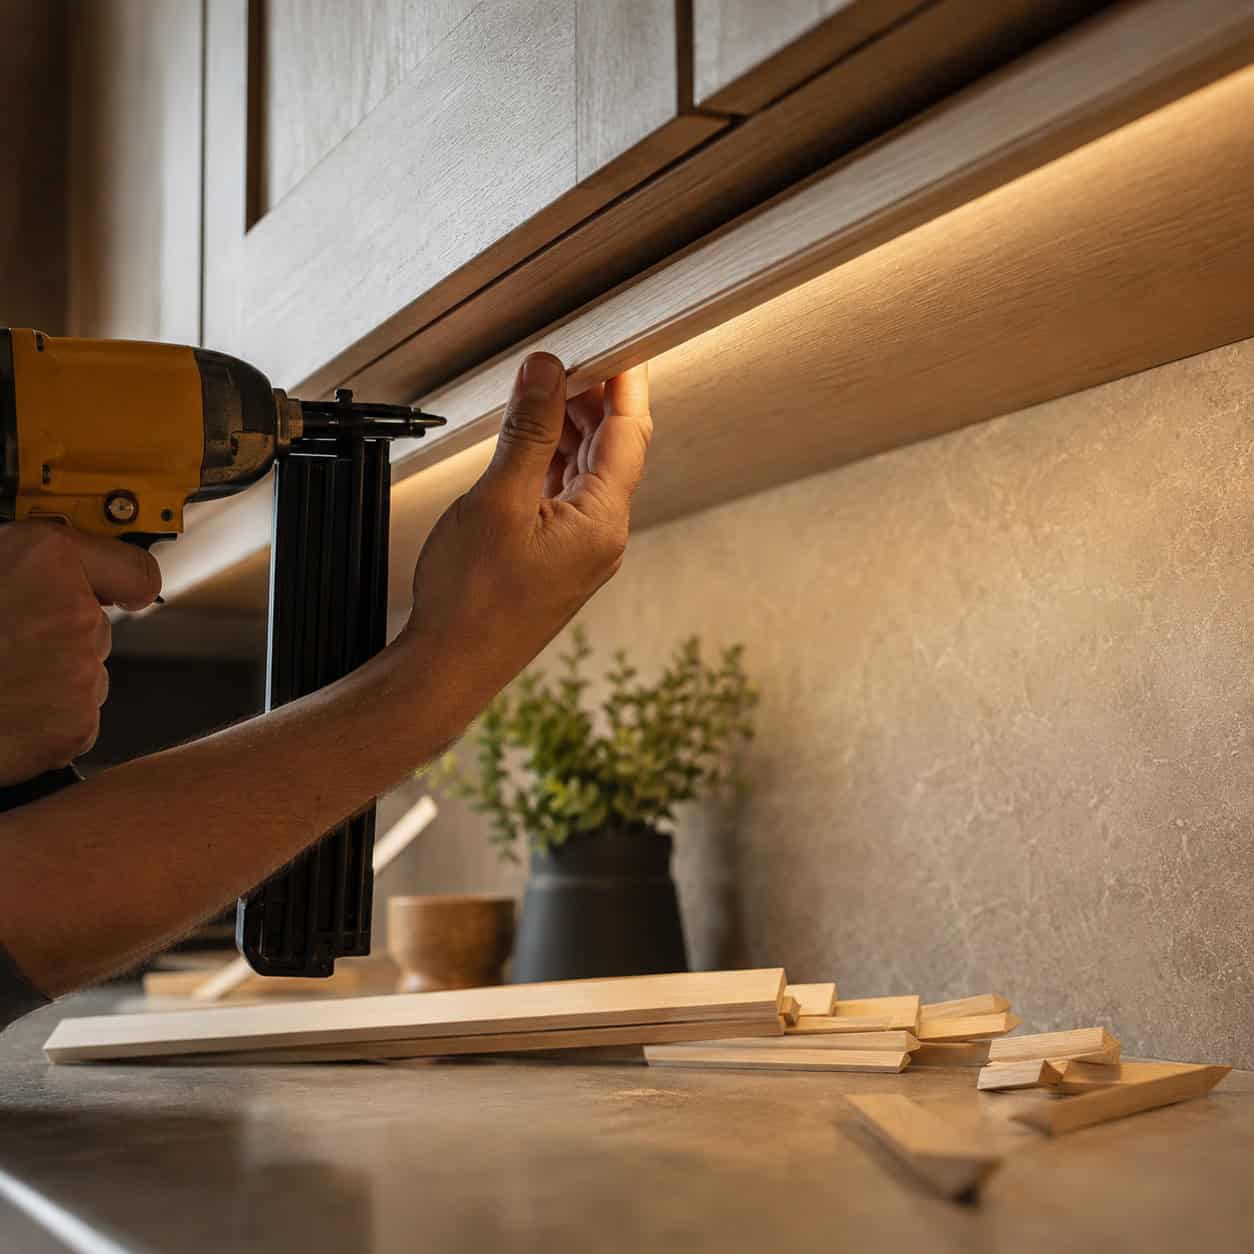
The underside of your upper cabinets is typically just an unfinished line. A light rail dresses it up.
It’s a length of trim run beneath the uppers, hanging down an inch or two. It conceals the under-cabinet lighting from step 17 and gives the bottom edge the same built-in quality the crown lends the top.
Cut it, tack it up, then paint or stain to blend. Inexpensive trim, sizable payoff.
Combine it with LED strips and the wiring disappears behind a crisp, purposeful edge.
5. Install Roll-Out Shelves
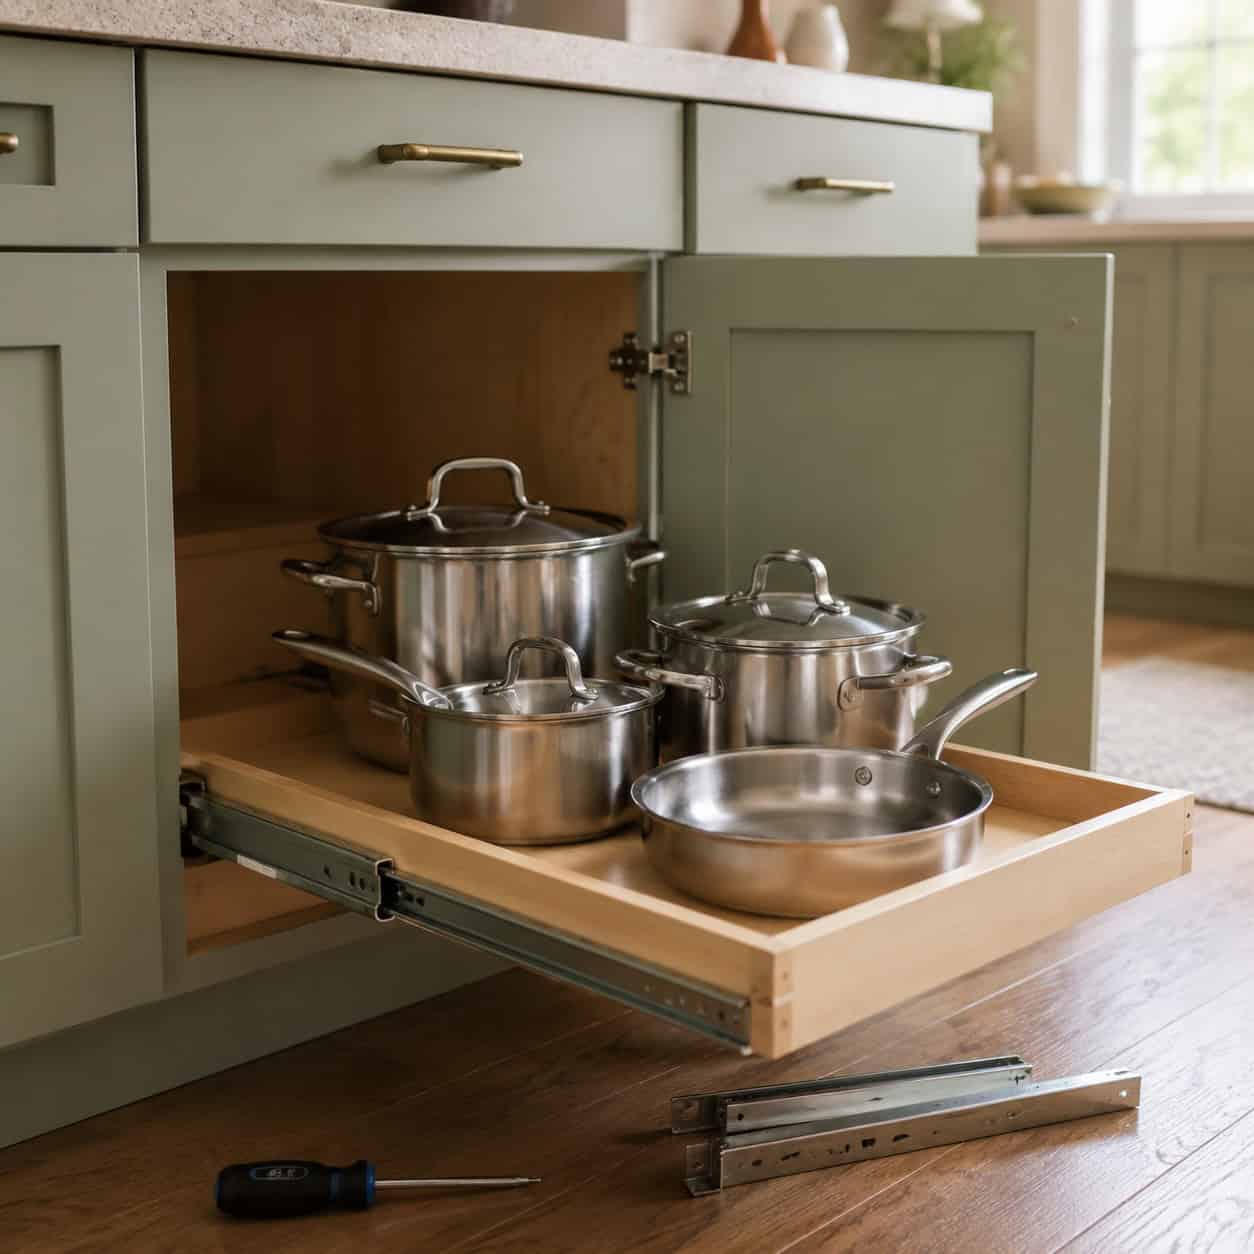
Deep base cabinets swallow everything. Whatever drifts to the rear is lost until you finally do a big cleanout.
Roll-out shelves solve it. They’re trays mounted on drawer slides that fasten into your existing box, so the whole shelf comes to you — no diving in headfirst anymore. Count on $45 to $60 a shelf plus a screwdriver.
You’re adding a tailored, custom-cabinet feature to boxes that are already yours. Measure the inside width closely and allow for the slide thickness on both sides.
Feeling ambitious? You can build your own simple slide-out trays for cabinet storage for even less.
6. Rebuild Only the Drawer Boxes and Slides
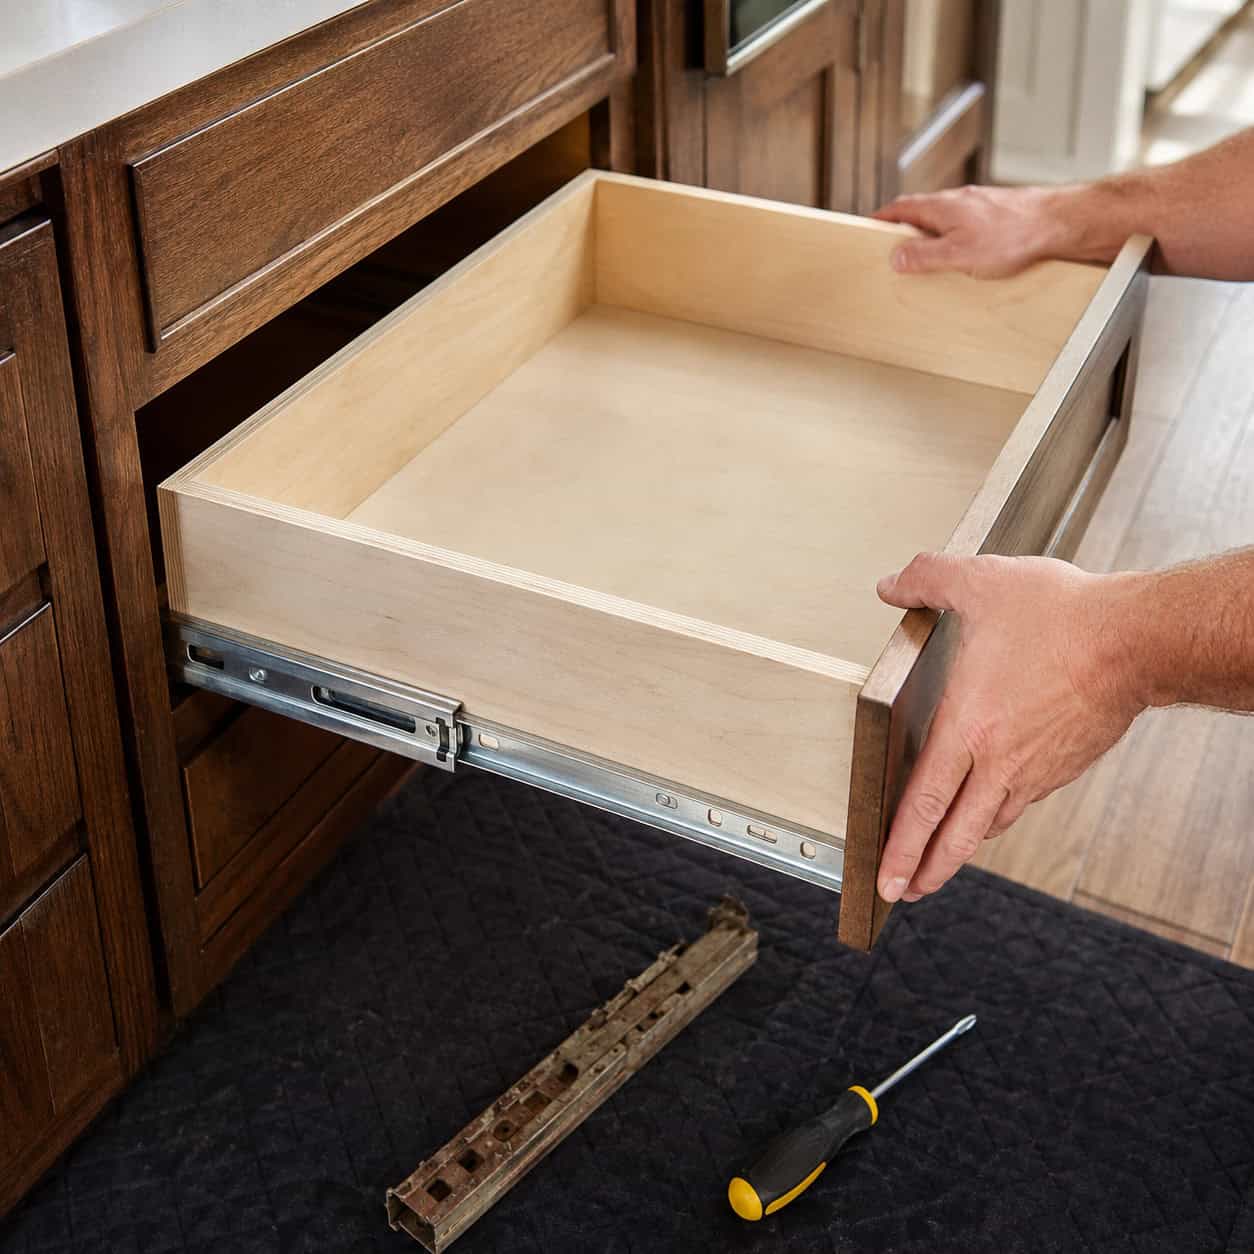
No part of a kitchen gets worked harder than the drawers. They’re what racks, droops, and quits closing properly.
Fixing them requires no work on the cabinet itself. Trade worn wooden runners or beat-up drawers for smooth ball-bearing slides, and if the box has given out, set a new box behind the original front.
It sits between refacing and replacing — aimed squarely at the single part that actually broke. A drawer that runs silently on full-extension slides feels brand new from the one spot your hands touch most.
Making your own boxes? Rabbet-and-dado plywood drawers hold up for decades.
7. Apply Peel-and-Stick Veneer or Film
If you’re a renter, this is your play.
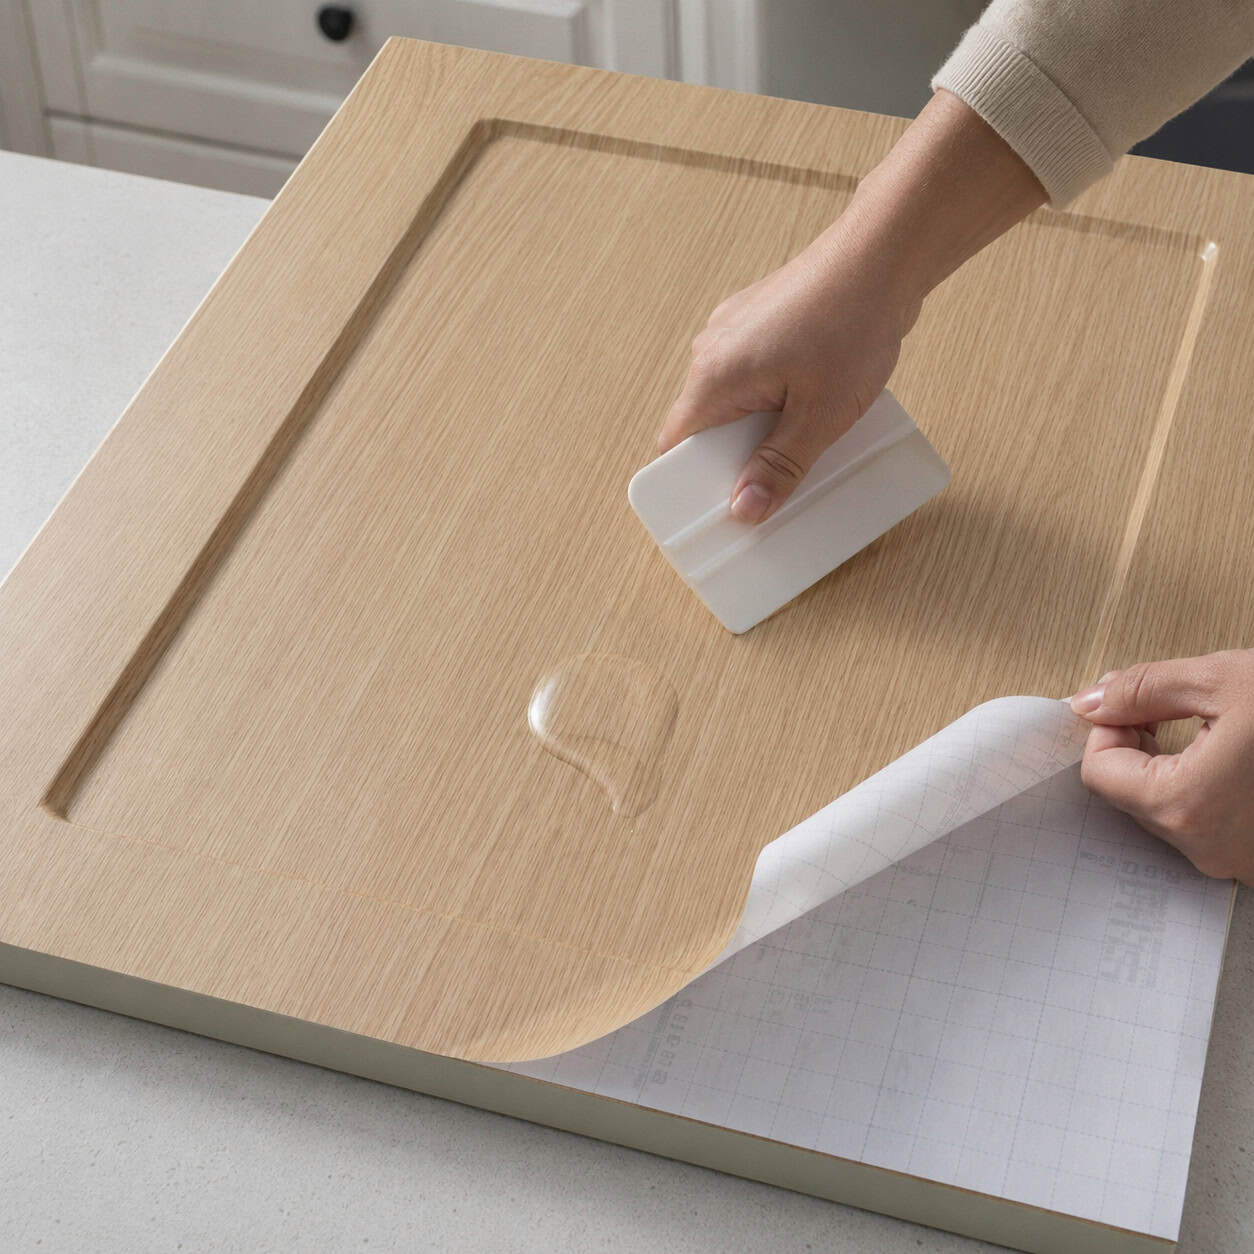
Peel-and-stick veneer and vinyl film re-skin cabinet fronts in a fresh color or wood look, and the entire idea is that it peels back off. Completely reversible. Your deposit is safe.
The secret is a clean, degreased, thoroughly dry surface and a plastic smoothing card to push out every bubble. Wrap the edges snugly so nothing snags a fingernail.
It isn’t permanent, and it makes no claim to be. That’s precisely the appeal.
8. Reface the Doors and Drawer Fronts
Between painting and full replacement, this is the substantial middle path.
Refacing holds onto your existing boxes, brings in all-new doors and drawer fronts, and skins the visible frame faces with matching veneer or laminate. The result is a genuinely fresh-looking kitchen — new door style, new color, new hardware — usually for 30 to 50 percent less than ripping out and replacing. Figure $900 at the low DIY end up to $6,000 for a professional job on a bigger kitchen.
Here’s the piece most articles gloss over. Refacing only pays off if the boxes underneath are solid. Skin a failing box and you’ve thrown good money at wrapping a problem.
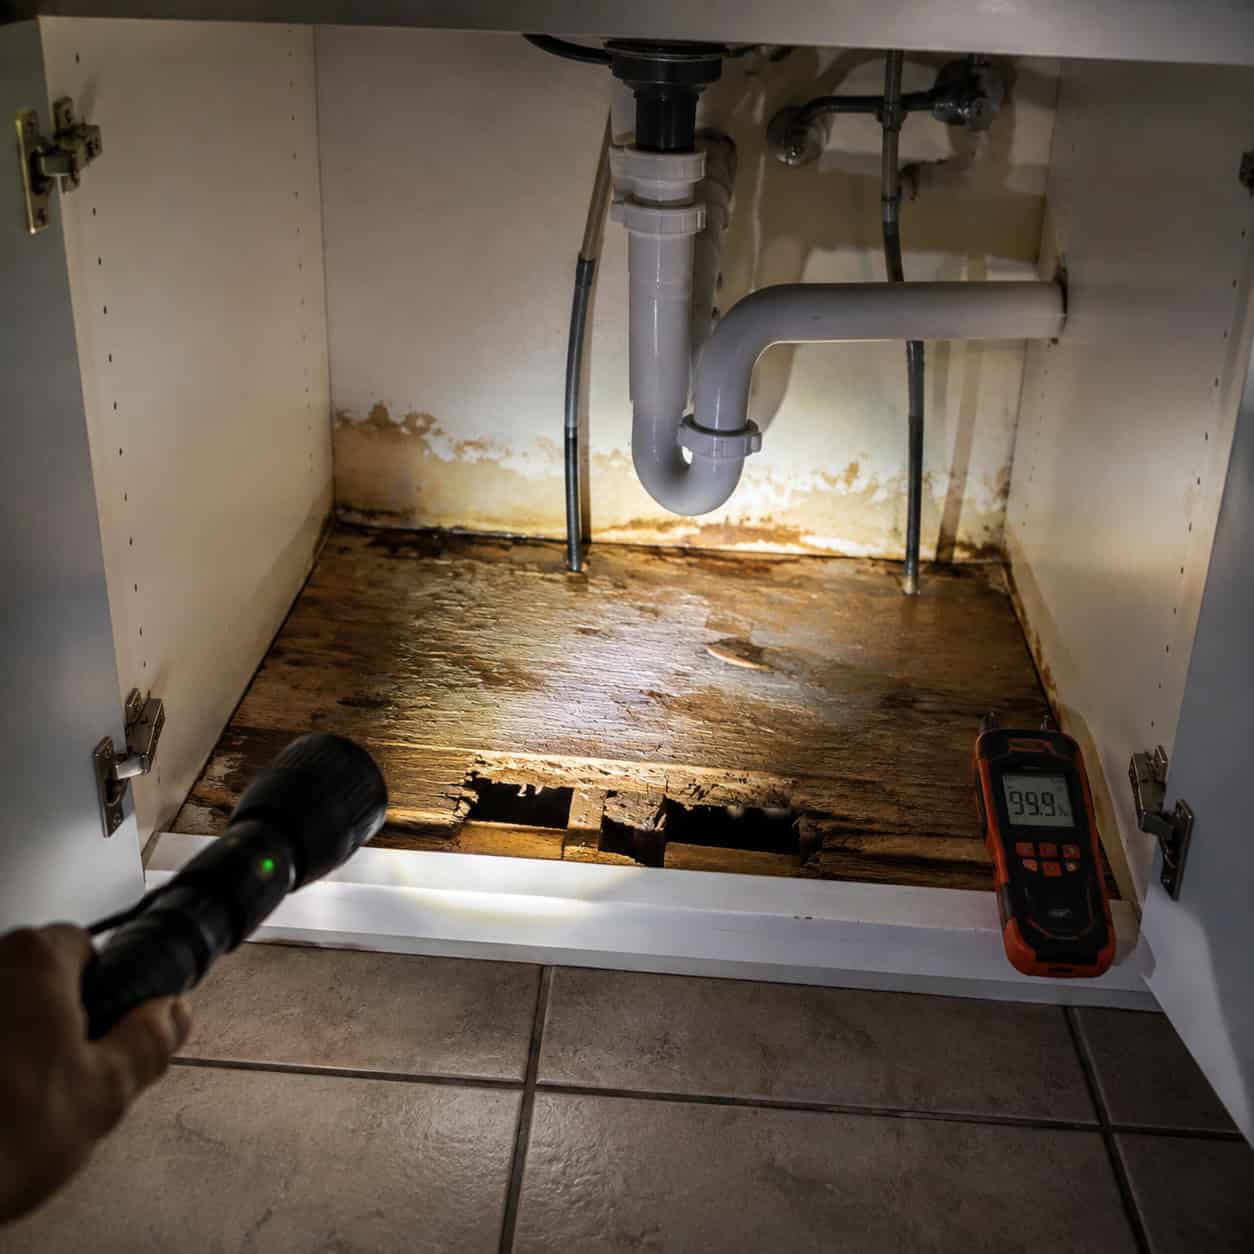
So look first, and be honest about it. Pull every drawer and shine a light into the corners. You’re hunting for three failure modes.
Water damage tops the list. Cabinets under and beside the sink absorb the worst of every slow supply-line drip and every dishwasher that leaked for a year before anyone caught it. Swollen particleboard, a soft spongy floor in the sink base, a tide line climbing the back panel, or a musty odor when the door opens — none of that is cosmetic. That’s a box already falling apart, often with a moisture issue behind it that no new door front will fix. Ongoing dampness breeds mold, and per the EPA, hidden moisture is exactly what feeds it. Track down and repair the leak, dry the cavity fully, and confirm the box is sound before spending a cent on refacing.
Second, look for racking — whether the box still sits square. Lean on a face frame. If it flexes or the door gaps unevenly from top to bottom, the box has twisted, usually from a settling floor or a poor original install. A racked box needs re-squaring and re-anchoring, not decoration.
Third, wiggle the joints. Old staple-and-glue boxes come apart over time. If a corner shifts, it needs glue and screws before anything gets skinned onto it.
Clear all three and refacing is one of the best-value updates around. Miss any of them and you’ve just uncovered the real project — and it’s the kind of repair worth doing properly, since a compromised sink base is how small leaks grow into subfloor and framing damage. Angi has a solid rundown on where the reface-versus-replace line actually falls once you know the box condition.
9. Carry the Cabinets Up to the Ceiling
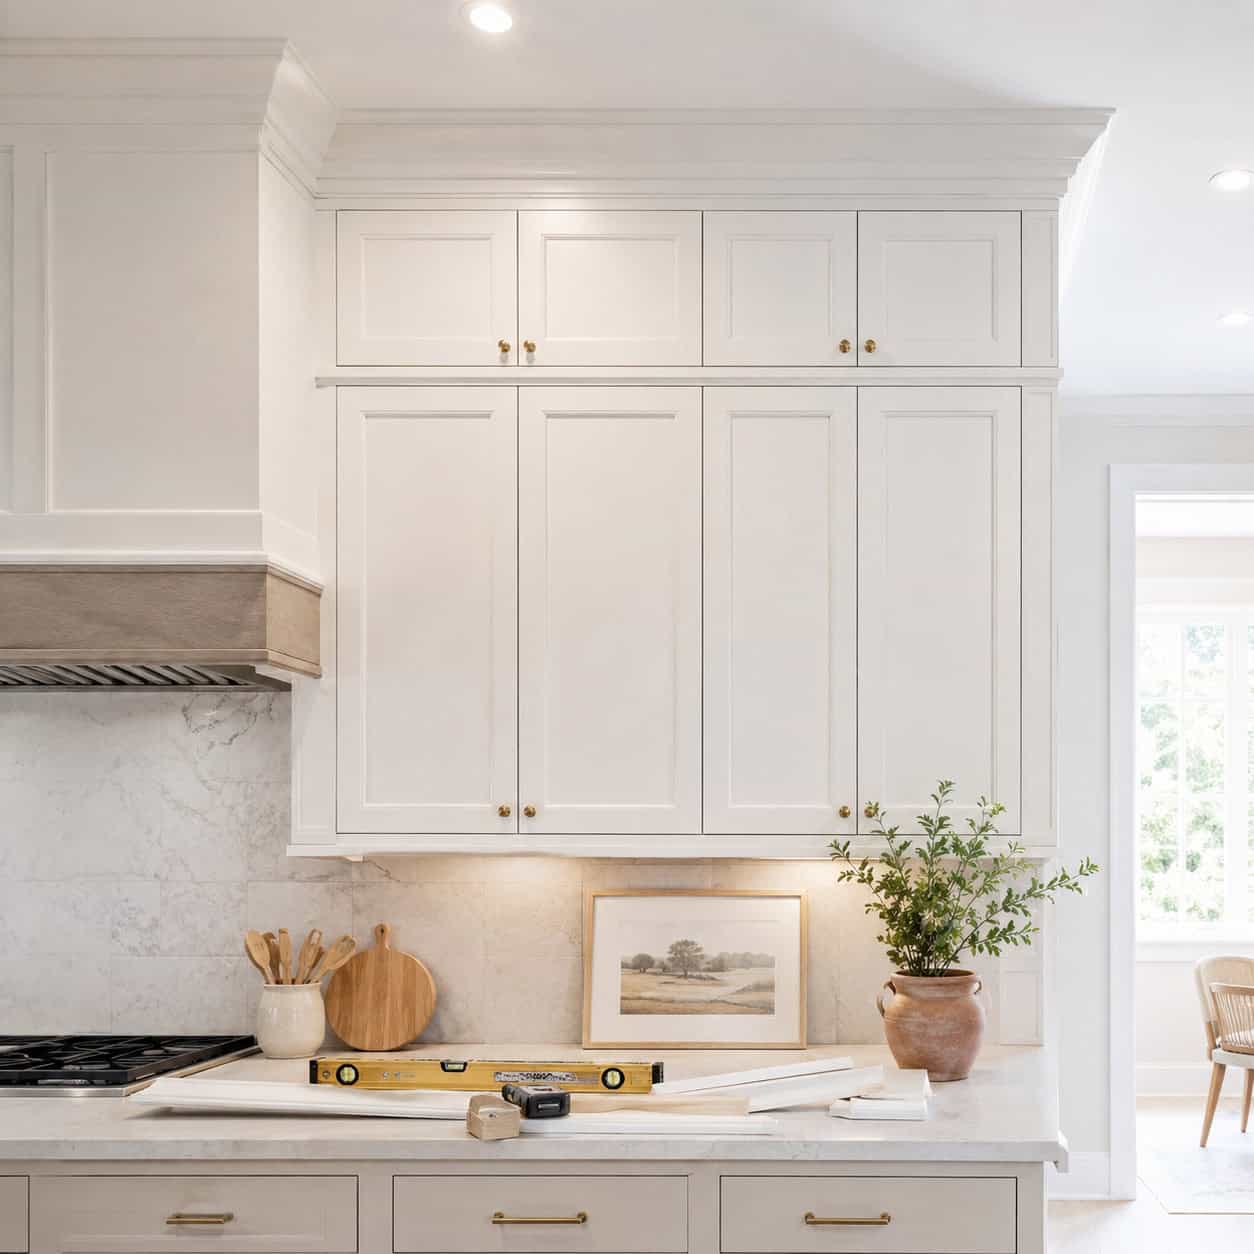
That empty strip above your uppers pulls double duty: it gathers grease-caked dust and makes ordinary cabinets look stubby.
Seal it off. Frame a simple box-out atop each cabinet, face it with a matching panel, and cap the run with stacked trim right up to the ceiling.
The uppers immediately look taller and custom, as if they were spec’d for the space rather than pulled from a catalog. This one shines in older homes with nine and ten-foot ceilings, where that gap is enormous.
Match the paint and the seam vanishes.
10. Line the Cabinet Interiors With Wallpaper
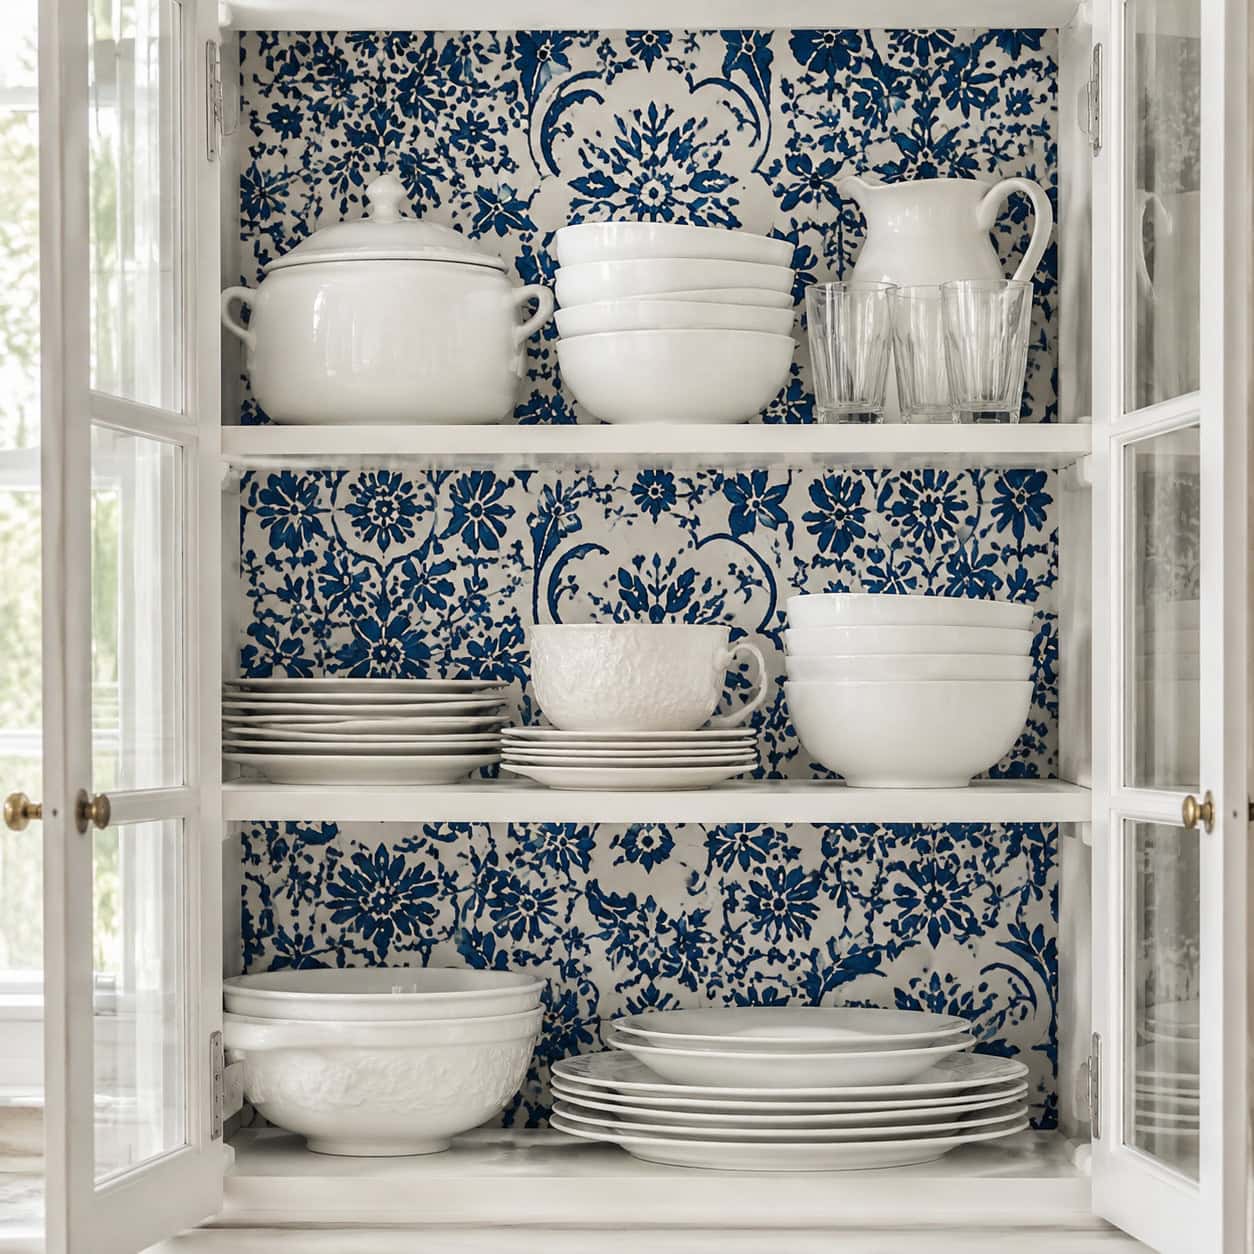
Here’s a designer’s move for pocket change.
Line the backs of glass-front cabinets or open shelves with peel-and-stick wallpaper and you earn a jolt of pattern every time a door swings open. It frames the dishes like a tiny stage.
Peel-and-stick means no paste and zero commitment — it lifts right back off. Trim it to the back panel, press it smooth, and let the door handle the reveal.
Tiny detail. Looks custom. Costs next to nothing.
11. Skin the Cabinet Ends in Beadboard
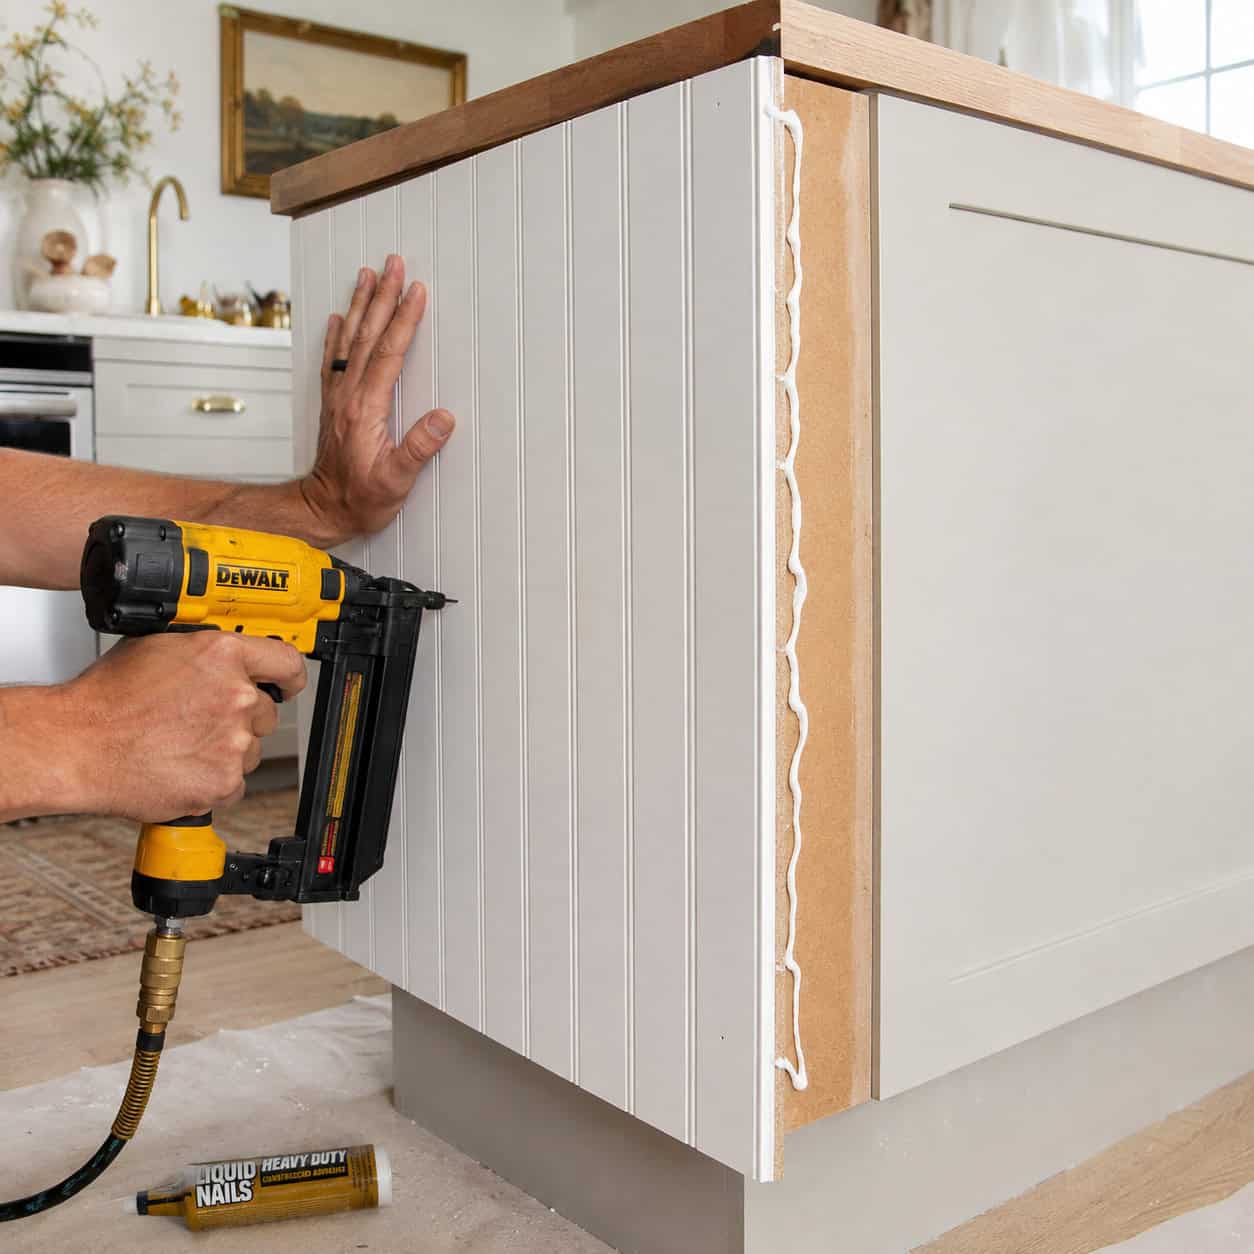
Take a look at the exposed side of your end cabinet. It’s likely the least attractive surface in the room — a flat sheet of laminate or raw particleboard nobody intended you to notice.
Glue and nail a beadboard skin right over it. The panel covers every flaw and lends cottage texture for the cost of a single sheet of paneling.
Cut it to fit, run construction adhesive on the back, brad-nail the edges, caulk the seams, and paint to match. An hour’s work.
Base cabinet ends and island sides accept it particularly well.
12. Rescue the Dead Corner Cabinet
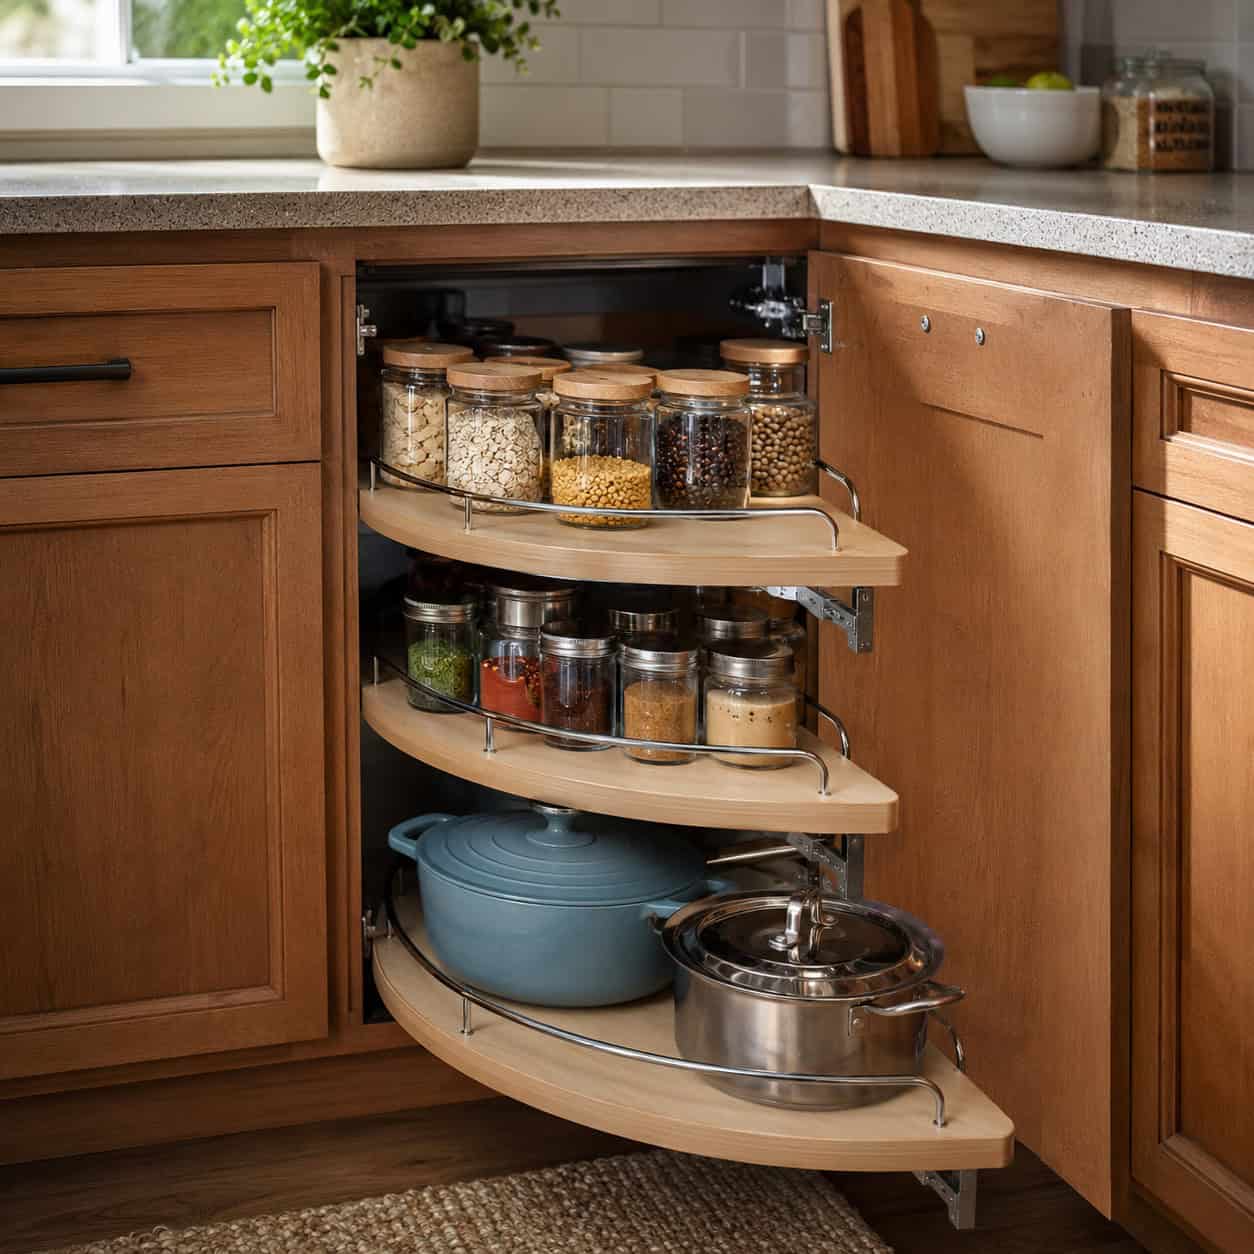
No kitchen is without one. The blind corner cabinet — that clumsy void where two runs meet and half the space stays out of reach.
A pull-out corner organizer or a swing-out unit can recover up to 50 percent more usable space back there. The mechanism swings the shelving out and around so whatever was buried arrives at the door.
It’s a two-to-four-hour retrofit into the cabinet you already own. Suddenly the worst storage in the kitchen behaves like it was planned by someone who actually cooks.
Measure the opening exactly first — corner units are picky about clearance.
13. Gel-Stain Right Over the Existing Finish
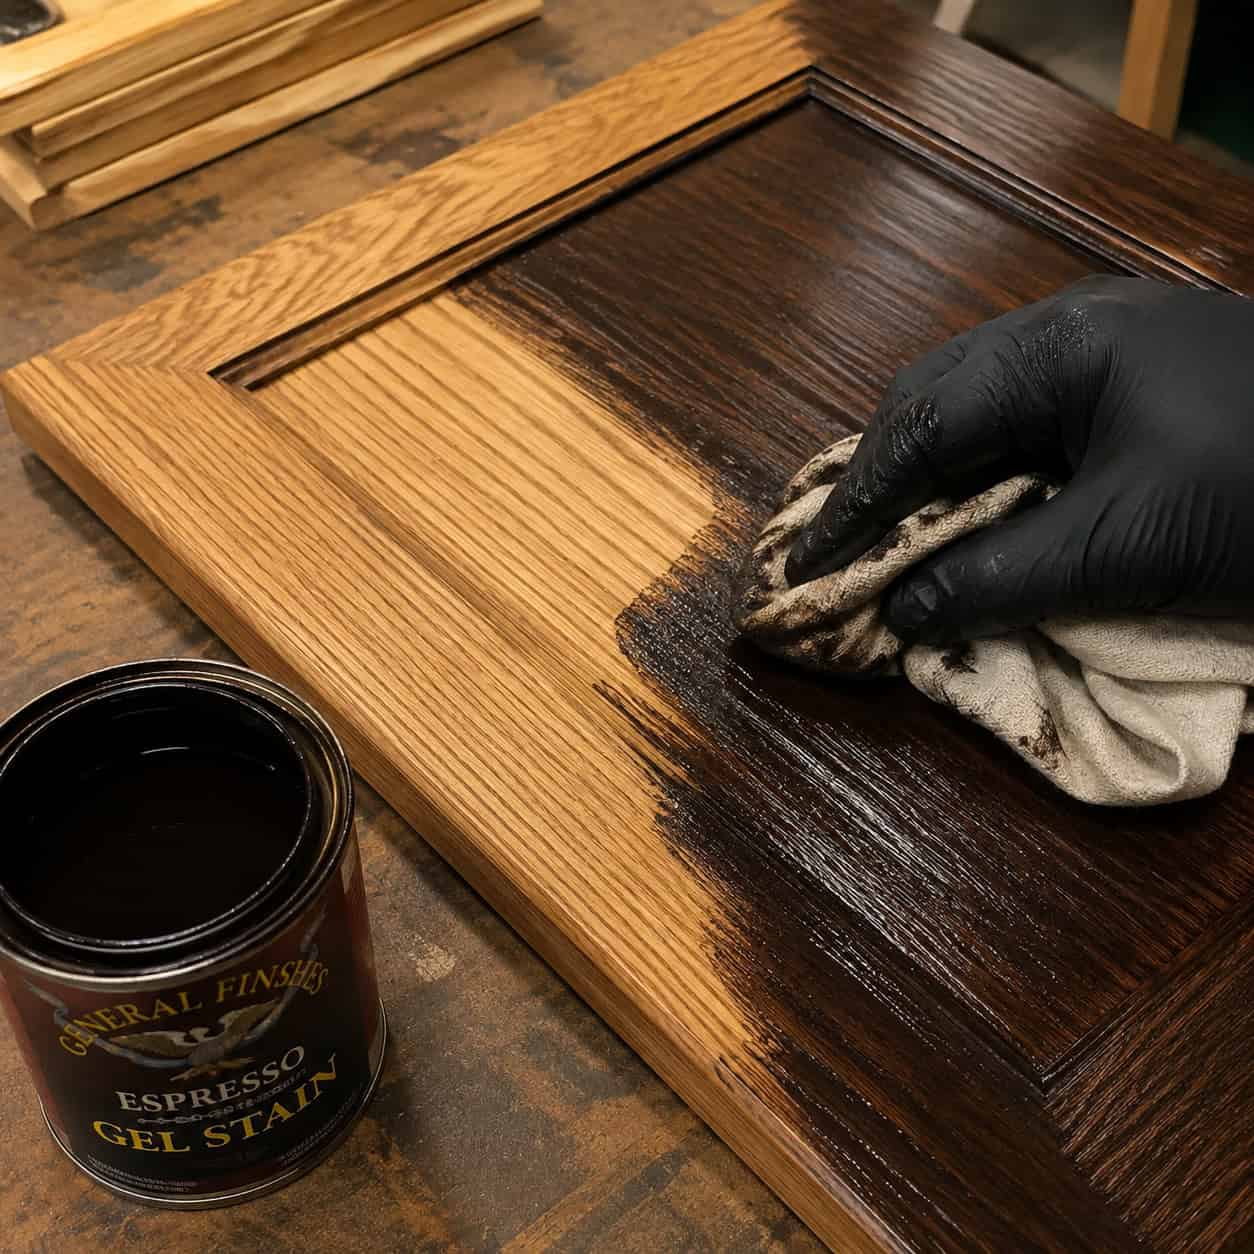
Attached to the wood grain? Then don’t cover it with paint.
Gel stain is thick — more pudding than liquid — so it rides on top of the existing finish instead of sinking in. That means no stripping and no aggressive sanding. A complete color change for under $80 in product.
Wipe it on, wipe most of it back off, let it dry, then topcoat. The grain reads darker and richer through it.
One firm rule: gel stain only moves darker. You can carry honey oak to espresso. You can’t bring espresso back to honey. Decide the direction before you crack the can.
14. Change Out the Knobs and Pulls
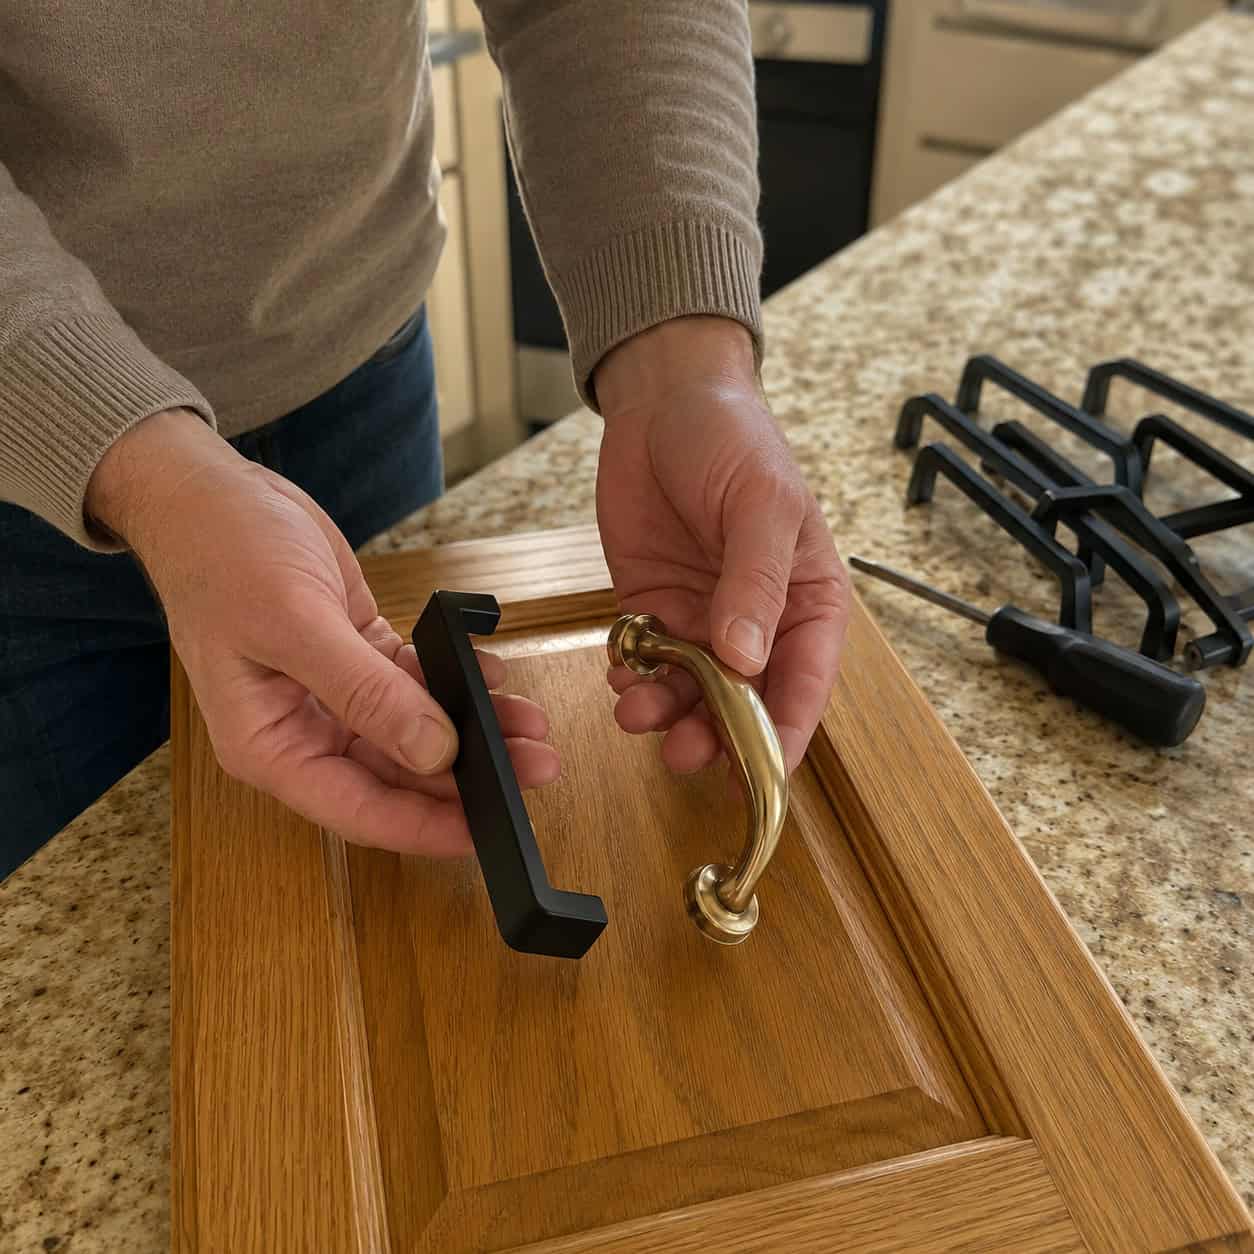
Begin here. Every time.
Hardware is the jewelry of your cabinets, and swapping it is the cheapest visible win going — roughly $2 to $15 apiece. Trade dated shiny brass for matte black, brushed brass, or brushed nickel and the whole kitchen reads new.
A hundred dollars handles most kitchens. Under an hour of labor.
The lone pitfall is spacing. If your old pulls took two screws, measure the hole centers before buying — the trade calls it the center-to-center measurement, and getting it wrong means drilling fresh holes. A simple hardware jig makes lining up new handles foolproof.
15. Renew the Toe-Kick With Fresh Molding
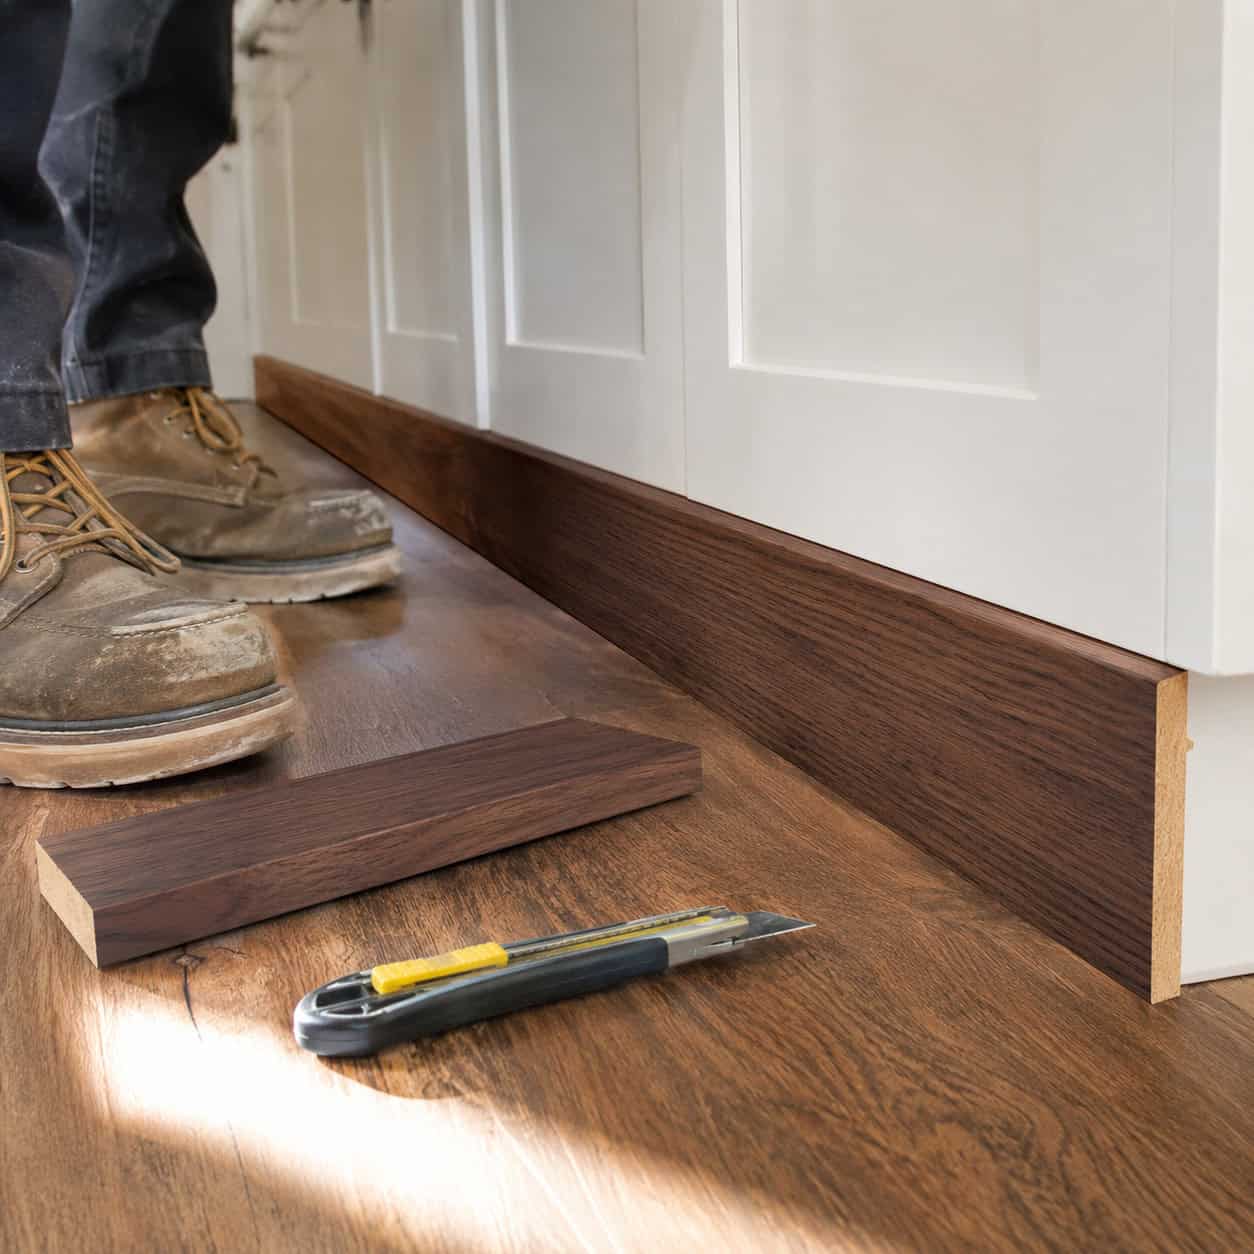
The recessed band down at the floor — the toe-kick — is the most battered, scuffed, mop-splashed part of your cabinets, and nobody ever thinks to address it.
Cover it up. A fresh cut-to-fit strip of trim, beadboard, or even a stained wood piece along the base pulls the whole look together, especially once you’ve added furniture feet above.
It’s cheap, it’s cut-to-fit, and it’s the finishing detail that separates a job that looks 90 percent done from one that looks truly finished.
Peel-and-stick vinyl base works here too, and it laughs off the mop.
16. Build Shaker Trim Onto Flat Doors
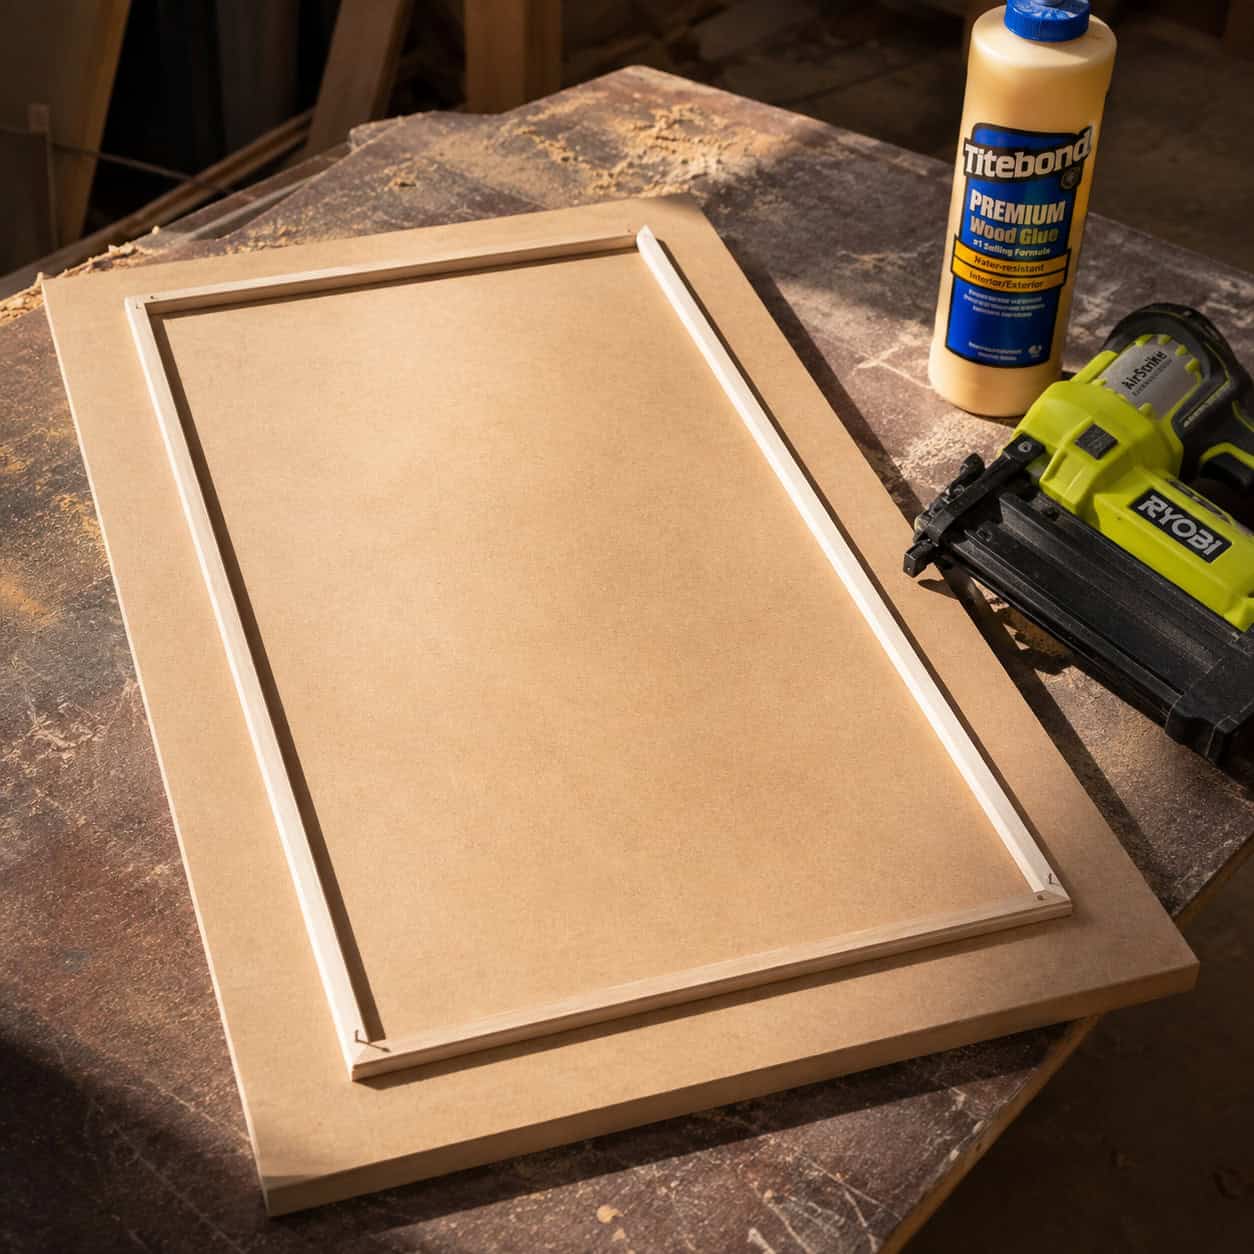
Here’s the woodworker’s play.
Plain slab doors read cheap. Shaker doors read current. You can conjure the second from the first with four strips of trim.
Cut 2 to 2.5-inch strips of MDF or plywood, glue and brad-nail them into a rectangle on the face of each flat door, then caulk the seams and paint the lot. Twenty to forty dollars covers a whole kitchen’s worth of strips.
That frame catches light and shadow just as a real rail-and-stile door does. Once painted, no one can tell. If you’d rather make the real thing, here’s how Shaker-style cabinet doors go together.
17. Mount Under-Cabinet Lighting
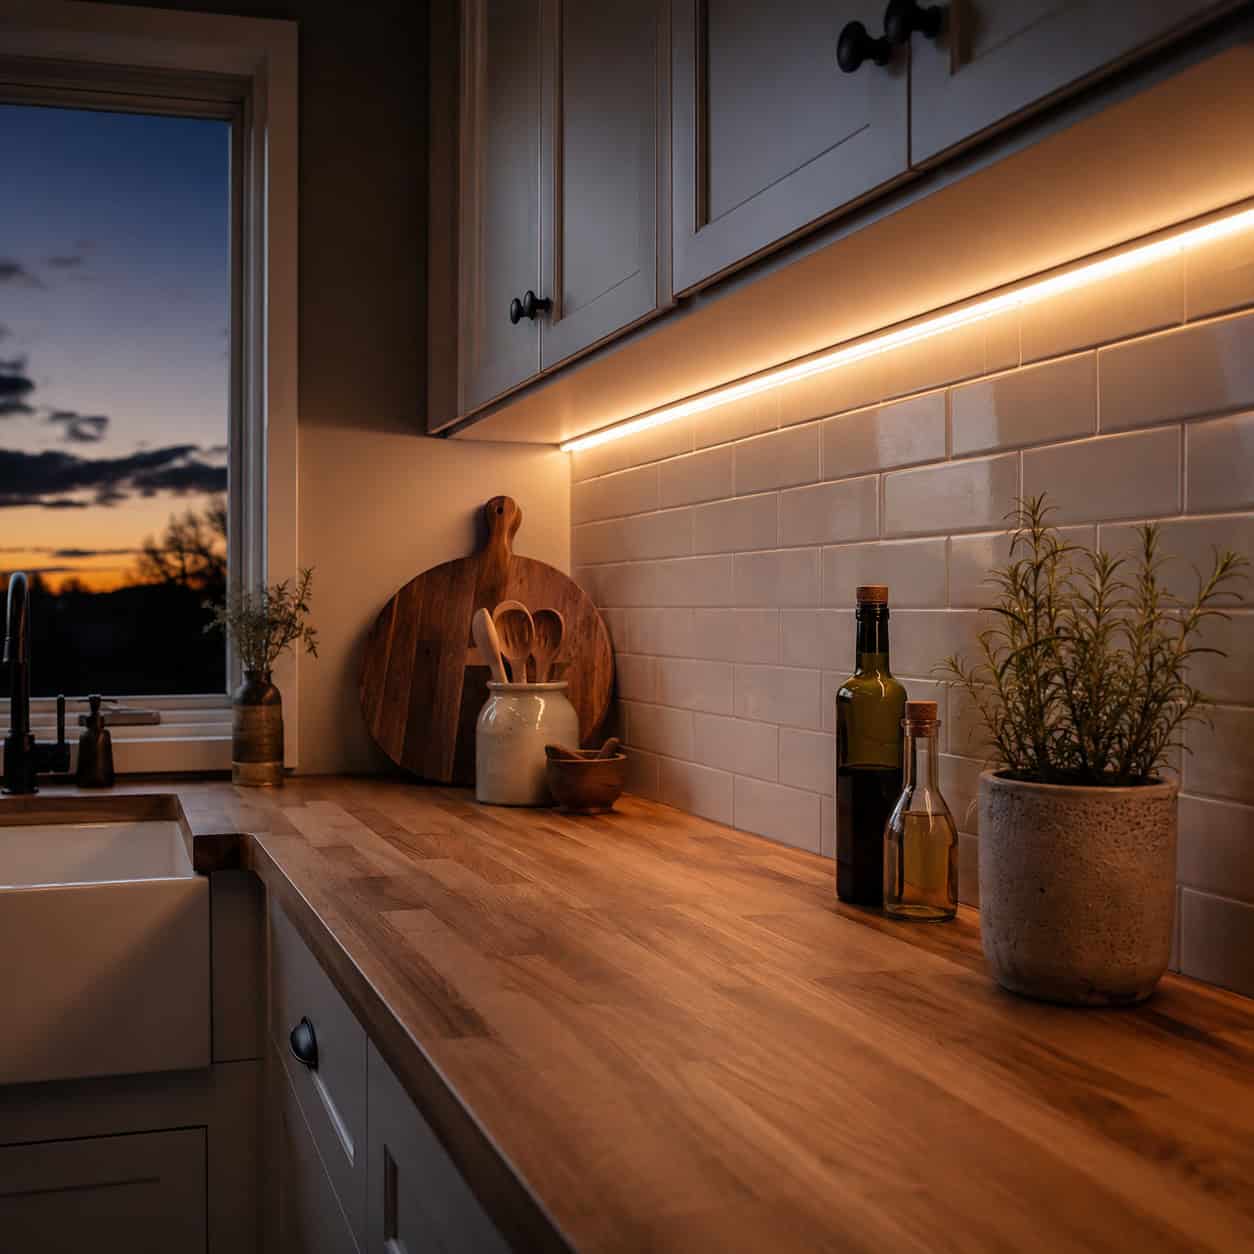
A run of LED lighting tucked beneath the uppers transforms a kitchen overnight.
It brightens the counter where you actually work and casts a warm glow that makes even dated cabinets feel current once the sun goes down. Function and atmosphere in one inexpensive upgrade.
Plug-in puck lights or adhesive LED tape are the no-wiring option — stick, plug in, finished. Hardwired strips look tidier but require running a bit of low-voltage wire.
Point the light toward the backsplash rather than out at your eyes, and hide the strip behind the cabinet’s front lip.
18. Paint the Island a Contrasting Shade
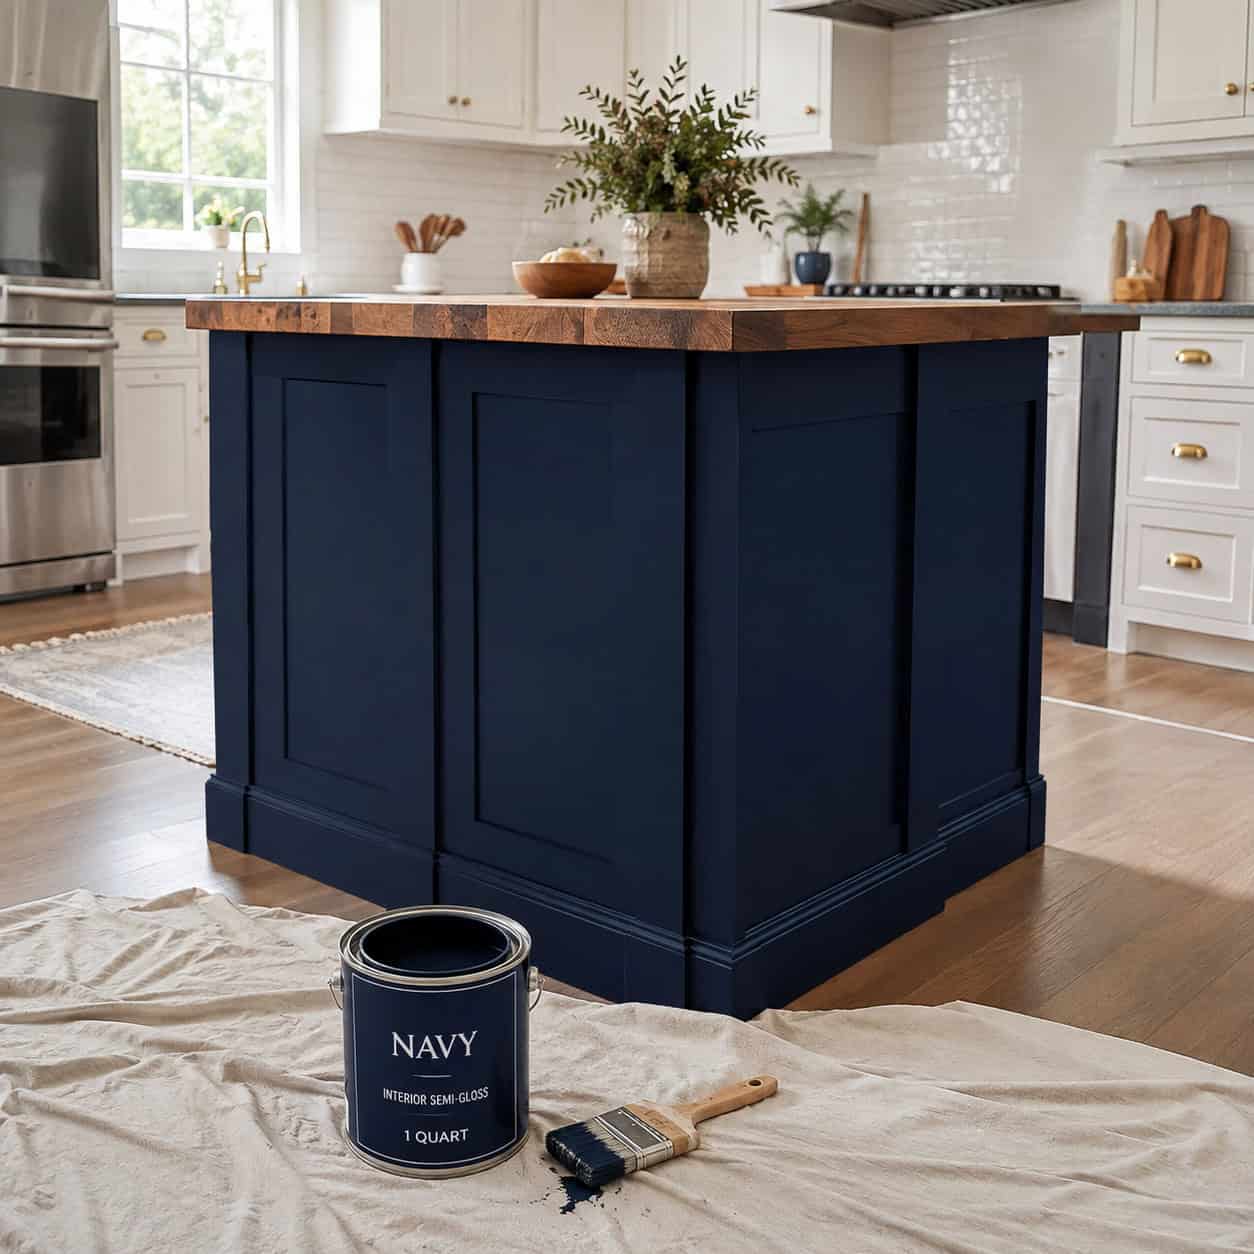
Leave the perimeter cabinets alone. Paint only the island a bold or deep tone.
Two-tone kitchens are all over the design magazines at the moment, and you can nail the exact look with a single quart of paint and a weekend. Navy, forest green, and charcoal islands each anchor a room of white or wood uppers.
Since it’s one self-contained piece, the prep stays manageable and the impact is bold. The island turns into a deliberate centerpiece rather than a matching afterthought.
Link the island hardware to your new perimeter hardware so the two tones still read as a single kitchen.
19. Fit Furniture Feet and Legs
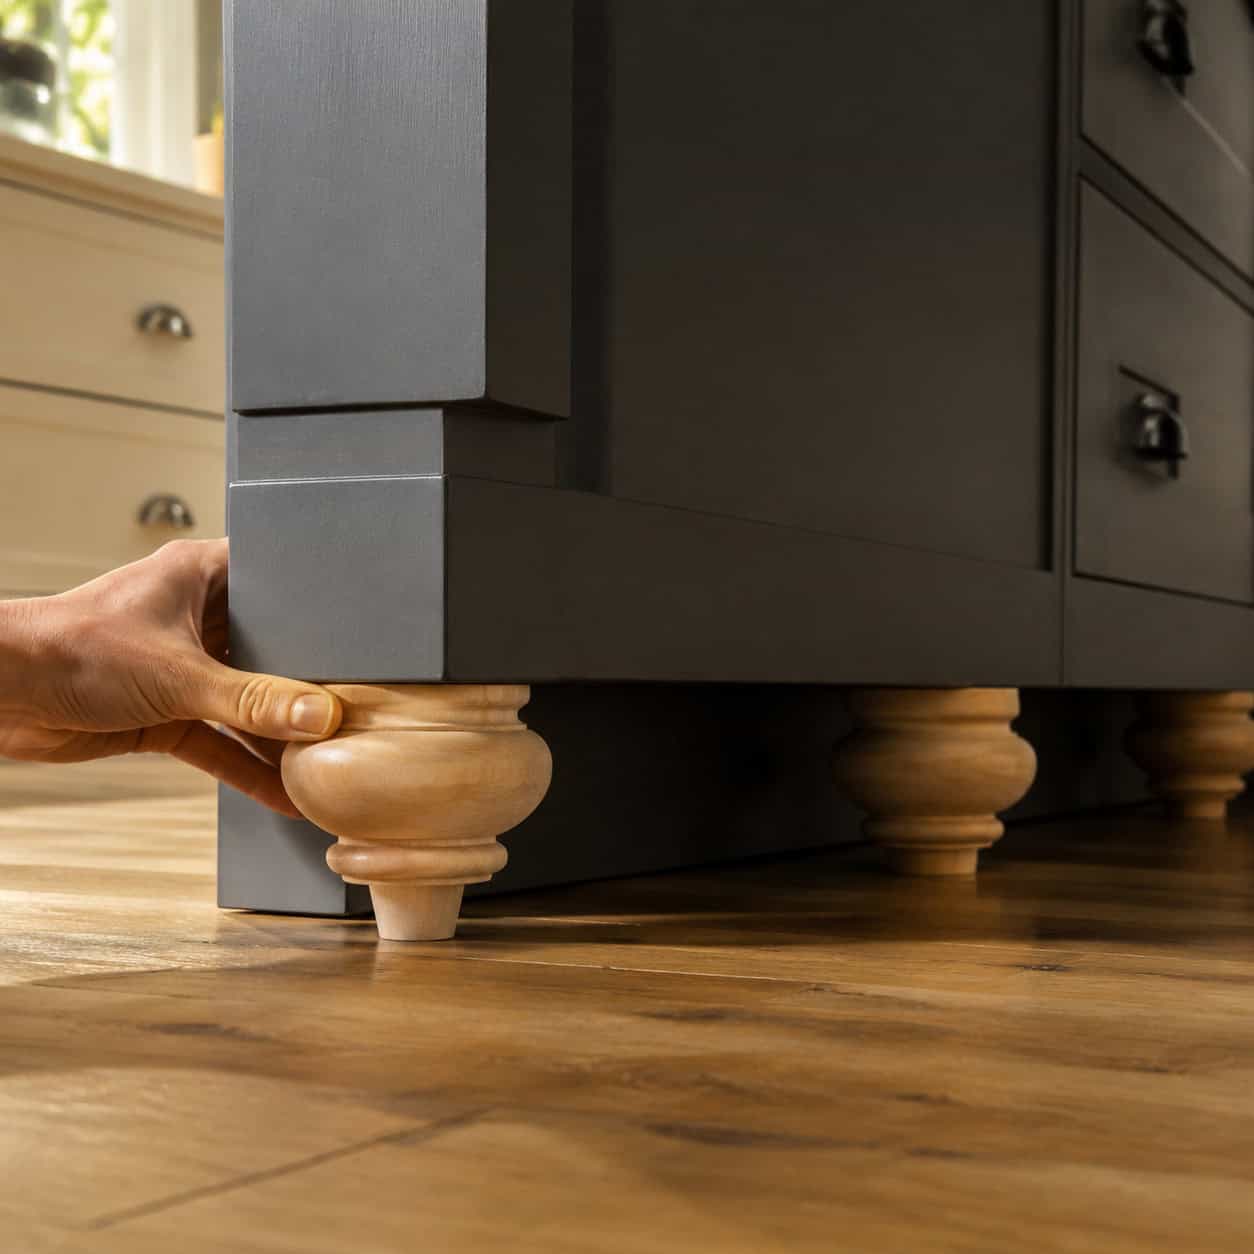
Base cabinets rest flat on a toe-kick. Furniture stands on legs. Add legs and your cabinets read as furniture.
Decorative feet under an island or a stretch of base cabinets give the whole thing a freestanding, custom presence. Genuine cabinet feet cost genuine money.
The budget workaround: cut-down wooden curtain finials from the hardware store fill in beautifully. Paint or stain them to match, screw them up into the base, and no one will ever know.
Combine it with the toe-kick trick further down and the furniture illusion is total.
20. Fit Soft-Close Hinges and Dampers
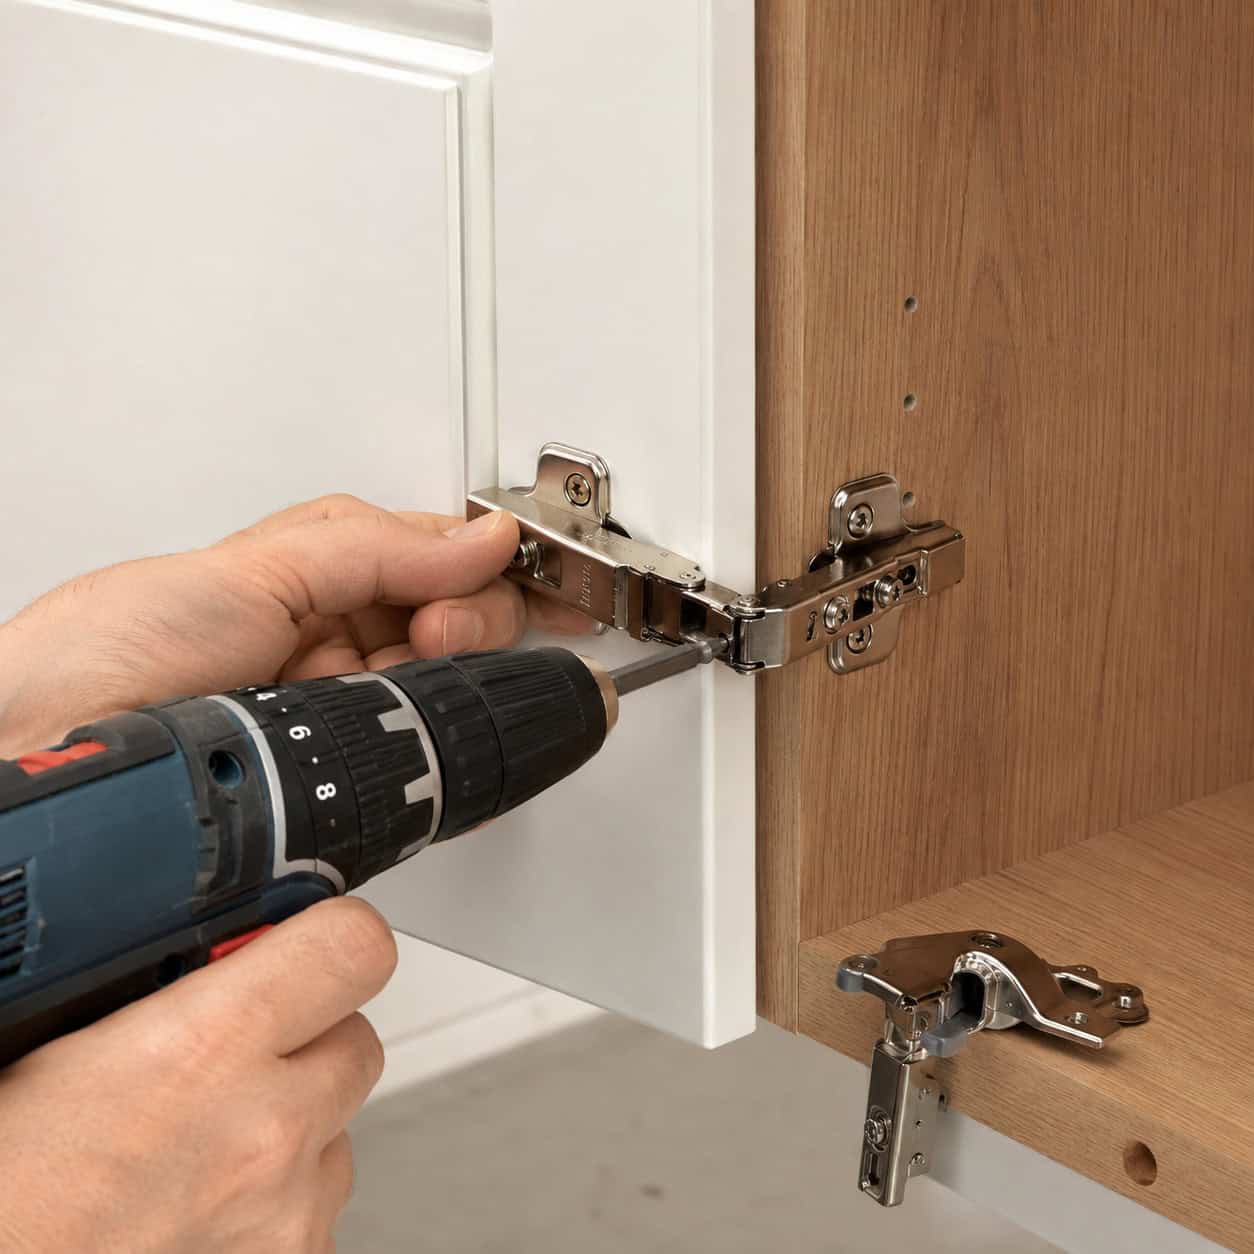
It alters nothing you can see. It alters everything you feel.
Soft-close hinges and small push-in drawer dampers grab the door in the final inch and glide it shut instead of letting it bang. It’s the gap between a kitchen that feels builder-grade and one that feels expensive, every time you close a cabinet.
Plenty of standard European hinges swap directly for a soft-close version — unclip, unscrew, replace. Drawer dampers simply clip or screw onto the cabinet. A drill is all it takes.
Cheap, unseen, and you feel it a dozen times a day.
21. Bring Back the Original Wood Finish
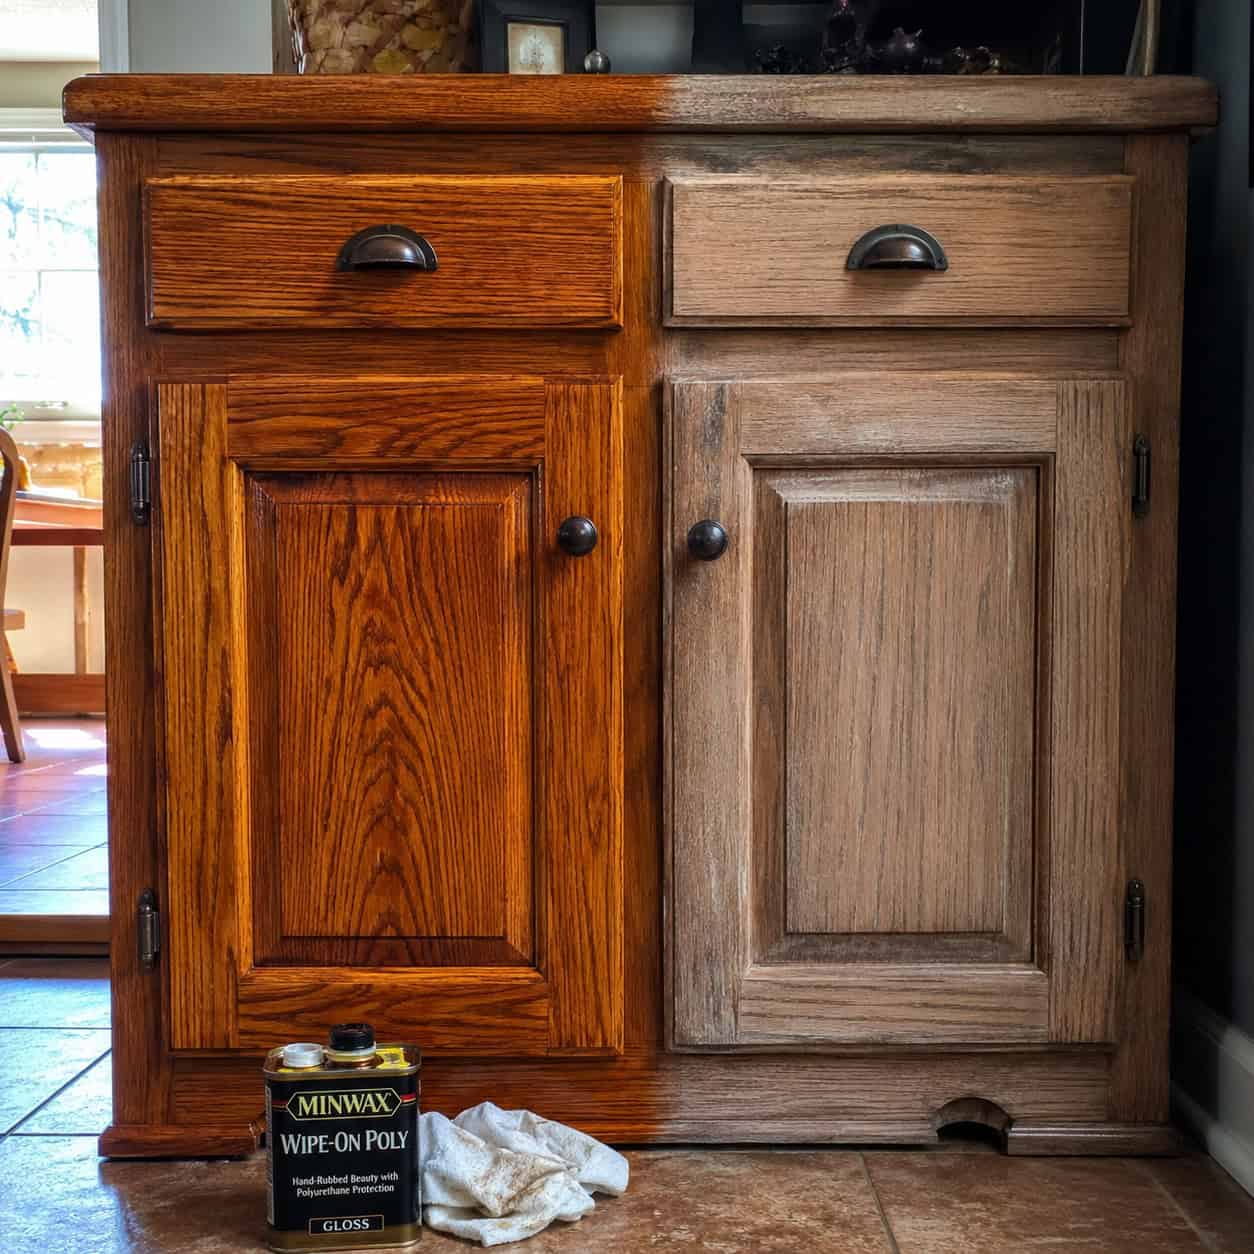
Now and then cabinets aren’t dated at all. They’re simply worn out.
Solid-wood boxes carrying a decade of grease haze and a few rubbed-through spots need no color whatsoever — just a deep clean and a new topcoat. This is the lowest-commitment option here for wood worth saving.
Degrease thoroughly. Light-sand to cut the gloss and give the new finish a grip. Then flow on a coat of wiping varnish and let it cure.
Tired oak comes right back to life. University extension guides like Oregon State’s furniture refinishing bulletin spell out the clean-sand-recoat sequence if you want to go by the book. If you’re unsure which product does what, sort out the finishes that get confused but behave very differently before buying.
22. Remove the Upper Doors for Open Shelving
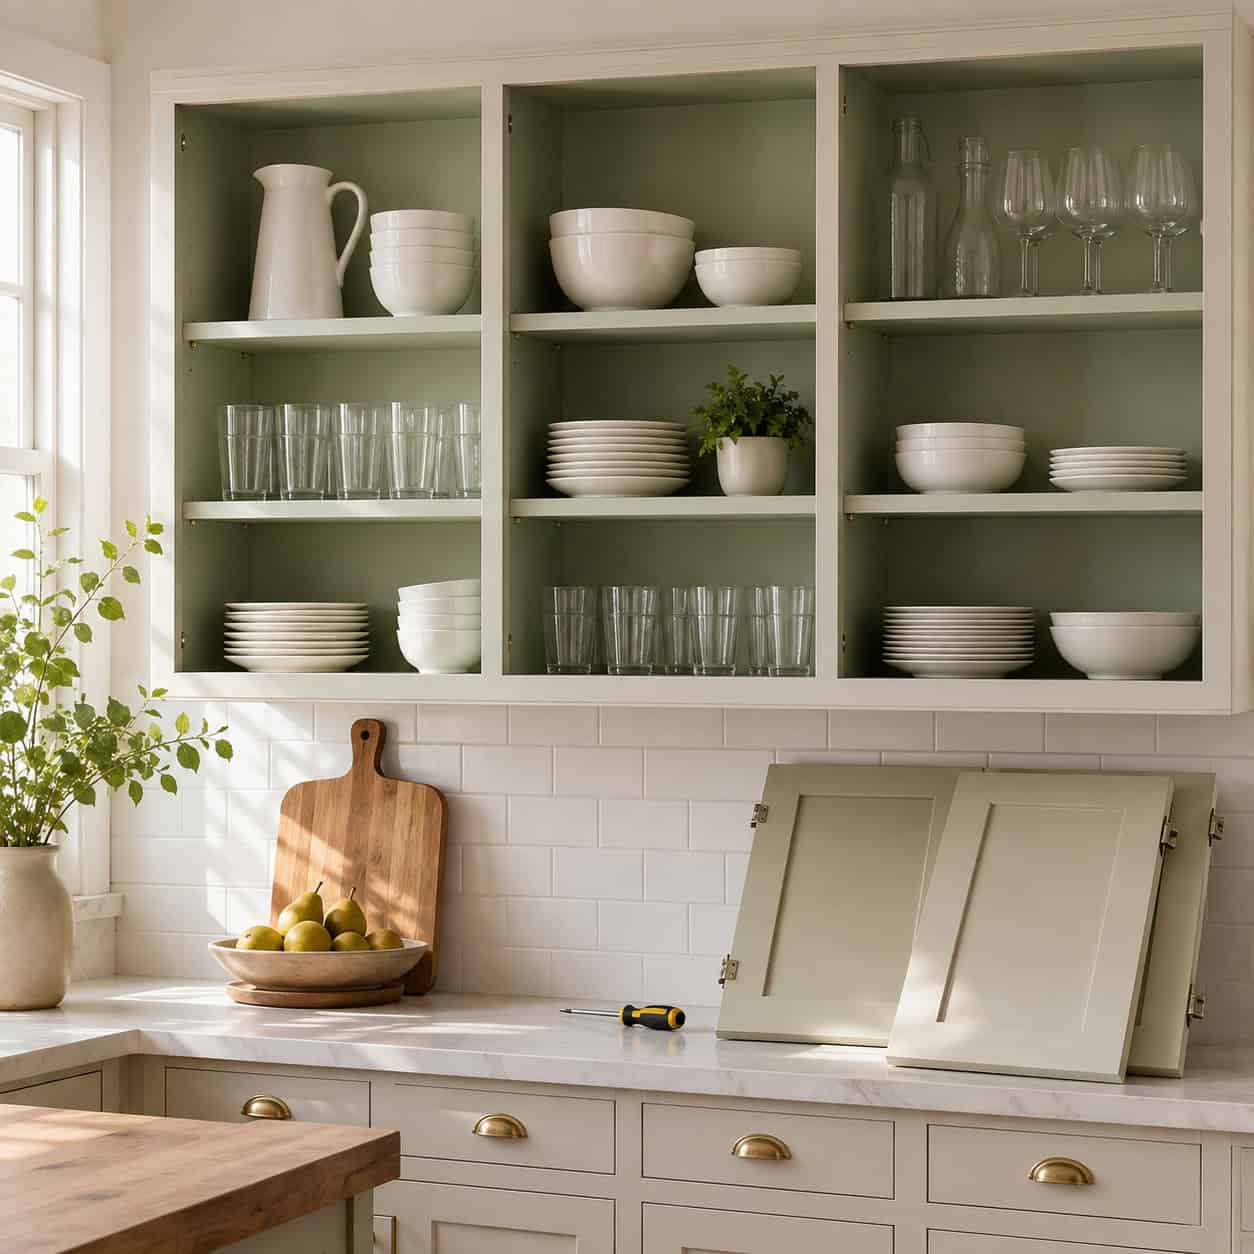
Costs nothing. Takes an afternoon.
Pull the doors off your uppers — or remove an entire upper cabinet and hang a bracketed shelf in its spot — and the kitchen instantly feels larger and more custom. Open shelving doubles as a display for the dishes and glassware you genuinely love.
If you keep the box and just drop the doors, sand and paint or line the interior so it looks deliberate. Fill the old hinge holes.
The honest catch: everything on those shelves attracts dust and grease. This works best for items you reach for often enough that they never sit idle.
The Takeaway
The truth is most kitchens don’t call for new cabinets at all. What they call for is new hardware, a better coating, and doors that open like it isn’t still 1994.
Begin with the cheapest visible win — the knobs — and gauge how far that takes you before committing to anything larger. You can layer most of these projects on, one weekend at a stretch.
Odds are the boxes on your wall are solid wood or solid ply, made better than half of what’s on the market today. Don’t haul them to the landfill just because their surface wore out.
Repair the surface. Hold onto the cash.