Jay Bates shared the woodworking tip featured in this video.
A failed kitchen drawer can happen for predictable reasons: the wrong sheet goods on the sides, weak joints, and a bottom panel that can’t handle repeated flex.
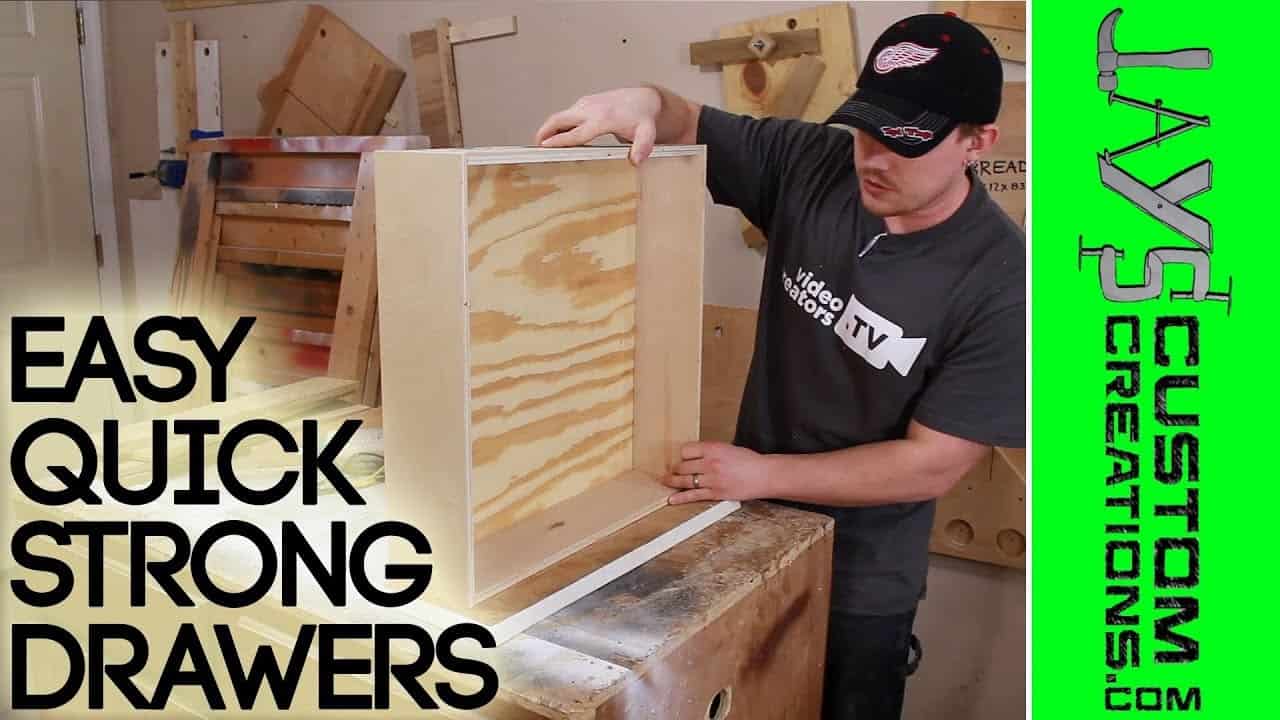
Watch the full video and subscribe to Jay’s channel:
Why This Drawer Failed in the First Place
The first issue was material choice: MDF drawer sides in a kitchen environment. MDF performs poorly when exposed to moisture or even recurring humidity, and once it absorbs water, it can lose strength and start breaking down.
The second issue was construction style: butt-jointing with glue and brad-style fastening. End-grain glue joints tend to be less reliable than joinery that provides a mechanical hold, and brad nails are often too “soft” for parts that constantly see movement.
The third issue was the bottom design. A shallow groove in MDF doesn’t provide much resistance to pressure pushing against the panel, and a bottom made from compressed board-style material can compress further over time, eventually cracking or separating.
Choose Drawer-Side Stock That Can Take Repeated Abuse
A durable drawer starts with drawer sides made from plywood or solid wood alternatives that handle movement better than MDF. The goal is strength at the groove area and stability when the drawer is loaded and unloaded day after day.
The approach shown uses plywood for the sides, false front, and back, with an intentional orientation to help the bottom stay supported longer. Even when plywood is slightly “bowed,” positioning the bow to face inward can improve how the bottom panel is held over time.
Layout and Sizing That Supports the Bottom Panel
For a false-front style drawer system, the geometry matters: the sides run the full length, while the front and back sit on the inside faces of the sides. That way, the bottom panel can be captured and supported without relying on fragile end-grain glue surfaces.
The groove for the bottom is cut into the drawer sides (and the front), while the back is handled in a way that lets the bottom panel slide in cleanly after assembly. This reduces the chance of misalignment and keeps the bottom installation straightforward.
Cutting a Reliable Bottom Groove (Without Overcomplicating It)
The groove width is set up so the bottom panel can slide in with a consistent fit. The method relies on careful blade height and fence positioning so the bottom panel thickness is matched accurately.
A smart time-saving tactic is using the sides to dial in the groove dimensions first, then finalizing the back piece to an exact fit. This keeps the bottom from binding or rattling and improves long-term stability.
Assembly Strategy: Pocket Holes for Speed, Access, and Clean Surfaces
The drawer body is assembled using pocket-hole screws, with fasteners positioned so they remain hidden once the false front is installed. This keeps the interior looking clean and avoids visible hardware where grime and wear tend to collect.
Placing pocket holes so they are covered by the false front and back is a practical design decision. It also makes future service easier because access can be gained from the side or rear depending on how the drawer is built.
Install the Bottom After the Frame (and Make It Replaceable)
Rather than gluing the bottom into a fixed position, the construction captures it and screws it down after the sides, back, and false front are assembled. That means the drawer bottom can be removed and replaced if it ever wears out.
This replaceable-bottom approach is one of the biggest durability wins. Drawer bottoms are wear parts in real kitchens, so designing for future replacement prevents a small failure from forcing a full rebuild.
False Front Covers “Ugly” Materials Without Compromising Structure
If a drawer front needs to be reused or is cosmetically less than ideal, the false front concept still allows the drawer box to perform correctly. The structural work happens in the drawer box and bottom support, while the visible face handles appearance.
In the example, an existing front component is repurposed and then hidden behind the new false front system. That’s a useful reminder that strong function doesn’t always require “perfect-looking” raw inputs.
Lesson Learned: Dovetails Aren’t the Only Path to Great Drawers
A common misconception is that drawers must use traditional joinery to be worthwhile. The larger point is that reliable drawers depend on appropriate materials, good joint design, and the ability to survive real-world loading.
Using plywood for drawer sides, avoiding weak end-grain glue-only connections, and building in a replaceable bottom creates a drawer that’s strong in practice. Jay Bates’ method emphasizes repeatability, which is especially helpful when multiple drawers need rebuilding.
Overall Takeaways for Building (or Fixing) Drawer Boxes
Strong drawers come from matching materials to the environment and the stress they’ll see. MDF drawer sides are fine for some furniture uses, but kitchens demand materials that resist moisture-related breakdown and can hold up at groove areas.
Mechanically sound joinery and hidden fasteners speed up assembly while improving reliability. Finally, making the bottom a serviceable component turns a common wear issue into a quick repair instead of a full failure.
Conclusion
This repurposing mindset—diagnosing why a drawer failed, changing the materials and joint strategy, and building a replaceable bottom—keeps drawers working long after the first failure would have ended the story.
Watch the full video and subscribe to Jay’s channel:

Matt’s Take
These are my personal thoughts and tips based on my own experience in the shop. This section is not written, reviewed, or endorsed by the original creator of this project.
The key insight here is understanding that drawer construction is really about managing stress points. Kitchen drawers get loaded, slammed, and deal with humidity swings daily — so the materials and joints need to handle that reality. Jay’s approach of switching from MDF to plywood sides makes a huge difference in longevity, especially around those bottom grooves where stress concentrates.
I really appreciate the pocket hole strategy shown here. While traditionalists might prefer dovetails or dadoes, pocket screws create a mechanical connection that’s fast to execute and actually performs better than glue-only joints when drawers see heavy use. The placement keeps everything hidden while making future repairs accessible — that’s smart shop thinking.
The replaceable bottom concept is brilliant and something more woodworkers should consider. Drawer bottoms are essentially wear parts, especially in kitchens where they deal with spills, weight, and constant flexing. Building them to be serviceable rather than permanent means a $5 piece of plywood can extend a drawer’s life by years instead of requiring a complete rebuild.
This whole approach shows how analyzing failures can lead to better building methods. Sometimes the “quick fix” mentality of brad nails and MDF creates more work down the road than taking time upfront to use appropriate materials and joints for the application.