Jon Peters from Longview Woodworking shared the woodworking tip featured in this video.
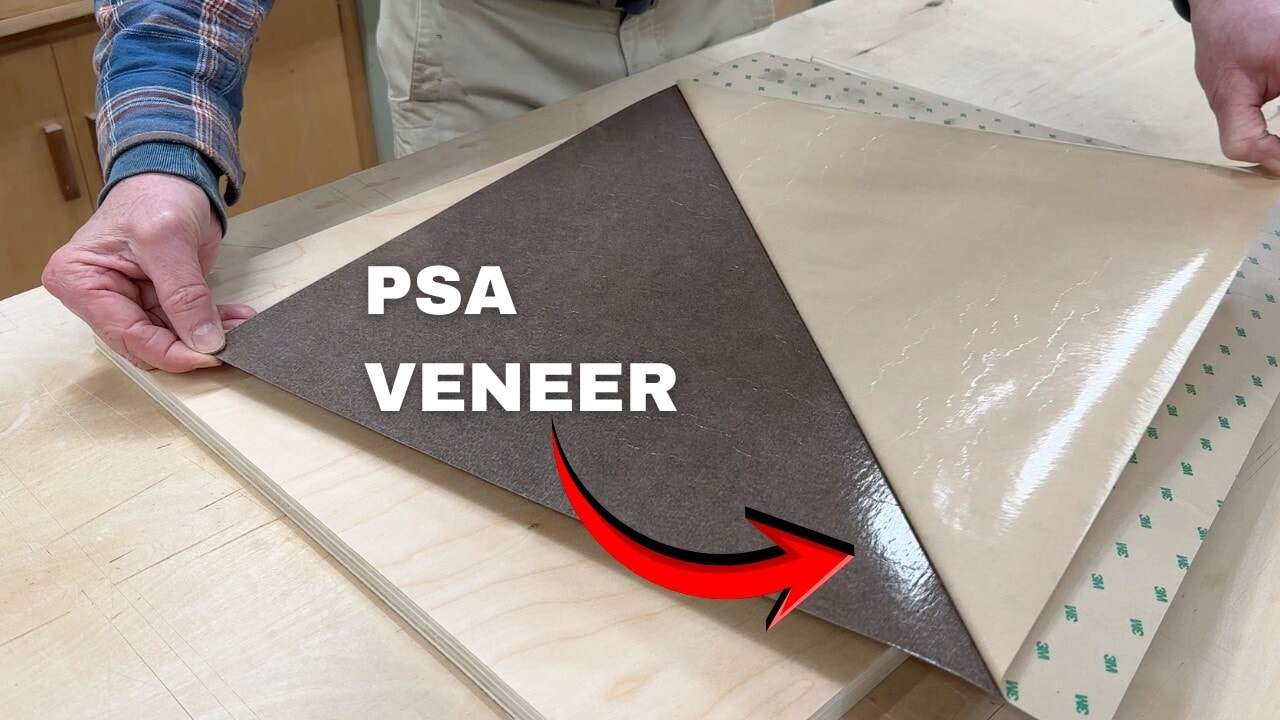
PSA veneer is a “peel-and-stick” approach to real wood surface coverage, and it can look excellent when the substrate is prepared properly. The key lesson is that PSA doesn’t forgive roughness, dust, or anything that interrupts full contact between the adhesive and the base.
When that bond is right, the result is smooth, durable veneer—without the bubbling issues some people experience. This guide explains the process as a set of practical principles: prep, alignment, pressure, and how to avoid common seam problems in cabinetry.
Watch the full video and subscribe to Jon’s channel:
Understand Why PSA Veneer Fails (and How to Prevent It)
Pressure-sensitive adhesive veneer behaves much like a large sticker: it bonds best to a smooth, clean, sealed surface. If the base is dusty, textured, or not sealed, the adhesive can’t achieve full contact, which can lead to lifting or bubbles during application.
That’s why the substrate preparation phase matters more with PSA veneer than with some traditional adhesive methods. A well-prepared surface helps the adhesive “grab” evenly across the whole panel, reducing defects before they start.
Substrate Prep: Seal, Smooth, and Remove Dust
The most important prep step is sealing the plywood so the adhesive sits on a stable, smooth layer rather than on random fibers and pores. Applying water-based polyurethane in multiple thin coats creates a consistent surface that supports strong adhesion.
After sealing, sanding and careful dust removal are what turn “pretty smooth” into “sticker-smooth.” Vacuuming before applying the veneer helps ensure there are no chips or grit trapped between layers.
PSA Application Is Trickier on Small, High-Risk Shapes
PSA veneer tends to demand more care on narrow or low-surface-area forms. If the veneer is applied over small supports, there’s a greater chance the adhesive grabs the wrong contact points.
Instead of relying on broad contact points, using temporary placement supports can keep alignment stable while minimizing unwanted sticking. In practice, the goal is simple: hold the veneer position long enough to seat it correctly, then press from the right areas without disturbing the bond.
Alignment and Seating: Start Clean and Keep Control
PSA veneer is best treated like a controlled placement rather than a “hover and adjust forever” process. Peeling the backing slowly, starting at a corner, and keeping handling to the edges reduces the chance of accidental contact.
Once the veneer is positioned, it’s important to align the edges so the reveal is even on all sides. Early alignment reduces later trimming headaches and helps the veneer sit flat without stress.
Pressure Matters More Than Pressure Tools
Even PSA veneer needs real, even pressure to form a lasting bond. A common mistake is assuming that a basic roller automatically provides enough force across the entire surface.
A simple pressure tool—made from scrap with a gentle edge profile to avoid damaging the veneer grain—can work very well. The technique is to apply pressure gradually, starting near the center and working outward while protecting the delicate edges from cracking.
A Seam-Free Cabinet Approach: Why Not Just Use Walnut Plywood?
A frequent question is why a cabinet face can’t just be built from walnut plywood. One big reason is visual continuity: many designers want the “waterfall” grain effect, where the grain flows around the cabinet rather than stopping at a panel seam.
Another reason is seam management. If the cabinet is built from plywood, edge transitions often create visible joins that require perfect joinery and careful hiding—especially at miters, where there’s little margin for error.
By applying decorative molding first and letting the veneer wrap over it, the design can hide the transition and virtually eliminate the seam at that critical meeting point. This approach also allows the veneer grain to remain the hero instead of exposing construction lines.
Overall Takeaways for PSA Veneer Success
PSA veneer performs best when it’s treated like a true adhesive film that needs full contact. Sealing the substrate, smoothing it thoroughly, and removing every trace of dust are the foundation for clean results.
Then, alignment and pressure finish the job: place carefully, press evenly, and use a pressure method that won’t damage the veneer. Once those principles are in place, PSA veneer opens up strong design flexibility for furniture and cabinetry, including grain-flow effects that are harder to achieve with simpler panel builds.
Conclusion
Applying PSA veneer is less about fancy tricks and more about disciplined surface prep and controlled placement. When the substrate is sealed and polished smooth, the PSA adhesive bonds like a well-applied sticker—flat, secure, and bubble-resistant.
For cabinet work, combining molding placement with veneer wrapping helps keep seams out of sight while supporting continuous grain design. For more veneer guidance and examples of different application methods, the best next step is to watch the full discussion from the original creator.
Watch the full video and subscribe to Jon’s channel:

Matt’s Take
These are my personal thoughts and tips based on my own experience in the shop. This section is not written, reviewed, or endorsed by the original creator of this project.
PSA veneer is one of those materials that seems simple until you realize how unforgiving it can be. The “peel and stick” nature makes it tempting to rush, but that sealed substrate prep really is everything. I’ve found that water-based poly works great for sealing because it dries fast and doesn’t add much thickness, but the key is those thin coats. Thick coats can actually create texture that works against you.
The pressure tool approach is smart thinking. A lot of folks grab a veneer roller and call it good, but those can actually be too aggressive on thin PSA veneer. A scrap wood block with slightly rounded edges gives you way more control over the pressure distribution. Start light and build up — you can always add more pressure, but you can’t undo a crease.
That dust removal step might sound obvious, but it’s worth being obsessive about. Even tiny particles will telegraph through and create bumps that catch the light wrong. I like to do a final wipe with a tack cloth after vacuuming, especially in corners where dust likes to hide. Once that PSA bonds down, you’re pretty much committed to whatever’s underneath.