Here’s the thing nobody tells you about making your home look great:
It almost never requires a contractor, a huge budget, or a free month on your calendar.
Most of the improvements that make the biggest visual difference are the ones that cost under $50 and take an afternoon.
The kind of thing you finish on a Sunday and spend the rest of the week quietly admiring.
Put your woodworking skills (and tools) to work and spruce up your space 🙂
Here are 19 of them.
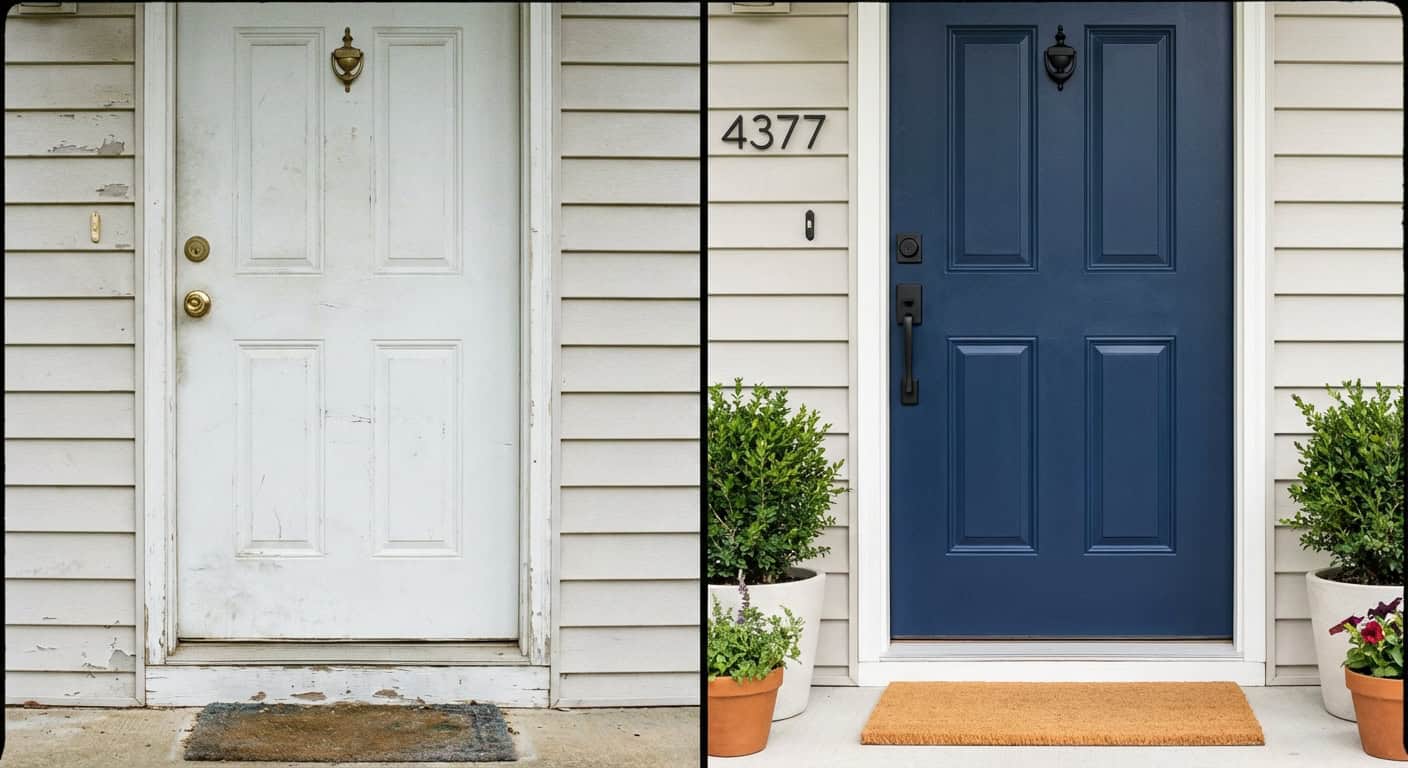
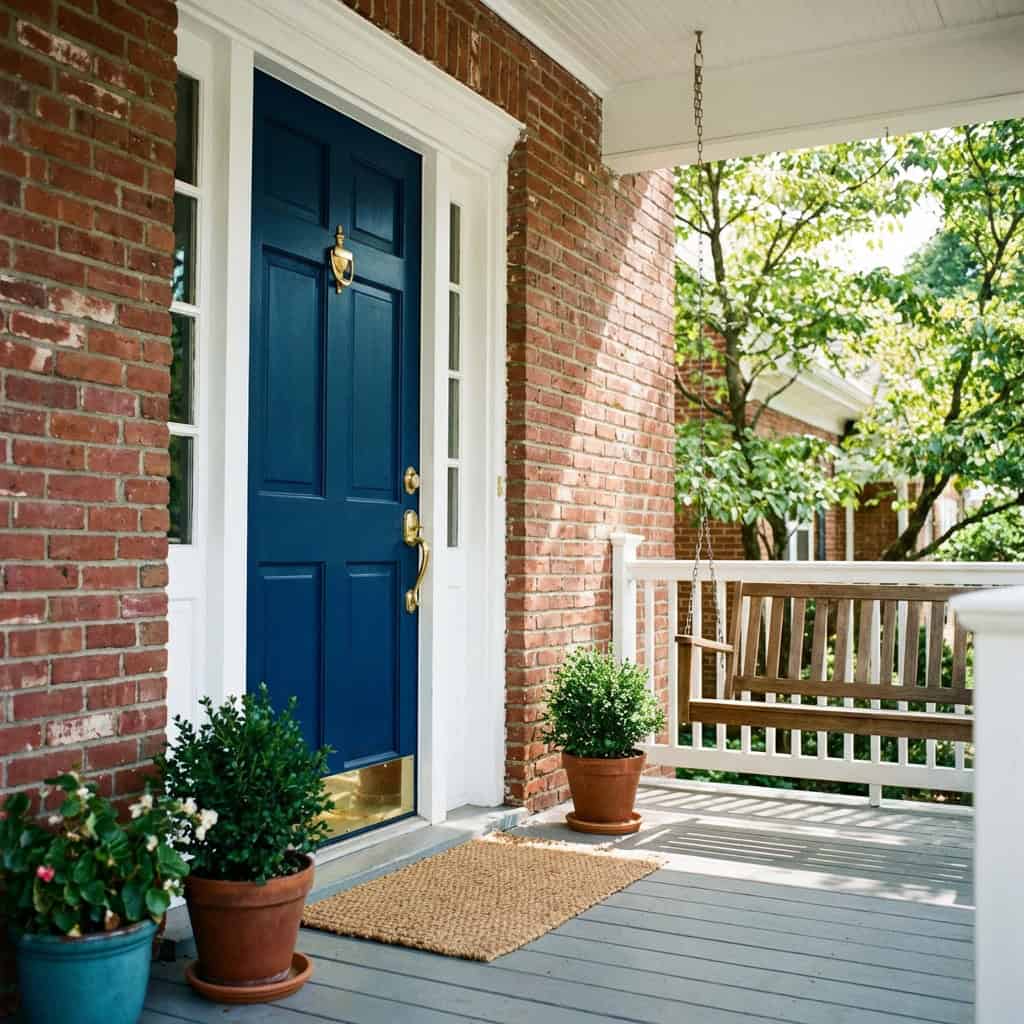
1. Paint Your Front Door a Bold Color
Your front door is the first thing anyone sees. And in most houses, it’s doing absolutely nothing.
A can of exterior paint costs $20-$30. A deep navy, forest green, rich red, or classic black door makes the whole house look more intentional — like someone actually lives there and cares about it.
Clean the door, lightly sand it, tape off the hardware, and apply two coats. Done in an afternoon.
Every neighbor will notice. Not one of them will know it cost less than dinner out.
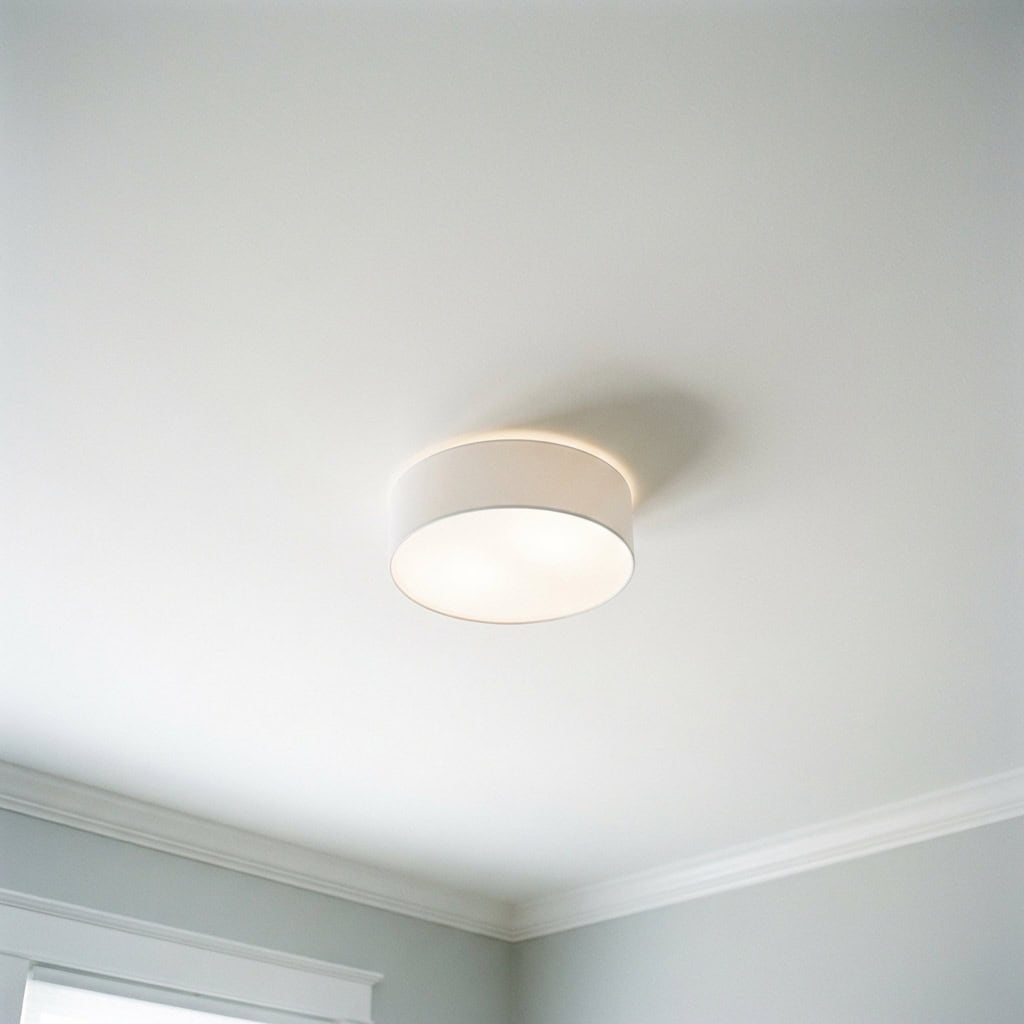
2. Swap Out Your Builder-Grade Light Fixtures
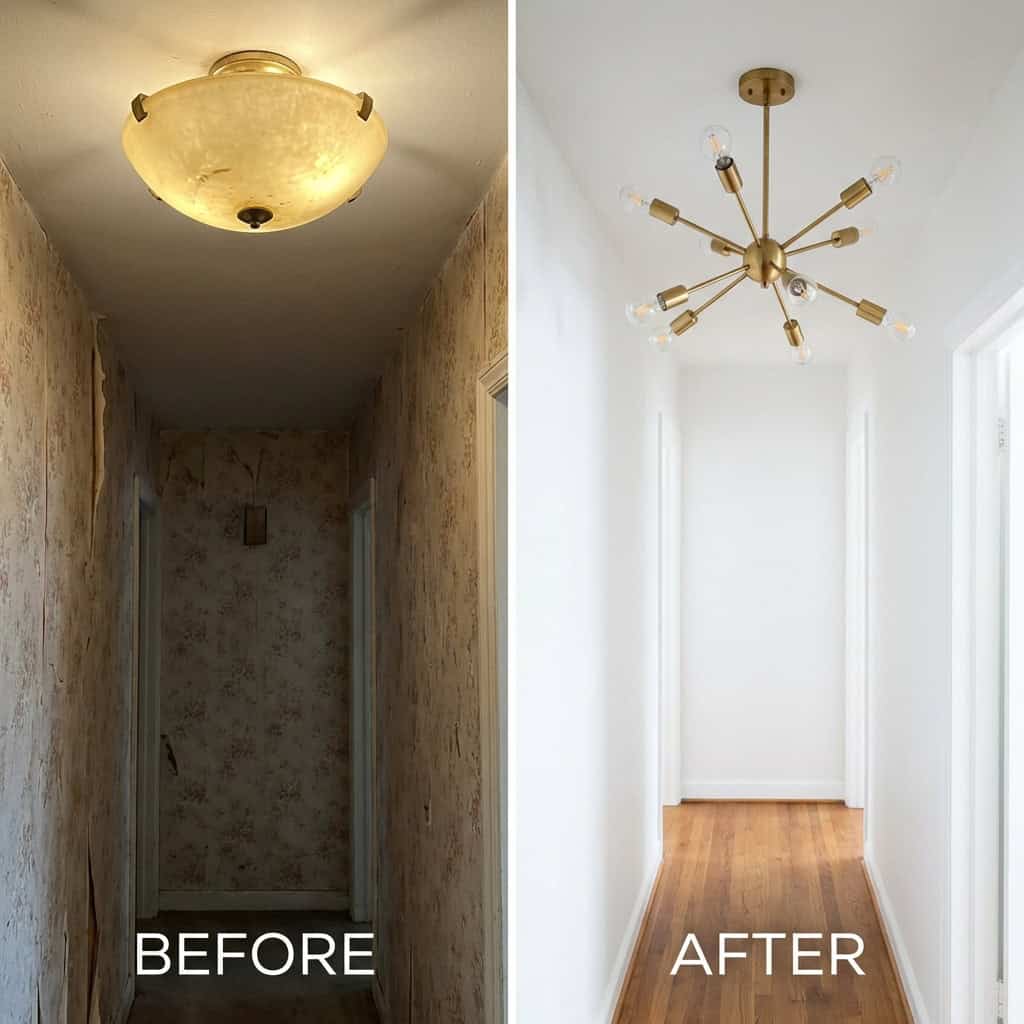
You know the one. The frosted glass dome that came with the house and somehow ended up in every single room.
Replacing a ceiling fixture takes about 20 minutes and zero electrical experience. You just match the wires by color — black to black, white to white, green to green.
A decent replacement fixture runs $30-$60. Pendant lights, drum shades, and semi-flush mounts all look dramatically more grown-up.
This is the easiest room upgrade most people never think to do.
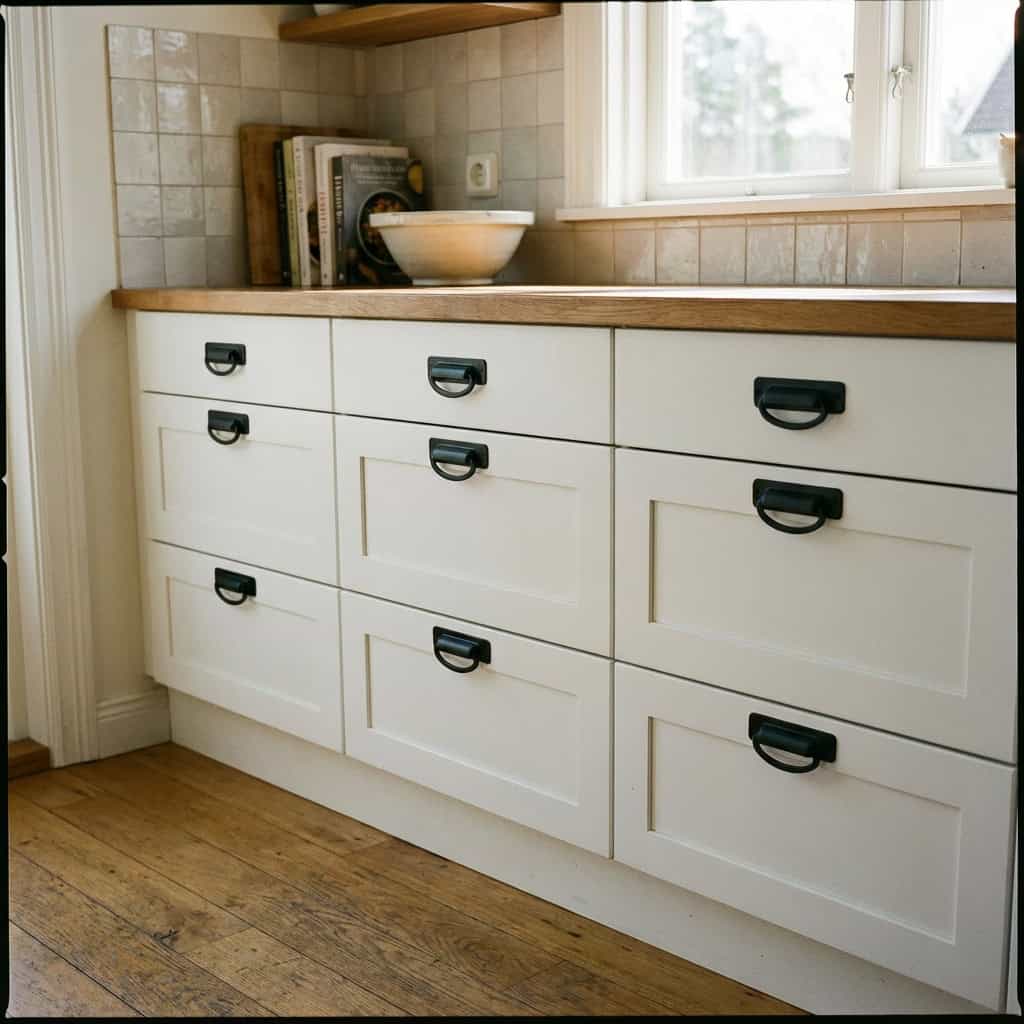
3. Replace Your Cabinet Hardware
If painting the kitchen cabinets feels like too much right now, just change the hardware.
Swapping out old brass knobs or plastic pulls for something modern — matte black, brushed nickel, or unlacquered brass — takes about an hour and costs $30-$50 for a full kitchen.
The difference is way bigger than it should be for the effort involved.
It’s the jewelry of the kitchen, and the right hardware makes even tired cabinets look intentional.
4. Hang Curtains High and Wide
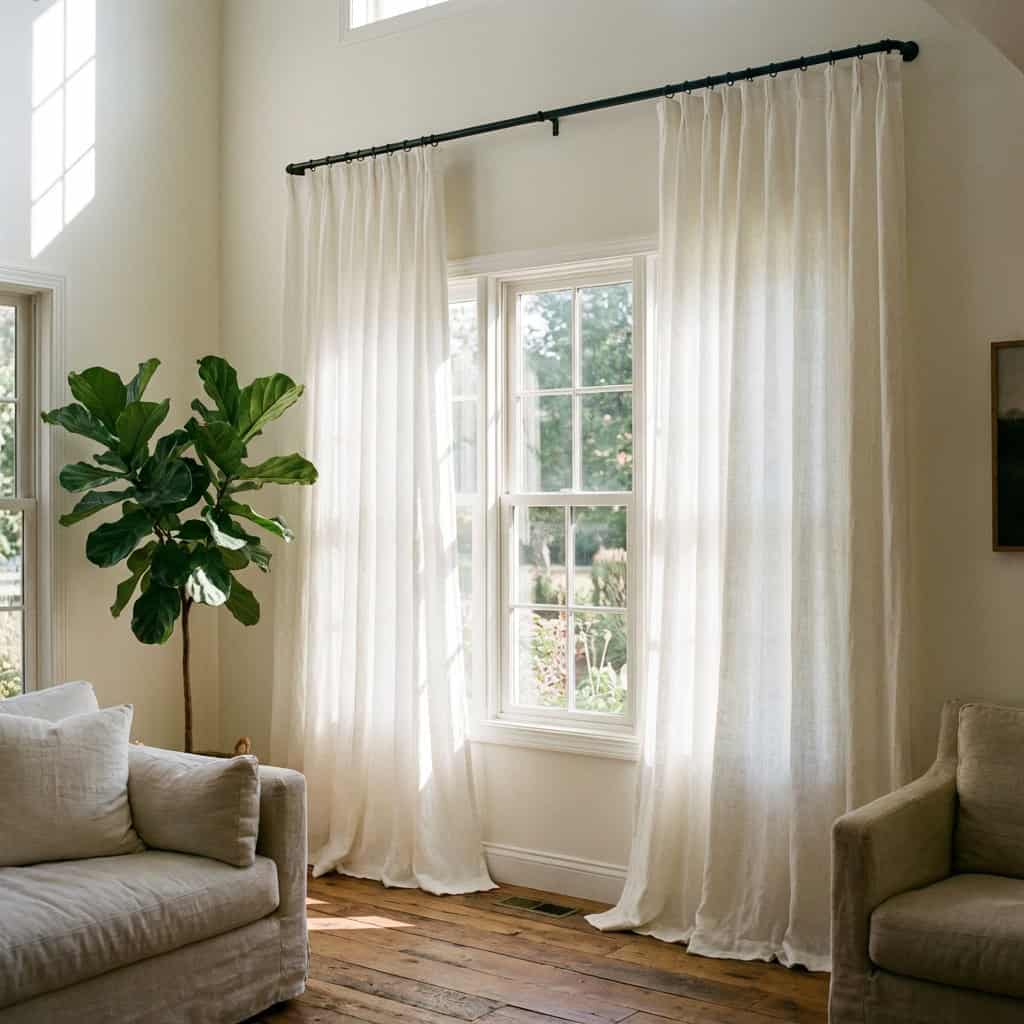
This is the most underused interior design trick in existence, and it’s basically free if you already have curtains.
Hang the rod as close to the ceiling as possible — not just above the window frame. Then extend it 8-12 inches wider than the window on each side.
When the curtains are open, they frame the window rather than cover it. The room looks taller. The windows look bigger. The whole space feels more polished.
New curtain rods run $15-$25. The difference is night and day.
5. Frame Your Builder-Grade Bathroom Mirror
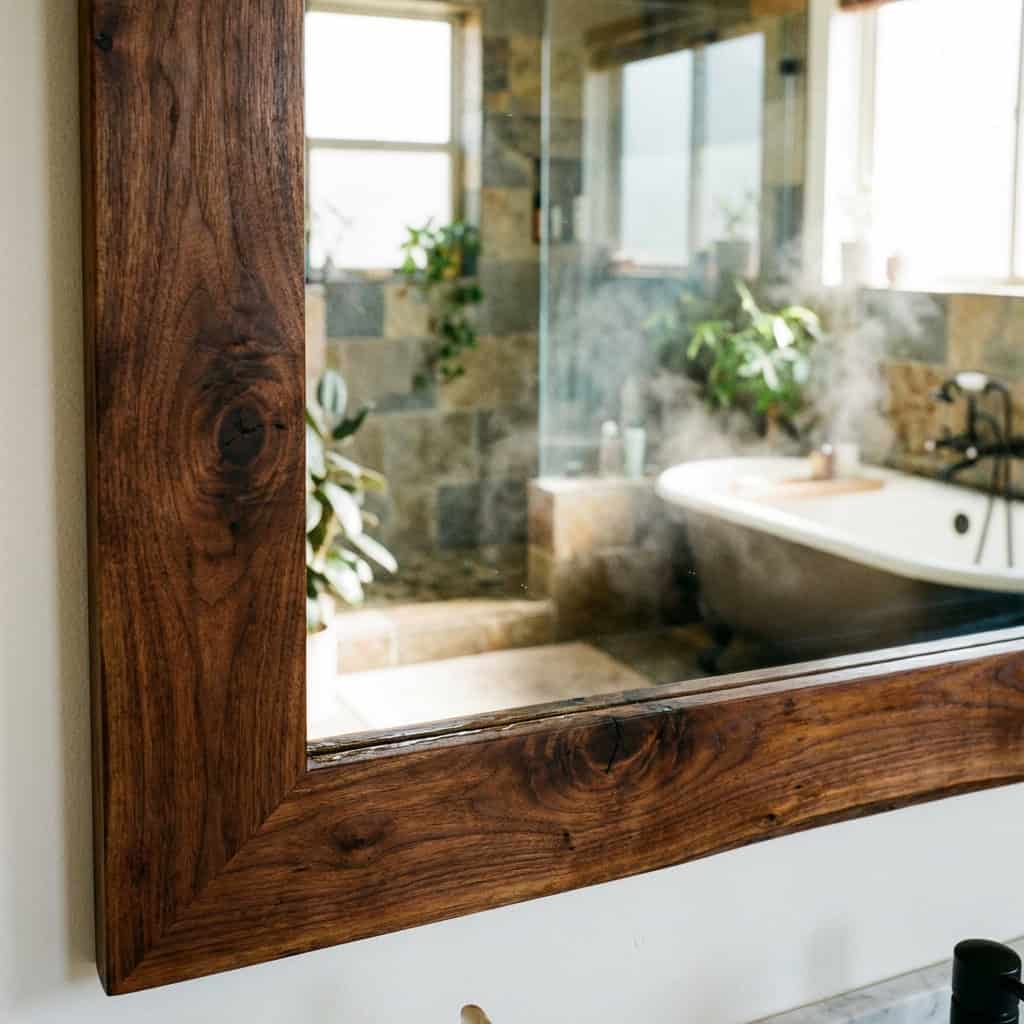
Most builder bathrooms have a plain, frameless mirror glued directly to the wall. Functional. Boring.
You can frame it without removing it. Mirror frame kits are sold online for $30-$50, or you can cut simple molding, paint it, and glue it directly to the mirror surface with mirror adhesive.
The frame goes right on top of the existing mirror. Takes about an hour.
It’s one of those before-and-after projects that makes people think you spent a lot more than you did.
6. Add a Peel-and-Stick Backsplash
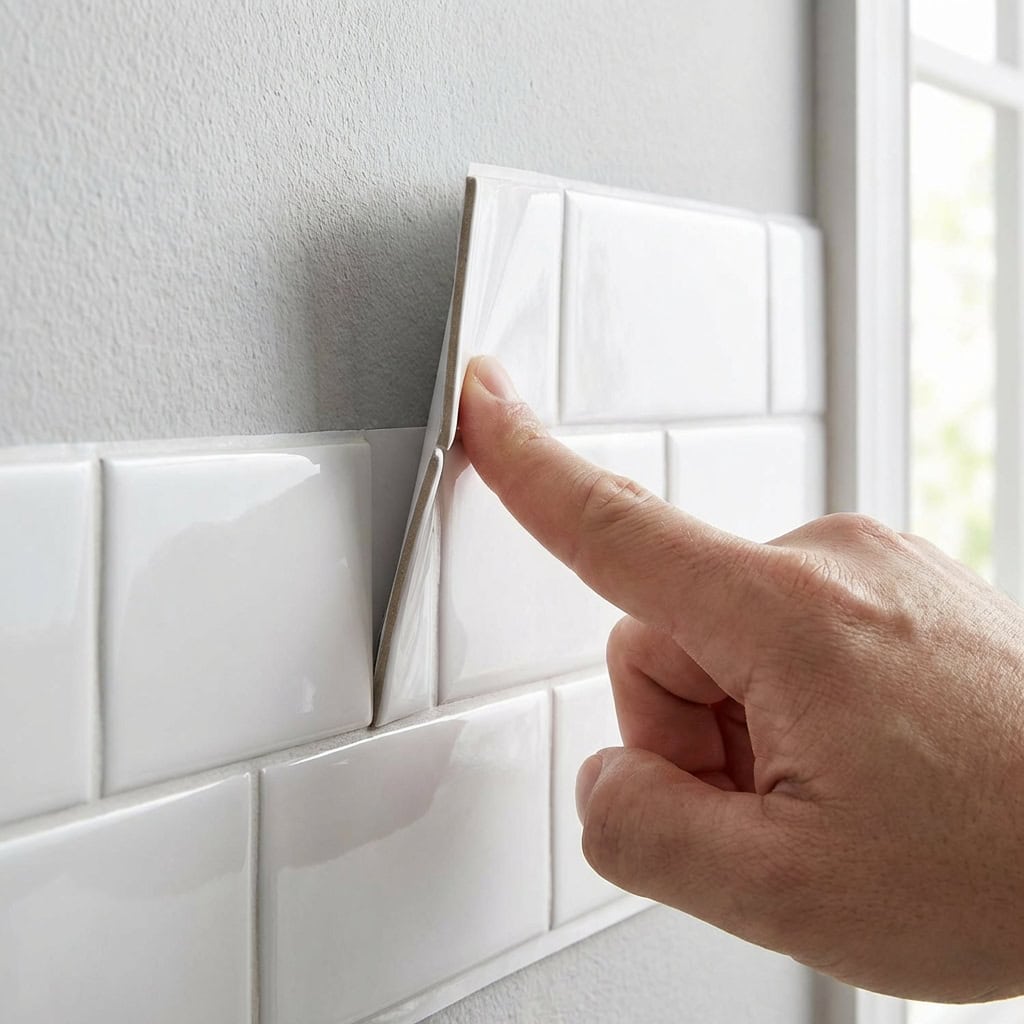
The strip of wall between your countertop and upper cabinets is doing nothing for you.
Peel-and-stick tile backsplashes have gotten genuinely good. Subway tile, geometric patterns, and zellige-look options all run $30-$50 for a standard kitchen wall and go up in an afternoon.
No grout. No mortar. No mess. Just peel, stick, and suddenly your kitchen looks like it got a renovation.
If you want to go the real tile route, mosaic mesh sheets with premixed grout are very manageable for a first-timer and cost about the same.
7. Add Under-Cabinet Lighting
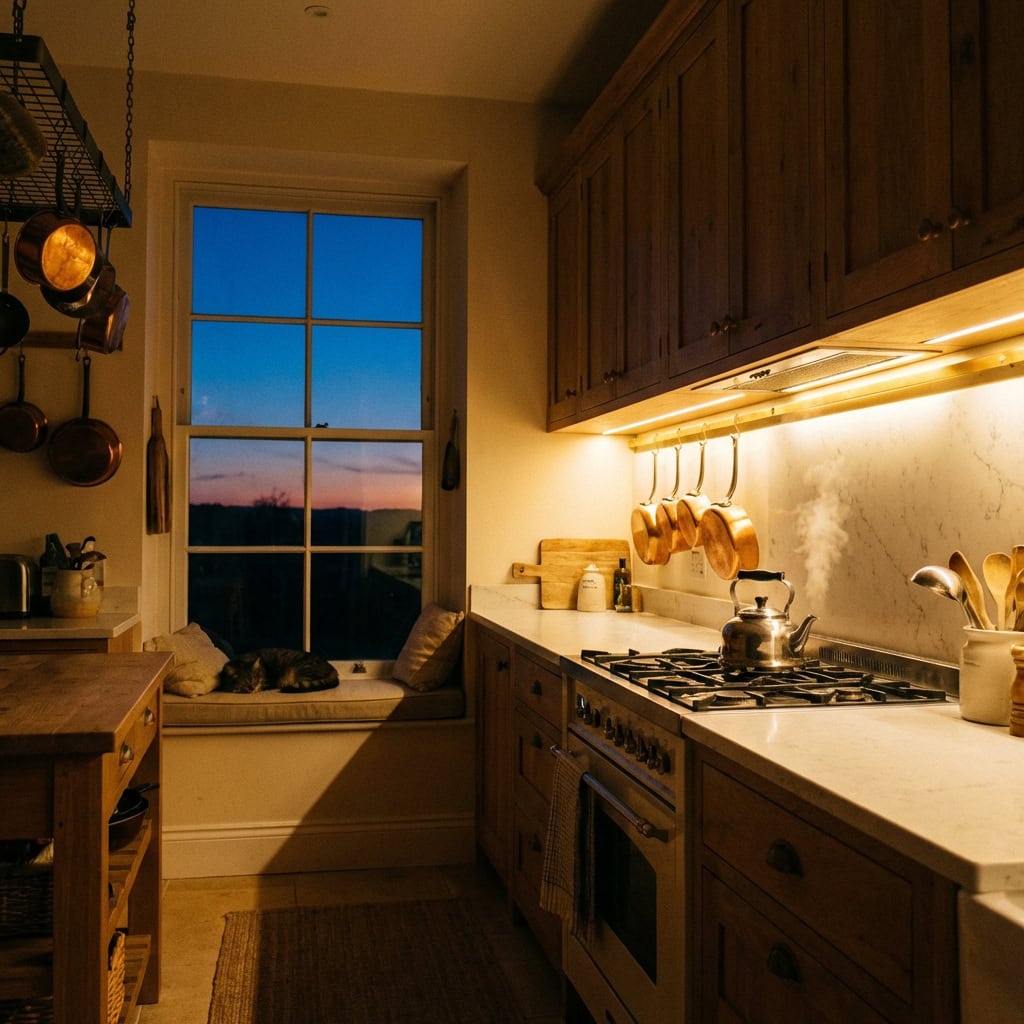
This one is wildly underrated.
Plug-in LED strip lights under kitchen cabinets cost $20-$40 and take 20 minutes to install. Peel the adhesive backing, stick them up, plug them in.
The effect is dramatic. The countertop actually becomes functional to work on, and in the evening the whole kitchen glows warm and cozy.
It goes from a kitchen you cook in to a kitchen you want to be in.
8. Refresh the Bathroom with New Accessories

You don’t need to remodel the bathroom to make it feel nice.
Swap out the towel bar, toilet paper holder, and hand towel ring for a matched set in the same finish. Add a new mirror if the old one is basic. Throw in a fresh bath mat and a small plant.
Total spend: $40-$60.
Bathrooms are small spaces where small details carry enormous weight. A coordinated set of accessories is the difference between “hotel bathroom” and “gas station bathroom.”
9. Caulk the Tub and Sink
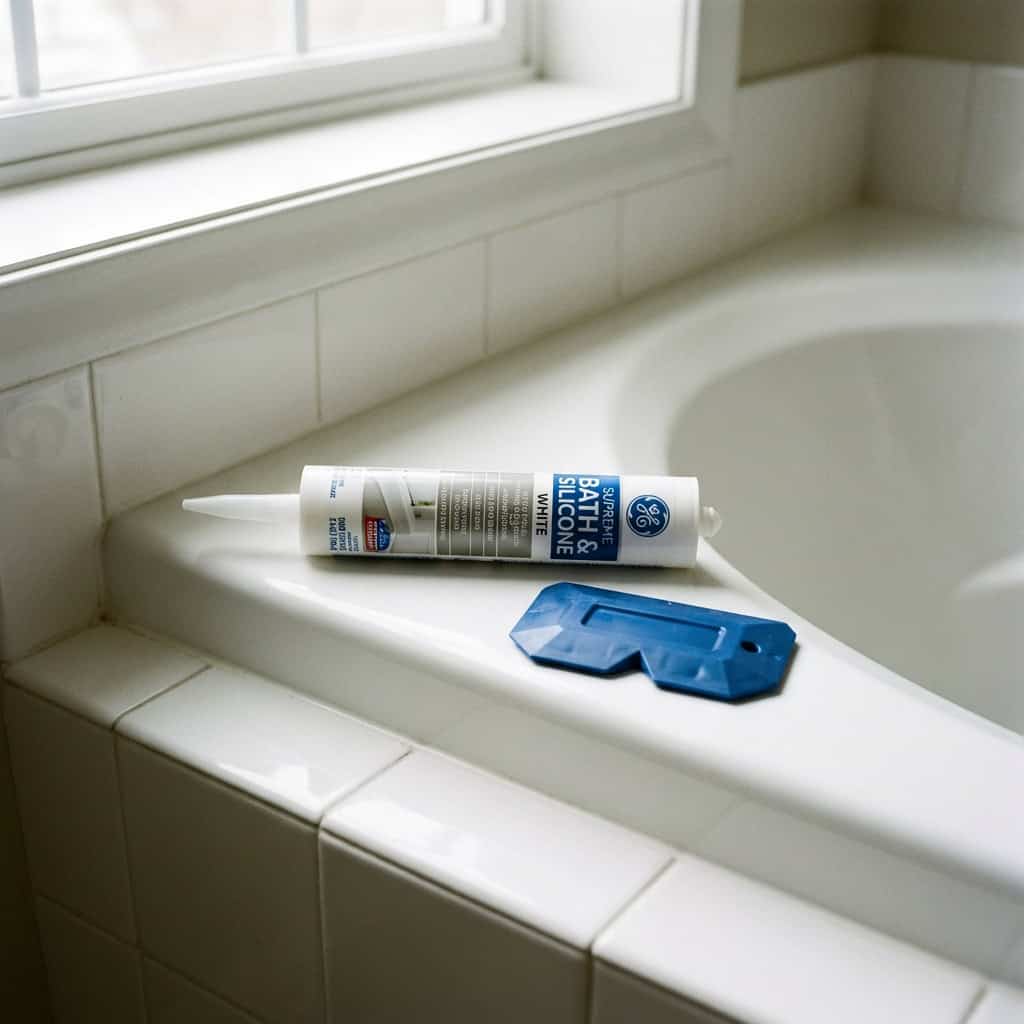
Old, yellowed, cracked caulk makes a bathroom look dirty no matter how hard you clean it.
Strip out the old caulk with a utility knife, clean the surface with rubbing alcohol, and apply a fresh bead of white silicone. Smooth it with a wet fingertip. Let it cure 24 hours.
It costs $5 and takes 30 minutes.
The bathroom will look cleaner than it has in years — not because it’s been cleaned, but because it actually looks new.
10. Paint Your Kitchen Cabinets

This one is a weekend commitment. But the payoff is enormous.
Remove the doors, clean everything with a degreaser (this step matters — paint won’t stick to greasy cabinets), sand lightly, prime, and apply two coats with a foam roller for a smooth finish.
White, off-white, and soft sage green are all solid, timeless choices.
New hardware on top of fresh paint and you’ve got a kitchen that looks like a full renovation — without the full renovation price tag.
11. Add a Board and Batten Accent Wall
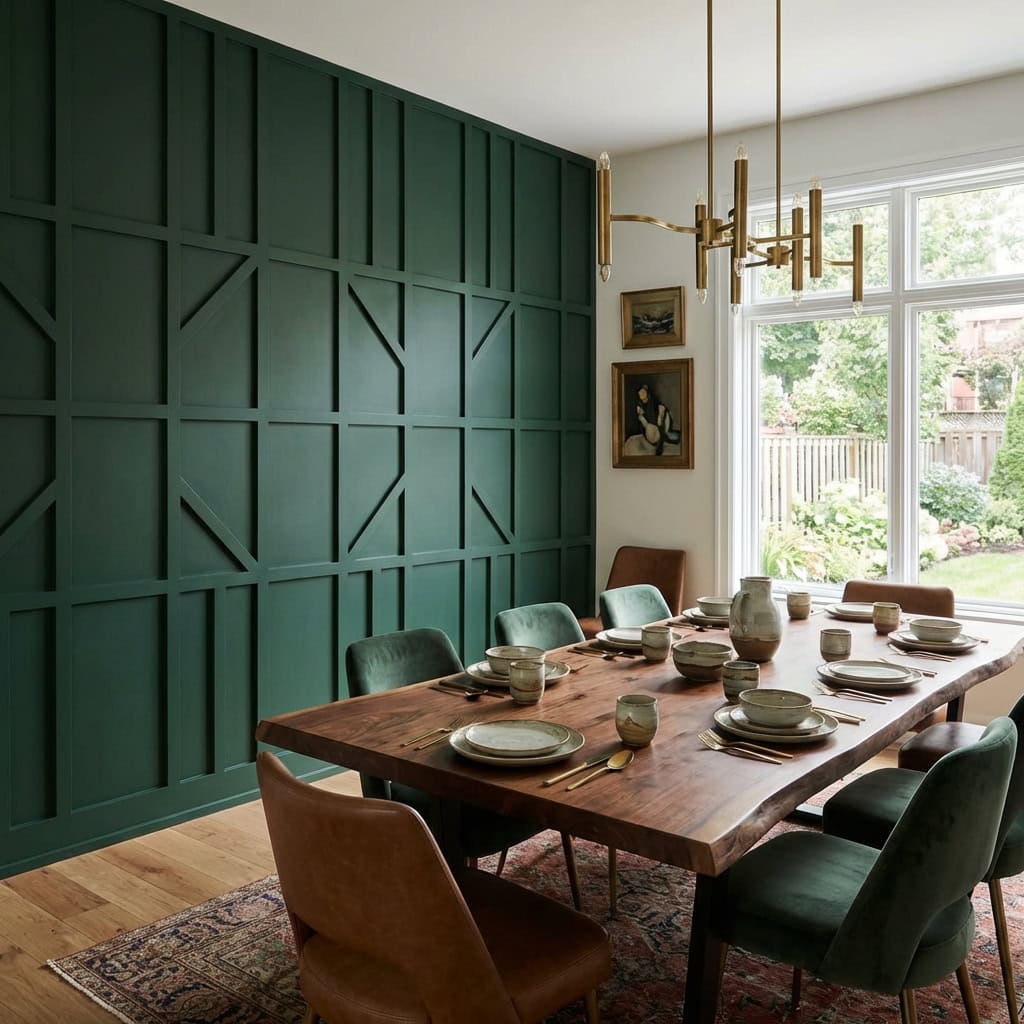
Board and batten looks expensive. It isn’t.
You’re gluing and nailing thin strips of MDF or pine to a wall in a grid pattern, then painting the whole thing one color. The result is a textured, architectural wall that photographs beautifully.
Materials for one wall run about $40-$80 depending on size, and there are countless tutorials online to guide you through the exact process step by step.
Pick one wall in a dining room, entryway, or bedroom. It will become the thing everyone asks about.
12. Install Open Floating Shelves
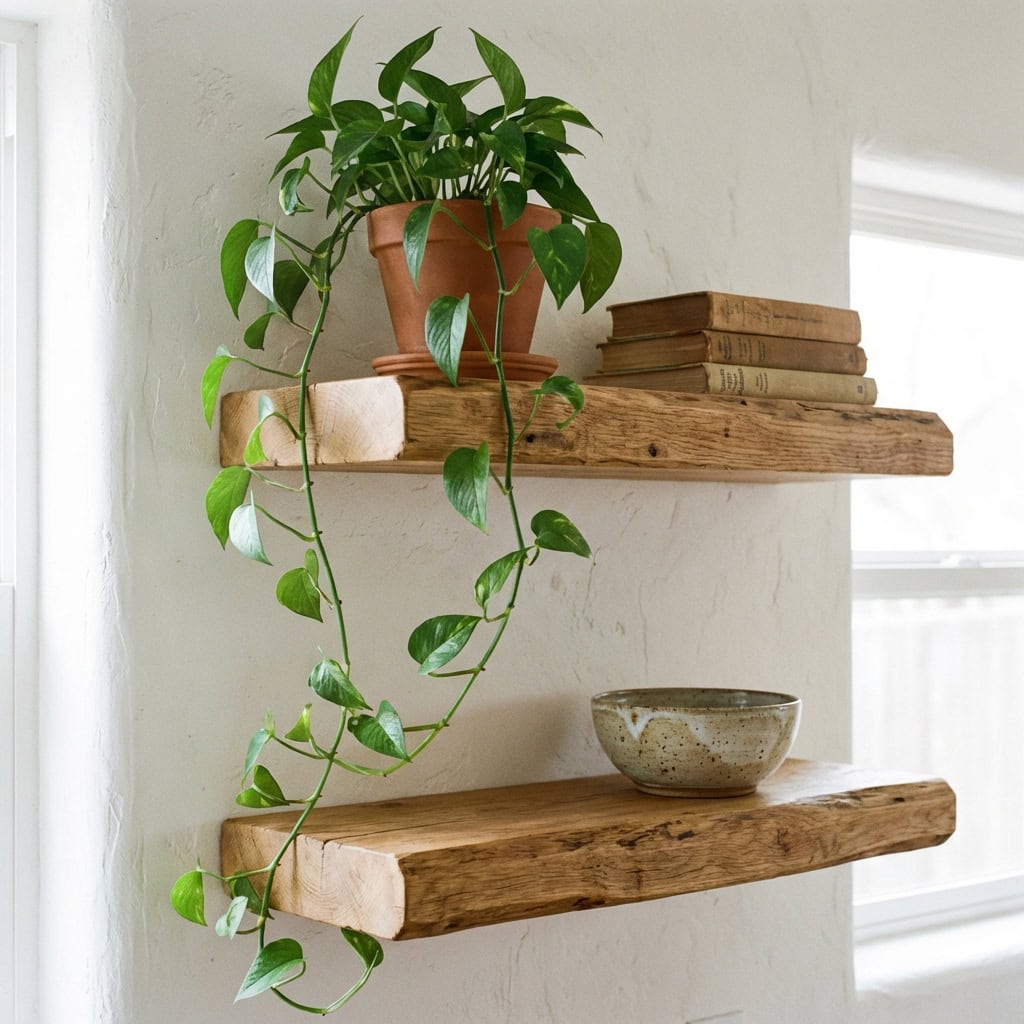
A blank wall is a missed opportunity.
A small grouping of floating shelves gives you a place to display books, plants, and things that show off some personality. They’re easy to install with the right wall anchors or into studs.
The shelves themselves can be as cheap as $15 at IKEA or as beautiful as a thick slab of live-edge wood from a lumber yard.
Style them simply: a few books, a plant, one decorative object. Resist the urge to fill every inch. Breathing room is the point.
13. Upgrade Your Interior Door Hardware

You touch your door knobs 20 times a day without noticing them.
Until they’re nice. Then you notice them every single time.
Replacing cheap hollow-feeling brass ball knobs with lever handles or more substantial knobs in a modern finish costs $8-$20 per door. Start with the most-used doors — bedroom, bathroom, hall closet.
A consistent finish throughout the house creates a quiet cohesion that makes everything feel more intentional.
14. Create a Gallery Wall

A blank wall is just a blank wall. A gallery wall is a statement.
The trick is laying the whole arrangement out on the floor first — sorting the sizes and spacing before a single nail goes in the wall. Mix frame sizes, include at least one larger anchor piece, and don’t stress about perfect symmetry.
Frames from thrift stores, discount retailers, and your own printed photos cost almost nothing.
The result is a wall that actually reflects who you are, rather than whatever was on sale at the furniture store.
15. Add Crown Molding to One Room
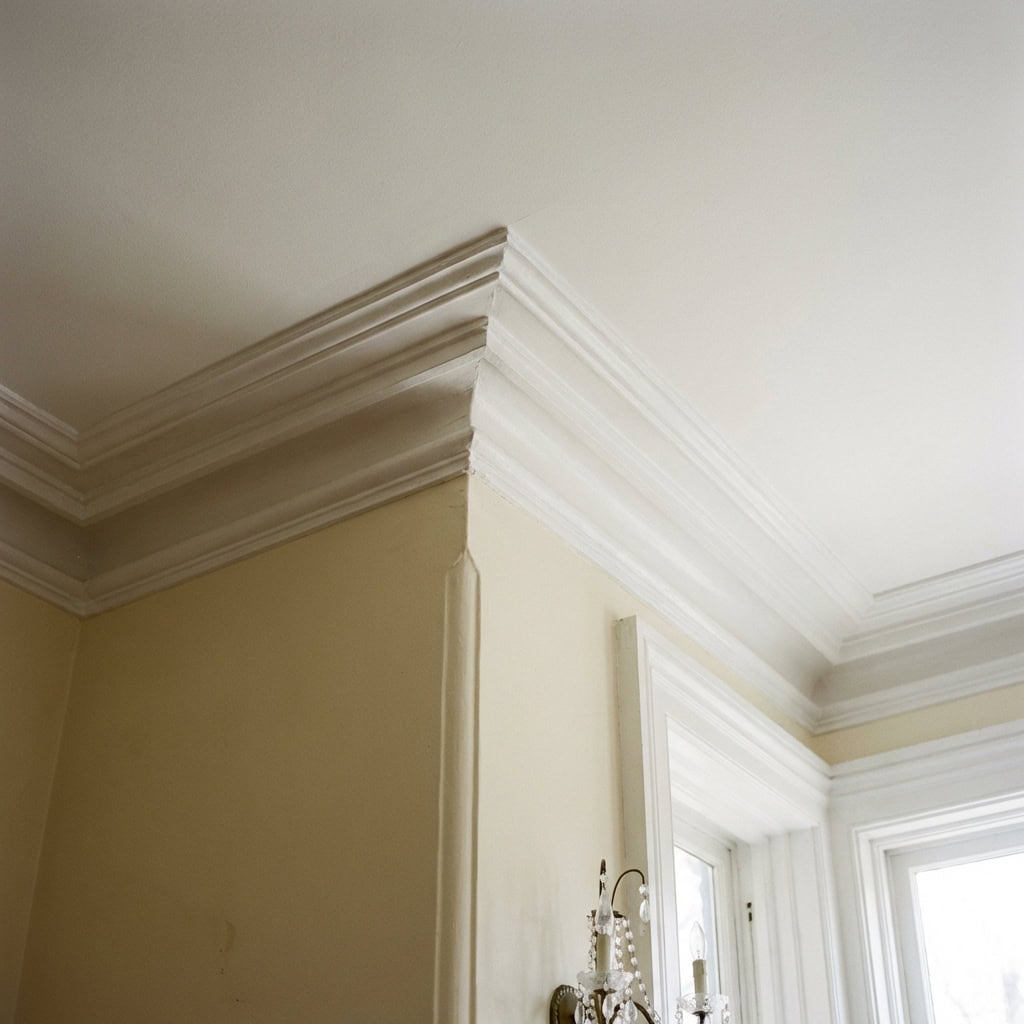
Crown molding is one of those details that makes a room feel finished and expensive — and most people have no idea how approachable it actually is.
Flexible foam crown molding cuts with a hand saw, glues up with construction adhesive, and gets caulked at the seams before painting. No fancy tools required.
Pick one room — the living room or primary bedroom — and do just that one. Materials cost around $50-$80 for an average room.
The difference between a room with crown molding and a room without it is hard to explain. You just feel it.
16. Refinish a Piece of Old Furniture
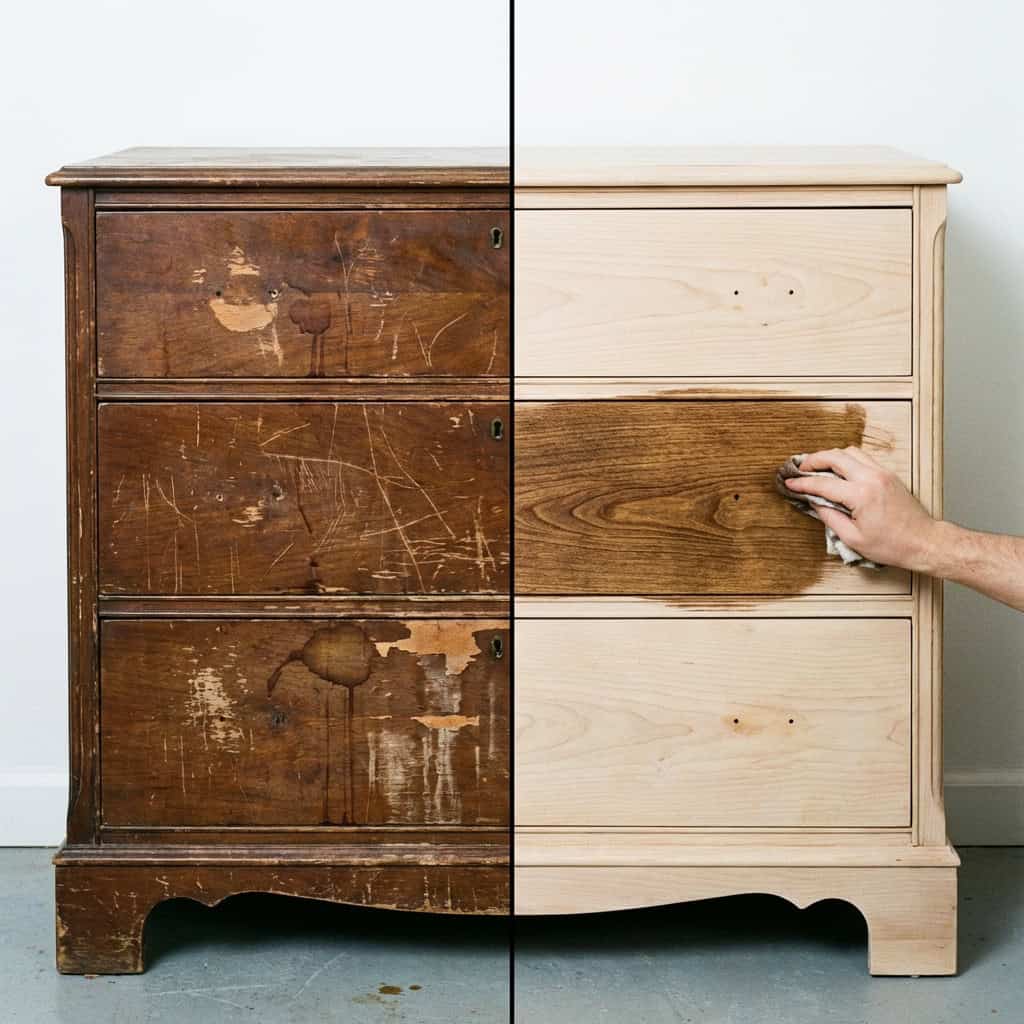
That beat-up dresser or wobbly side table isn’t trash. It’s a project.
Sand it down, apply a fresh stain or a coat of paint in a color that works with your room, add new hardware. You end up with a custom-looking piece for the cost of a can of stain and a set of drawer pulls.
Thrift stores and Facebook Marketplace are full of solid wood pieces people are essentially giving away because they look dated.
To someone with sandpaper and a little vision, they’re diamonds.
17. Add a Coat Rack or Entryway Organizer
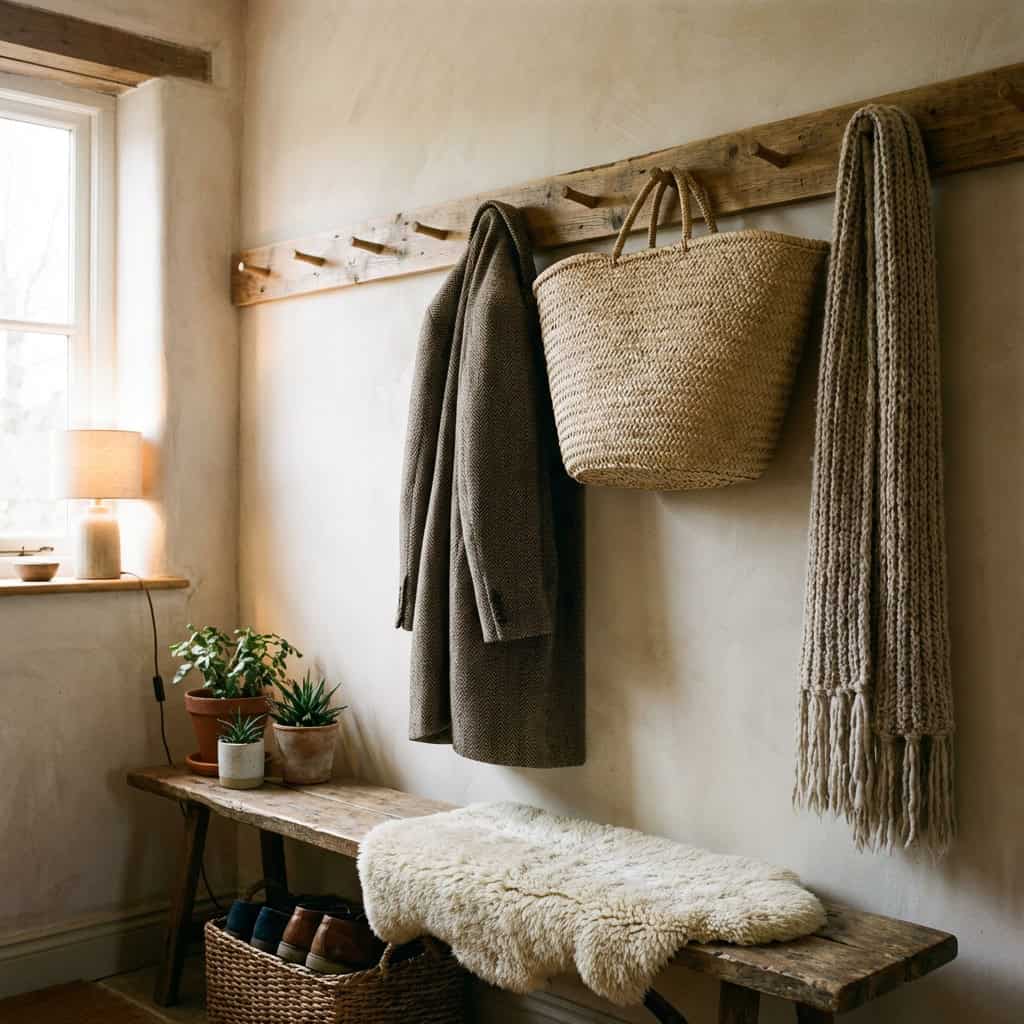
The entryway is the first thing you see when you come home. If it’s currently a pile of shoes and some mail that never gets sorted, that’s not a great start to your evening.
A wall-mounted coat rack with hooks, a small shelf, and a spot for keys transforms a chaotic entry into something that feels welcoming.
Shaker-style peg rails are easy to DIY with a piece of pine and some Shaker pegs from the hardware store. Total cost: under $30.
Your future self, walking in after a long day, will thank you.
18. Try Limewash Paint on One Wall
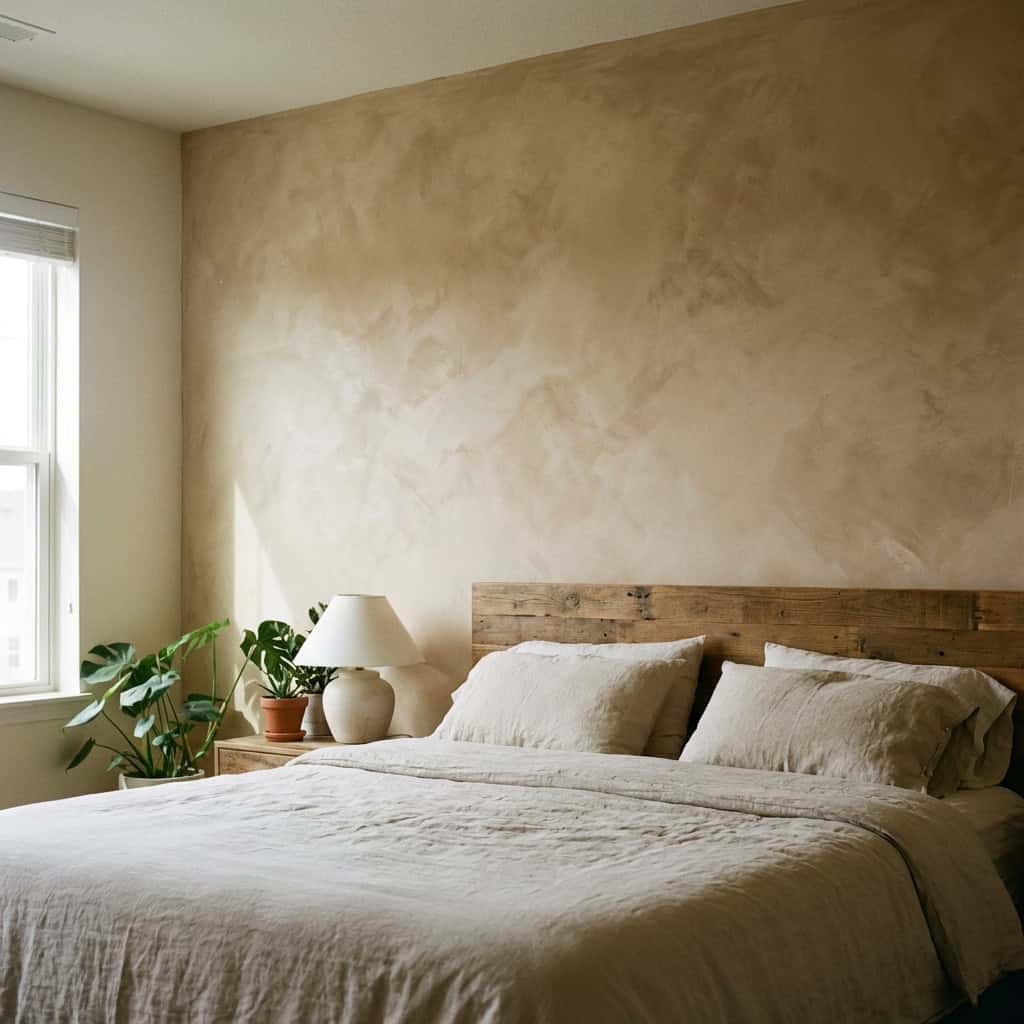
Regular flat paint is fine. Limewash paint is fabulous.
It creates a soft, layered, slightly textured look that adds depth and warmth in a way that standard paint simply can’t. You brush it on in an X pattern and wipe back with a damp cloth to create variation.
Brands like Romabio and Portola Paints make beginner-friendly versions. One accent wall runs about $40-$60 in materials.
It’s the kind of thing guests point at and ask about. In a good way.
19. Paint the Ceiling
Nobody paints the ceiling. That’s exactly why you should.
Most ceilings are covered in the same flat white that went up when the house was built and has been gathering age ever since. A fresh coat of bright white ceiling paint makes the whole room feel cleaner and taller.
For a bolder move: paint the ceiling a soft color. Pale blue in a bedroom. Warm blush in a dining room. It sounds unusual until you see it.
A colored ceiling is one of those design details that makes a space feel genuinely thoughtful rather than just default.
None of these require a contractor, a big loan, or a free month.
Pick two or three, put on a good playlist, and go make your place look fab.