Izzy Swan from Izzy Swan shared the woodworking tip featured in this video.
Izzy demonstrates making a zero clearance insert plate for a table saw using rigid PVC to solve the lip and clearance problems common with hybrid and cabinet saws. The technique produces a flush, tear-out reducing insert that can be adjusted for a snug fit in the saw table.
Watch the full video and subscribe to Izzy Swan:
Design and Purpose
The goal of this project is to create a zero clearance insert that sits flush in saws with a raised lip around the throat plate opening. Using a slightly flexible, machinable material lets the maker match the exact profile of the original insert while improving the cut quality at the blade exit.
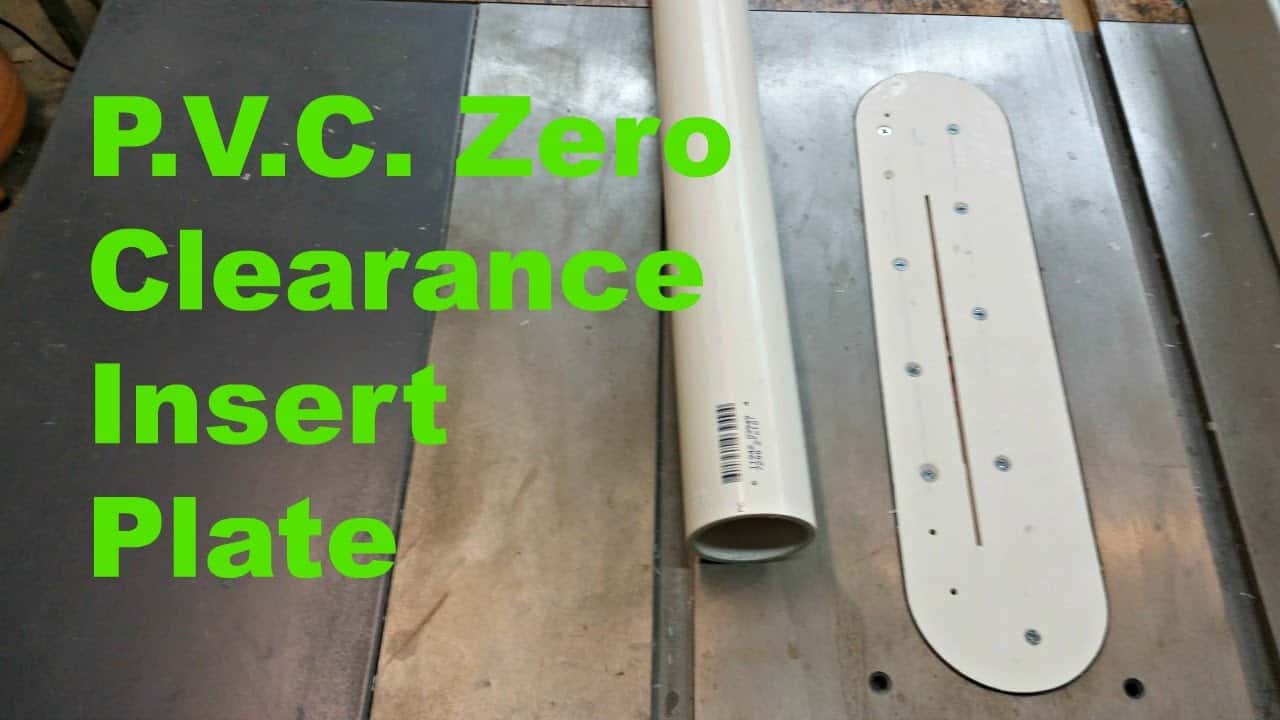
Material Choice and Preparation
Rugged PVC sheet is used as the primary surface because it can be softened, flattened, and machined to a precise thickness that registers against the saw housing. Pairing the PVC with a backing panel provides stability for routing and for fastening to the existing insert plate during shaping.
Molding and Flattening the PVC
The PVC is softened and flattened so it can conform to the plate shape and sit true in the throat opening without interference from the saw lip. Clamping it between flat faces while it cools yields a repeatable, stable blank that machines cleanly with a router and saw blades.
Assembly and Registering the Insert
The PVC blank is temporarily attached to a backing board and the existing insert to transfer the exact perimeter and alignment to the new assembly. After trimming and removing the temporary adhesive, the backing is used to mark and register the small reliefs and fastener locations so the finished insert aligns perfectly in the table.
Fitting the Blade Slot and Fine Adjustment
The blade slot is established with conservative cuts and test blades to ensure the slot clears the intended blade diameter without overcutting the insert. Small adjustment screws and careful sanding let the maker dial in a tight, rattle-free fit so the plate doesn’t move during use.
Why This Approach Works
Using PVC provides a machinable, stable surface that resists chipping and can be routed flush to the original insert for a perfect fit in saws that don’t accept standard plywood inserts. The method is adaptable: different thicknesses or backing materials can be used to suit other saw models or personal preferences.
Overall, this PVC-based insert offers a durable, low-cost way to reduce tear-out and improve safety by closing the gap around the blade. It’s a practical tip that can be adapted for many table saw setups with minimal specialized tools.
Please support Izzy by visiting his website: https://www.izzyswan.com/.

Matt’s Take
These are my personal thoughts and tips based on my own experience in the shop. This section is not written, reviewed, or endorsed by the original creator of this project.
The PVC approach is really clever for saws with those raised lips that make standard zero-clearance inserts such a pain. I’ve always appreciated how rigid PVC machines so cleanly compared to plywood — no splintering or tear-out when you’re routing those precise edges. The heat-forming step is key here; taking time to get that PVC completely flat while it cools makes all the difference in how well it sits in the throat opening.
One thing I really like about this method is how forgiving PVC is if you need to make adjustments. Unlike plywood inserts that can chip out if you try to sand or file them after cutting, PVC responds well to fine-tuning. Just remember to take light passes when routing — PVC can melt if you push too hard or move too fast, which creates a mess on your router bit.
The temporary attachment method using the original insert as a template is smart shop practice. Getting that registration perfect from the start saves so much hassle later. And those adjustment screws are worth their weight in gold — being able to dial in that perfect fit without having to remake the whole insert is exactly the kind of detail that separates a good shop solution from a great one.