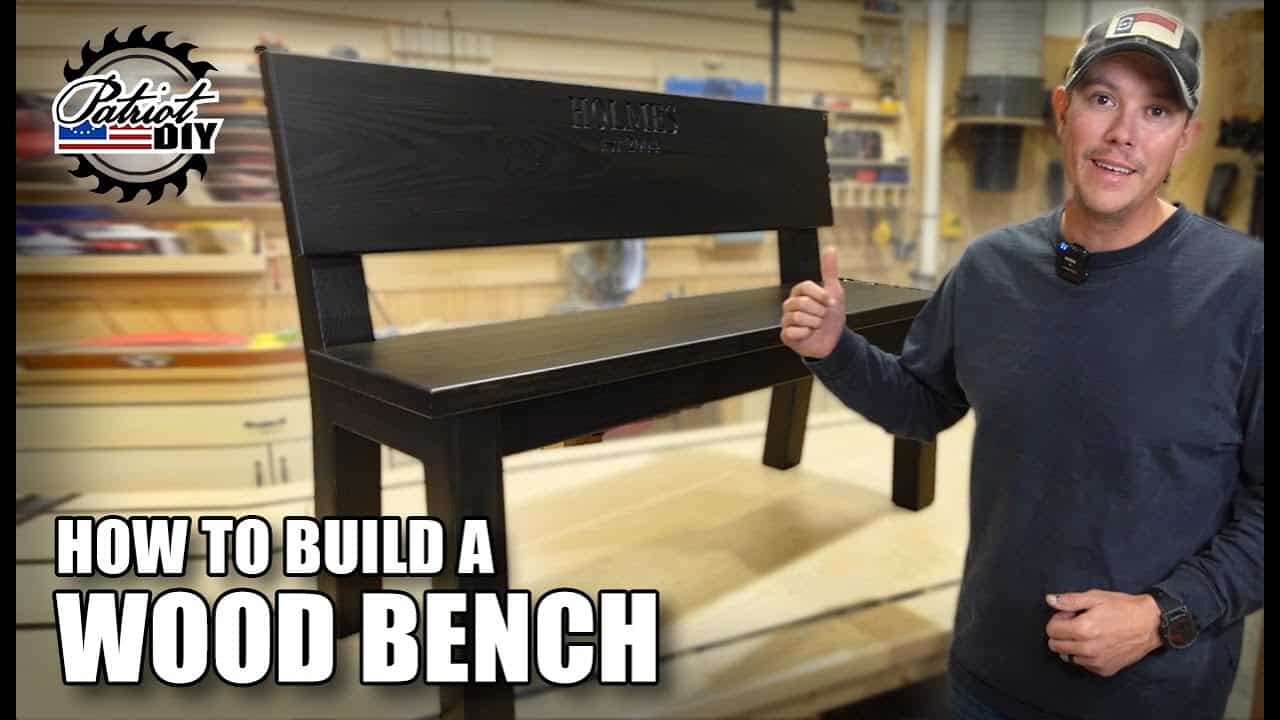
This project was built and designed by Jason from PatriotDIY.
This article summarizes Jason’s approach to making a heavy-duty outdoor bench that balances durability with clean, straightforward construction techniques suitable for beginner to intermediate woodworkers.
Watch the full video and subscribe to PatriotDIY:
Design
The bench is designed as a rugged outdoor piece with simple lines and oversized components for long-term use and stability.
Jason prioritizes proven proportions and functional details — a wide seat and robust leg assemblies — rather than decorative complexity, which makes the project approachable and repeatable.
Lumber Prep
Preparation begins by flattening and squaring boards, then laminating pieces where extra thickness is needed to create stout legs and supports.
Jason emphasizes creating flat, matching glue surfaces and using biscuits to align glued panels so seams disappear and parts fit together cleanly.
Joinery
The build uses a mix of joinery methods—glue-up laminations, biscuits for panel alignment, dowels for structural alignment, and pocket holes where a hidden fastener is ideal.
Jason demonstrates making and fitting dowels, and he uses a self-centering jig to ensure accurate, straight holes, which is a simple technique that raises the overall fit and strength of the piece.
Assembly and Clamping
Frame assembly is straightforward: aprons fasten between leg assemblies and are secured with pocket hole screws to keep the underside tidy and robust.
Jason also shows useful alignment tricks, like using pins to transfer hole locations and clamping against straight edges to maintain perfect registration during glue-up.
Shaping and Final Fit
After the frame is assembled, Jason refines the seat and back contours with a jigsaw, router, and sanding to soften edges and ensure a comfortable profile.
He notches the seat to fit around the rear legs and rounds over edges with a router bit so the bench reads as a single cohesive piece rather than a collection of parts.
Finishing
To avoid blotchiness on pine, Jason applies a pre-stain conditioner before a wipe-on gel stain, which produces a deep color while keeping the grain visible.
Mounting holes are capped with glued dowels and sanded flush for a clean appearance, and hardware for the seat is installed from underneath to keep the top uncluttered.
Why This Build Matters
This bench is an excellent project for learning a range of shop techniques—from milling laminates and accurate dowel work to pocket hole assembly and surface finishing.
The combination of straightforward joinery and attention to fit makes the approach adaptable: the same methods scale up for larger outdoor benches or scale down for small seating and stools.
Conclusion
The project shows how thoughtful material prep and a mix of simple joinery methods can produce a long-lasting, attractive bench without advanced tools or techniques.

Matt’s Take
These are my personal thoughts and tips based on my own experience in the shop. This section is not written, reviewed, or endorsed by the original creator of this project.
The lumber prep phase really sets the tone for the entire build. Taking time to get those glue surfaces perfectly flat and matched pays dividends later — nothing beats the feeling of panels going together without gaps or misalignment. That biscuit joiner work for panel alignment is something I lean on heavily in my own shop, especially when laminating thicker stock like Jason’s doing here for the legs.
One thing I appreciate about this approach is the mix of joinery methods. Each technique serves its purpose — dowels for structural alignment where you need precision, pocket holes where you want clean lines, and those laminated assemblies for the heavy-duty components. It’s a good reminder that you don’t need to stick to just one joinery method for an entire project.
The pre-stain conditioner step is crucial when working with pine. Softwoods like this can get really blotchy without it, turning what should be an even, rich finish into something that looks amateur. Gel stains are forgiving too — they give you more working time and tend to be less streaky than liquid stains, which is especially helpful on a large surface like a bench seat.
This kind of build teaches fundamentals that translate to so many other projects. Master these techniques here, and you’ve got the foundation for everything from dining tables to shop furniture.