This project was built and designed by Nick from Rocky River Woodworks.
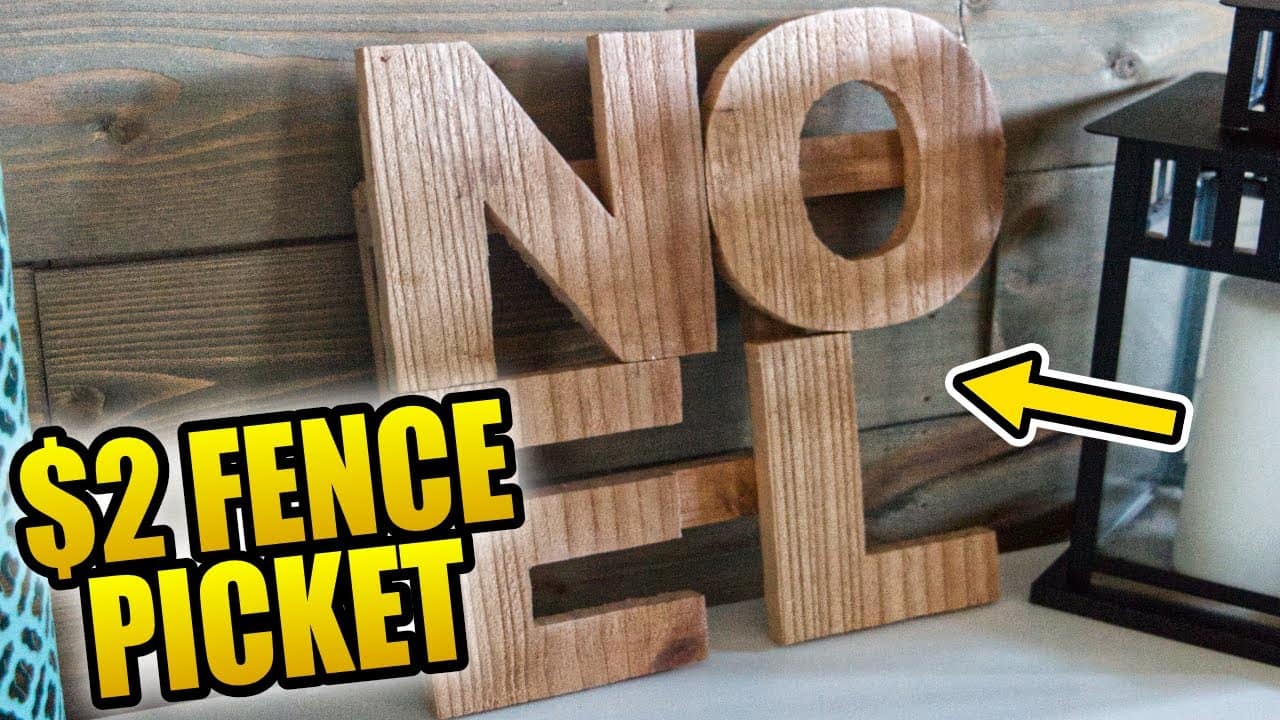
This beginner-friendly project demonstrates how to repurpose a single fence picket into a decorative NOEL sign that can earn around $40 at market. The approach favors simple tools, low-cost materials, and a rustic aesthetic that fits seasonal decor or shelf accents.
Watch the full video and subscribe to Rocky River Woodworks:
Design
The sign uses a straightforward typographic layout—large block letters cut from the face of a fence picket to spell NOEL—creating strong visual impact with minimal parts. The rustic character of the picket is embraced rather than hidden, so small surface imperfections add charm rather than detract from value.
This restrained design is ideal for mass production or quick weekend builds because it relies on a single repeated element and a backer system to join the letters. The aesthetic can be altered easily by choosing different wood or applying paint and stain to match other decor styles.
Prep & Template Use
Templates drive the layout to ensure consistent letter shapes and sizing across builds, and they’re applied to the picket with temporary adhesive for accurate cutting. Using paper templates saves time during layout and keeps the parts repeatable for someone producing multiple signs.
Nick recommends trimming the template to roughly the right size before transferring and suggests using a veneer roller to press the paper down so the adhesive holds during cutting. Removing the paper while the adhesive is still tacky prevents stubborn residue and simplifies the finish stage.
Cutting & Joinery
Key cutting is handled with a bandsaw for the exterior shapes and a jigsaw for internal cuts like the center of the O, while drill holes provide entry points for interior blade work. Taking it slow at the saw and following the template closely reduces the need for aggressive sanding and keeps production time low.
Instead of complicated joinery, the letters are tied together with narrow backer strips glued and brad-nailed at angles to avoid fasteners showing on the front face. This approach creates a rigid assembly quickly and is forgiving for beginners while keeping the rustic look intact.
Shaping & Finishing
Sanding is kept light to preserve the weathered character of the fence picket, focusing on removing adhesive residue and stray paper fibers rather than producing a glass-smooth surface. For builders seeking a cleaner appearance, finer sanding, edge treatments, or different lumber choices will change the final look significantly.
Finishing options are flexible—left raw for a rustic shelf accent, stained for depth, or painted for a holiday-ready piece—so the same build can target different buyers or decor tastes. Nick’s version intentionally leans into cedar’s natural texture and color to maximize the sign’s charm without heavy finishing work.
Mounting & Presentation
The finished sign is intended primarily as a lean-on decorative accent for mantels, shelves, or media consoles, which negates the immediate need for wall hangers. For customers who want a hanging option, simple sawtooth hangers or a loop of twine maintain the rustic theme while adding functionality.
Presentation matters for sales: staging the sign on a mantel or in a holiday vignette helps buyers visualize it in their homes and supports a higher perceived value. Small touches like consistent sizing across multiple pieces and a clean assembly back can speed up sales at markets or online listings.
Why This Build Matters
This project is a strong example of turning inexpensive salvage material into a profitable decorative item through good design and efficient shop workflow. It shows that thoughtful use of templates, simple joinery, and intentional finishing choices can yield repeatable, sellable products for makers at any skill level.
The techniques demonstrated are adaptable: the same workflow applies to other words, sizes, or styles, and builders can scale production by refining template application and cutting steps. For makers seeking quick-turn, low-cost inventory items, this sign balances craftsmanship with straightforward execution.
Please support Nick by visiting his website here: https://www.rockyriverwoodworks.com/.

Matt’s Take
These are my personal thoughts and tips based on my own experience in the shop. This section is not written, reviewed, or endorsed by the original creator of this project.
This type of project really showcases the beauty of working with cedar fence pickets—they’re affordable, readily available, and already have that weathered character that customers love. One thing I appreciate about Nick’s approach is how he leans into the rustic imperfections rather than fighting them. When you’re working with salvaged or weathered lumber, those little dings and surface variations become features, not flaws.
The template system is smart for anyone looking to make multiples. I’d suggest making your templates from thin cardboard or hardboard instead of paper if you plan to reuse them—they’ll hold up better through multiple projects and give you cleaner lines. A spray adhesive works great for temporary mounting, but test it on a scrap first since different woods can react differently to adhesives.
Safety-wise, take your time with those interior cuts on the “O.” Drilling relief holes at the corners before jigsawing helps prevent binding and gives you better control. And when you’re brad nailing those backer strips, pre-drilling pilot holes will prevent splitting, especially near the edges of thin stock.
The pricing potential Nick mentions is realistic for holiday decor. Simple projects like this prove that good design and clean execution can turn a $3 fence picket into something that sells for $40. Sometimes the best woodworking projects are the ones that don’t overthink it.