Norman Pirollo from WoodSkills shared the woodworking tip featured in this video.
The video walks through a practical approach to making simple, strong drawers using rabbet joinery and glue as the only reinforcement, with emphasis on fit, glue management, and final trimming to the cabinet opening.
Watch the full video and subscribe to WoodSkills:
Design and Purpose
The approach favors simplicity and reliability: rabbets increase glue-to-wood contact and produce very strong corner joints without mechanical fasteners.
Norman frames the method as adaptable to both router-based and hand-tool workflows, making it suitable for a range of shop setups and skill levels.
Preparation and Fit
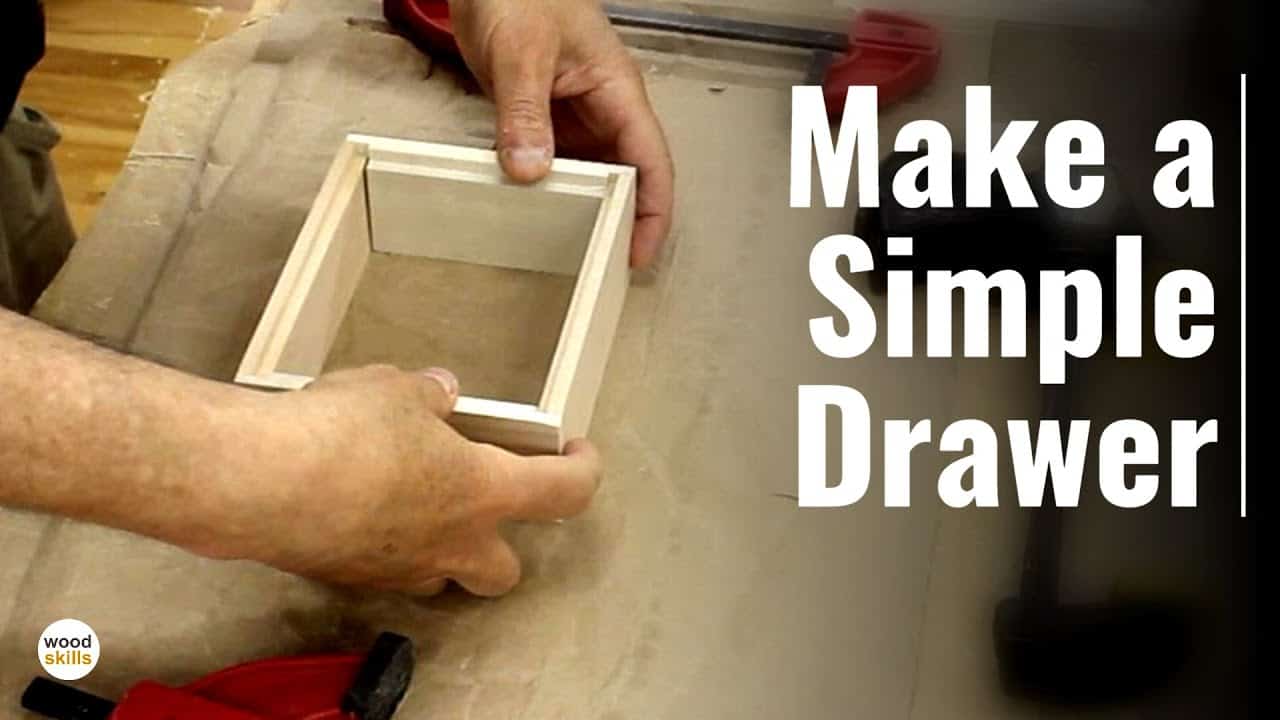
Careful dry fitting is presented as the most important step before any glue touches the parts, with all clamps staged and ready to avoid rushed decisions during glue-up.
Parts are intentionally left slightly oversized so the drawer can be trimmed and fine-tuned to its compartment after assembly, ensuring a precise final fit.
Rabbet Joinery and Glue Technique
Instead of slathering glue at the last minute, Norman sizes the end grain and rabbet surfaces first so the porous ends won’t absorb all the glue and starve the joint.
Glue is applied to both the interior rabbet and the exterior mating surfaces, and excess squeeze-out is removed once it reaches a rubbery consistency to keep cleanup manageable.
Clamping and Squaring
Clamping strategy matters: the drawer is clamped with the top up so any squeeze-out drips toward the bottom and is easier to clean, and clamps are adjusted until the assembly is square.
Diagonal measurements are used to verify squareness before the glue fully sets, and slight adjustments are made to prevent skewed assemblies that can require disassembly and repair.
Bottom Panel and Final Fit
The drawer bottom is made from veneered plywood and is fitted into the bottom rabbet, glued in place to add stiffness and stability to the box.
The assembled drawer is cleaned and then trimmed to match the cabinet opening, using the extra material left during glue-up as allowance for a perfect final adjustment.
Lessons and Adaptations
The workflow highlights key shop habits: test-fit thoroughly, size end grain, control squeeze-out, and check for square—habits that reduce costly mistakes and rework.
These techniques are versatile and can be adapted for different joinery tools, plywood bottoms, or drawer styles while retaining the same focus on fit and glue management.
Watch the full video and subscribe to WoodSkills:

Matt’s Take
These are my personal thoughts and tips based on my own experience in the shop. This section is not written, reviewed, or endorsed by the original creator of this project.
Rabbet joints are one of those techniques that look simple but really reward good execution. The strength comes from all that extra glue surface area compared to a butt joint, and when you get the fit right, they practically clamp themselves together.
The sizing technique Norman shows is a game-changer for end grain joints. That first coat of glue acts like a primer, sealing those thirsty wood fibers so your actual joint doesn’t get starved. I keep a small brush just for this – makes it easy to work glue into all those little pores before the real assembly.
Building drawers oversized is one of those “trust the process” moves that feels wrong until you try it. Having that extra material gives you permission to get the joinery right without stressing about perfect measurements. You can always trim to fit, but you can’t add wood back once it’s cut short. Plus, hand-planing those final surfaces after assembly often gives you a better fit than trying to cut everything perfect from the start.
That squeeze-out timing tip is worth remembering for any glue-up. Wet glue just smears around and makes a mess, but waiting for it to get rubbery means it peels off clean and saves you a lot of sanding later.