Jodee from Inspire Woodcraft shared the woodworking tip featured in this video.
The video demonstrates a reliable approach to get a vibrant white on a shou sugi ban–inspired finish by combining charring, aggressive brushing, careful staining, and a steel wool polishing technique.
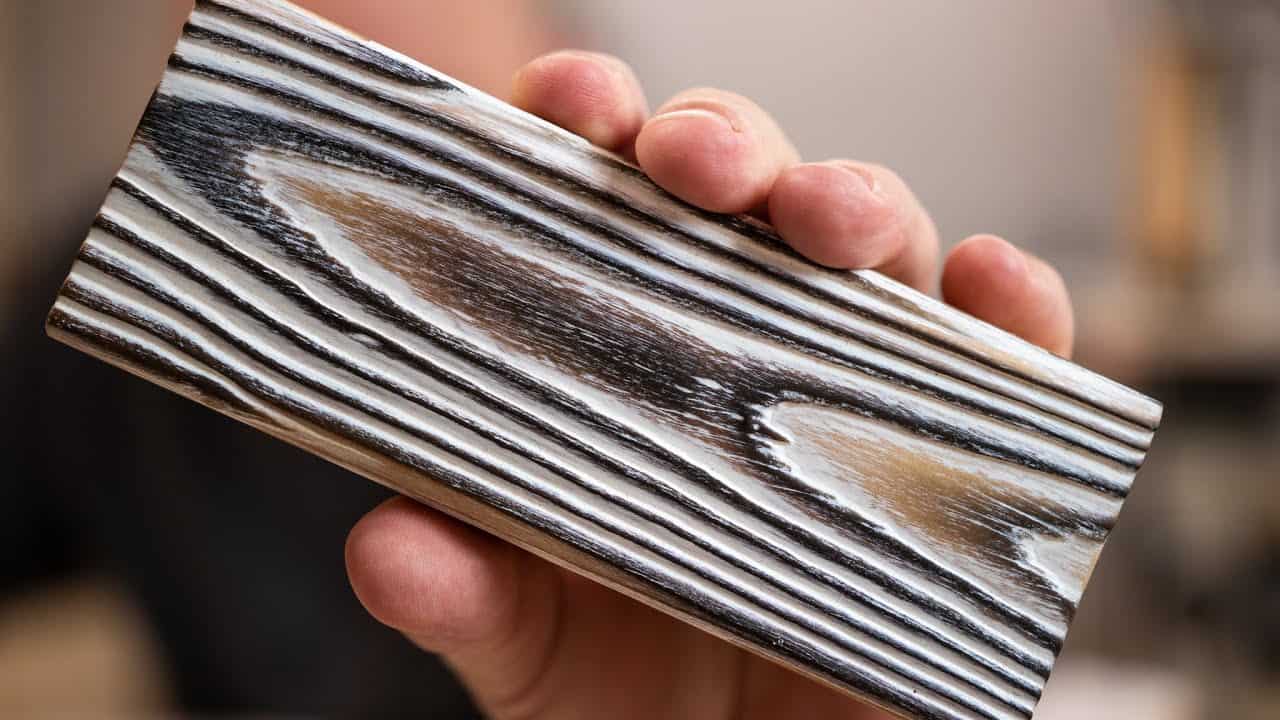
The method focuses on pushing stain into the low, dug-out springwood while removing stain from the raised charred ridges to maximize contrast.
Watch the full video and subscribe to Inspire Woodcraft:
Overview
The core idea is simple: char the surface to blacken the hard grain, brush back into the softer springwood to reveal raw wood, saturate with antique white stain, and then selectively remove the top layer so white remains in the valleys.
This produces strong black-and-white contrast and a dramatic three-tone effect when some hard grain is left unburned.
Burning and Grain Selection
Jodee emphasizes picking lumber with a pronounced springwood/heartwood contrast so the burning creates distinct ridges and valleys. A small propane torch is used to char the face; the hard grain blackens and stays dark while the softer areas can be brushed back to raw wood.
Brushing: Brushes, Grits, and Technique
The brushing stage determines how deep the valleys go and how much raw wood is exposed, so Jodee recommends abrasive flap brushes in multiple grits to control removal.
Starting with a coarse flap (about 80 grit) then moving to finer grits (120 then 220) lets the brush dig in and then polish the raised ridges for a refined look.
Brush condition matters: newer, longer bristles flex and scoop better, while worn brushes with short bristles tend to tear and leave more tooling marks. Adjust the brush choice and brushing direction based on the grain so the brush skips over pools of pulled stain rather than scooping them out.
Staining White: Flooding vs Wiping
White behaves differently than other colors because it often looks transparent and less vibrant if it only penetrates the wood. Jodee’s recommended approach is to flood the surface with a thin antique white stain, then let it fully cure overnight instead of aggressively wiping it back while still wet.
Wiping while wet tends to drag pooled stain across peaks and valleys, creating streaks and diminishing contrast, whereas allowing the stain to set preserves the white in the low points where it creates the most impact.
Steel Wool Polishing Trick
After the stain fully cures, Jodee uses steel wool to shear off the top layer of stain from the peaks while leaving the pooled white in the valleys intact.
Coarser grades (for quicker results) or finer grades (for subtle refinement) can be used depending on how aggressively the tops should be reduced.
Work with the grain and pick a directional approach so the steel wool skips over pools rather than scooping them; use small, controlled motions around knots and ridges to reveal highlights without removing the dark char completely.
Tips for Practice and Experimentation
Testing on multiple short scrap pieces is the fastest way to dial in brush grit, burn intensity, stain saturation, and steel wool grade.
Jodee suggests cutting several test pieces, trying different brush wear conditions, and varying how much stain is wiped versus flooded to understand how each variable affects the final contrast.
The same steel wool method can be adapted for lighter dyes or colors that sit more on the surface, and the overall approach scales to different brushing techniques and wood species with some experimentation.
Conclusion
This technique matters because it turns a finicky, often-transparent white finish into a bold, high-contrast look that highlights texture and grain. The workflow—char, brush, flood with white, cure, and polish—gives dependable results once a few tests tune the variables for a given wood and brush condition.
Support Jodee by visiting his online store here: https://inspirewoodcraft.com/collections/all.

Matt’s Take
These are my personal thoughts and tips based on my own experience in the shop. This section is not written, reviewed, or endorsed by the original creator of this project.
The steel wool polishing step is really the game-changer here. I’ve seen so many attempts at white shou sugi ban where the white just looks muddy or washed out, and it’s usually because people try to control everything while the stain is still wet. Letting that stain fully cure overnight takes patience, but it’s what allows you to selectively remove material from just the high points without disturbing the pooled white in the valleys.
One thing worth noting about the flap brushes — they can load up with char dust pretty quickly, which reduces their cutting ability. I keep a wire brush handy to clean out the bristles between passes. Also, when you’re burning, work in a well-ventilated area or outdoors if possible. That char dust isn’t something you want to be breathing, and a simple dust mask goes a long way.
The grain selection point really can’t be overstated. Quarter-sawn lumber often gives the most dramatic results because you get those consistent, parallel grain lines that create uniform ridges and valleys. Flat-sawn pieces work too, but the cathedral grain patterns can make it trickier to get even brushing across the whole surface.
Testing on scraps is absolutely critical with this technique. Every piece of lumber burns differently, and even small variations in torch distance or speed can completely change how the brushing stage goes. Cut yourself five or six test pieces and treat it like a science experiment — you’ll save yourself a lot of frustration on the actual project.