
Some of the best woodworking tricks I’ve learned didn’t come from books or YouTube — they came from watching my grandfather and dad work around their shops.
These were the little habits and clever fixes they used without thinking, but they made a big difference in how smoothly a project came together.
They’ve been around for decades, and they still work just as well today — no matter how many fancy new tools hit the market.
1. Use a Nail as a Tiny Drill Bit
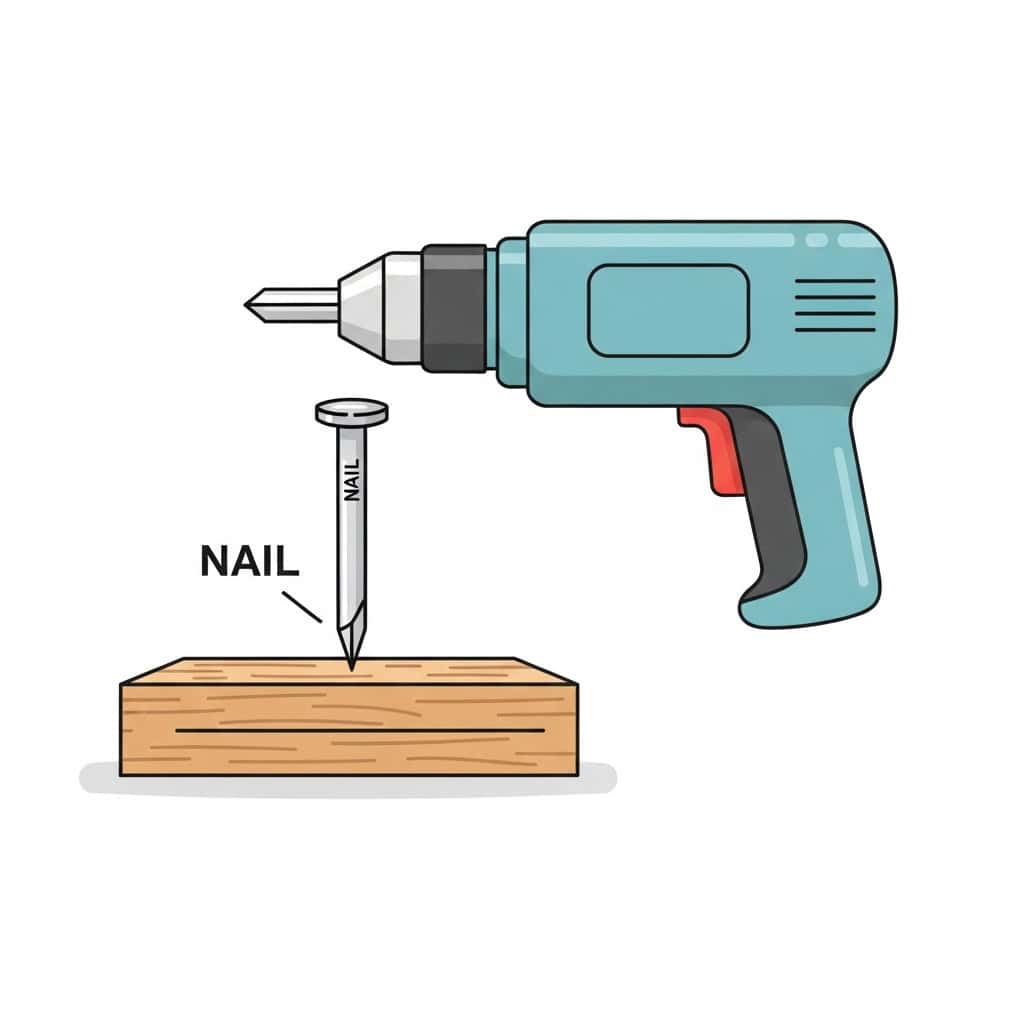
When I need a tiny pilot hole and don’t have the right bit, I chuck a small finish nail into the drill. I file the tip to a point so it cuts instead of tears.
It’s perfect for softwoods, thin stock, and small hardware like cup hooks or picture hangers. I go slow and keep pressure light to avoid heat and bending.
For a cleaner hole, I tap a quick starter dimple with an awl before drilling. I also rub a little wax on the nail so it spins easier and is less likely to grab.
2. Use Blue Tape for a Hinge Mortise Template
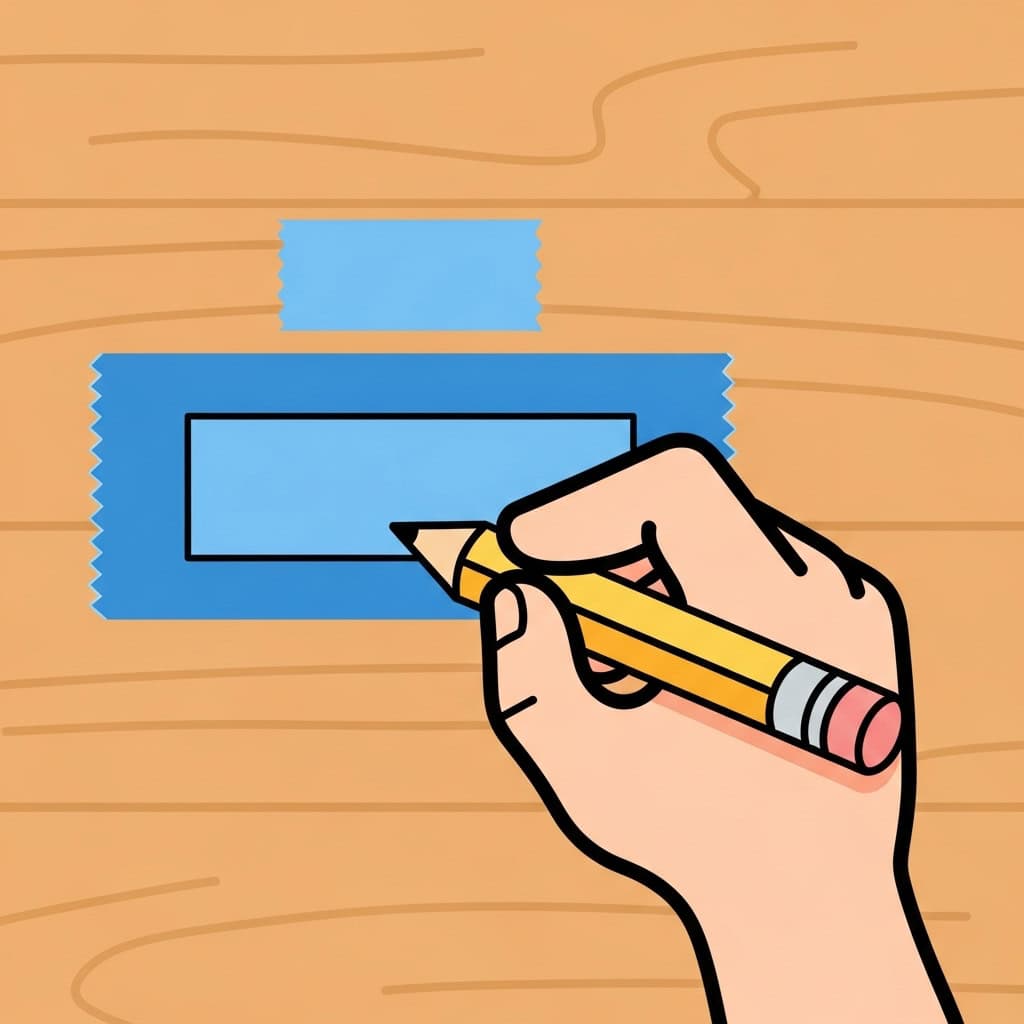
I stick a strip of painter’s tape where the hinge will go, then place the hinge on top and trace around it with a sharp pencil or marking knife.
After that, I peel away the tape inside the lines, leaving the rest in place.
It’s a clean, no-mess way to mark the exact outline for chiseling. The tape also helps prevent tear-out along the edges, so the mortise looks crisp when the hinge is installed.
3. Use Chalk to Stop Belt Sander Clogging
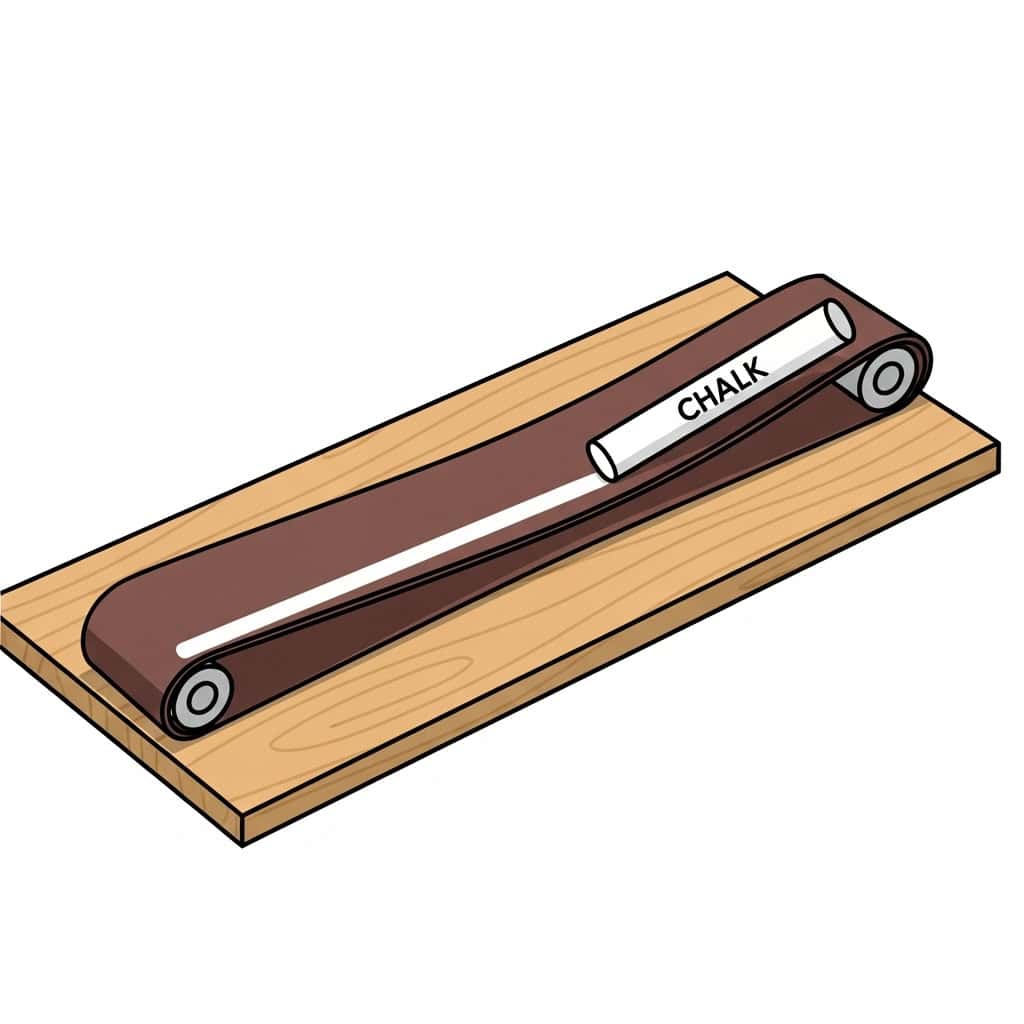
Before sanding resinous wood or paint, I rub a piece of plain white chalk over the belt.
The chalk acts like a dry lubricant, keeping sawdust and gunk from sticking to the abrasive.
It’s a quick trick that makes the belt last longer and keeps sanding more consistent. When I’m done, I just tap or vacuum off the excess dust.
4. Wrap a Rubber Band Around a Stripped Screw
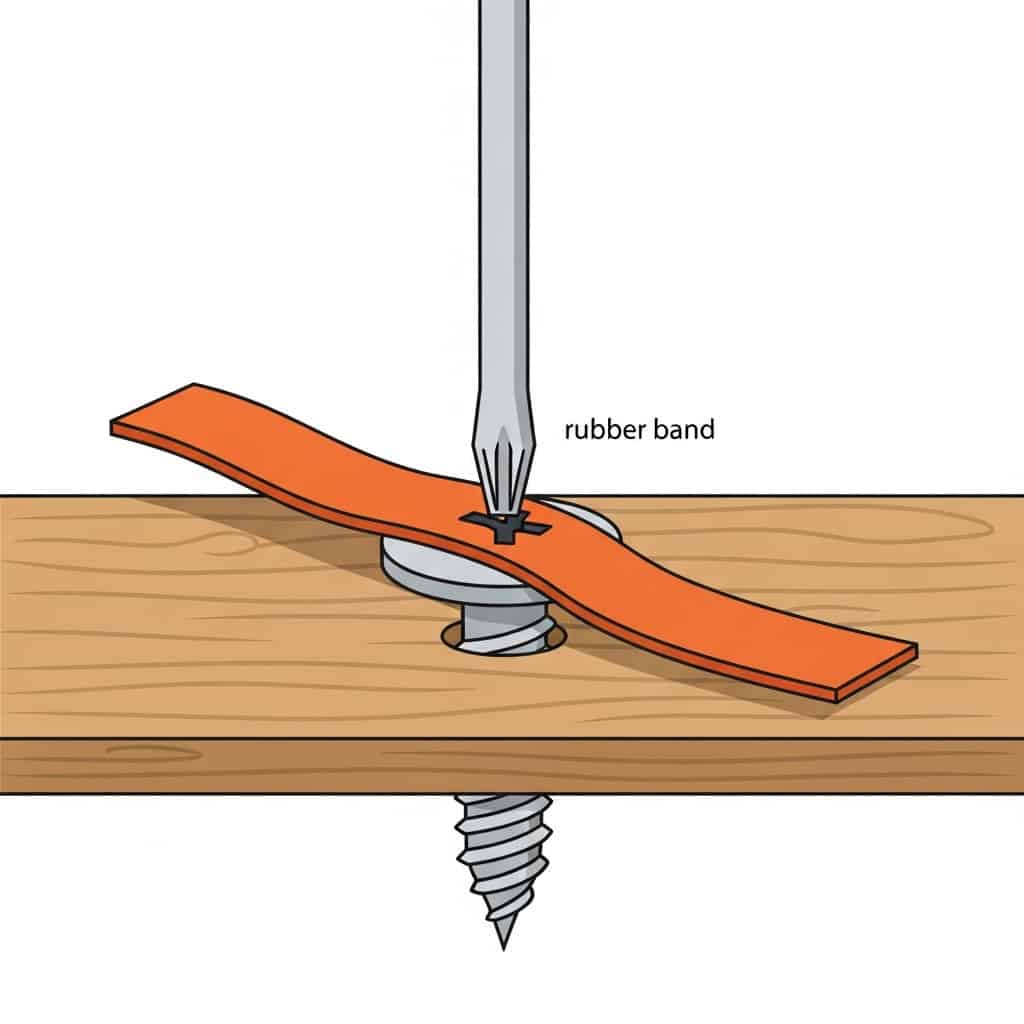
When a screw head is stripped and my screwdriver just spins, I lay a wide rubber band flat over the head before inserting the driver. The rubber grips the metal, giving me just enough bite to back the screw out.
It’s a quick save that works best with slower turns and steady pressure. I keep a few rubber bands in my toolbox just for this.
5. Keep a “Story Stick”
Instead of measuring each piece of a project separately, I mark all the important dimensions on one stick.
Then I use that stick to transfer measurements directly to my workpieces.
It’s faster, more accurate, and eliminates the little errors that can creep in when reading a tape measure over and over.
6. Save Old Toothbrushes for Glue Cleanup
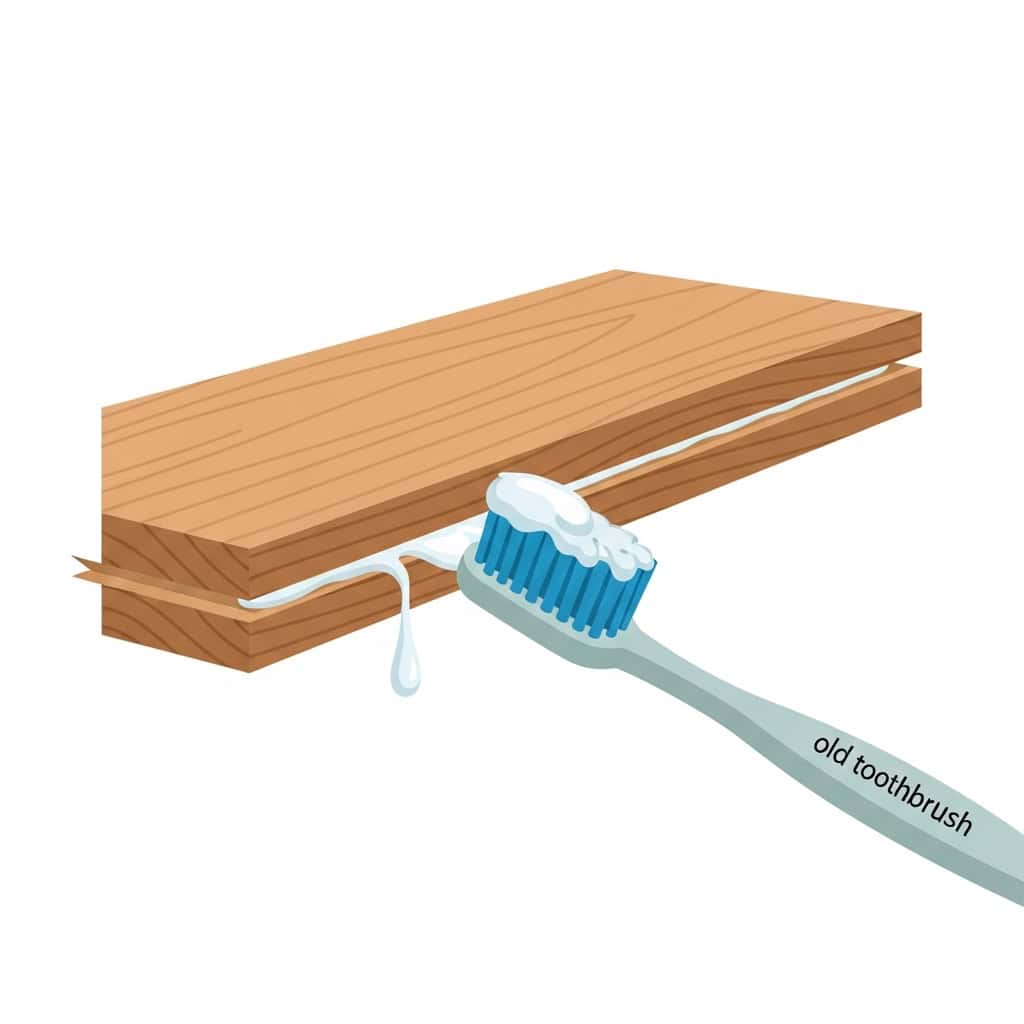
When glue squeezes out of a joint, I grab an old toothbrush and a little water.
A quick scrub along the seam removes the excess before it dries and hardens.
It keeps the joint clean and saves a lot of sanding later. I keep a few brushes in the shop just for this job.
7. Beeswax for Drawer Slides
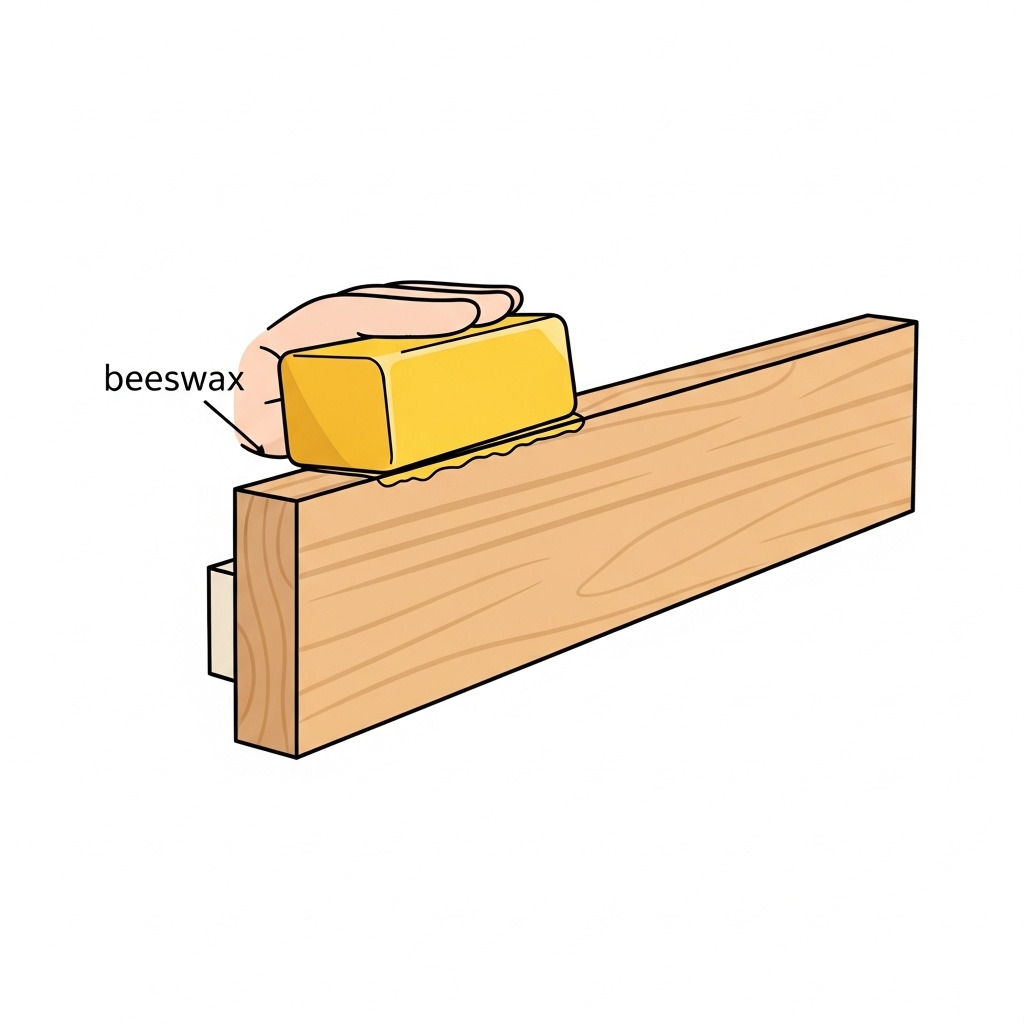
If a wooden drawer sticks or squeaks, I rub a little beeswax along the runners. It makes the drawer glide smoothly and silently.
Candle wax works in a pinch, but beeswax lasts longer and smells better. It’s a quick fix that can make an old piece feel brand new.
8. Use a Handsaw Kerf as a Marking Guide
When I need to cut several pieces the same size, I make the first cut, then use that saw kerf as a guide for marking the rest.
It ensures every cut is spaced exactly the same.
This works especially well for repeat cuts in trim or small parts where precision matters.
9. Blue Tape for Clean Crosscuts
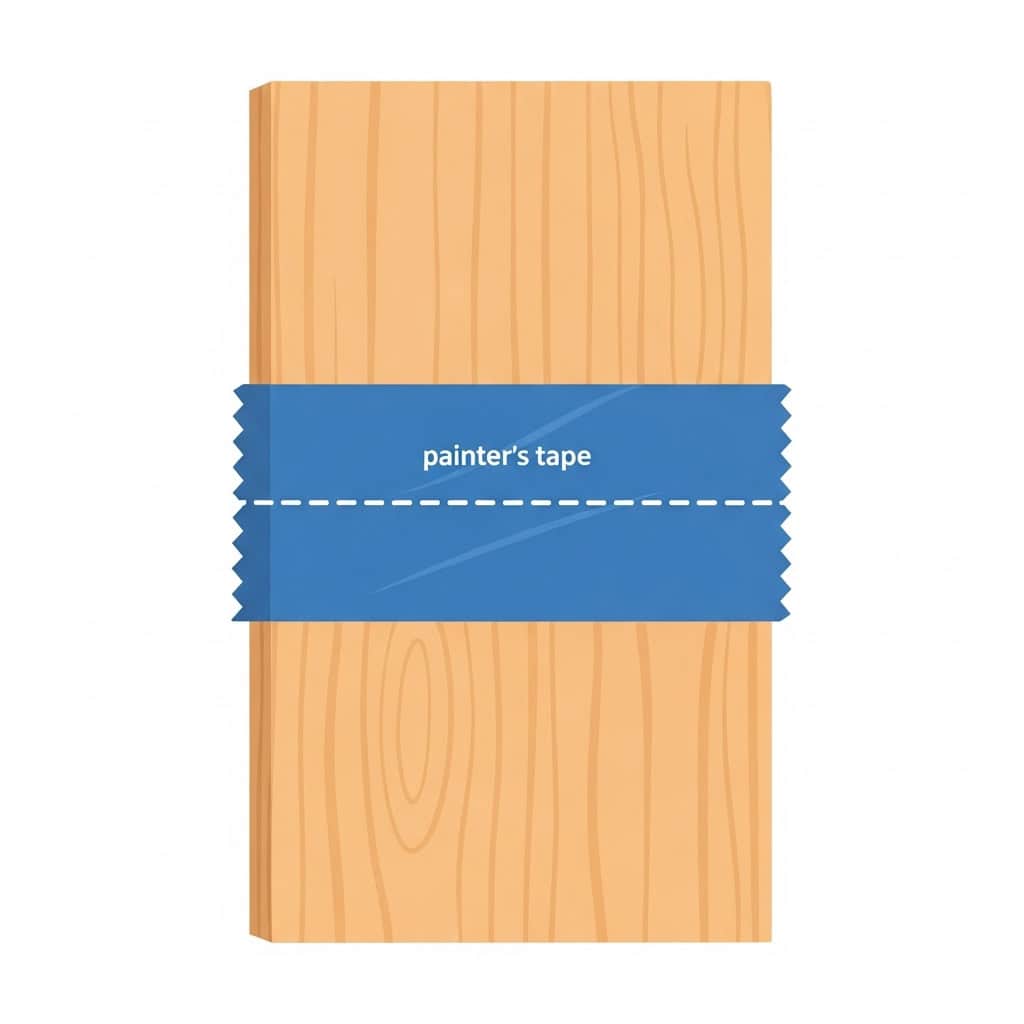
Before cutting plywood or veneered boards, I lay painter’s tape over the cut line.
It helps hold the fibers in place so the saw blade doesn’t tear them out.
After the cut, I peel the tape away for a crisp, clean edge.
10. Rub Screws on Soap or Wax

When driving screws into hardwood, I rub the threads on a bar of soap or a block of wax first.
It makes them go in easier and reduces the chance of splitting the wood.
This is especially helpful for long screws or when working without a pilot hole.
11. Use a Handsaw as a Straightedge

If I don’t have a long straightedge handy, I lay my handsaw flat and use the spine to draw a straight line. The back of the saw is usually straight enough for marking cuts or layout lines.
It’s a quick fix that works well for rough layouts or when working away from the shop.
12. Clamp Boards Together to Match Cuts
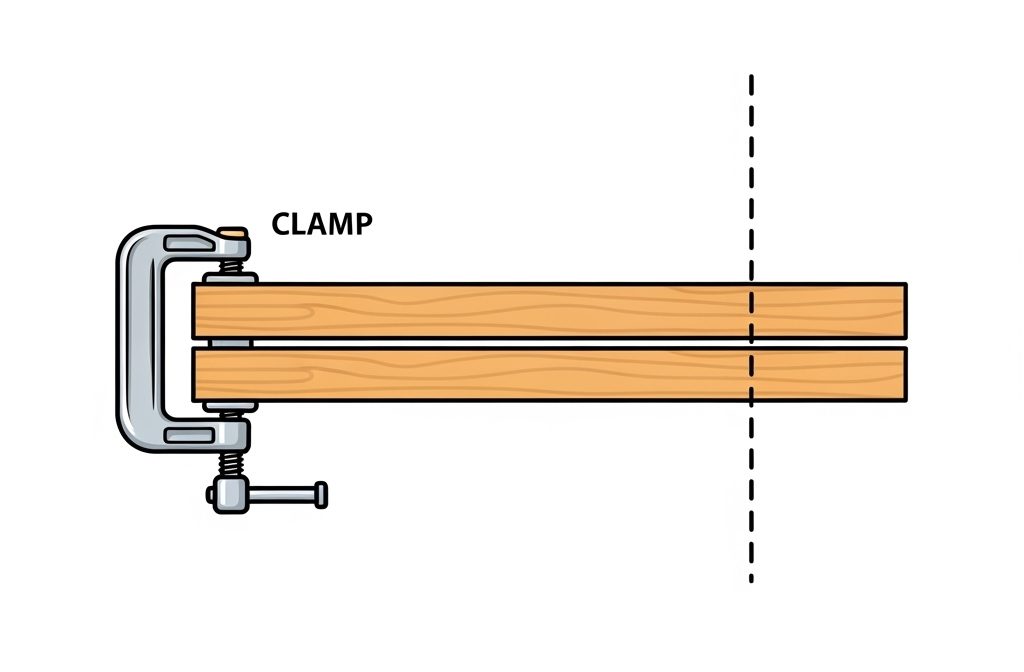
When I need two or more pieces exactly the same length, I stack them together and clamp them tight before cutting.
This way, one cut makes them all match perfectly.
It’s a classic time-saver and helps keep projects looking uniform.
13. Mark Both Sides of a Cut
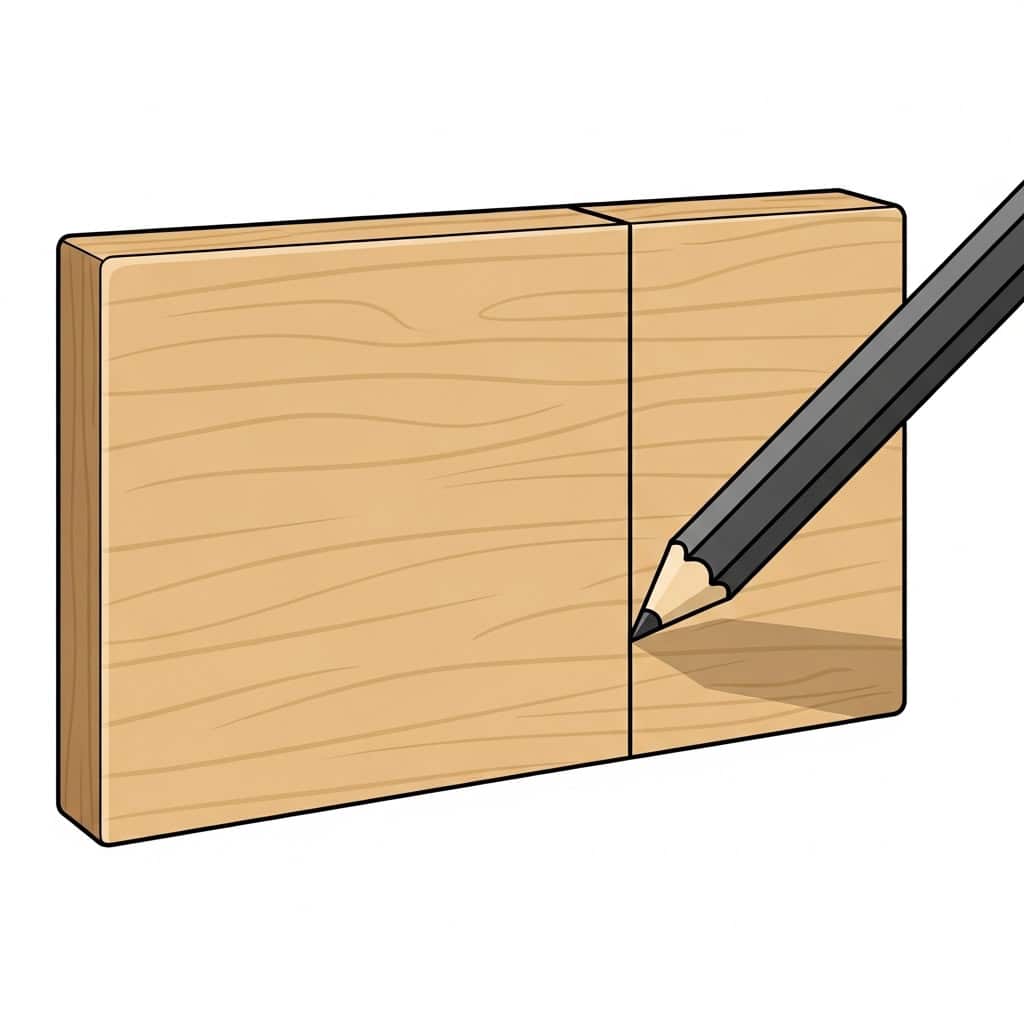
When cutting by hand, I mark the cut line on both the front and back of the board.
This makes it easier to keep the saw tracking straight all the way through.
It’s a small habit that can make a big difference in accuracy.
14. Keep Sandpaper in an Accordion Folder

Storing sandpaper in an accordion-style file folder keeps each grit organized and easy to find.
I label each pocket so I can grab the grit I need without sorting through a messy pile.
It also keeps the sheets flat and clean, so they last longer.
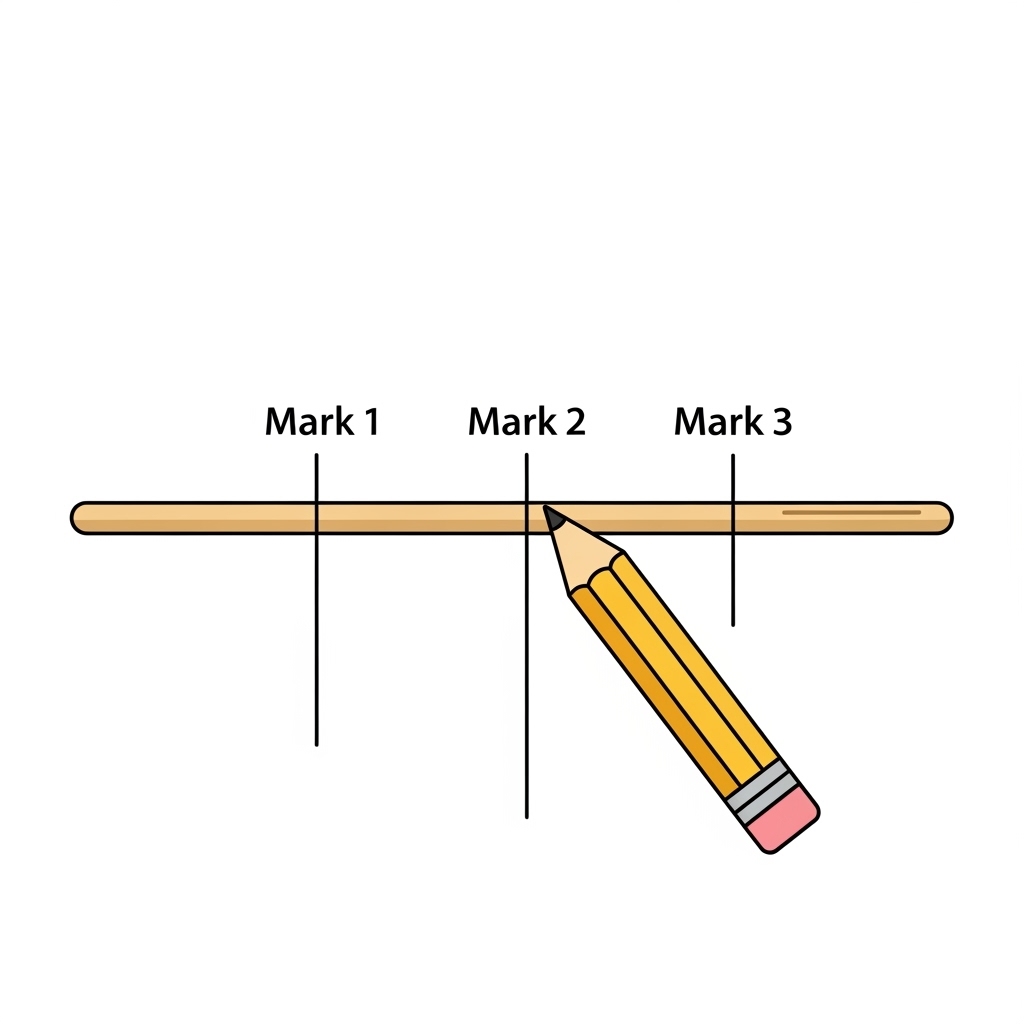
15. Use a Pencil as a Depth Gauge
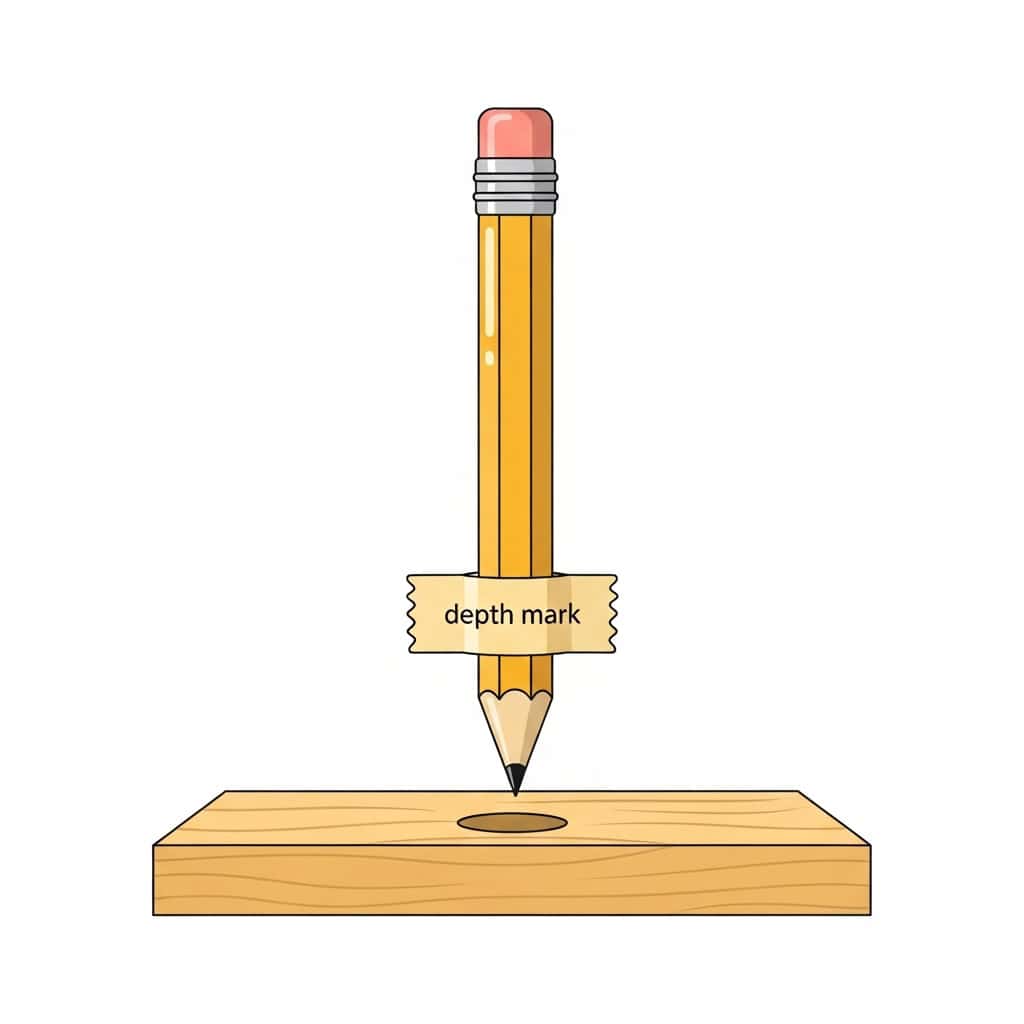
When I need to drill to a specific depth, I wrap a small band of masking tape around a pencil to mark the depth I want.
Then I use that pencil to check the hole as I go.
It’s quick, accurate, and works with any size drill bit.
I’ve picked up plenty of new tools and techniques over the years, but these simple old-school tricks are still part of my regular routine.
They’re quick, they work, and they remind me of the time I spent watching my grandfather and dad work in their shops.
Try a few of them in your own projects and see how they fit into your workflow. You might find that the simplest solutions really do stand the test of time.