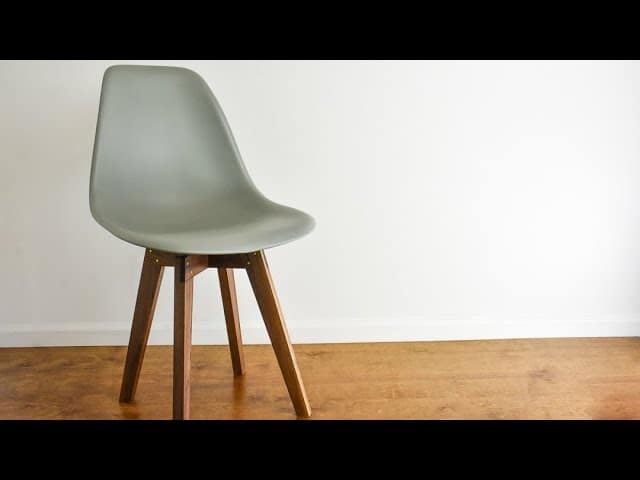
This project was built and designed by Caleb from YouCanMakeThisToo. It features a refined walnut base made to enhance the look and stability of molded Eames chairs while complementing a modern dining setup.
The build balances modern styling with traditional joinery and thoughtful prototyping. Whether you’re looking to match an existing table or create a standalone showpiece, this base elevates the standard molded Eames chair into something truly custom.
Watch the full video and subscribe to Caleb’s channel:
Starting with a Prototype
The project kicks off with a full prototype built from inexpensive materials using screws and pocket holes. This step allows Caleb to test proportions, angles, and overall strength before committing to high-end walnut.
By assembling and loading the prototype, he verifies that the base will support a seated adult without any structural concerns. With that confidence, the focus shifts to creating the final version from premium hardwood and brass.
Choosing Walnut for a Modern Match
The base is built from walnut to visually match a dining table Caleb previously built for the same client. Walnut’s rich tone and smooth grain help elevate the design from standard to sophisticated.
To reinforce the design, Caleb also includes pinned brass accents, adding contrast and a touch of elegance. These pins also serve as subtle callbacks to the brass used in the table’s joinery.
Shaping the Legs and Tapers
Using a bandsaw, Caleb roughs out the leg shapes, then flattens one side on the jointer to prepare for precise angle cuts. The next stop is the miter saw, where he adds the required miters to each end for tight-fitting joints.
To refine the look and reduce visual bulk, the legs receive an inside taper. Caleb uses a tapering jig made specifically for this design, ensuring accuracy while allowing for consistent repetition across all pieces.
Making and Joining the Stretchers
The stretchers—horizontal pieces that join each pair of legs—are cut with precise angles on each end. Long stretchers are cut down into shorter ones, each with a 90-degree inside cut that ties everything together cleanly.
Unlike the original dining table design, these stretchers don’t include underside tapers, as their shorter length makes them visually compact without added shaping. The goal here is strength and minimalism.
Caleb uses a dado blade to create half-lap joints that join the legs and stretchers. While effective, the dado blade can leave rough surfaces, so each joint is cleaned up with a hand plane before glue-up.
Dowels and Brass Pins for Strength and Detail
To ensure the stretchers stay firmly attached, Caleb uses dowel joints, aligning them with the help of a doweling jig. This guarantees accurate placement and keeps the joinery tight and long-lasting.
For added strength and aesthetic, brass pins are epoxied into place at key joints. Creating a jig helps speed up the drilling process—48 holes in total—and scuffing the brass beforehand ensures a better bond.
These pins mirror elements from the table and act as both visual and structural enhancements.
Assembling with Care
With all the components prepared, glue-up begins. Clamps are applied using small blocks to create parallel pressure and avoid slippage from the angled leg cuts.
Keeping the base square is critical. Caleb uses careful measurements and dry fits to confirm everything is aligned before the glue sets. A trick using a table saw helps fine-tune the level—he shaves down the longer legs just enough to eliminate any rocking.
Smooth Finish for a Clean Look
The entire base is finished with multiple coats of Arm-R-Seal from General Finishes. Between coats, light sanding ensures a smooth, professional appearance.
This finish enhances the walnut’s rich tones while protecting it from wear, especially important on something as frequently handled as chair legs.
Attaching the Base to the Chair
The final task is attaching the base to the molded chair seat. Caleb fabricates custom hardware that elevates the rear slightly for improved ergonomics and visual balance.
Using an angle grinder, he shapes and refines the attachment pieces to ensure a precise fit. The result is a stable, functional chair that blends sleek mid-century styling with handcrafted details.
A Project Worth the Effort
This chair base project is a great example of blending modern aesthetics with traditional woodworking skill. From prototyping and jig making to dowel joints and brass pin details, the process is full of techniques that apply to many custom furniture builds.
If you’re interested in making something similar, Caleb offers plans for both the chair base and matching table. Pre-orders are available, with bundle discounts for those wanting the full set.
Please support Caleb by visiting his website: https://www.ycmt2.com/.

Matt’s Take
These are my personal thoughts and tips based on my own experience in the shop. This section is not written, reviewed, or endorsed by the original creator of this project.
What really stands out here is how smart the prototyping approach is. Testing with cheap material first saves you from expensive mistakes later, especially when you’re working with premium walnut. It’s one of those habits that separates confident builders from those who just hope everything works out.
The brass pin detail is a nice touch that goes beyond just looks. When you’re drilling that many holes for pins, a jig is absolutely essential for consistency. That scuffing step Caleb mentions is crucial too—smooth brass doesn’t bond well with epoxy, so giving it some tooth makes all the difference in long-term durability.
Half-lap joints with a dado stack can be tricky to get clean. Those blade marks are inevitable, so planning for hand plane cleanup from the start is the right call. For joints this visible, taking that extra step makes the difference between amateur and professional-looking results.
The leveling trick using the table saw to trim the legs is clever problem-solving. Even with careful work, getting four legs perfectly even can be challenging, and this gives you a precise way to make final adjustments rather than trying to sand your way to level.