This project was built and designed by Gary Herd, also known as The Bearded Woodworker. It’s a straightforward but highly effective way to store chainsaws neatly and safely, making your workspace more efficient and less cluttered.
A tidy shop isn’t just about looks—it saves time, prevents accidents, and makes it easier to stay focused on the work. Gary’s build shows how a compact, under-bench storage rack can solve a common problem using a practical and no-nonsense approach.
Watch the full video and subscribe to Gary’s channel:
Why a Chainsaw Rack Helps
Chainsaws are bulky, oddly shaped tools that don’t always fit on standard shelves or in drawers. Without a designated space, they often end up leaning against walls or taking up valuable bench space.
Gary designed his rack to keep multiple chainsaws off the ground, within reach, and protected from accidental damage. This type of organization is especially helpful in shops where floor space is limited or tools are shared among multiple users.
Planning the Space
Before cutting any wood, Gary identifies the best spot in his shop for the rack. It ends up fitting nicely beneath his main workbench, an area that’s often wasted or filled with random clutter.
This location keeps the chainsaws easily accessible without getting in the way. It also allows the rest of the bench surface to remain clear for active projects.
Design and Function
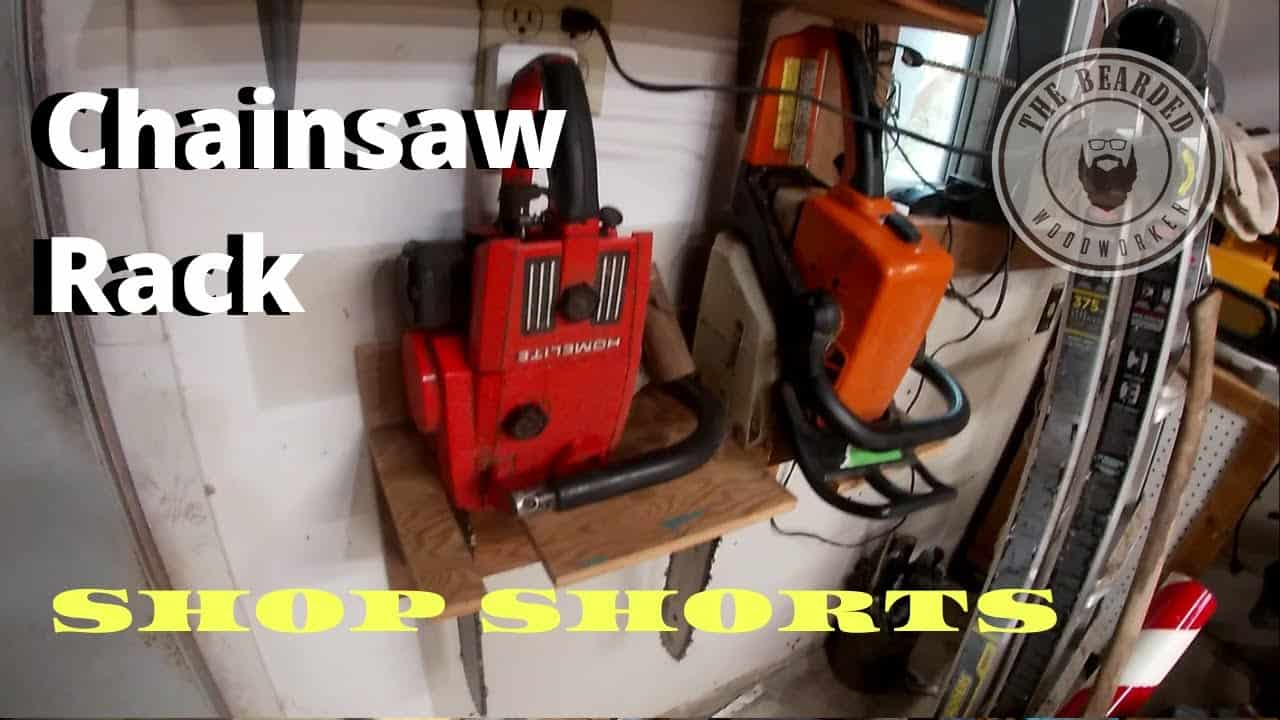
The rack is built like a low-profile shelf with individual notches to cradle the chainsaw bars. The structure includes a back support and bracing to make sure it stays stable under the combined weight of multiple saws.
There’s enough clearance for each chainsaw to be pulled out and returned without knocking into the others. The notches also keep the blades separated and secure, reducing the risk of damage.
Choosing the Materials
Gary doesn’t use any exotic materials—just basic plywood and solid wood offcuts from his shop. These provide plenty of strength and are easy to cut, drill, and sand.
For joinery, he uses screws and a few small brackets to reinforce corners. This keeps the project beginner-friendly while still ensuring a strong frame that can hold heavy tools.
Building the Frame
The build starts by cutting pieces for the front, back, and side panels of the rack. Once these are laid out, the frame is assembled on the floor using screws to tie it all together.
Triangular braces are added under the top shelf to prevent wobbling. These supports are important, especially when the rack is fully loaded with chainsaws, which can get heavy fast.
Making the Notches
To hold each chainsaw in place, Gary cuts evenly spaced notches across the top of the rack. These are sized to match the width of the saw blades and are spaced out to avoid overlap.
The notches are kept shallow enough to support the saw without it tipping but deep enough to keep the tool from sliding off. Once cut, all edges are sanded smooth to prevent catching or scratching during use.
Mounting the Rack
The completed rack is mounted to the wall by drilling directly into the studs. Gary uses a stud finder to mark solid mounting points, which is important for supporting the weight of several chainsaws.
Screws are driven through the back panel into the studs, anchoring the rack securely in place. Once mounted, the rack feels solid and doesn’t flex or sag.
Bonus Storage Options
Gary adds a few extra features to make the rack even more useful. A small shelf below the main panel holds oil, extra chains, and safety gear. Hooks on the sides provide space for gloves or accessories.
These additions don’t take much time to install but greatly improve the rack’s functionality. Everything related to chainsaw use can be stored in one spot, making setup and cleanup much quicker.
Shop Maintenance and Upkeep
As Gary points out, a good storage system only works if it’s used consistently. He encourages viewers to return their chainsaws to the rack after each use and to keep the area around it clear.
Over time, this small habit builds a cleaner, more efficient workshop that’s easier to work in. And when you’re working with sharp, heavy tools, keeping your space tidy isn’t just a convenience—it’s a safety issue.
Final Thoughts
This chainsaw rack is a simple weekend project that makes a big impact. It solves a real storage problem with a durable and efficient design that’s easy to customize based on your space and number of tools.
Gary’s approach is straightforward, smart, and repeatable—exactly the kind of shop project that keeps everything running smoothly. If you’re looking for a practical way to organize your tools, this build is a great place to start.
Watch the full video and subscribe to Gary’s channel:

Matt’s Take
These are my personal thoughts and tips based on my own experience in the shop. This section is not written, reviewed, or endorsed by the original creator of this project.
What I love about this rack design is how it tackles one of the most awkward storage challenges in the shop. Chainsaws are heavy, oddly balanced, and have that long bar sticking out—they’re basically designed to be difficult to store neatly. Gary’s approach of creating dedicated notches for each saw is spot-on because it keeps the weight distributed properly and prevents that domino effect when you pull one out.
The wall mounting is crucial here, and I’m glad to see Gary emphasizing the importance of hitting solid studs. With multiple chainsaws loaded up, you’re looking at potentially 50+ pounds pulling on those mounting screws. I’d also suggest adding a small lip or raised edge along the front of the shelf—just a quarter-inch strip of wood glued and screwed in place. It gives you that extra peace of mind that a saw won’t slide forward if someone bumps the rack.
The bonus storage for chains, oil, and safety gear is really smart planning. There’s nothing worse than having to hunt around the shop for a spare chain or mixing oil when you’re ready to get to work. Having everything in one spot turns what could be a 10-minute setup into a 2-minute grab-and-go situation.