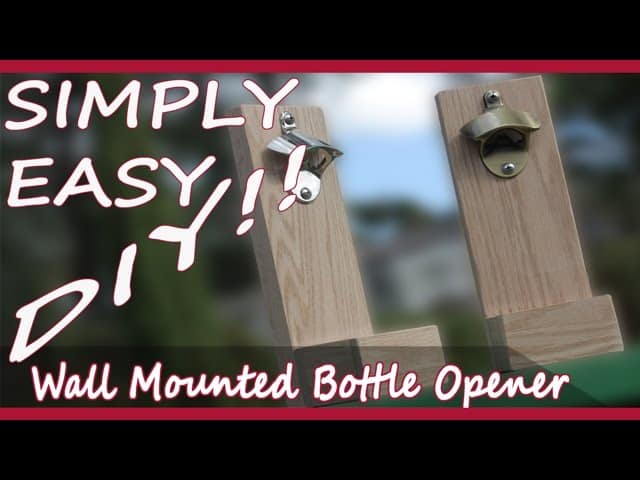
This project was built and designed by Stan Sullivan. It’s a small but practical woodworking project that creates a wall-mounted bottle opener with a built-in cap catcher—perfect for any kitchen, bar, or outdoor space.
With simple joinery, scrap hardwood, and a bit of patience, this bottle opener not only solves a daily inconvenience but also adds character to your home. Whether for personal use or as a thoughtful gift, it’s a build worth tackling.
Watch the full video and subscribe to Stan’s channel:
A Handy Project for Any Woodworker
Stan designed this project to be both stylish and functional. The build centers around a mounted bottle opener and a small collector box for catching caps before they hit the floor.
Because the materials are simple and the size is manageable, this project makes a great weekend build. It’s also an ideal use for leftover hardwood scraps from other projects, especially if you’re working with species like oak, walnut, or maple.
Materials and Tool Basics
The core of the build uses a solid hardwood board for the back and smaller offcuts for the cap catcher sides and base. Bottle openers can be sourced from hardware stores or online, with styles ranging from rustic cast iron to polished steel.
Tools needed include a miter saw or table saw, clamps, wood glue, a thickness planer (optional), and a router for joinery work. A drill and screws may also be needed depending on how you choose to attach the opener.
Prepping the Wood Components
The first step is cutting all the wood components to rough size. Stan starts by ripping and cross-cutting the hardwood for the backboard and the cap catcher pieces, making sure the lengths align for a square and tidy assembly.
Once cut, he runs the boards through a planer to remove saw marks and create a smooth surface. This extra step gives the piece a clean, finished look and also improves glue adhesion during assembly.
Creating the Cap Catcher Box
Stan uses a rabbet joint to attach the sides and bottom of the cap catcher. A router bit is used to cut shallow grooves into the side pieces so the bottom board slots in neatly and remains hidden once mounted.
Wood glue is applied along each rabbet, and the box is clamped up until dry. This simple box forms the container for fallen bottle caps, keeping your countertop or floor clean during use.
Attaching the Bottle Opener
Once the cap catcher box is dry and square, attention turns to the bottle opener itself. Stan chooses a heavy-duty metal opener and attaches it to the backboard using screws. The placement is centered above the cap catcher, ensuring functionality and balance.
He adds glue for extra hold, though screws are what really lock it in place. After installation, Stan performs some final sanding to smooth edges and remove any machining marks or glue residue.
Wall Mounting and Hardware
Mounting the project is straightforward. Stan recommends placing the opener in a convenient spot, such as near a fridge, bar cart, or outdoor deck wall. Pre-drilling holes through the backboard and using appropriate anchors ensures it can handle repeated use.
A French cleat system or direct screw mount both work well. Just make sure the mounting is level and secure before you put it to the test.
Small Details That Elevate the Build
Stan rounds over the corners of the cap catcher and backboard to soften the appearance. This detail is easy to skip, but it adds a polished feel that makes the piece look store-bought—even if it’s entirely homemade.
He also suggests personalizing the build with a woodburned name, engraving, or a finish that matches your décor. The project is easily customizable, making it a great item for gift giving or small-batch selling.
A Project with Gift or Sales Potential
In addition to being a fun shop project, the wall-mounted bottle opener is a fantastic gift. Whether it’s for a birthday, housewarming, or wedding, it’s a unique and useful item that people genuinely appreciate.
For those interested in selling small woodworking projects locally or online, this is also a great candidate. It’s fast to make, doesn’t require a lot of material, and has wide appeal.
A Community Twist
Stan also adds a fun element to this build with a giveaway. Viewers who comment with the word “coolinary” on his Facebook post have a chance to win one of the extra openers built during the project. It’s a great way to engage with the woodworking community and spread some handcrafted goodwill.
A Clean, Practical Addition to Any Space
This wall-mounted bottle opener may be simple, but it’s incredibly useful. Stan’s attention to detail—from clean joinery to secure mounting—makes this project both functional and attractive.
Whether you’re improving your own space or making something for a friend, this is a quick win with lasting utility. Plus, it’s a reminder that even small builds can deliver big satisfaction.
Please support Stan by visiting his website: https://www.simplyeasydiy.com/.

Matt’s Take
These are my personal thoughts and tips based on my own experience in the shop. This section is not written, reviewed, or endorsed by the original creator of this project.
This type of project hits that sweet spot where simple meets useful. The rabbet joint approach for the cap catcher is smart — it gives you a clean look while keeping the joinery straightforward. If you’re newer to routing rabbets, take your time with the setup and make test cuts in scrap first. The joint doesn’t need to be perfect since it’ll be hidden once mounted, but getting consistent depth makes assembly much smoother.
One thing I really appreciate about builds like this is how they make great use of shop scraps. That piece of walnut or cherry from your last project that was too small for anything else? Perfect for something like this. Just keep in mind that harder woods like maple or oak will hold up better over time, especially if this is going in a high-traffic spot or outdoor area.
The mounting is worth getting right since this thing will see regular use. I’d lean toward hitting at least one stud if possible, and don’t skip the pilot holes — even in drywall anchors. A loose bottle opener that wiggles every time you use it gets annoying fast. Take a minute to check that it’s level too, since the cap catcher needs to actually catch those caps.
For finishing, think about where this will live. A kitchen spot might benefit from a more durable finish that can handle occasional splashes, while a basement bar might be fine with just a few coats of oil. Either way, it’s one of those projects that feels way more valuable than the time you put into it.