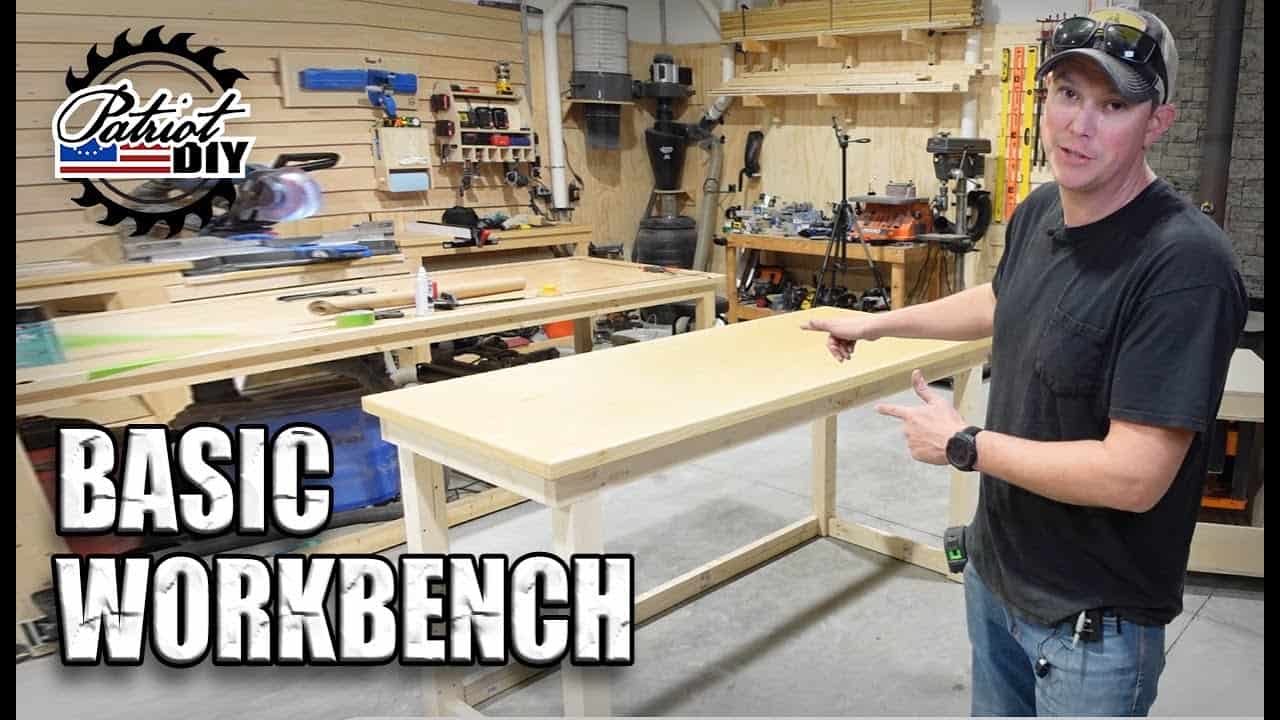
This project was built and designed by Jason from PatriotDIY. It’s a simple yet sturdy workbench that fits neatly into compact workshops, offering plenty of surface area without wasting valuable space.
What sets this bench apart is its height, which is designed to allow a flip-top planer and jointer cart to roll right underneath. That smart detail, combined with a solid frame and versatile top, makes it a great option for anyone building out a functional and flexible workspace.
Watch the full video and subscribe to Jason’s channel:
A Thoughtful Design for Real Shops
This isn’t just a table with legs—it’s a space-conscious layout that works in tandem with your other shop tools. Jason designed this bench to meet the needs of real woodworkers, especially those working with limited room.
Instead of including a bottom shelf like many traditional workbench builds, this version stays open underneath. That allows tool carts or storage bins to be tucked away without adding bulk to the footprint.
Materials and Planning
While the exact cut list isn’t detailed in the video, the frame is built primarily from 2x4s and the top from layered plywood. These materials are durable, affordable, and easy to work with using standard shop tools.
Good wood glue and quality screws are key here. Jason emphasizes strong joinery and tight fits throughout the build, ensuring the bench can handle heavy-duty use without wobble or sag.
Breaking Down the Lumber
The build begins by cutting all the frame pieces to length using a miter saw. Jason uses a stop block for repeatable cuts, which helps keep everything uniform and speeds up the process.
The leg assemblies are slightly more involved, as they require offset placements to accommodate the bench’s corner fit. Once assembled, the legs need one flat face, which can be achieved using a jointer—or, if needed, trimmed down on a table saw.
Frame Assembly with Pocket Holes
To start the assembly, Jason works upside down. This makes it easier to install the legs and cross supports while keeping everything flush with the work surface.
Pocket holes are used to attach the frame rails, offering strong, hidden joinery. Horizontal supports between the rear legs add more strength and help square up the frame.
The offset legs nest cleanly into each corner, providing stability without crowding the footprint. Even without a lower shelf, the design feels rigid and balanced.
Building the Top
Jason uses two sheets of plywood for the work surface, giving it durability and strength. The lower sheet is cut to the exact size of the frame, while the upper sheet is left oversized to be trimmed flush later.
Pocket holes are drilled into the top frame rails, allowing the plywood to be pulled tight against the frame. With glue applied and everything aligned, the top layers are screwed together and secured in place.
This layered approach creates a thick, solid surface that resists flex and provides plenty of working area for woodworking tasks of all kinds.
Sanding and Finishing
Once assembled, the entire bench gets sanded to remove rough edges and splinters. Jason keeps the finish simple, applying multiple coats of shellac for a clean, natural look.
Shellac offers moderate protection while highlighting the wood’s grain. It dries quickly and can be reapplied easily over time, making it a practical choice for shop furniture that sees daily use.
Mobility and Leveling Options
To make the workbench even more useful, Jason adds fold-down casters that allow it to be rolled around the shop when needed. These can be retracted to set the bench firmly in place during use.
Adjustable leveling feet are also added to the legs. This helps fine-tune the height and eliminate rocking on uneven floors, which is common in garages and basements.
Together, the wheels and feet make the bench easy to move, but rock-solid when stationary.
Adaptable for Any Woodworker
While this version was built to accommodate a specific tool cart, the design can be easily adapted. You can add a lower shelf, drawers, or even tool holders to customize it to your workflow.
Jason’s version keeps things minimal and functional—ideal for tight shops or mobile setups. But the frame is sturdy enough to support upgrades later if your space or needs change.
A Smart, Sturdy Shop Project
This basic workbench is a smart project for anyone needing more surface area without giving up valuable shop space. It’s a practical build that encourages customization and delivers long-lasting performance.
Jason shows how attention to proportions, tool storage, and layout can make a huge difference—especially for DIYers building out their first real shop.
Please support Jason by visiting his Etsy Store: https://www.etsy.com/shop/patriotdiy.

Matt’s Take
These are my personal thoughts and tips based on my own experience in the shop. This section is not written, reviewed, or endorsed by the original creator of this project.
This type of build really highlights how thoughtful design beats fancy features every time. The open base concept is brilliant for small shops — I see too many workbenches with shelves that just collect dust and make the whole setup feel cramped. Keeping that space clear for rolling storage is way more practical.
The pocket hole approach for the frame makes a lot of sense here. It’s fast, strong, and keeps everything clean looking. Just make sure your pocket screws are long enough to really bite into that receiving piece — usually 1.25″ screws work well for 2×4 construction. And that tip about working upside down during assembly is gold. It’s so much easier to get everything square and flush when you’re not fighting gravity.
That double-layer plywood top is a smart move too. You get the thickness and stability without the cost of hardwood, plus it’s easy to replace down the road if it gets beat up. The shellac finish is perfect for shop furniture — durable enough to handle daily use but won’t break the bank if you need to touch it up. Those fold-down casters are a game changer in tight spaces where every inch counts.