This project was built and designed by Chris from A Glimpse Inside. It’s a dual-purpose jig that works as both a jointer sled and a precision tapering jig, making it a valuable addition to any workshop.
Whether you’re cleaning up edges or cutting accurate tapers, this jig is designed for repeatability and ease of use. Chris walks through the full build process on his channel, showing how to get great results without complex tools.
Watch the full video and subscribe to Chris’s channel:
Getting Started with the Build
The project begins with half-inch furniture-grade plywood, chosen for its smooth surface and stability. Chris cuts two pieces to roughly 12 inches wide and 30 inches long, which form the main body of the jig.
From one of the larger boards, he cuts small pieces from each end to help build the recessed base for the T-tracks. These are the first parts that give the jig its multi-use capability.
After cutting, Chris sands the pieces to remove rough edges. This step is important since the jig will be handled regularly during use.
Before assembly, he marks the layout for the T-tracks using pencil and a straightedge. Careful alignment here ensures a clean and accurate build.
Assembling the Jig Base
To build the base, the small end pieces are tacked into place on the main board. This creates a layered recess where the T-track will sit without needing a dado blade.
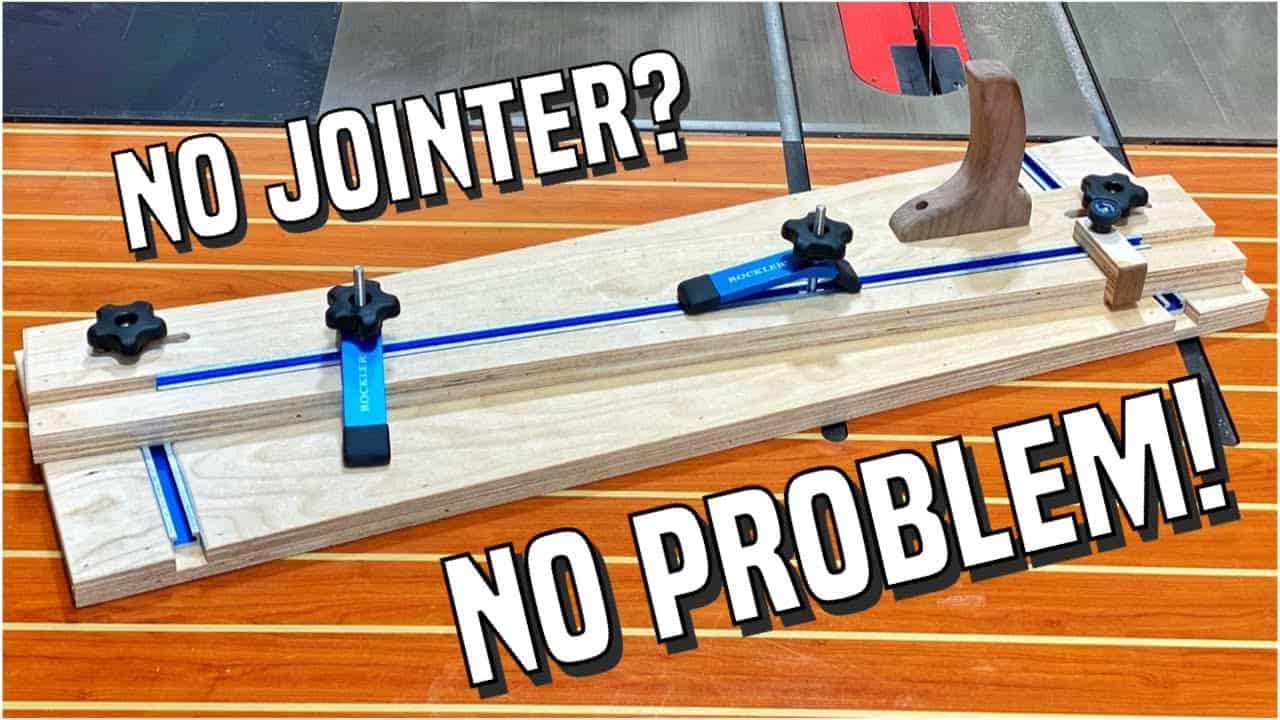
The T-track is laid into the space and secured, giving the jig adjustable functionality. This makes it easy to use stop blocks or guides when tapering or aligning material.
Chris then moves on to building the top assembly of the jig. He cuts a three-inch strip and a narrower one-inch-and-a-quarter piece to form the upper surface.
These are glued and nailed together, creating a solid, straight platform. Precision here ensures the jig remains square and performs consistently over time.
Adding the Tapering Feature
To make the jig useful for tapers, Chris adds an adjustable stop block. He drills holes in the upper piece to insert T-nuts, which hold the block in place along the track.
This adjustable stop allows for precise control over the angle of each cut. By changing the stop’s position, you can set the taper exactly as needed.
Once the hardware is installed, the jig becomes fully adjustable. This setup makes it easy to switch between different angles and workpieces without reconfiguring the entire jig.
Testing the Jig in the Shop
With everything assembled, Chris puts the jig to work. He places a board against the edge and pushes it through the table saw to test its ability to joint square edges.
The results are clean and consistent, with the jig holding the piece flat throughout the cut. It’s especially useful for boards that are too wide or uneven to joint on a standard jointer.
Chris then tests the tapering function using scrap wood. By adjusting the stop block, he makes repeated taper cuts that are identical in angle and length.
This level of precision would be difficult to achieve without a jig like this. It shows just how versatile a well-planned shop jig can be.
Final Adjustments and Enhancements
After testing, Chris evaluates areas for improvement. He considers trimming bulkier parts to reduce the weight and adding a handle for easier control.
A small piece of walnut is added in a high-stress area to increase strength. These small refinements help improve durability without overcomplicating the build.
Finally, Chris shapes and attaches a custom handle for better grip during use. This makes it easier to push the jig through longer cuts on the table saw.
Conclusion
This joinery and tapering jig is an excellent example of efficient workshop design. It saves time, increases accuracy, and adds versatility without requiring specialty tools.
Chris shows that with a few thoughtful details, a simple piece of plywood can become a dependable and multifunctional tool. It’s a rewarding build for any woodworker looking to improve their shop setup.
Please support Chris by visiting his website here: https://www.aglimpseinside.org

Matt’s Take
These are my personal thoughts and tips based on my own experience in the shop. This section is not written, reviewed, or endorsed by the original creator of this project.
This type of dual-purpose jig really shines when you’re working with longer boards or pieces that don’t want to cooperate on a standard jointer. The plywood construction is smart – it stays flat and won’t warp like solid wood might over time. When building something like this, I always recommend taking extra time with that initial layout. Those T-track positions need to be dead-on parallel, or you’ll fight the jig every time you use it.
The layered approach for creating the T-track recess is clever and saves having to cut dadoes. Just make sure those end pieces are really secure – they’ll see a lot of stress when you’re pushing boards through. A few screws from underneath in addition to the nails wouldn’t hurt for long-term durability.
Safety-wise, remember that this jig puts your hands closer to the blade than normal cuts. Keep good downward pressure on the workpiece and never let your fingers drift toward the blade side of the jig. The handle addition Chris made is more than just convenience – it’s a real safety improvement that keeps your hands in a better position throughout the cut.