This project was built and designed by Chris from A Glimpse Inside. It’s a functional and visually appealing way to conceal an outdoor AC unit while maintaining proper airflow and accessibility.
A well-built cover can help extend the life of the unit by shielding it from debris and harsh weather. At the same time, it can clean up the appearance of your outdoor space and blend better with your yard or patio.
Watch the full video and subscribe to Chris’s channel:

Why Build an AC Cover?
Outdoor air conditioner units aren’t exactly known for their charm. A thoughtfully designed cover makes the space look more intentional while offering a layer of protection.
In addition to the visual upgrade, the cover keeps leaves, twigs, and debris from accumulating around the unit. It’s also a smart way to repurpose leftover materials from past projects.
Materials Used for the Build
Chris built the cover using standard 1×4 and 1×2 dimensional lumber. Solid wood performs better outdoors compared to plywood, which can break down over time when exposed to moisture.
To ensure durability, exterior paint was used to seal and protect the wood. Choosing weather-resistant materials helps the cover hold up through changing seasons.
Constructing the Frame
The project begins with cutting the lumber to length using basic tools like a miter saw or circular saw. The pieces are then joined with pocket holes, offering clean connections and strong support.
A pocket hole jig is especially helpful when working with dimensional lumber. It creates a flush fit that simplifies assembly and looks neat from all angles.
Once the frame pieces are drilled, they are glued and clamped into place. Titebond 3 wood glue, ideal for outdoor builds, ensures long-lasting joints.
Screws are added to reinforce the structure, but care is taken not to overtighten. This prevents splitting the wood or weakening the hold.
Adding Ventilation and Protection
With the basic frame in place, Chris added screen material to improve airflow and keep debris out. The screen is similar to what you’d find on patio doors and is cut to fit inside the frame.
Using a handheld stapler, the screen is attached securely and evenly. Galvanized plates are used to anchor it at the corners, adding durability and keeping it taut.
Clean corners and smooth edges give the screen a polished appearance. This step also improves the overall finish of the project.
Decorative Features and Support
For added visual interest, PVC trim is installed on the top and bottom edges of the frame. This provides a clean border and a solid surface for attaching additional design elements.
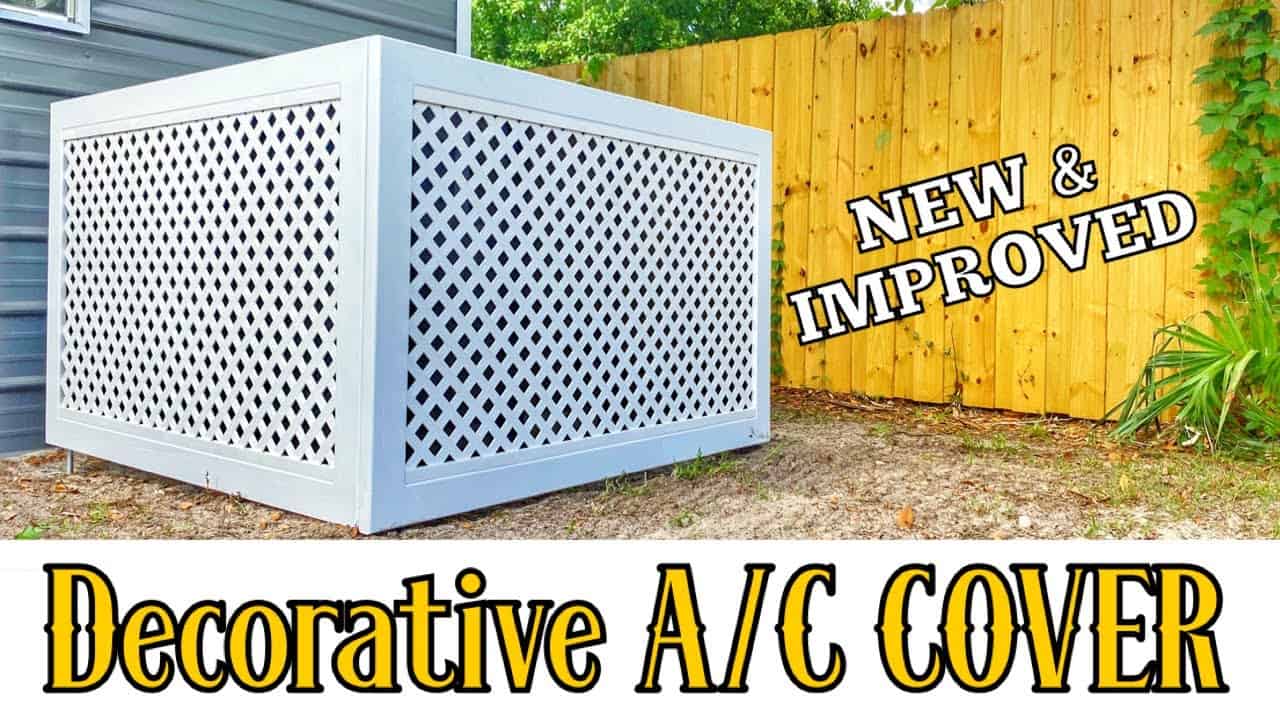
Lattice panels are added to the frame for a decorative touch. These lightweight strips create a stylish cover that still allows airflow around the AC unit.
To support the panels, grounding rods are driven into the ground as a base. They help elevate the structure slightly and keep it stable even in windy conditions.
The Finished AC Cover
The result is a custom outdoor air conditioner cover that looks great and works well. It blends into the outdoor area while keeping the unit protected and accessible.
The combination of lumber, screen, PVC, and lattice offers a durable, functional build. It’s a creative way to improve outdoor aesthetics without compromising utility.
Want to See the Full Build?
Please support Chris by visiting his website here: https://www.aglimpseinside.org

Matt’s Take
These are my personal thoughts and tips based on my own experience in the shop. This section is not written, reviewed, or endorsed by the original creator of this project.
This type of outdoor project really highlights the importance of material selection when you’re building something that’ll face the elements year-round. Chris made a smart choice going with solid dimensional lumber over plywood — I’ve seen too many outdoor projects fall apart because someone tried to save a few bucks with materials that weren’t up to the task. That Titebond 3 glue choice is spot-on too, since it’s designed for exterior applications and won’t break down with moisture cycles.
The pocket hole approach keeps things clean and strong, which is perfect for a project like this. When you’re working with 1x material outdoors, those joints need to be rock solid since the wood will be expanding and contracting with temperature and humidity changes. One thing I really appreciate about this design is how it balances protection with airflow — that’s the tricky part with AC covers since you never want to restrict the unit’s operation.
If you’re planning a similar build, don’t skip the finishing step. Even with exterior-grade lumber, a good coat of paint or stain makes a huge difference in longevity. And that screen material is genius for keeping debris out while maintaining ventilation. It’s these kinds of thoughtful details that separate a weekend project from something that’ll actually serve you well for years to come.