This project was built and designed by Drew Fisher from Fisher’s Shop. If you’re interested in functional woodworking projects with clean design, his channel is packed with detailed builds and useful techniques.
Watch the full video and subscribe to Drew’s channel:
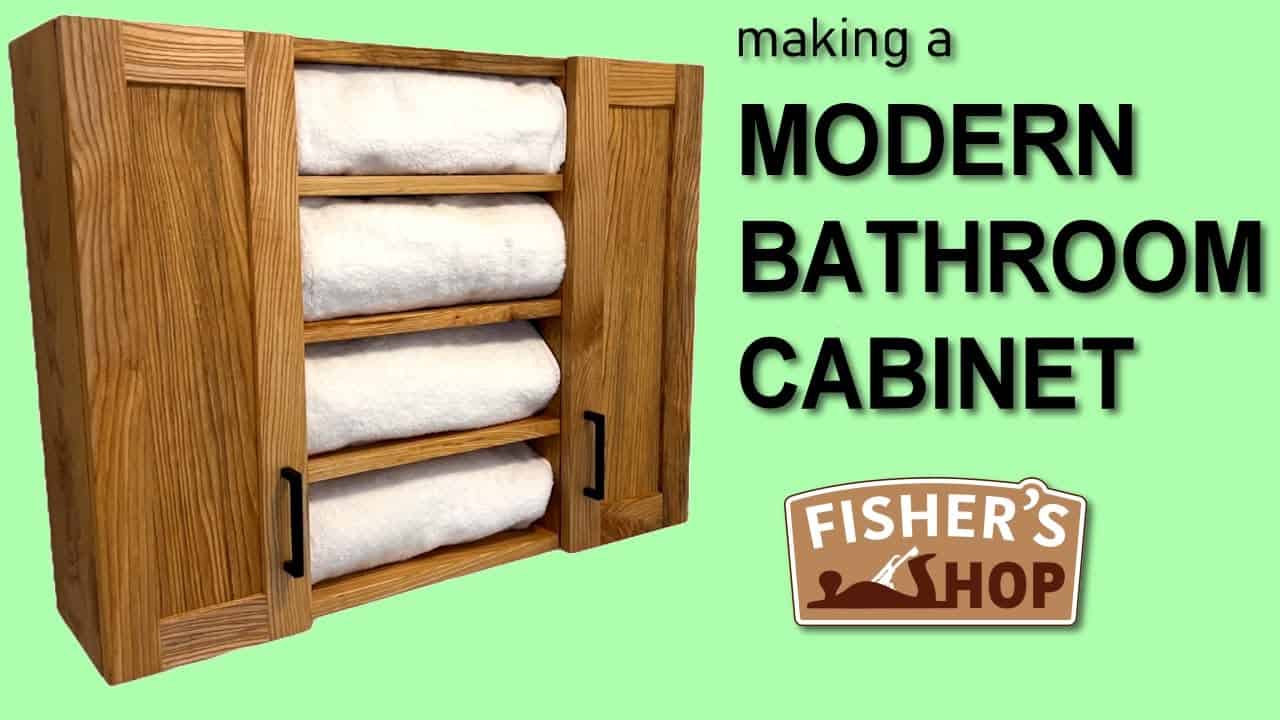
A Cabinet That Fits Both Style and Function
While renovating a rental property in Northern Michigan, Drew set out to build a modern bathroom cabinet that balanced style and practicality. His final design features two connected cabinets with open shelving in between, creating versatile storage for towels and daily essentials.
The project not only improves the space’s functionality, but also adds a sleek, updated aesthetic to the bathroom. The dual-cabinet structure provides concealed storage while keeping frequently used items easily accessible.
Design and Planning
Drew’s original concept leaned toward a more traditional look. After feedback from the property owner, he revised the plans to reflect a cleaner, modern style that still met the room’s storage needs.
The final version included two standalone cabinets joined by central shelves and cubbies. This solution allowed for adjustable shelf heights and open sections for rolled towels or decorative storage.
Choosing and Preparing Materials
Drew selected ash for the build, a hardwood known for its strength and attractive grain. Before beginning construction, he used a pinless moisture meter to confirm the lumber was properly dried for indoor use.
This step helped avoid warping or shrinkage later, especially important in a humid bathroom environment. Once confirmed, he rough-cut the boards, then planed them to the desired thickness.
Milling and Joinery
The boards were squared at the jointer to create clean edges for tight joinery. For the cabinet boxes, Drew used dados and rabbets, which provided a simple but sturdy construction method.
He cut the dados with a stack blade on the table saw, carefully aligning the grooves for a snug fit. These joints helped keep the assembly square and allowed for efficient glue-up without complicated hardware.
Assembly Process
With all pieces milled and joints prepared, Drew began assembly using right angle brackets to keep everything aligned. Each side was glued and fitted into its matching grooves, then clamped securely as it dried.
After the cabinet boxes were in place, he installed the back panels and top pieces. Keeping everything flush ensured the final result would sit cleanly against the wall during installation.
Crafting the Doors
Drew made the cabinet doors using cope and stile joints, shaped with a router bit set. These were reinforced with tenons for a strong connection between the rails and stiles.
For the panels, he resawed a single ash board to create two book-matched pieces, adding a visual highlight to the doors. After assembly, he drilled for soft-close hinges, ensuring smooth and quiet operation.
Applying the Finish
To protect the cabinet in a moisture-prone space, Drew finished the wood with a blend of tung oil and citrus solvent. This combination penetrates deeply while still allowing the grain to show through.
He followed up with a buff of carnauba wax, adding light water resistance and a soft sheen. This finishing process gives the piece both durability and a rich, natural look.
Final Installation
Drew mounted the finished cabinet using a French cleat system, securing it firmly to the bathroom wall. The cleats allowed for a flush appearance while making installation easier to adjust and level.
The final result is a clean, modern bathroom cabinet that adds real value to the space. It blends practical storage with thoughtful design choices, proving that utility and style can go hand in hand.
Want to Build Your Own?
If you’re thinking about building a version of this cabinet, detailed plans are available on Drew’s website. These include dimensions, materials, and helpful tips for customizing the build to your own space.

Matt’s Take
These are my personal thoughts and tips based on my own experience in the shop. This section is not written, reviewed, or endorsed by the original creator of this project.
Ash is such a fantastic choice for bathroom furniture. It’s got that beautiful grain that really pops under a good finish, plus it’s tough enough to handle the humidity swings that come with daily shower use. That pinless moisture meter check was smart — nothing worse than finishing a project only to have it warp a few months later when the wood decides it wasn’t quite ready.
The French cleat mounting system is one of my favorite ways to hang heavy cabinets. It distributes weight evenly across the wall studs and makes installation so much easier when you’re working solo. You can get the wall cleat perfectly level, then just slide the cabinet into place. If you’re thinking about this type of project, invest in a good moisture meter — they run about $40-60 and will save you headaches down the road.
That tung oil and citrus solvent combination is interesting for bathroom use. Tung oil really does penetrate deep into the wood fibers, and while it’s not waterproof, it gives good moisture protection when properly applied. Just remember to let each coat cure fully — rushing the finish process in a humid environment like a bathroom can leave you with a tacky surface that never quite hardens properly.