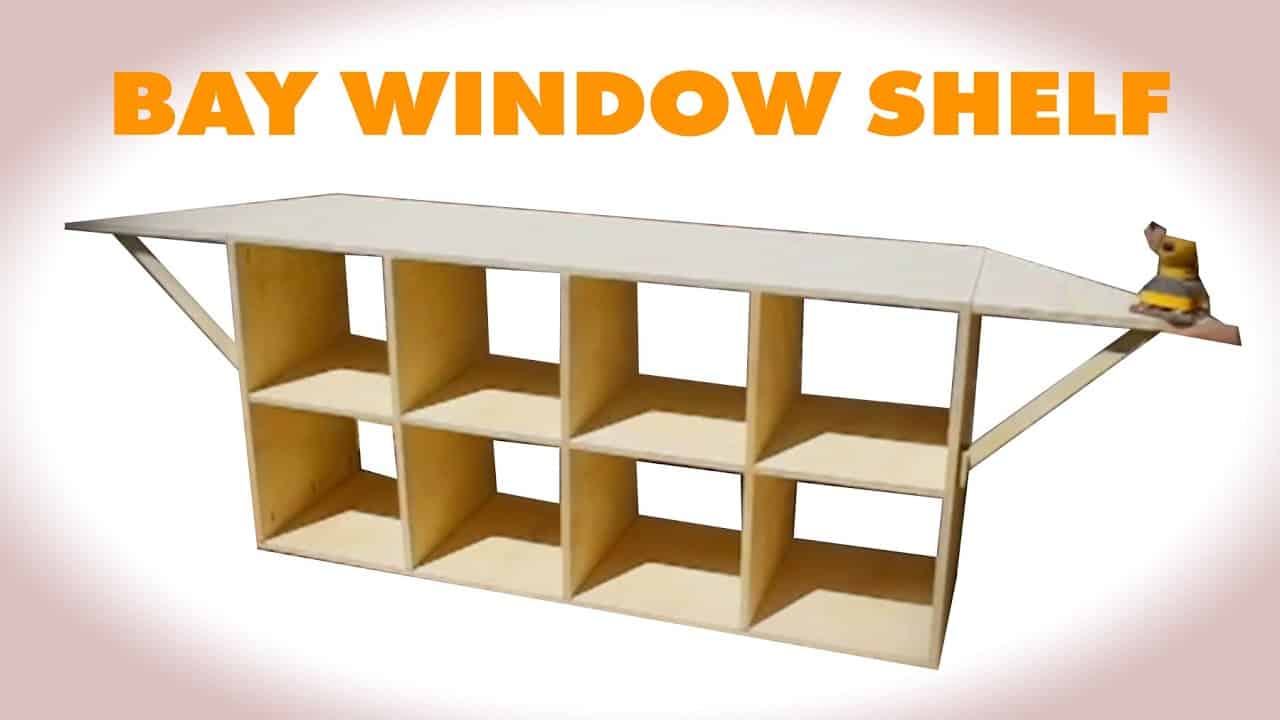
This woodworking project was built and designed by Josh Hardcastle from Rookie DIY. Combining practical storage with creative features, this cube shelf includes flip-up wings designed for flexibility and adaptability, especially useful in a child’s room or bay window.
If you enjoy functional woodworking projects, be sure to check out Josh’s YouTube channel, Rookie DIY, for more creative builds and inspiration.
Watch the full video and subscribe to Josh’s channel:
Why Build a Cube Shelf with Flip-Up Wings?
A cube shelf is a practical storage solution suitable for almost any space, but adding flip-up wings brings additional versatility. The wings allow the shelf to adjust easily to different environments, whether fitting snugly in a bay window or providing extra play surfaces for children.
Building your own shelf provides the opportunity to customize size, color, and functionality to match your exact needs. It’s a project that balances practicality with creativity, making it a satisfying build for any woodworker.
Selecting Materials and Planning the Build
Josh began by selecting durable plywood for strength and stability, essential for a shelf intended for frequent use. Along with sturdy plywood, piano hinges were chosen to provide reliable folding action for the wings.
Accurate measurements and planning were key steps before any cutting began. Josh carefully measured the plywood, marking dimensions clearly to streamline the construction process.
Creating the Structure with Half-Lap Joints
To securely hold the shelves in place, Josh chose half-lap joints for their strength and ease of assembly. Initially experimenting with various tools, he discovered a combination of saws and chisels provided the best precision for clean joints.
Careful cutting and cleaning up with a chisel ensured tight, secure joints. The attention given to these joints significantly contributed to the overall stability and strength of the final product.
Assembling the Main Shelf
Once the joints were ready, Josh assembled the main body of the shelf, starting by constructing the outer frame. He slid shelves securely into their positions, adding screws to reinforce the structure and ensure durability.
For a clean and attractive finish, Josh attached the top and bottom panels using finishing nails. This minimized visible hardware and gave the shelf a smooth, professional appearance.
Adding the Flip-Up Wings
Josh carefully measured and cut the wings, creating 45-degree angles to ensure smooth folding action. Piano hinges were attached, allowing the wings to easily flip up or down depending on the user’s needs.
He added small, U-shaped supports on the sidewalls, using leftover plywood cut-offs, to hold the wings securely in the upright position. This thoughtful addition enhanced the shelf’s usability, especially for playtime activities or additional storage.
Sanding, Finishing, and Detailing
Josh took extra care during sanding, smoothing out edges and corners, which was especially important for a child-friendly piece. Using a palm sander, he rounded sharp corners to make the shelf safe and comfortable to handle.
He painted the shelf with multiple coats, lightly sanding between each coat for a smooth, even finish. Additionally, Josh applied edge banding with heat-activated adhesive, giving the shelf a polished, finished appearance.
Final Assembly and Installation
After all the individual components were painted and prepared, Josh reassembled the shelf for the final time. The completed shelf was then delivered and installed in its new home, ready to provide functional and attractive storage.
The final build successfully achieved Josh’s vision of creating a versatile, user-friendly piece suitable for various uses around the home. The thoughtful design ensures both practicality and adaptability in everyday situations.
Why You Should Build One
This cube shelf with flip-up wings provides a functional storage solution combined with a creative, adaptable design. It can easily fit into different rooms, serving multiple purposes while adding charm and practicality.
Building your own furniture allows for customization and creativity, making your woodworking projects truly unique. This particular shelf demonstrates how thoughtful design and simple techniques can result in beautiful, practical furniture.
Ready to See Josh’s Full Build?

Matt’s Take
These are my personal thoughts and tips based on my own experience in the shop. This section is not written, reviewed, or endorsed by the original creator of this project.
Half-lap joints are a fantastic choice for this type of project. They create a strong mechanical connection that distributes weight evenly across the shelf structure. The key is taking your time with the layout — measure twice, cut once definitely applies here. A sharp chisel makes all the difference for cleaning up the joints, so keep yours honed.
Piano hinges are perfect for flip-up wings because they distribute the stress along the entire edge rather than at just a few points like butt hinges would. When installing them, I always pre-drill the screw holes to prevent splitting, especially near the plywood edges. Those little U-shaped wing supports Josh added are brilliant — they turn what could be a flimsy feature into something genuinely functional.
Edge banding with heat-activated adhesive can be tricky at first, but it’s worth mastering. Keep your iron moving to avoid overheating, and use a veneer roller or block of wood to press it down while it’s still warm. If you’re new to it, practice on some scraps first. The difference it makes in the final appearance is significant — it transforms plywood edges from obviously DIY to furniture-grade.