Creating perfectly round pieces for woodworking projects can be a challenge without the right tools. In this project, Drew Fisher addresses this issue by designing a CNC lathe that allows for consistent and precise shaping of wood.
This project was built by Drew Fisher. Be sure to check out his channel, Fisher’s Shop, for more woodworking videos.
Watch the full video and subscribe to Drew’s channel:
Identifying the Need
Without a traditional lathe, Drew had been using a drill and a belt sander to shape wood into round pieces. While this method worked for small projects, it lacked the efficiency needed for creating multiple identical parts.
Recognizing this limitation, he set out to design a more effective solution. By integrating CNC technology, he could automate the shaping process and achieve more consistent results.
Designing the CNC Lathe
Drew began by sketching out a design that would allow stock to rotate securely while the CNC machine carved the desired shape. Using Fusion 360, he developed a precise model that could be adapted and refined as needed.
This approach ensured the design was both functional and scalable. By planning everything digitally first, he could optimize each component before making physical cuts.
Material Selection and Preparation
For the main structure, Drew chose plywood due to its stability and ease of machining. He cut the necessary pieces using a miter saw, ensuring each section fit seamlessly into the overall design.
With the help of his CNC machine, he carved out precise components, making assembly much smoother. The design functioned like a puzzle, allowing the parts to slot together securely.
Assembling the Lathe
Once the pieces were ready, Drew moved on to assembly, installing bearings in the headstock and tailstock. These components allowed for smooth rotation and reduced friction, making the lathe more efficient.
The assembly process was straightforward due to the thoughtful design. A bit of glue, some clamps, and careful alignment ensured everything came together securely.
Crafting the Adjustment Knob
To allow for easy adjustments, Drew created a custom knob from black walnut. This small detail added both function and a refined aesthetic to the lathe.
He carefully drilled mounting holes and shaped the knob using a bandsaw and sander. The result was a comfortable grip that made fine-tuning the lathe much easier.
Tailstock and Drive System Enhancements
To provide better support, Drew added a live center to the tailstock, which he created by sharpening a bolt. This ensured the wood remained stable during operation, reducing movement and improving precision.
For the headstock, he built a spur drive center to securely grip the workpiece. This helped maintain consistency while shaping the wood at different speeds.
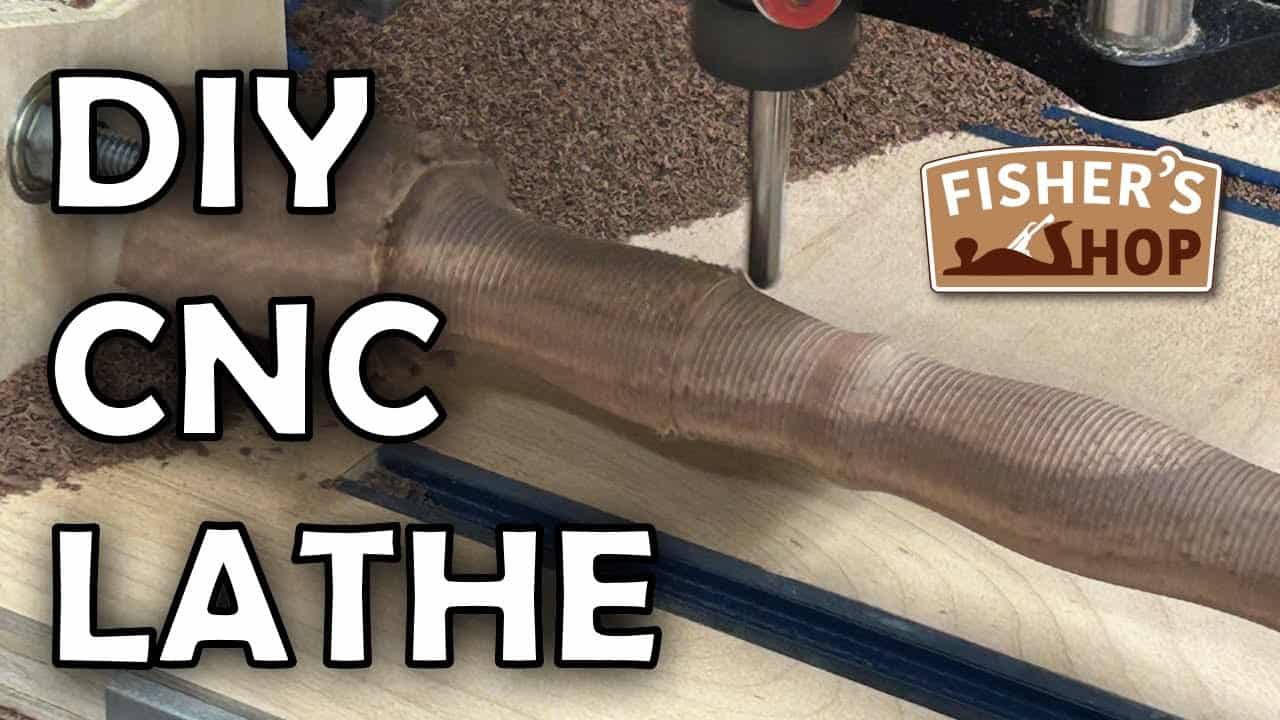
Testing and Refining the Design
With assembly complete, Drew tested the lathe by securing a piece of pine and experimenting with rotation speeds. His initial tests revealed that the drill bit sometimes grabbed too aggressively, requiring adjustments for smoother operation.
Through an iterative process, he refined the setup, tweaking the tailstock for better clearance and improving the alignment of the cutting mechanism. Each test provided insights that helped enhance the final design.
Final Adjustments and Results
To improve functionality, Drew lowered the overall height of the lathe, creating a more stable base. He also redesigned the spur drive center for a stronger grip, ensuring better control over the workpiece.
The final results were impressive, with the lathe producing smooth, perfectly rounded shapes with ease. This tool now allows Drew to create multiple identical pieces efficiently, opening up new possibilities for future woodworking projects.
Conclusion
This DIY CNC lathe showcases how technology and woodworking can be combined to create innovative tools. By designing his own lathe, Drew has built a system that enhances precision and efficiency in his workshop.
For woodworkers looking to expand their capabilities, this project is an inspiring example of problem-solving and creativity.
Get Drew’s project plans here.

Matt’s Take
These are my personal thoughts and tips based on my own experience in the shop. This section is not written, reviewed, or endorsed by the original creator of this project.
What I love about this project is how it perfectly demonstrates the evolution of problem-solving in the shop. We’ve all been there with the drill-and-sander method for making round pieces — it works in a pinch but leaves you wanting something better. The CNC approach here takes that common frustration and turns it into a legitimate production tool.
The material choice of plywood for the structure is smart from both a cost and stability standpoint. Plywood machines cleanly on a CNC and stays put once assembled, which is exactly what you need for something that’s going to see rotational forces. That puzzle-piece approach to the design is clever too — when parts fit together naturally, you know your digital modeling was on point.
The iterative testing approach Drew used here is pure gold for any project like this. Starting with basic functionality and then refining based on real-world feedback is how you end up with tools that actually work well long-term. Those little details like the custom walnut knob and the sharpened bolt for a live center show how you can elevate a purely functional build into something that’s genuinely nice to use.
For anyone considering a similar build, remember that the beauty of designing your own tools is being able to tailor them exactly to your needs and shop space. This kind of project opens up possibilities for production work that would be tough to achieve with hand tools alone.