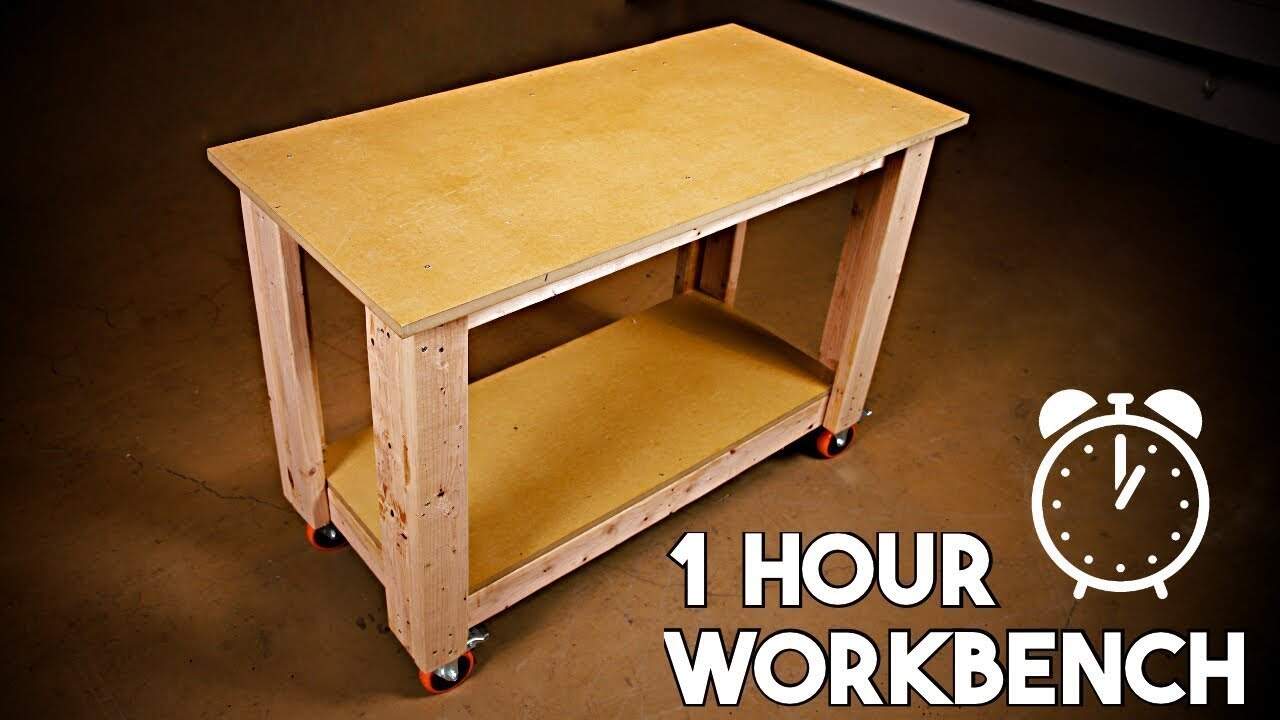
This project was built and designed by Jonny from Jonny Builds. It’s a straightforward, no-frills workbench that’s strong, useful, and quick to assemble with basic tools.
Whether you’re just getting started in woodworking or looking to add a second bench to your shop, this one fits the bill. Jonny keeps the process beginner-friendly while producing a bench that’s built to last.
Watch the full video and subscribe to Jonny’s channel:

Starting the Build
The legs are made from 2x4s, joined together in pairs to form solid vertical supports. This double-up method adds strength and provides a sturdy base for both the top and the lower shelf.
If you want your bench to be mobile, casters can be added at this stage. Jonny offers helpful tips on how to incorporate them without compromising stability.
Building the Frame
Two identical frames are built next—one for the work surface and one for the lower shelf. These frames use straight 2x4s and cross members cut to the same lengths for a consistent, level build.
Assembly is done with screws and careful measuring to keep the corners square. A square frame is key for getting a flat and stable work surface.
Attaching the Legs
Once the frames are complete, the legs are installed between them. The top frame is placed flush with the top of the legs, and a flat surface is used to keep everything aligned.
Screws are driven through the side of the frames and into the legs. This helps anchor the whole structure securely and evenly.
Installing the Work Surface and Shelf
A sheet of MDF is cut and attached to the top frame to create the main work surface. Jonny uses a combo square to keep the alignment clean while driving in screws around the edges.
Another sheet of MDF is cut to size and installed for the lower shelf. This addition increases the bench’s storage capacity and further reinforces the frame.
Sealing and Finishing
To protect the MDF from moisture and shop wear, Jonny recommends sealing it with a water-based varnish. This step helps prevent swelling and extends the lifespan of the bench.
The finish can also make cleanup easier, especially if you’ll be using glue or finish products on the surface. It’s a small step that makes a big difference over time.
A Practical Shop Addition
This bench can be built quickly, even if you’re working alone with minimal tools. It’s a great weekend project that doesn’t require complex joinery or specialty equipment.
While the build is simple, the final result is a durable and versatile bench that will get plenty of use in any workshop. The lower shelf adds convenient storage, and the overall design can be modified to fit your space.
Want to See the Full Build?
Get the plans here: https://www.jonny-builds.com/1-hour-workbench.

Matt’s Take
These are my personal thoughts and tips based on my own experience in the shop. This section is not written, reviewed, or endorsed by the original creator of this project.
Building a solid workbench doesn’t have to be complicated, and this design proves it. The doubled-up 2×4 legs are a smart approach — you get the strength of thicker stock without the cost, and standard lumber is easier to find straight and true. When you’re screwing those leg pairs together, take your time to keep them flush. Any bow or twist here will telegraph through the entire bench.
MDF gets a bad rap sometimes, but it’s actually a great choice for a work surface. It’s flat, dense, and affordable — perfect for a utility bench like this. The key is that sealing step. Unsealed MDF will soak up moisture like a sponge and turn into a swollen mess. A couple coats of water-based poly will keep it stable and make cleanup much easier when glue inevitably drips on it.
One thing I really appreciate about this design is how it prioritizes function over fancy joinery. Sometimes the best shop project is the one that gets you working again quickly. If you’re setting up your first shop or need a second surface for assembly work, this hits the sweet spot of sturdy, useful, and achievable in a weekend.