

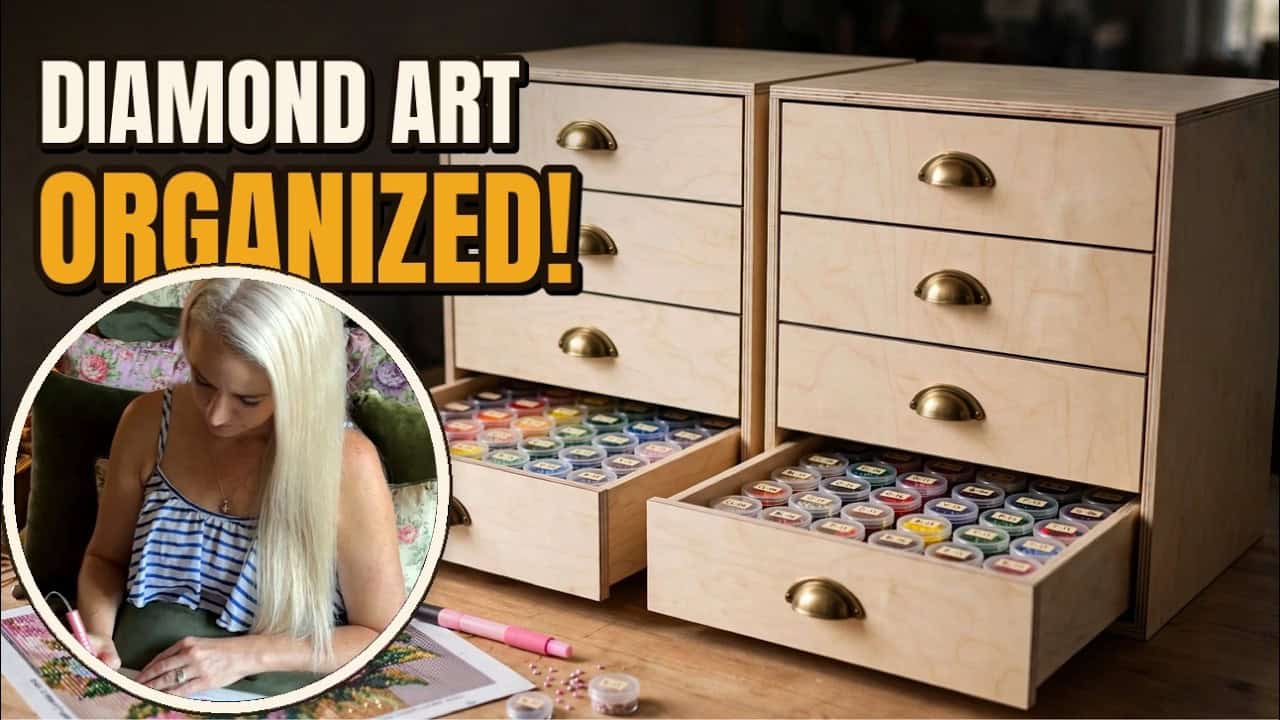
This project was built and designed by Chris from A Glimpse Inside.
Chris set out to solve a storage problem for his wife’s growing diamond painting hobby, a craft that uses tiny resin rhinestones to create detailed artwork. With dozens of small containers and bags of supplies piling up, she needed an organized system that could keep everything sorted and accessible. Chris turned to his CNC machine to design and cut a modular drawer unit custom-fit to her supplies.
Watch the full video and subscribe to A Glimpse Inside:
Design
Chris started the design process using an online box-building tool that lets users lay out custom enclosures in minutes. After confirming measurements with his wife to make sure the drawers would actually fit her supplies, the pair mapped out the entire project on a modest amount of thin plywood. The goal was simple: a straightforward drawer box system without any fancy lid or added bells and whistles.
Designing digitally first allowed Chris to nest all the parts efficiently on the sheet material before ever firing up the CNC. This kind of planning saves material and time, and it’s a technique that translates well to almost any plywood-based project where repeat parts are involved.
Cutting and Assembly
Once the files were set, Chris cut everything out on his CNC machine and laid out the parts for assembly. Interestingly, he skipped glue entirely for the main box joints, opting instead to rely on a large number of thin pin nails driven at multiple angles to lock everything together. For a piece that’s going to sit indoors and never see rough handling, this approach holds up fine and speeds up the build considerably.
To simulate drawer slides without hardware, Chris stacked thin spacer strips between each drawer opening, then took careful measurements to make sure everything would glide smoothly. These spacers double as simple drawer rails, just enough to keep each drawer tracking straight without needing anything heavy-duty.
Hiding the Edges
To clean up the exposed edges of the plywood, Chris added thin strips of Baltic birch plywood as edge banding. He’s upfront that leaving the raw edges exposed looks fine on its own, but dressing them up gives the piece a more finished, furniture-like appearance.
For attaching the edge banding, Chris used a combination of regular wood glue and CA glue, a technique he’s relied on for years because of how quickly and securely it bonds. This method is worth trying for anyone looking to speed up edge-banding work without clamps, since the CA glue sets almost instantly and locks the strip in place while the regular glue cures.
Final Assembly and Fit
With all the panels pinned and edges banded, Chris flipped the case and repeated the fastening process on the bottom to make sure every joint was locked from multiple directions. A quick pass of sanding knocked down any rough spots before the drawers went in.
In total, Chris built two of these units, giving his wife eight drawers of dedicated storage. He used foam-lined, neoprene-style organizer cases to measure the interior drawer dimensions, since those cases hold the small acrylic containers that store the diamond art pieces. The fit worked out well on the first attempt, which made for a satisfying finish to the build.
Small Touches
For hardware, Chris picked up a batch of inexpensive drawer pulls, a reminder that budget-friendly finds can still look sharp when paired with a clean build. It’s a good example of how a thoughtful design can make modest hardware choices look intentional rather than cheap.
This kind of modular drawer system isn’t limited to craft supplies. The same basic approach, CNC-cut plywood boxes with simple pin construction and edge banding, could easily be adapted for small parts organization in a shop, a kitchen, or anywhere small items need a dedicated, visible home.
Why It Matters
Beyond the build itself, this project is a good reminder that woodworking skills can be put toward thoughtful, personal solutions for the people in a maker’s life. Chris didn’t need an elaborate design to make a meaningful improvement in his wife’s hobby space, just a practical box built with care and a bit of digital fabrication. It’s proof that useful shop projects don’t always need to be complicated to make a real difference.
Watch the full video and subscribe to A Glimpse Inside:

Matt’s Take
These are my personal thoughts and tips based on my own experience in the shop. This section is not written, reviewed, or endorsed by the original creator of this project.
Designing the whole layout digitally before cutting anything is a habit worth building if you work with sheet goods a lot. Nesting parts ahead of time isn’t just about saving plywood, it also lets you catch sizing mistakes on screen instead of after the cut. Anyone with access to a CNC, or even just a table saw and a cut list made in software, can borrow this workflow for drawer systems, shelving, or anything with repeated parts.
Skipping glue on the main joints and relying on angled pin nails is a reasonable call for something like this. For small, lightweight boxes that live indoors and won’t take abuse, mechanical fasteners alone can hold up fine. That said, if you’re building something that’ll get knocked around or loaded heavier, adding glue to those joints gives you a lot more long-term insurance for not much extra effort.
The spacer-strip trick for drawer rails is a nice low-cost way to get smooth action without buying slides. Just make sure your spacers are consistent in thickness, even small variations will make a drawer bind or sit crooked. A quick pass of wax or a dry lubricant on those rails can make a big difference in how smoothly the drawers glide over time.
Mixing wood glue with CA glue for edge banding is a solid method if you want strength without clamps. Just work in small sections, CA glue sets fast, so you don’t get much room to adjust the strip once it’s placed. It’s a good technique to have in your back pocket anytime you’re banding edges on a deadline.