

Paint is the cheapest thing you can do to a house and the fastest thing to go wrong.
Not wrong on day one. Day one is always gorgeous. Wrong at month fourteen, when a handprint by the light switch turns into a shiny halo you can’t scrub out. Wrong in spring, when the siding you painted in late October starts letting go in sheets.
Professional painters see the same mistakes on repeat. Same substrates, same shortcuts, same phone call two years later asking why it failed.
Most of it comes down to three things: sheen, prep, and picking a product rated for a job it was never built to do.
Here are 33 paint choices that look fine now and cost you later — plus what the pros reach for instead.
1. Flat Paint in the Hallway
Color gets all the attention. Sheen causes all the regret.
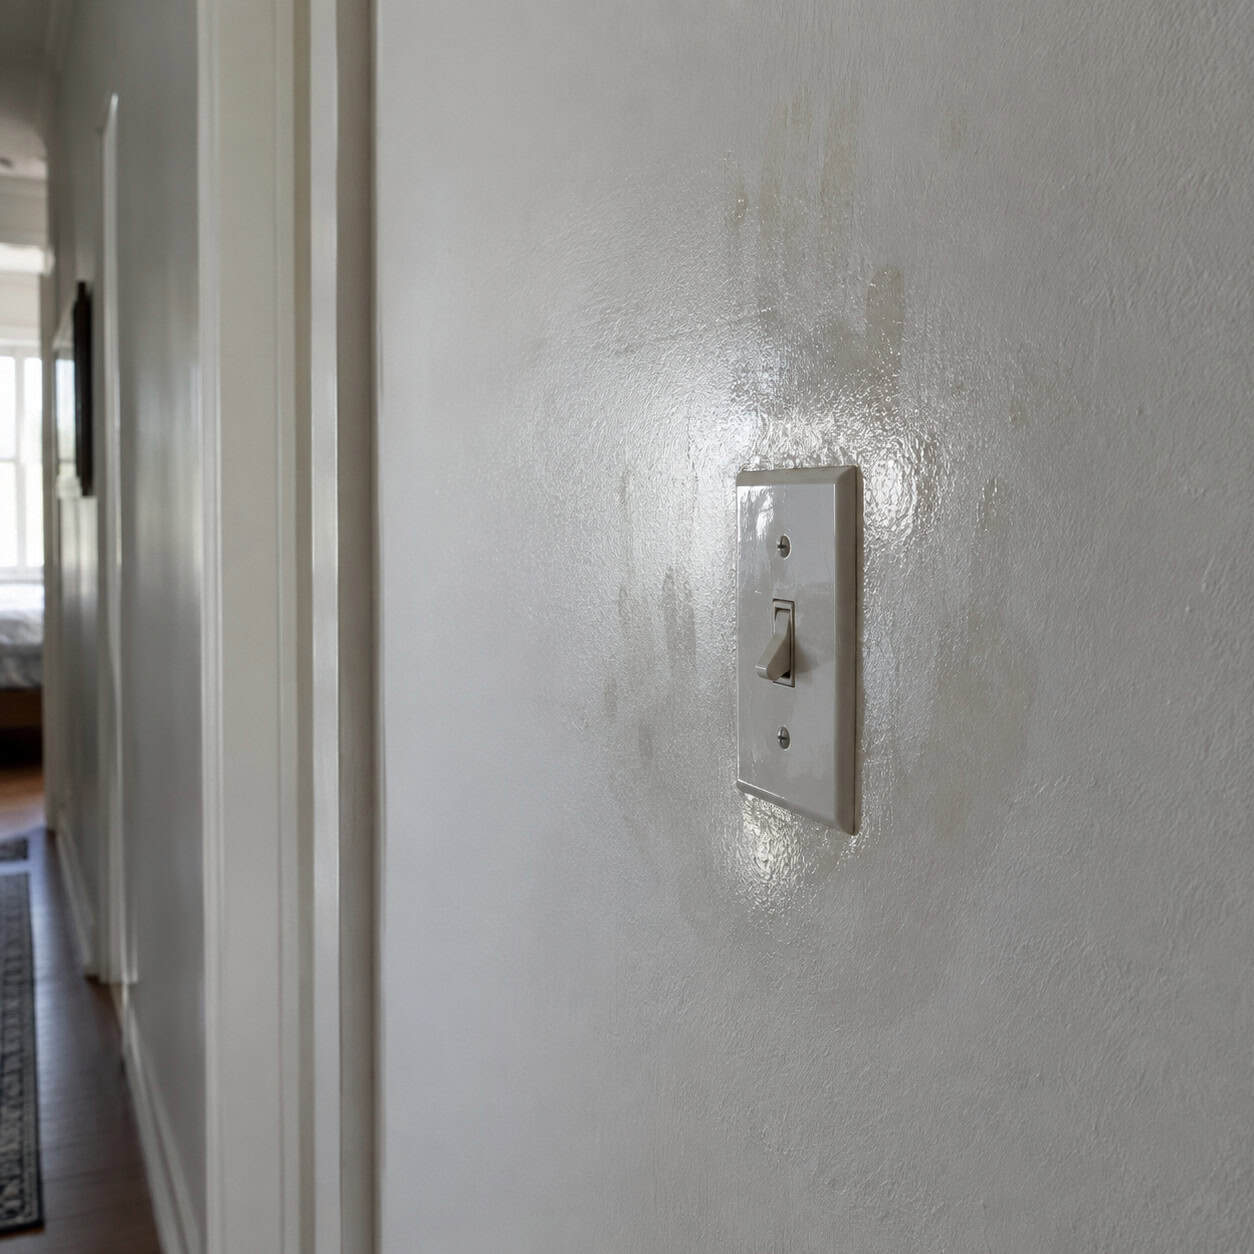
Flat paint hides drywall seams and roller marks beautifully, which is exactly why builders spray it everywhere. Then somebody wipes a smudge off the wall and the rubbed spot goes glossy — that’s burnishing, and it doesn’t wash out.
Hallways, stairwells, and anywhere near a back door take the worst of it. By year three you’ve got a shine map of where your family walks.
Pros spec a scrubbable matte or an eggshell in traffic lanes. Modern washable mattes hide flaws nearly as well as flat and survive a sponge. The debate over flat versus eggshell ends the first time you have a toddler.
2. Dark Paint on Vinyl Siding
This one isn’t taste. It’s thermodynamics.
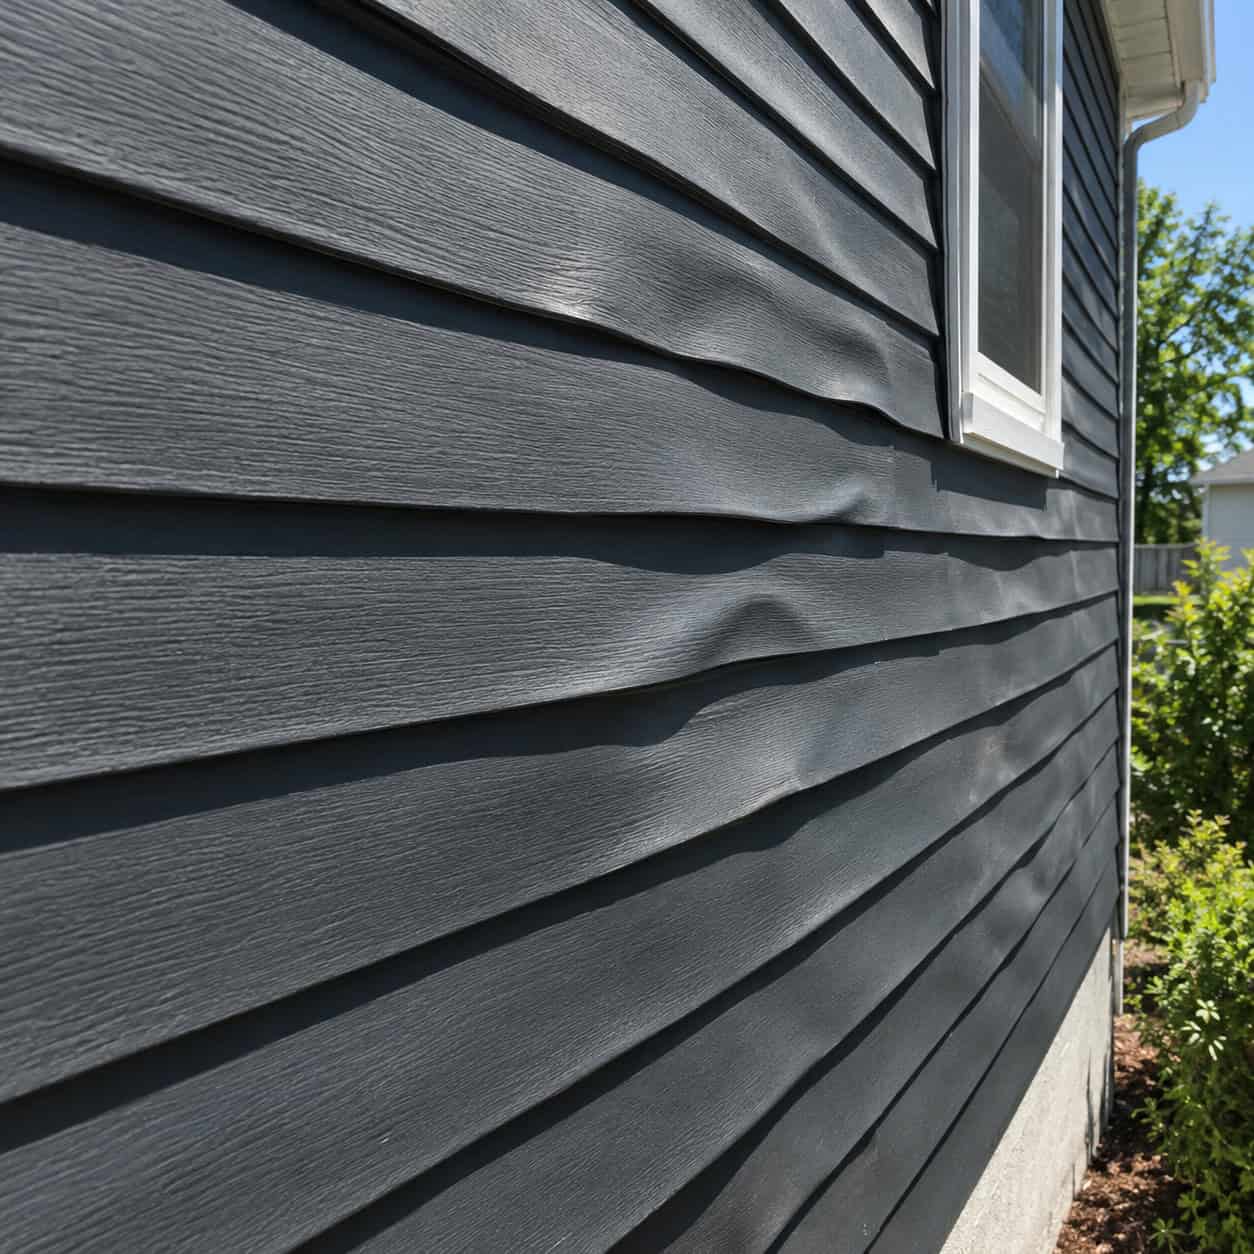
Vinyl panels are engineered to expand and contract within the heat range of their factory color. Paint them darker and they absorb more solar energy than the material can handle — they warp, wave, and buckle, and they never go back.
Sherwin-Williams and other manufacturers publish light reflectance value limits for exactly this reason. Go below the panel’s original LRV and you’ve voided whatever warranty was left.
Stay at or lighter than the factory shade, or use a vinyl-safe formulated line with heat-reflective pigments. Want black siding? Replace the panels.
3. Latex Rolled Straight Over Oil-Based Trim
Trim painted before the mid-1990s is usually oil enamel. Slick, hard, and completely unwilling to bond with waterborne paint.
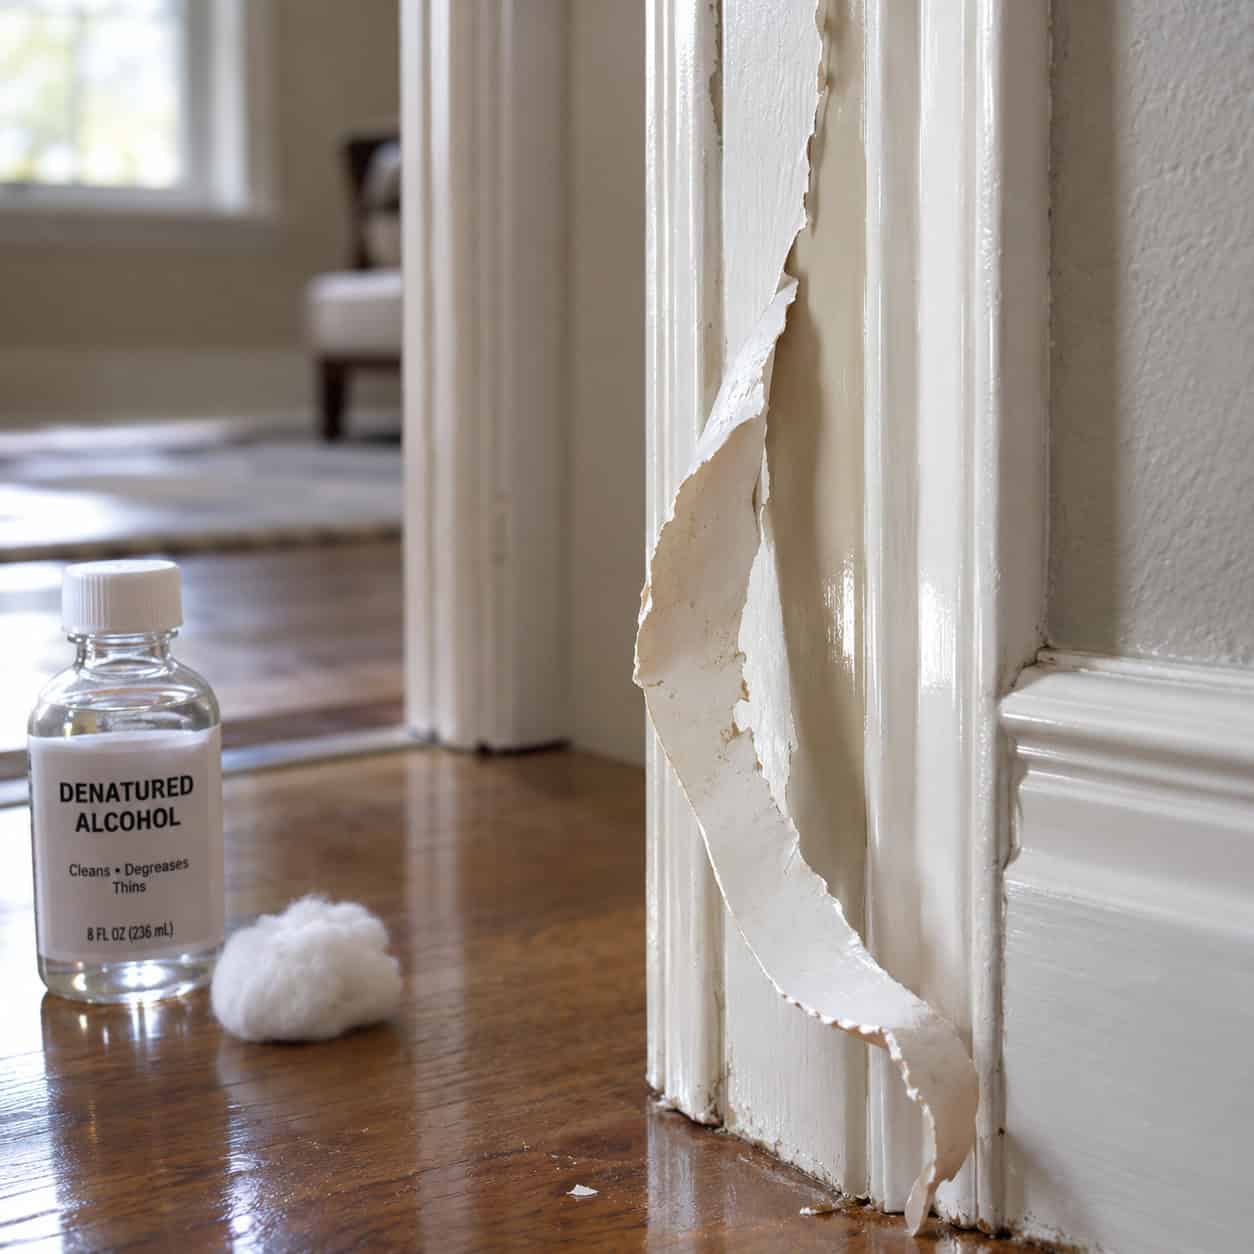
The new coat looks perfect for a year or two. Then it peels off in ribbons, often in one satisfying strip you can pull with your fingernail.
Test first. Soak a cotton ball in denatured alcohol and rub a hidden spot — if paint comes off on the cotton, it’s latex. If nothing moves, it’s oil.
Scuff sand with 150 grit, vacuum the dust, and lay down a bonding primer. Skip that step and nothing else you do matters.
4. Cool Gray and Greige on Every Wall
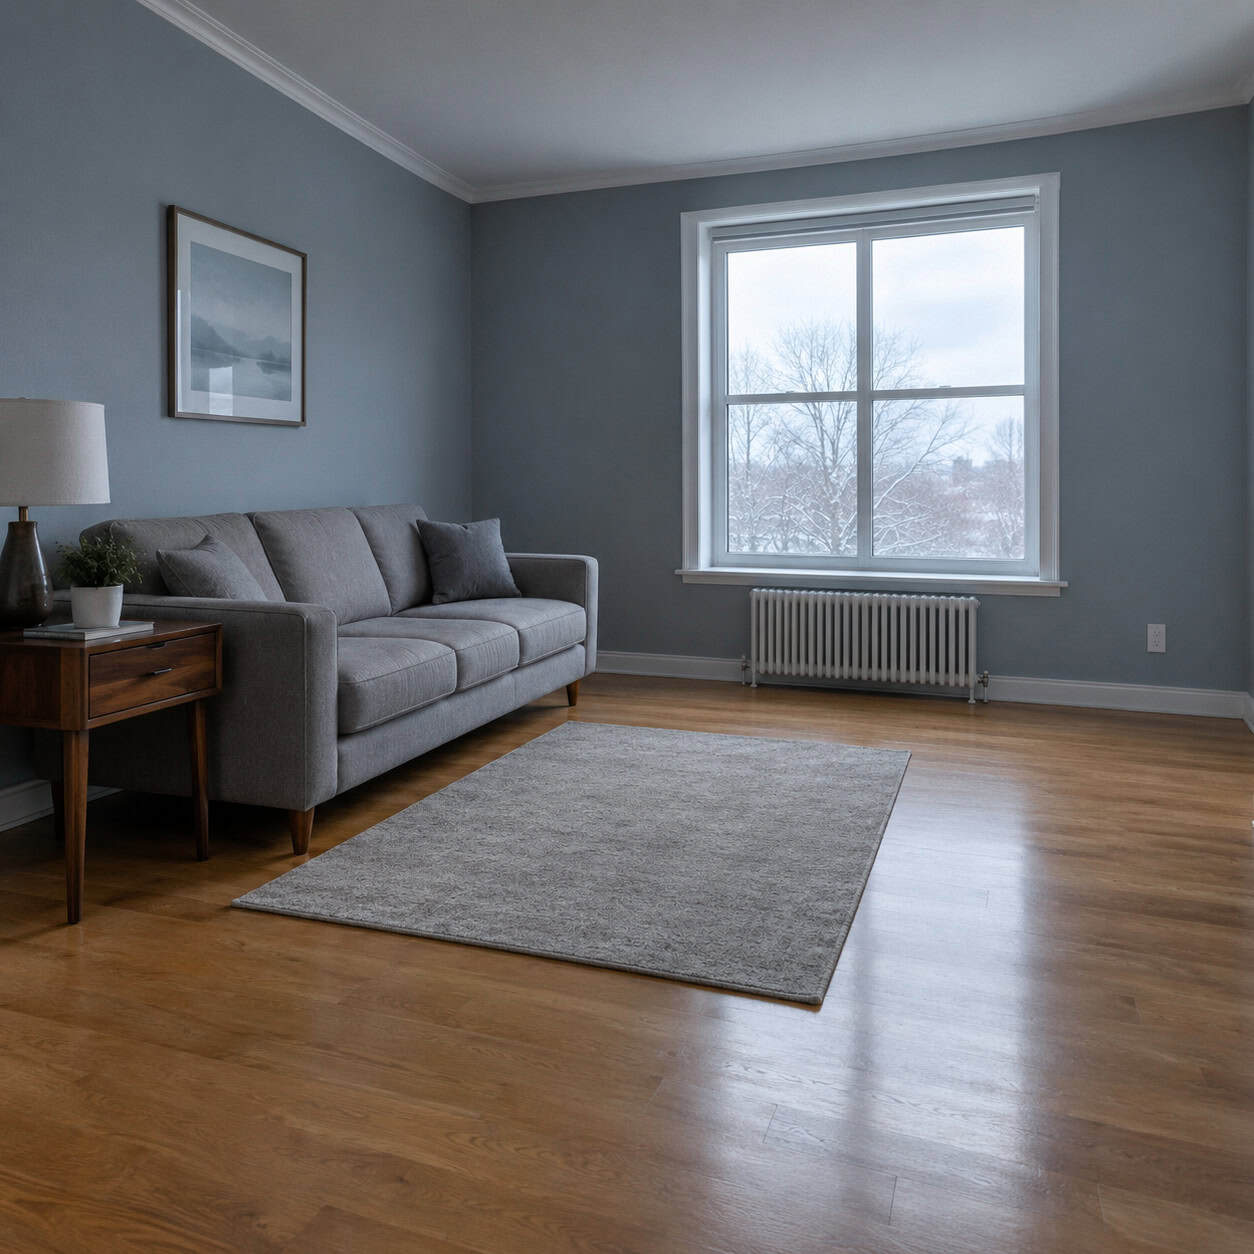
Between 2012 and 2022, roughly every flip in America got the same treatment. Agreeable gray, greige trim, white ceiling.
Cool grays have a blue undertone. Put them next to oak floors, walnut furniture, or warm LED bulbs and they read clinical — like a dentist’s waiting room with better art.
Painters now report gray removal as one of the most-requested repaints in the country, according to Apartment Therapy.
Pros have moved to warm whites, soft clays, and putty tones with yellow in the base. They play nicely with wood instead of fighting it.
5. Chalk Paint and Wax on a Hardworking Tabletop
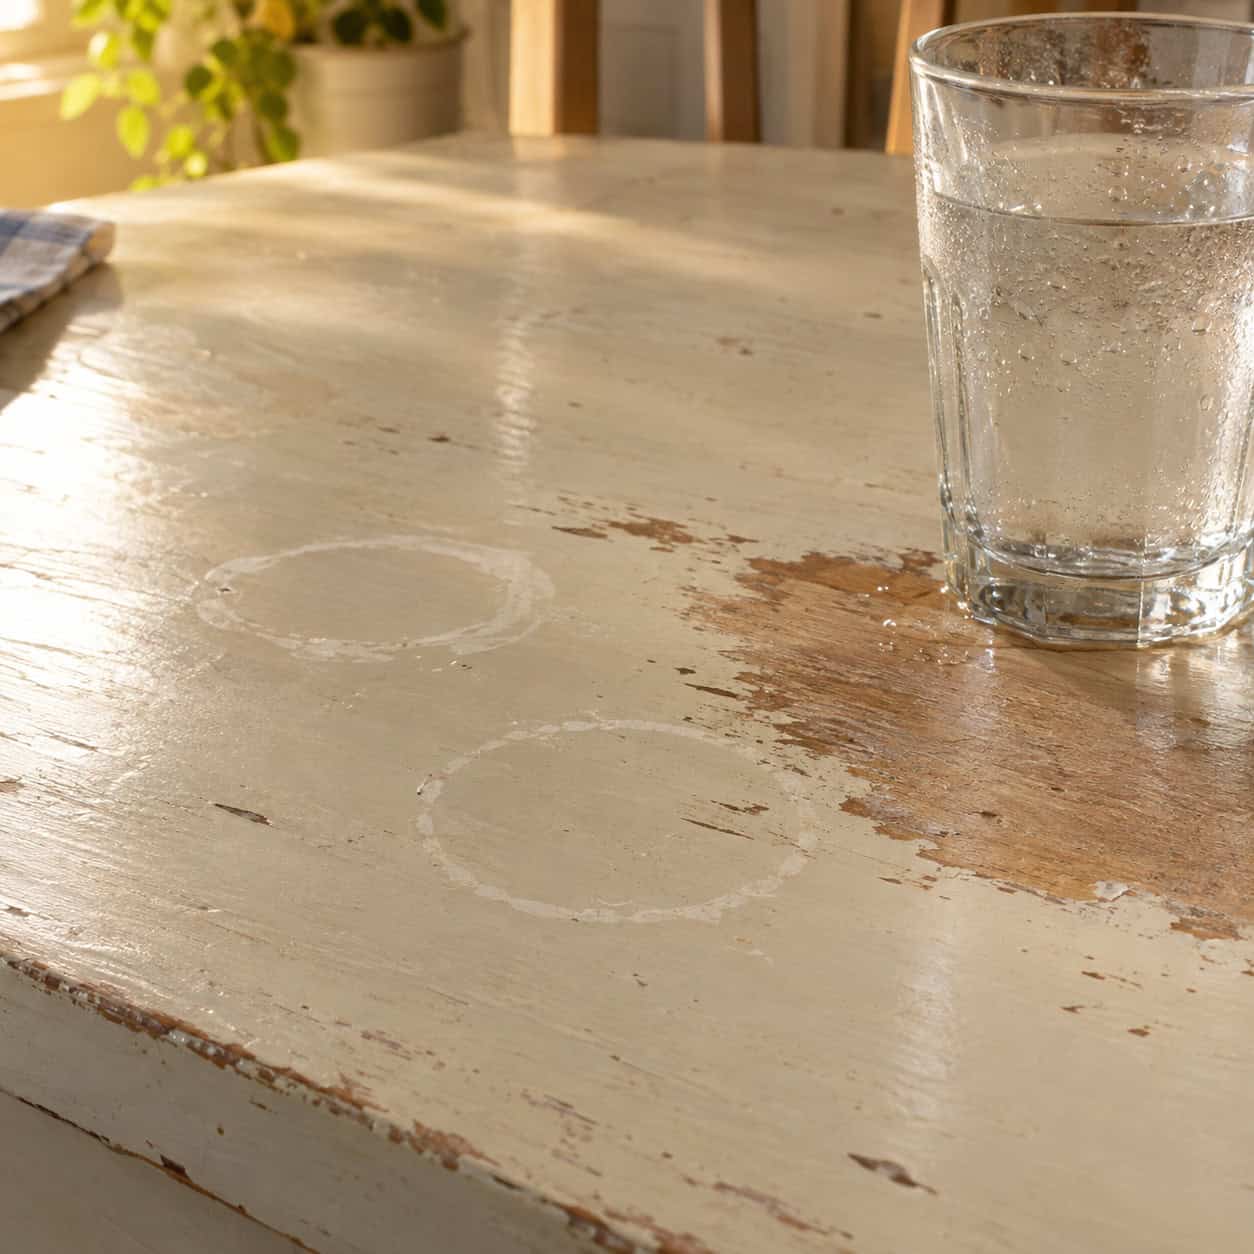
Chalk paint goes on without sanding and looks like a miracle. The problem is what’s protecting it.
Wax is a sacrificial finish. It’s porous, it reacts to water, and hand oils break it down. A sweating glass leaves a ring. A sippy cup leaves a bigger one.
It also needs reapplication every six to twelve months, which nobody does.
Chalk paint is fine on a decorative dresser or a bookcase. Anywhere food or water lands, pros seal with a water-based polyurethane instead — the same logic behind a farmhouse table makeover with paint and polyurethane.
6. Painting Straight Over Wallpaper
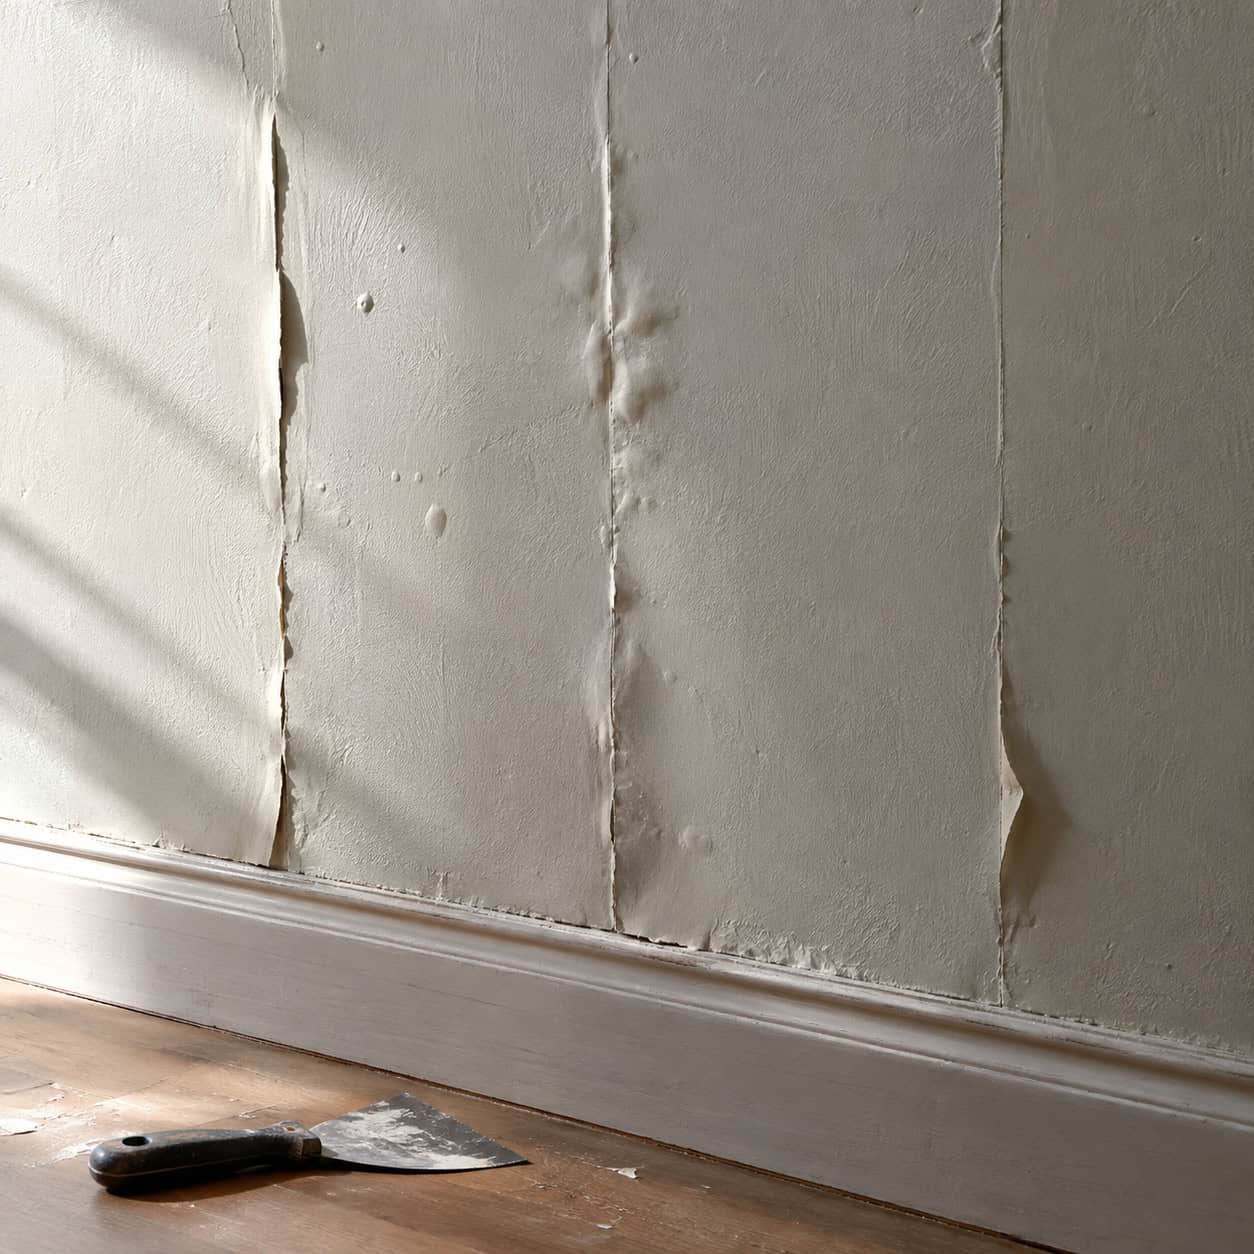
Water is the enemy here. Every coat of latex reactivates the old paste underneath.
Seams telegraph through. Edges curl. Bubbles show up four months later in the middle of a wall that looked flawless at the time.
Steam it off. It’s a miserable Saturday and it’s still the right call.
If the paper is genuinely bonded — original to the plaster, no loose edges anywhere — seal it with an oil or shellac primer first, then skim-coat the seams flat before any color.
7. Paint-and-Primer-in-One as Your Only Primer
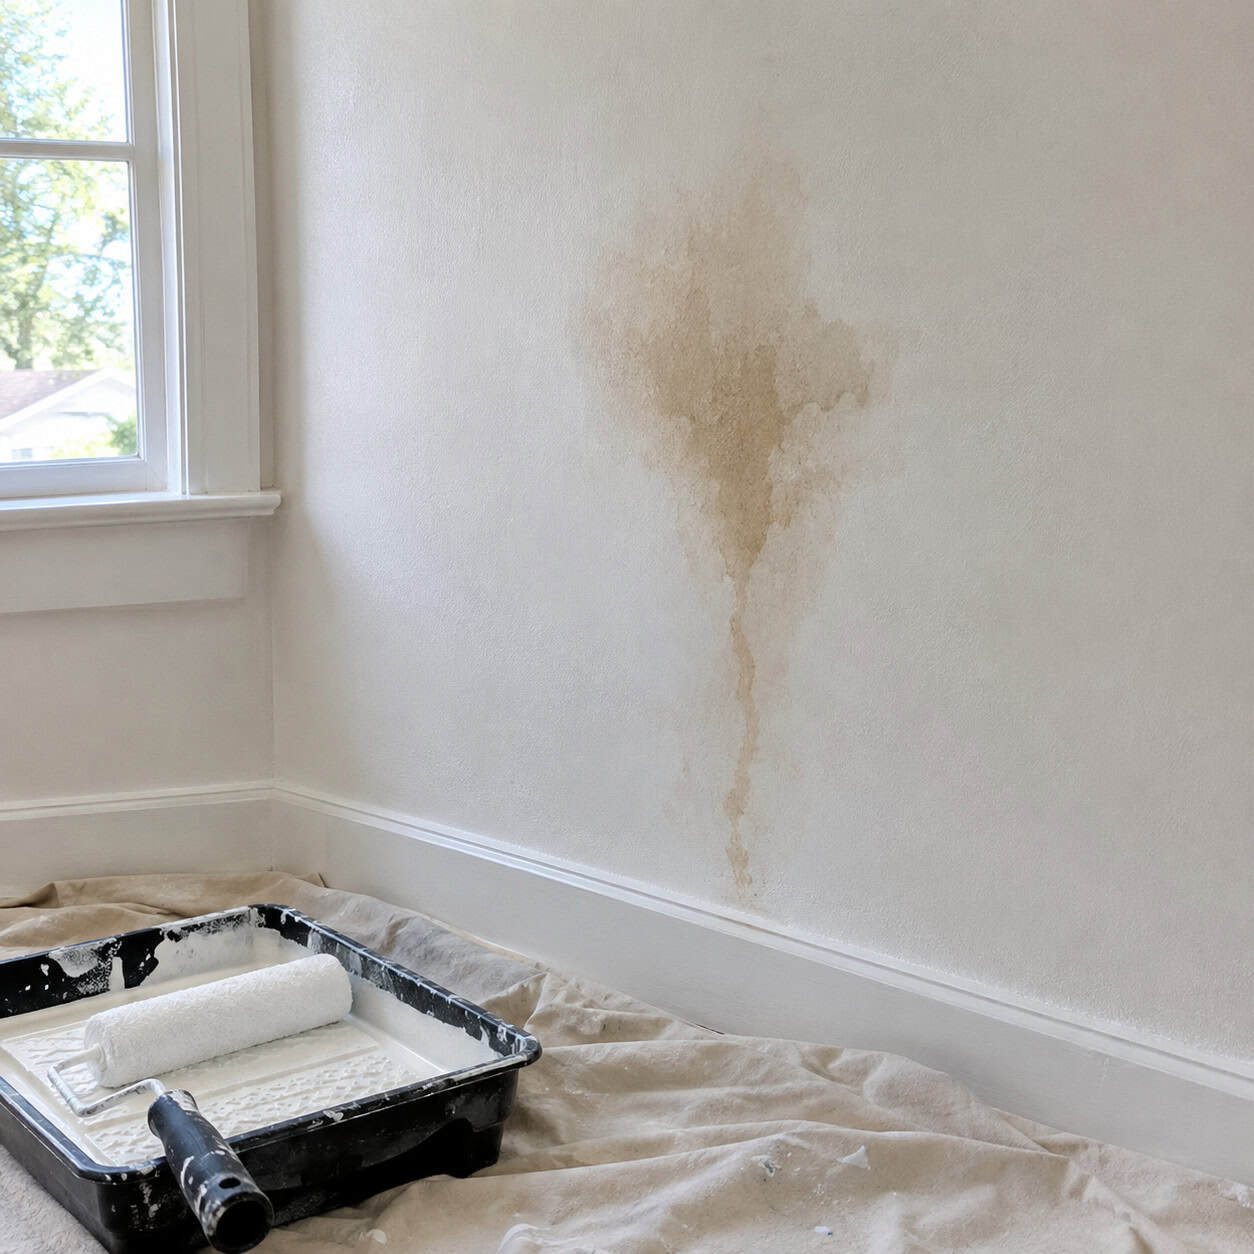
The name is marketing. It means a self-priming topcoat for sound, previously painted drywall. Nothing more.
It won’t block a water stain. It won’t bond to gloss. It won’t seal bare wood or fresh joint compound, and it won’t stop tannin bleed.
Spot-prime stains with a stain-blocking primer, use a bonding primer over anything slick, and use PVA on new drywall.
One gallon of real primer costs less than repainting a room twice.
8. Waterproofing Paint on a Wet Basement Wall
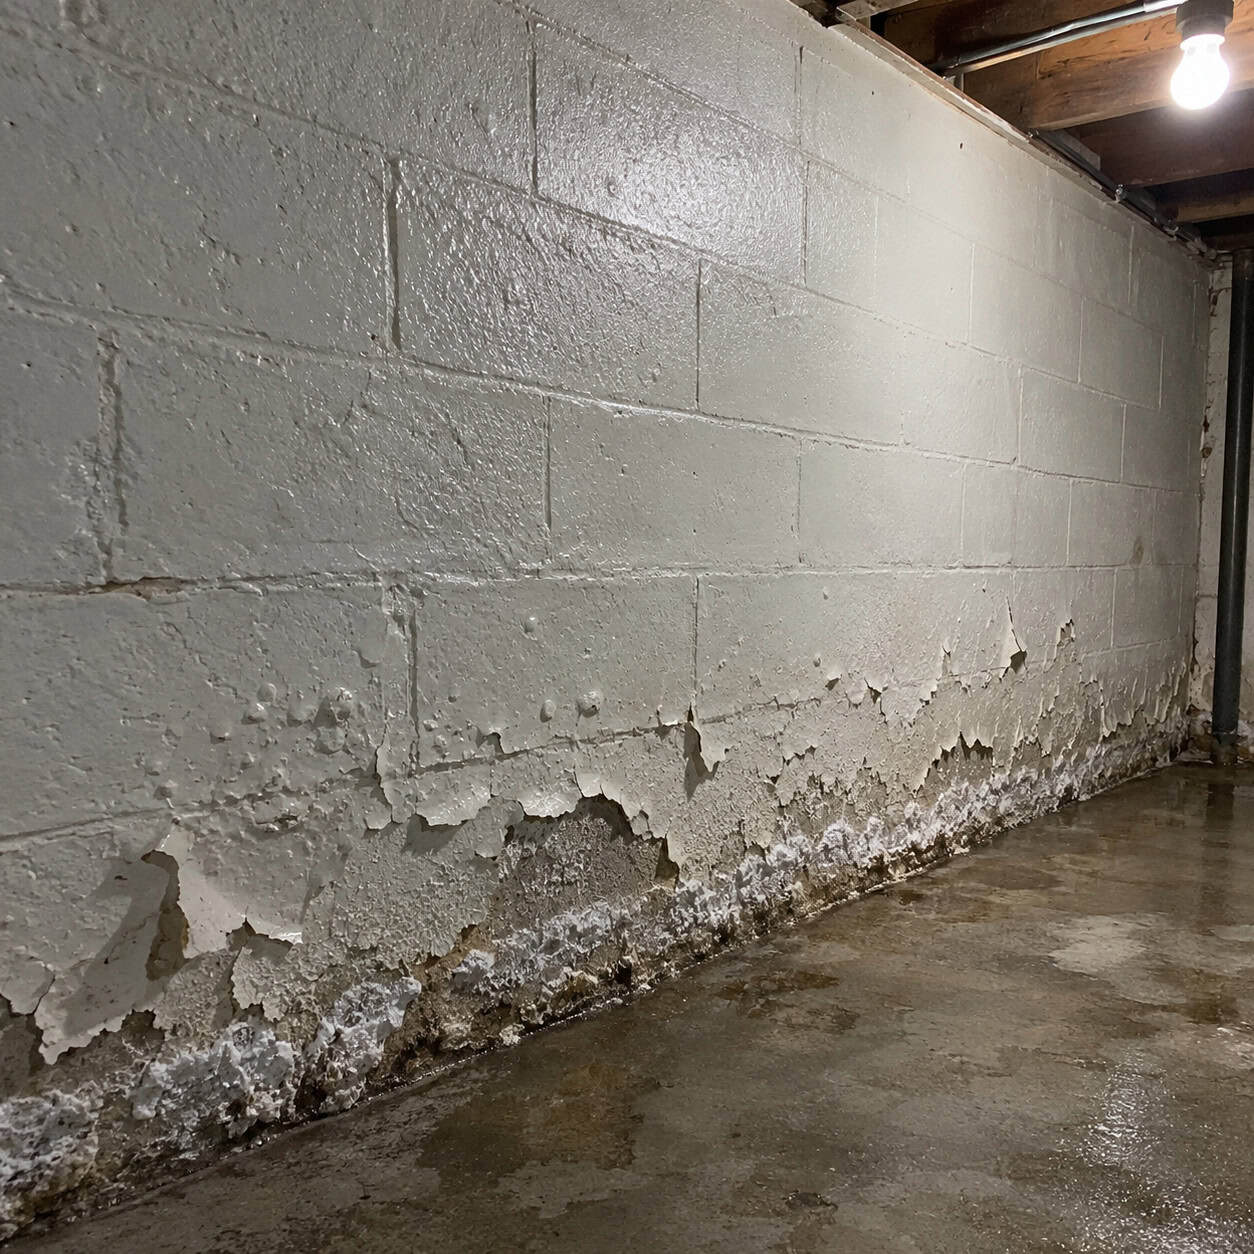
Every hardware store sells a thick white masonry coating that promises a dry basement. Read the label closely and you’ll find the limits.
Those coatings are rated for damp walls and light seepage — minor moisture vapor, not water under pressure. When soil around the foundation is saturated, hydrostatic pressure pushes water through the weakest point in the wall at several pounds per square inch. No film-forming paint on the inside face stops that.
What happens instead: the coating holds for a season, then water finds the seam between it and the block and lifts it off in blisters. Now you’ve got failed paint, trapped moisture in the masonry, and a mineral efflorescence crust underneath.
Worse, you’ve hidden the evidence. A buyer’s inspector will find it. You’ll be explaining a two-year-old paint job in a wet corner.
Fix the water first, always. Start outside. Soil should fall away from the foundation at roughly six inches of drop over the first ten feet. Gutters need to actually move water — downspouts should discharge a minimum of four to six feet from the wall, and extensions cost under twenty dollars each.
Check for the obvious stuff: flower beds graded toward the house, a window well with no drain, a downspout dumping straight onto the slab, an AC condensate line running to nowhere. Those four account for an enormous share of “mysterious” basement water.
If the water is coming up through the floor slab or through the cove joint where floor meets wall, you’re looking at an interior drain tile system and a sump — a real contractor job in the thousands, not a weekend with a roller.
Once the basement is actually dry, a masonry coating is a reasonable cosmetic upgrade. Applied before that, it’s a mask.
9. Wall Paint on Your Trim
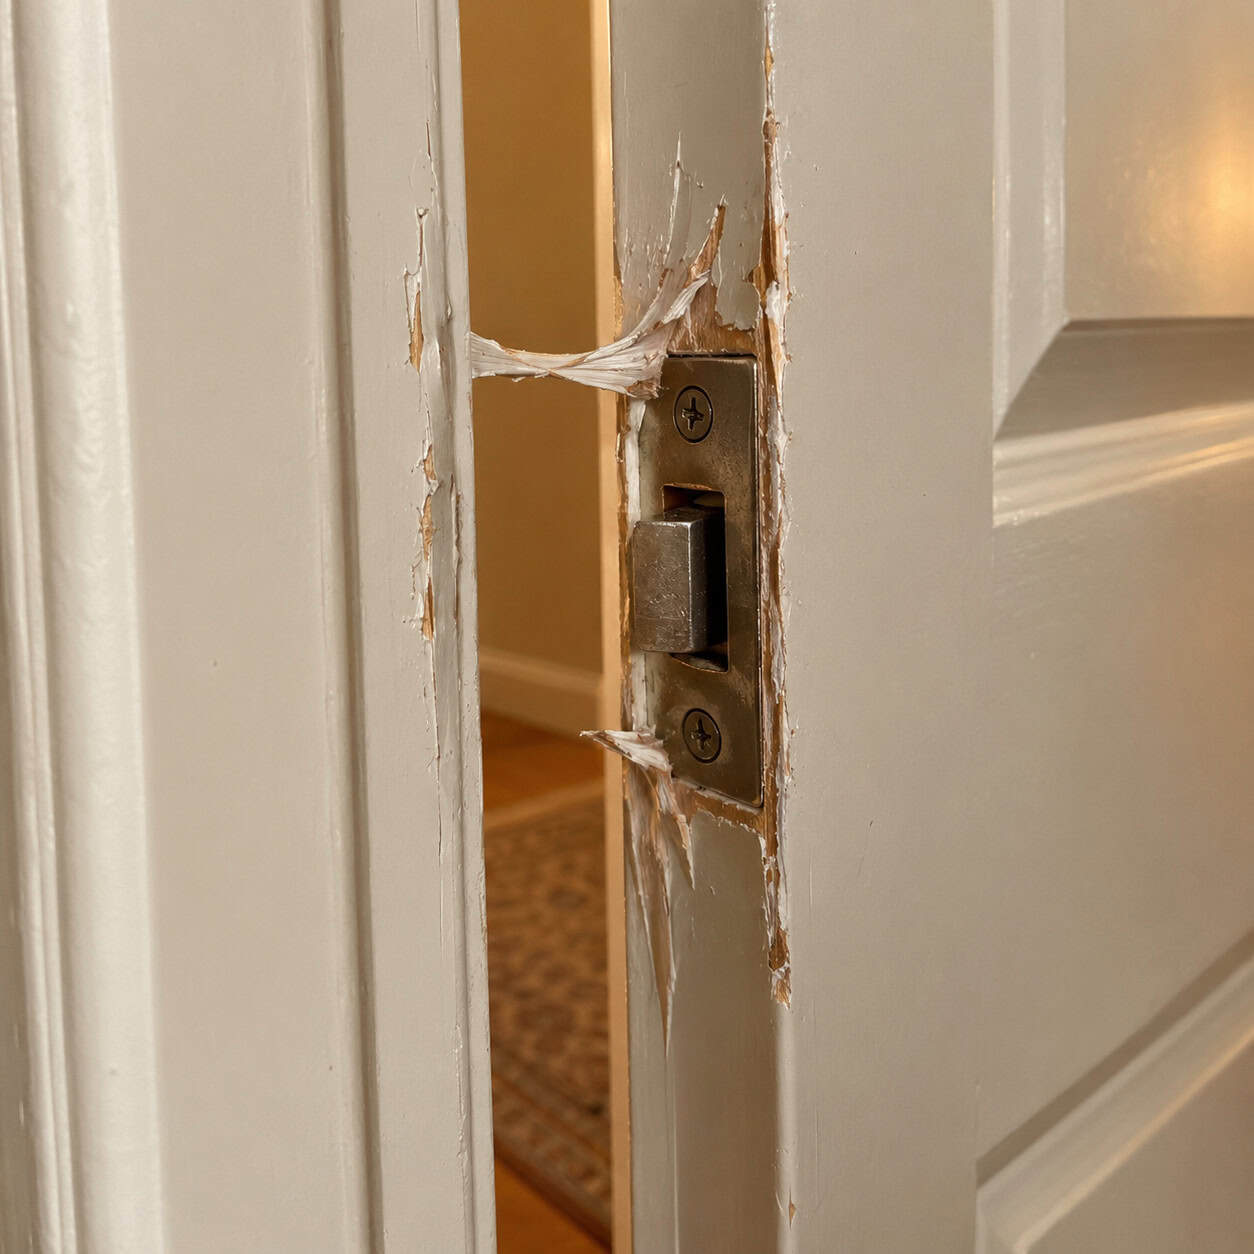
Trim gets kicked, grabbed, scraped by vacuum heads, and bumped by furniture. Wall paint never cures hard enough to take it.
It stays slightly soft indefinitely. Press something against it in August and the surface prints. Worse, painted door edges block — the door literally sticks to the jamb and tears the finish when it opens.
Use a waterborne alkyd or urethane enamel. They level out brush marks as they dry and cure to something closer to furniture-grade hardness.
Give it a full week before you close a freshly painted door against its stop.
10. Painting Unpainted Exterior Brick
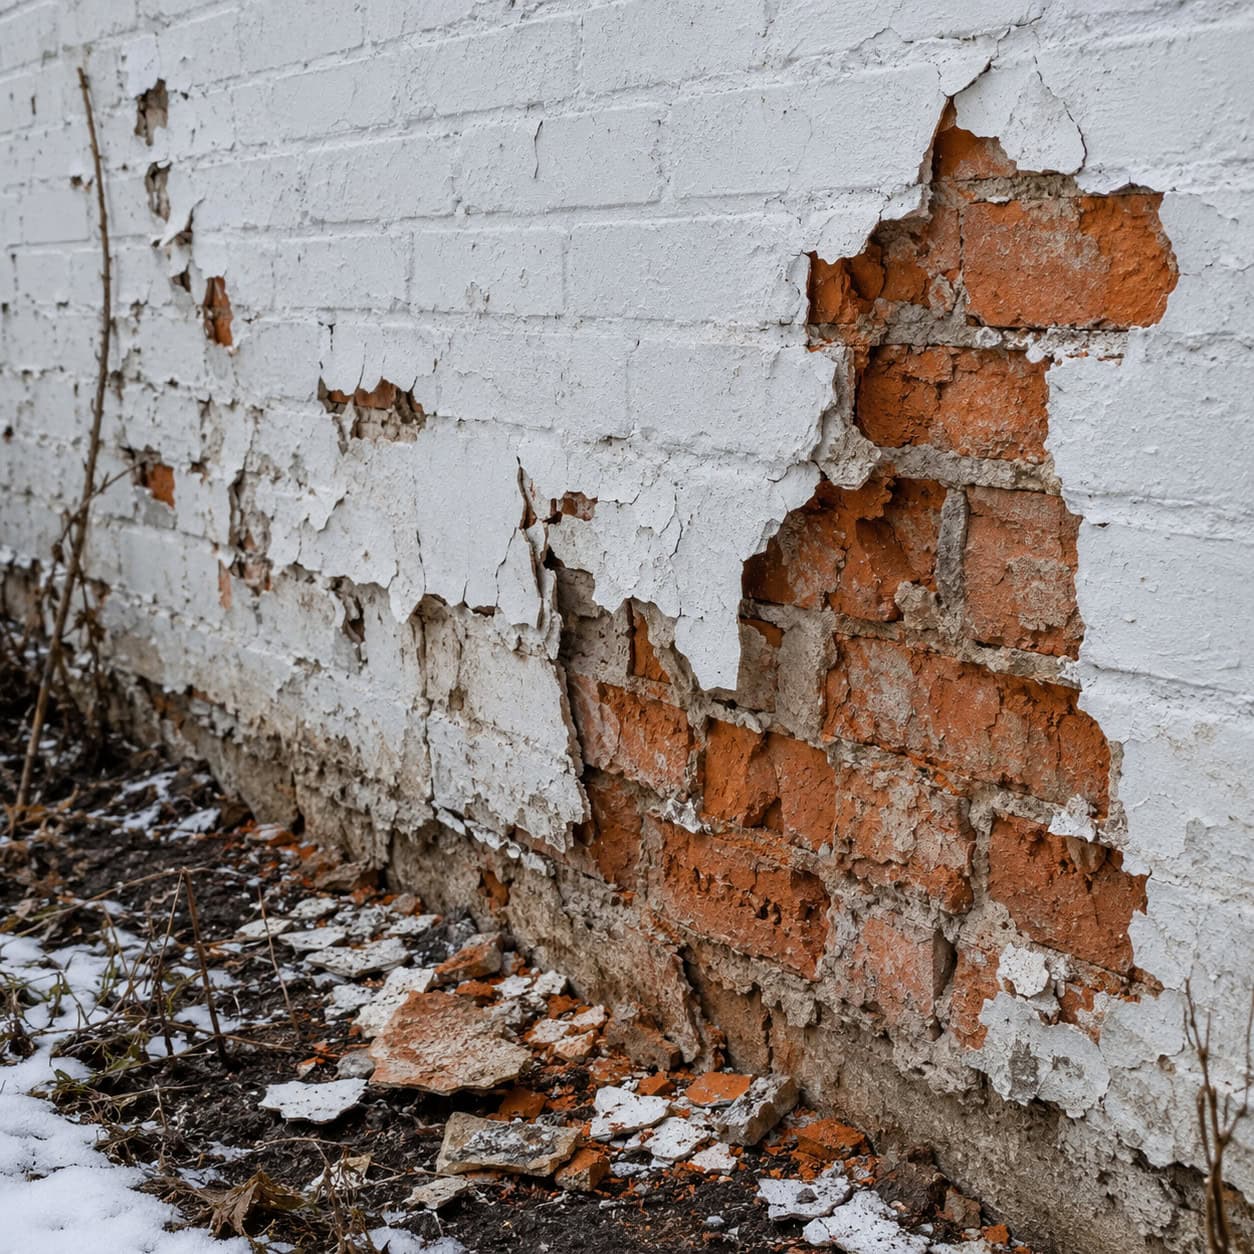
This is the most permanent decision on the list. Painted brick essentially never goes back.
Brick laid before roughly 1930 was fired at lower temperatures and set in soft lime mortar. It’s porous by design — the whole wall assembly works by letting moisture move into the masonry and then evaporate back out. Old houses breathe.
Roll a film-forming acrylic across that face and you shut the exit. Moisture still gets in through the back of the wall, through the mortar joints, through the top of a failing parapet. It just can’t leave.
Then winter arrives. Water trapped just behind the brick face freezes, expands about nine percent, and pops the hard outer skin off. That’s spalling. The exposed interior of the brick is softer and more absorbent than the face was, so the next freeze does more damage, faster.
Five years in, you’ve got a wall that’s shedding orange crumbs into the flowerbed. Stripping paint off soft brick with chemicals or media blasting usually takes more face with it.
If the brick has to be coated, pros use a vapor-open mineral silicate paint or a traditional limewash. Both chemically bond with the masonry and stay permeable — the wall still breathes.
Honestly, the better move is usually to walk away. Repoint the failing joints with a soft lime mortar matched to the original, wash the brick, and let it be brick. The Purdue Extension guide to paint failure is blunt about moisture being the root cause behind most coating failures on buildings.
11. Semi-Gloss on Old Plaster Walls
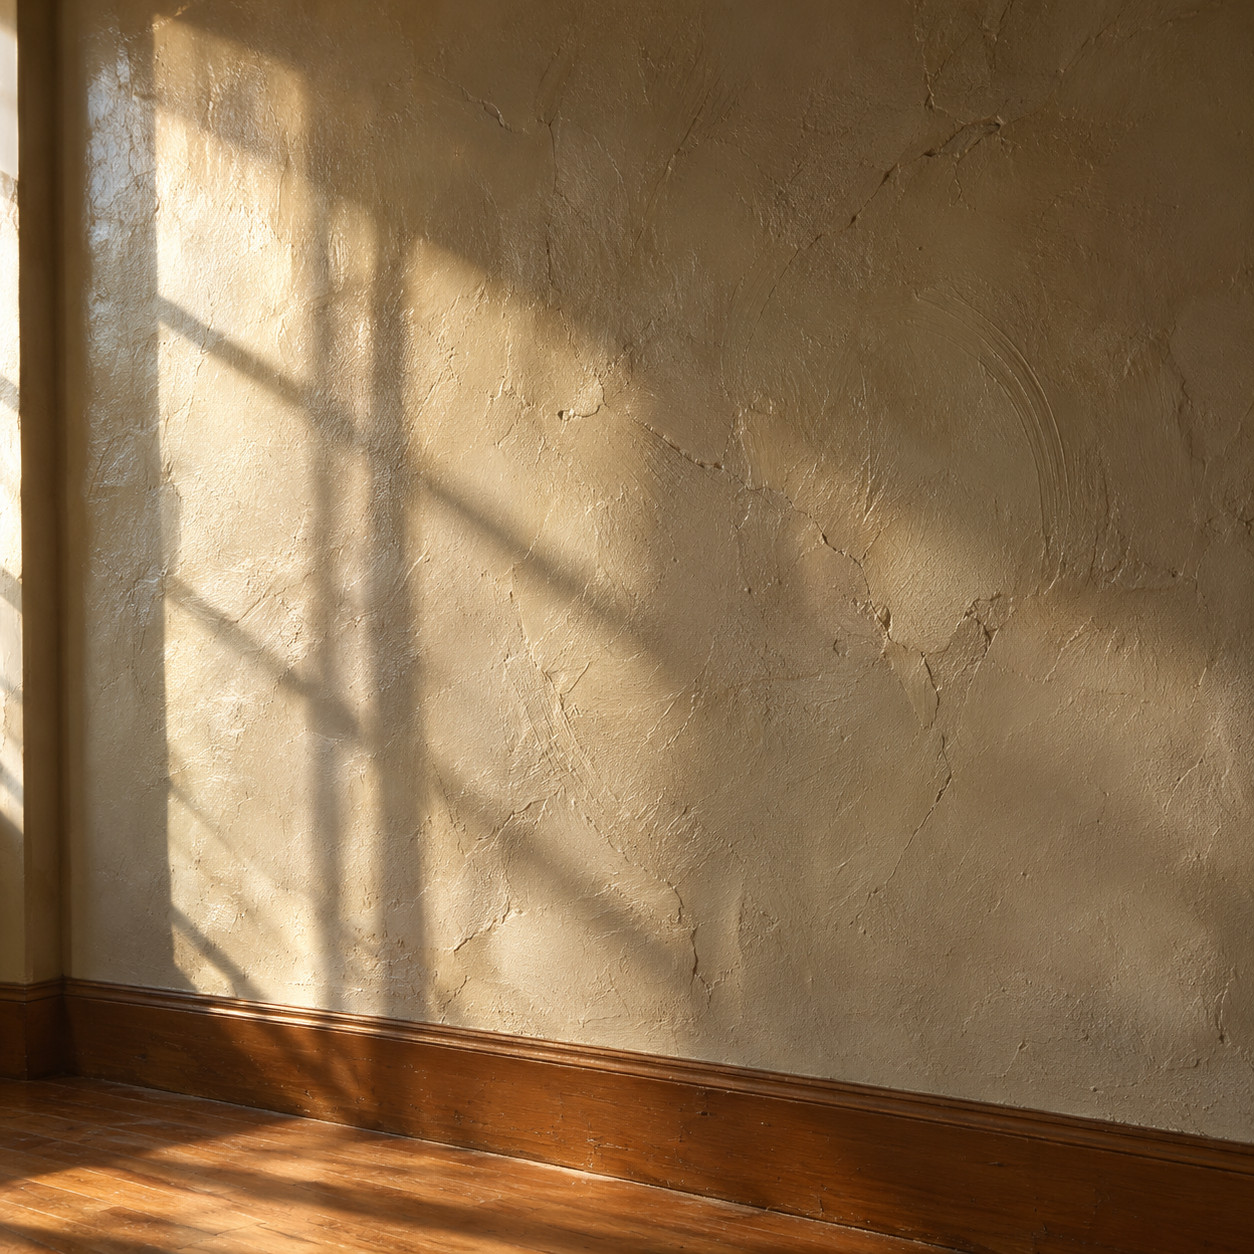
Gloss is a flaw magnifier. Plaster from 1915 is full of flaws.
Trowel waves, settlement bulges, hairline map cracking — invisible in flat, screaming in semi-gloss the moment afternoon sun rakes across the wall.
Keep plaster at matte or eggshell. Put the sheen on the woodwork where it belongs and the room reads intentional instead of lumpy.
12. Kitchen Cabinets Rolled with Wall Paint
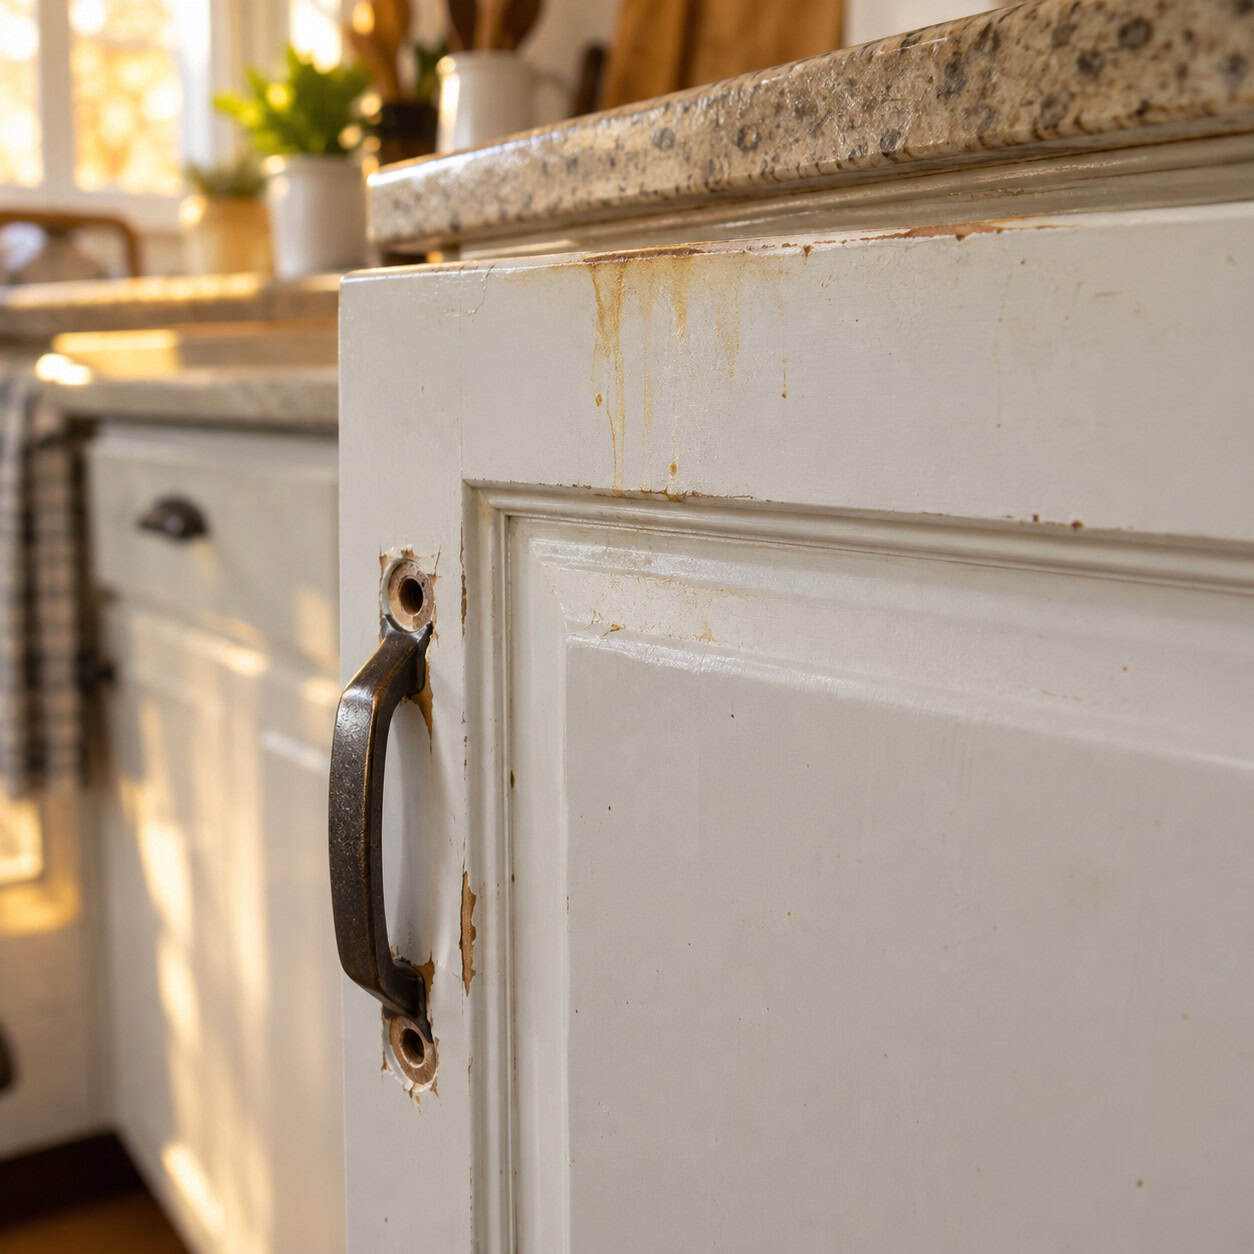
Cabinet doors near a range carry years of aerosolized cooking oil. You cannot see it. Paint can.
Skip degreasing and the finish goes tacky, chips at every pull within months, and brown grease stains bleed up through white paint about three weeks after you declared victory.
The sequence matters: degrease with a strong cleaner, rinse, scuff sand, prime with shellac to lock down both the grease and any oak or cherry tannin, then spray a waterborne alkyd enamel. The Paintly walks the same order.
If you’re already this deep, it’s worth knowing which cabinet choices turn into regrets before you commit a weekend.
13. Picking the Color Off a Two-Inch Chip at the Store
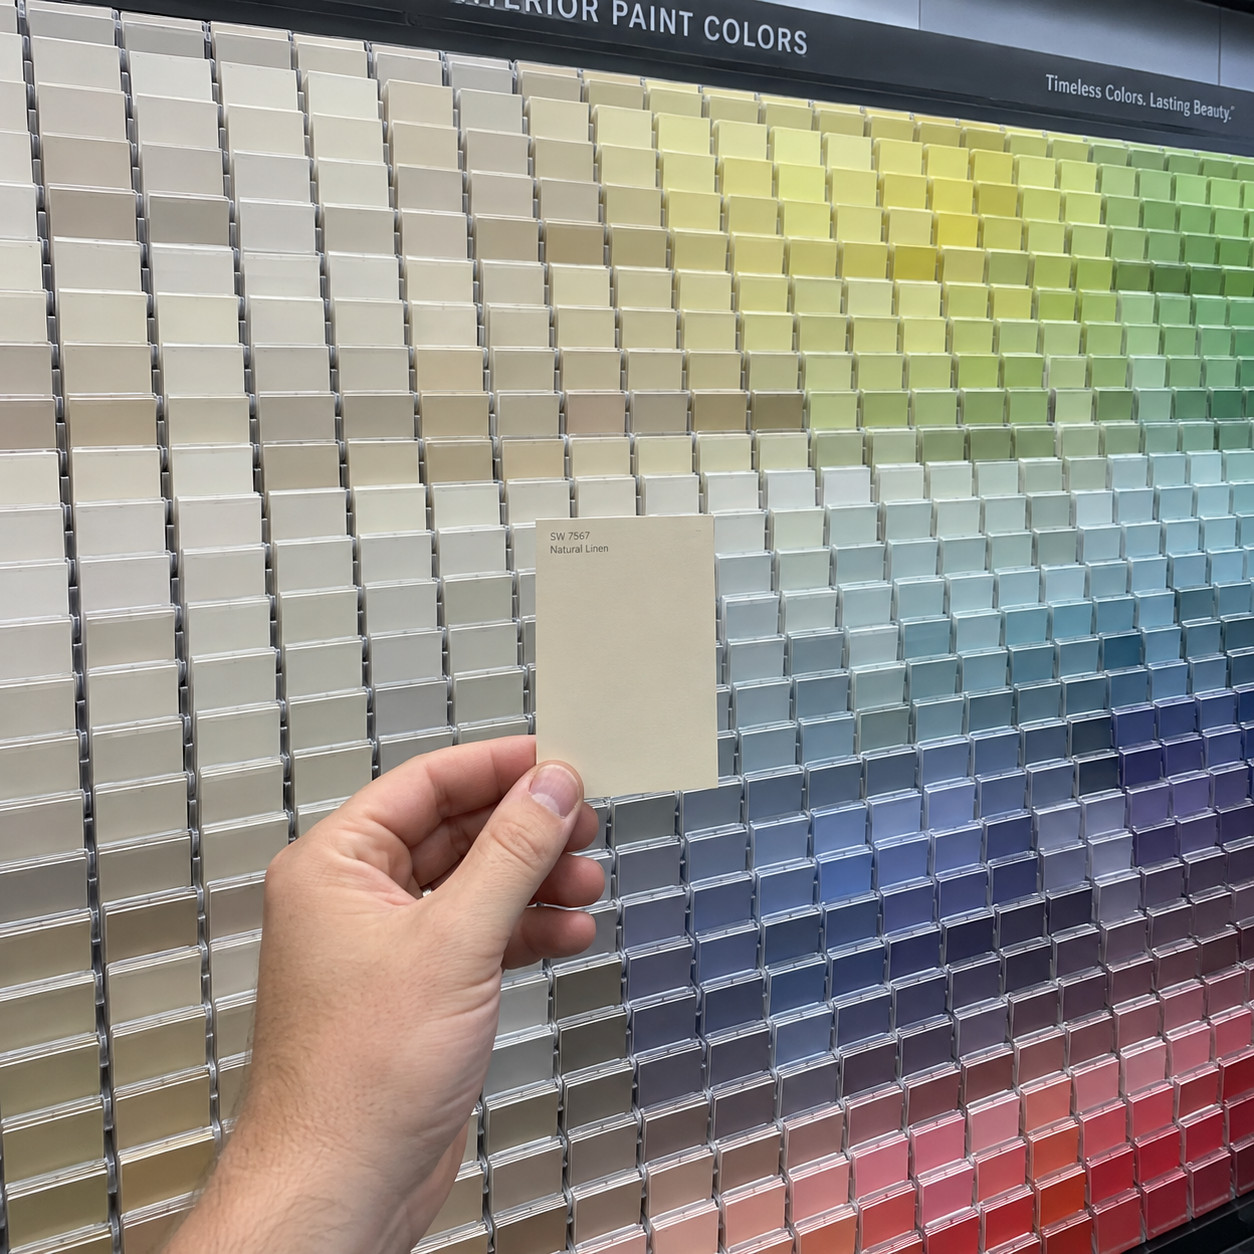
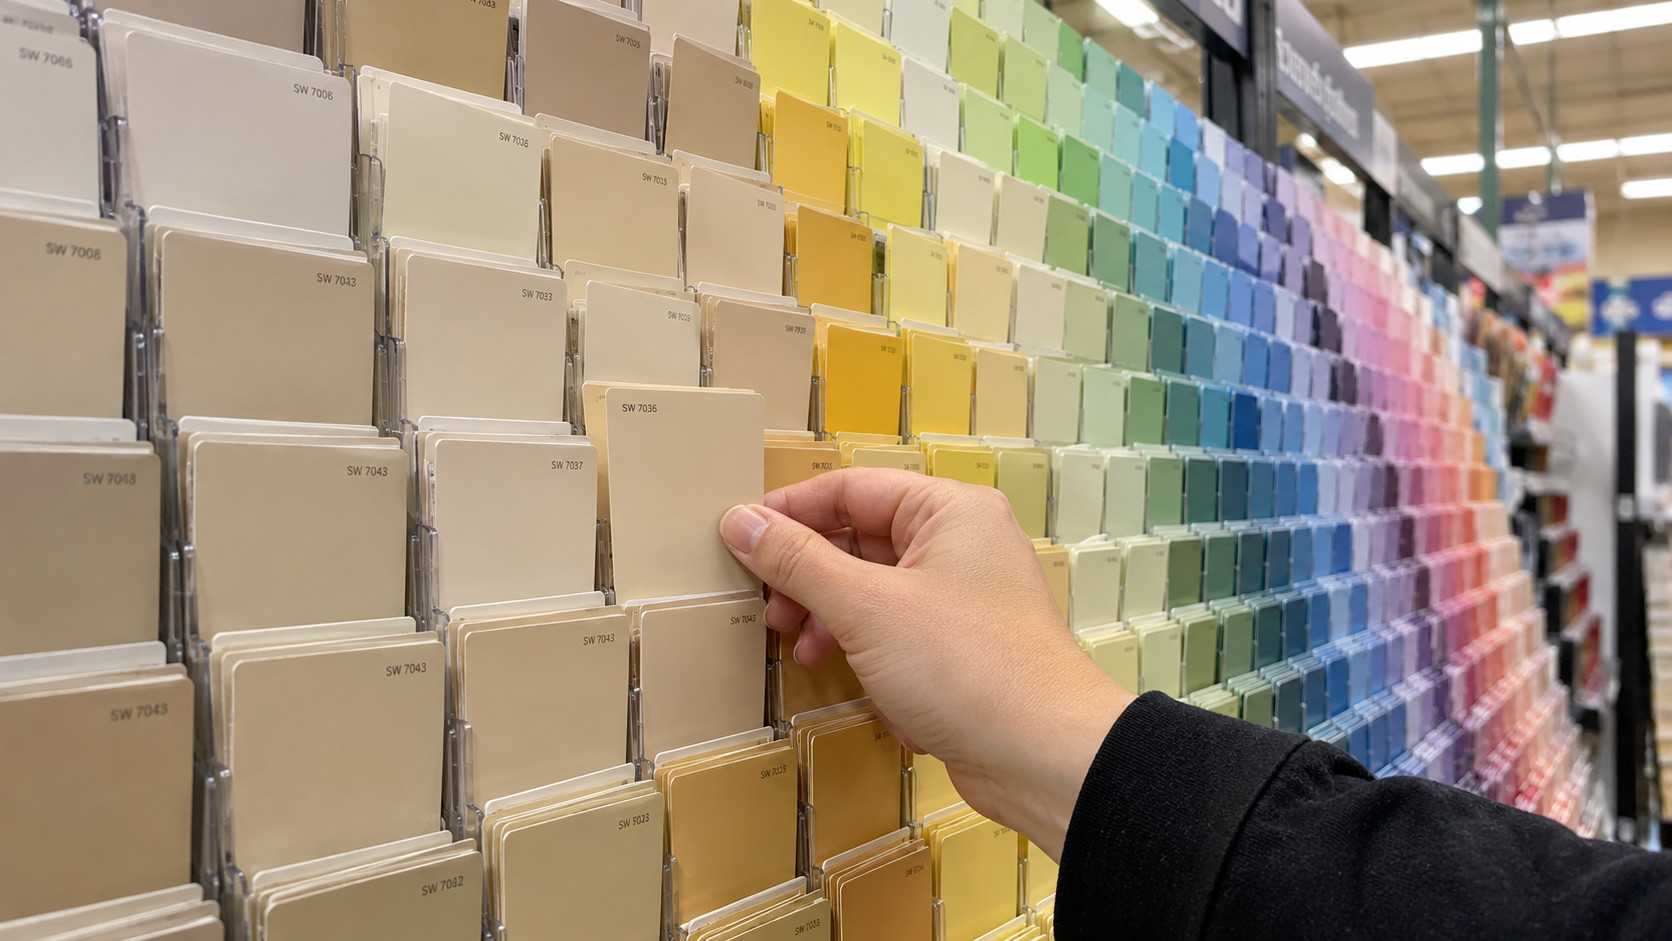
A paint chip under 5000K store fluorescents, surrounded by 300 other chips, tells you almost nothing about how that color behaves on your wall at 4 p.m. in November.
Color reads differently at scale, too. A soft beige on a chip becomes aggressive yellow across 200 square feet.
Buy samples. Paint two coats on a 2×2 foot board — not directly on the wall, where the old color contaminates your read.
Move the board around. Check it at morning light, at noon, and under your actual lamps after dark. Three days of this beats five years of hating a room.
14. Deck Boards Painted Instead of Stained
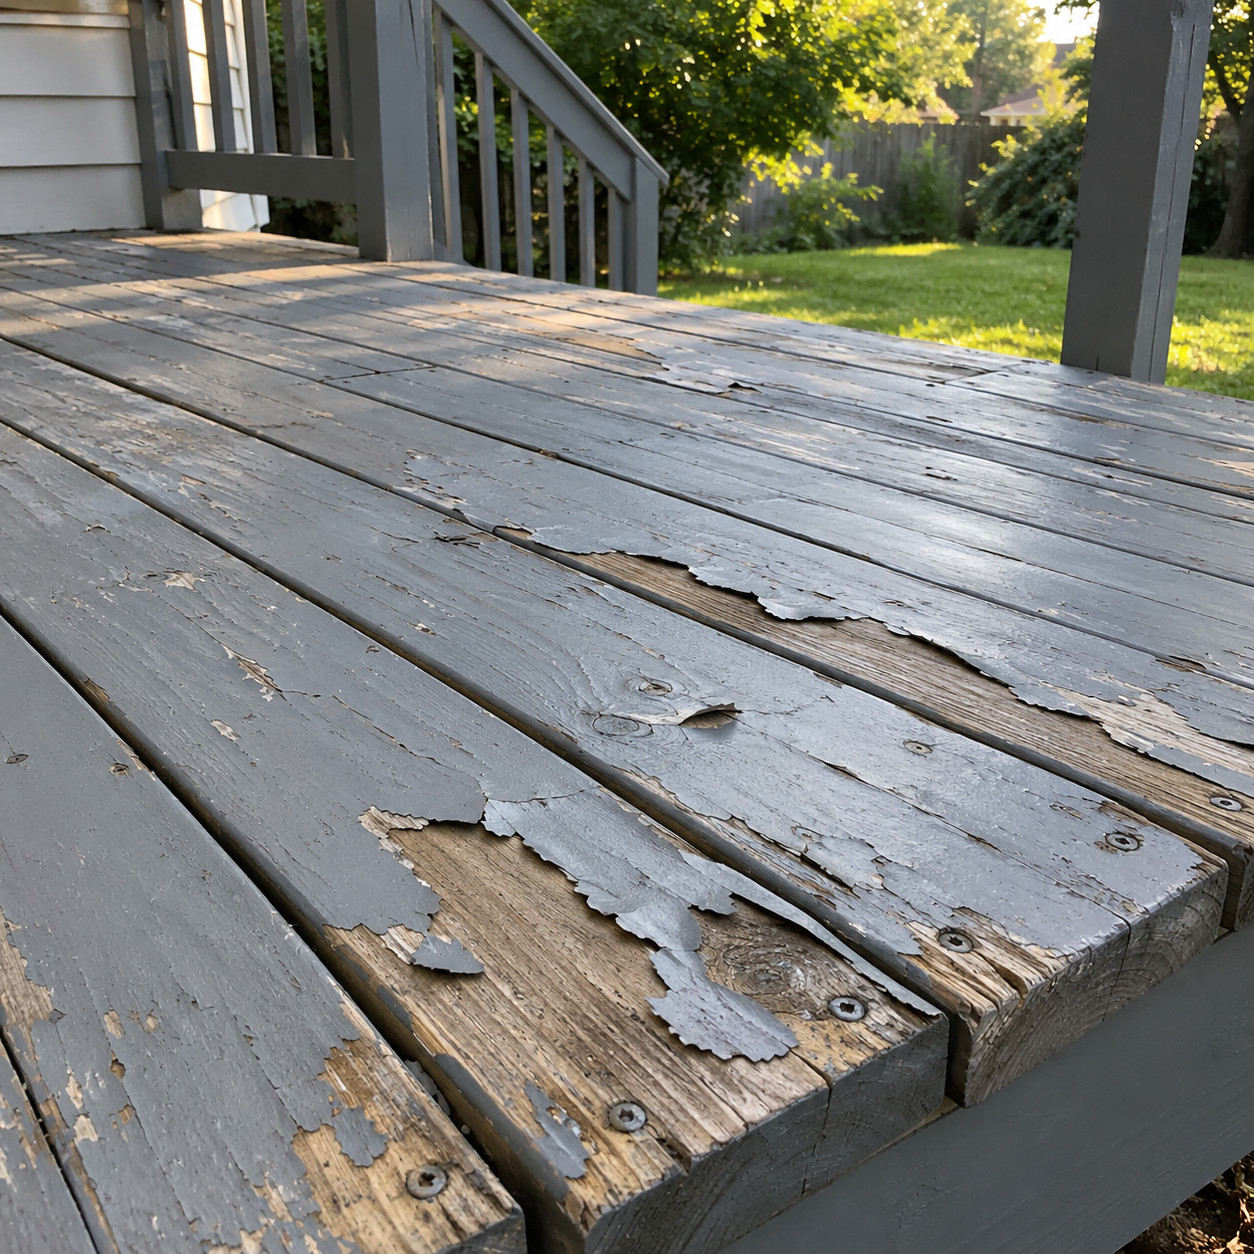
A deck is a horizontal surface that holds water, bakes in UV, and moves with every humidity swing. Paint forms a film on top of all that movement.
Two or three seasons and it’s peeling in sheets, usually starting at the board ends and around fasteners.
Here’s the part people underestimate: once a deck has been painted, you own that decision forever. Stain won’t penetrate over old paint, so the only path back is sanding or stripping every board and every rail.
Penetrating semi-transparent stain soaks into the fiber instead of sitting on it. It wears away gradually rather than flaking, and recoating is a wash-and-roll weekend.
15. Standard Wall Paint in the Bathroom
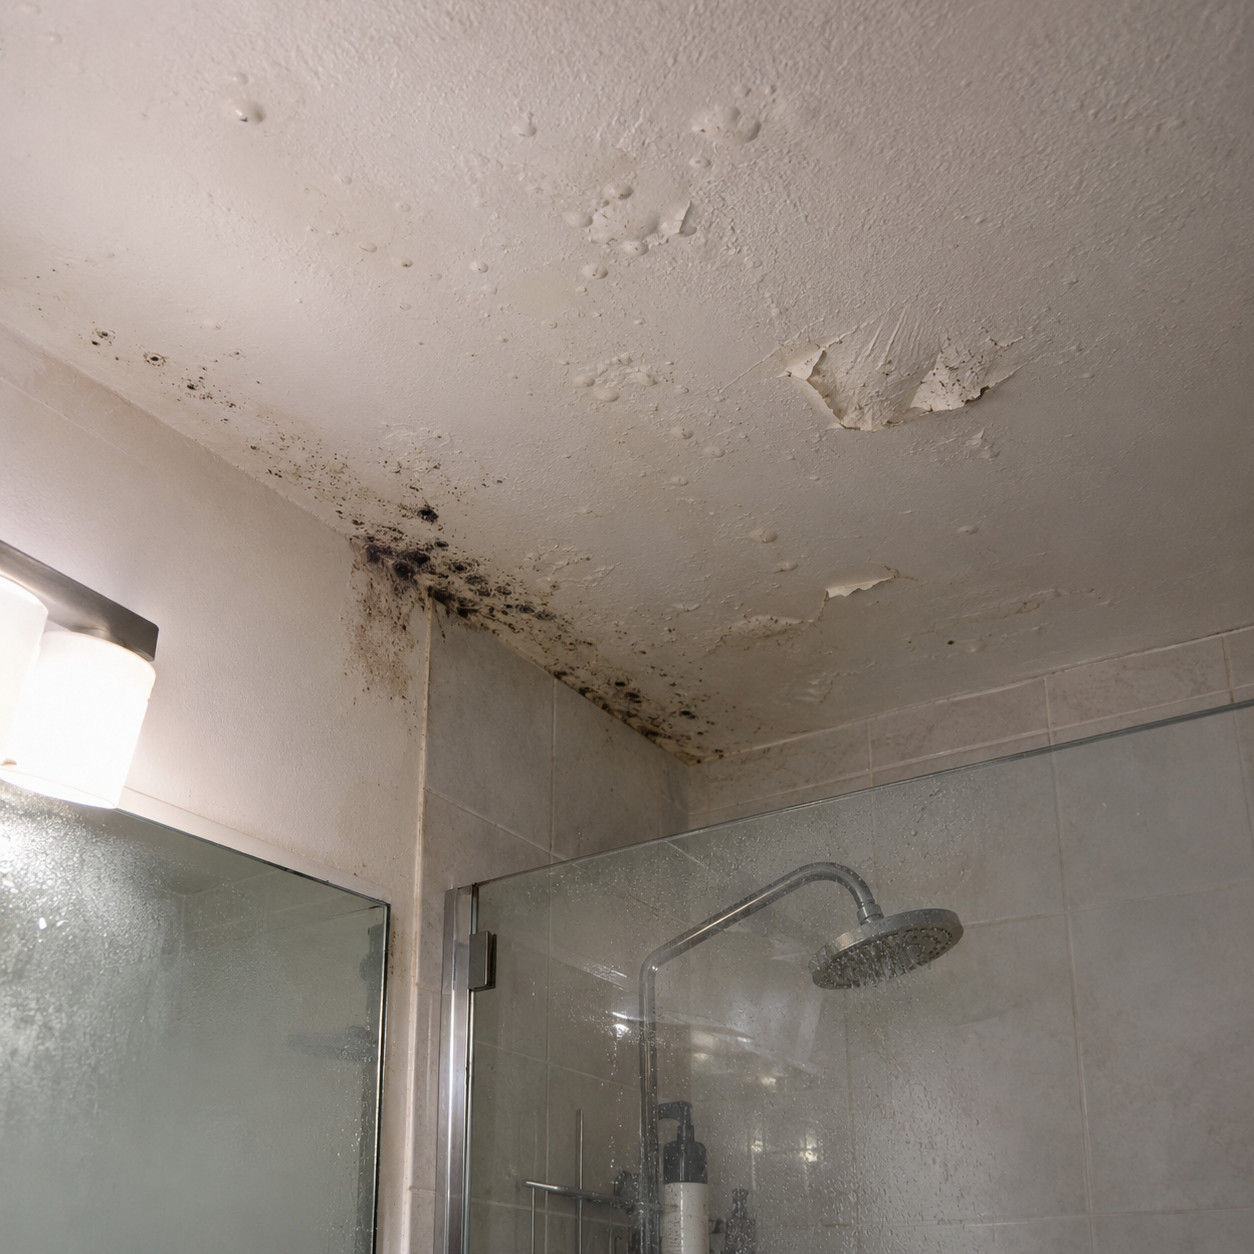
A ten-minute shower can dump close to half a pound of water into the air. That moisture has to go somewhere.
Ordinary interior latex isn’t formulated to handle repeated condensation cycles. The ceiling above the shower blisters first, then mildew colonizes the cool corners where the walls meet, and the paint film starts letting go at the top of the tile.
Bath-specific formulations help — they’re built with tighter films and mildewcide additives, and they shed condensation instead of absorbing it. Use one, and run it on the ceiling too, not just the walls.
But paint can’t out-engineer bad ventilation. Check your fan honestly. Hold a square of toilet paper to the grille — if it doesn’t hold, the fan isn’t moving air.
Size it properly. The rough rule is one CFM per square foot of bathroom for rooms under 100 square feet, with a bump up for a jetted tub or an enclosed shower stall. And confirm the duct actually terminates outside, not in the attic, which is a mistake you’ll find in a shocking number of houses built in the 1990s.
Run the fan during the shower and for twenty minutes after. A cheap timer switch is about twenty-five dollars and solves the problem permanently.
Mildew in the corners is never really a paint problem. It’s an airflow problem wearing a paint costume.
16. A Stark White Ceiling Over Warm Walls
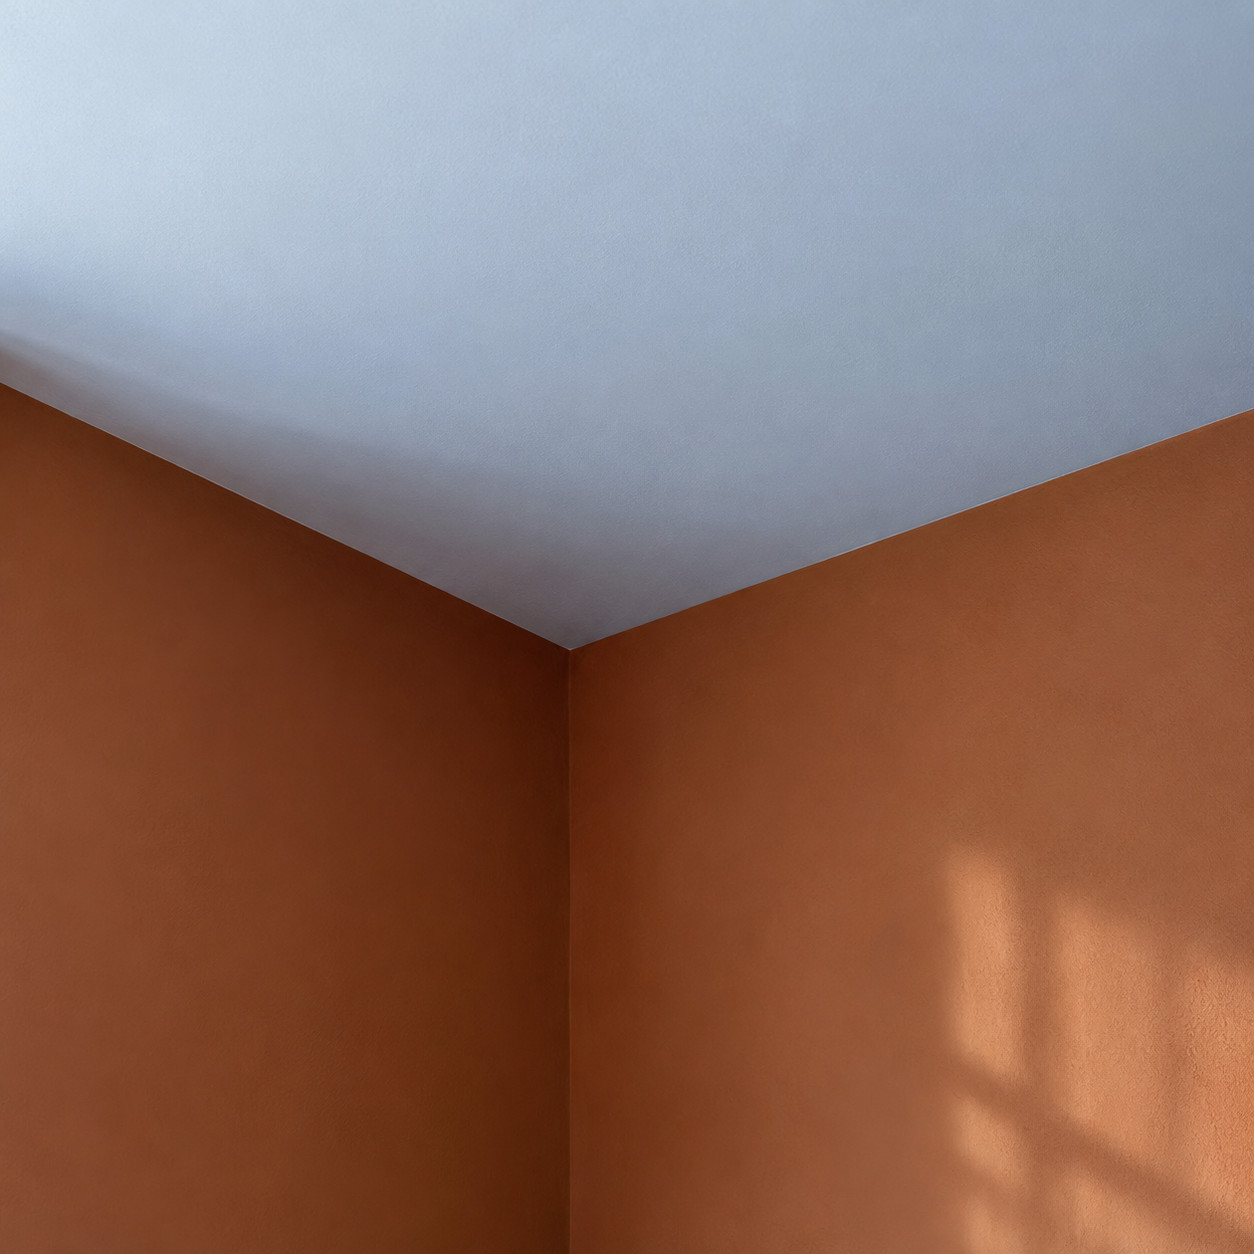
Big-box “ceiling white” is engineered for coverage and brightness, which usually means a blue-white base.
Drop that over a warm clay or putty wall and the wall suddenly looks dingy by comparison. The room gets a cold lid.
Tint the ceiling to roughly 50 to 75 percent of the wall color. It stays lighter than the walls but belongs to the same family.
Or just match the ceiling to your trim white. Fewer whites in a room is almost always better.
17. Painting a Popcorn Ceiling in a Pre-1980 House
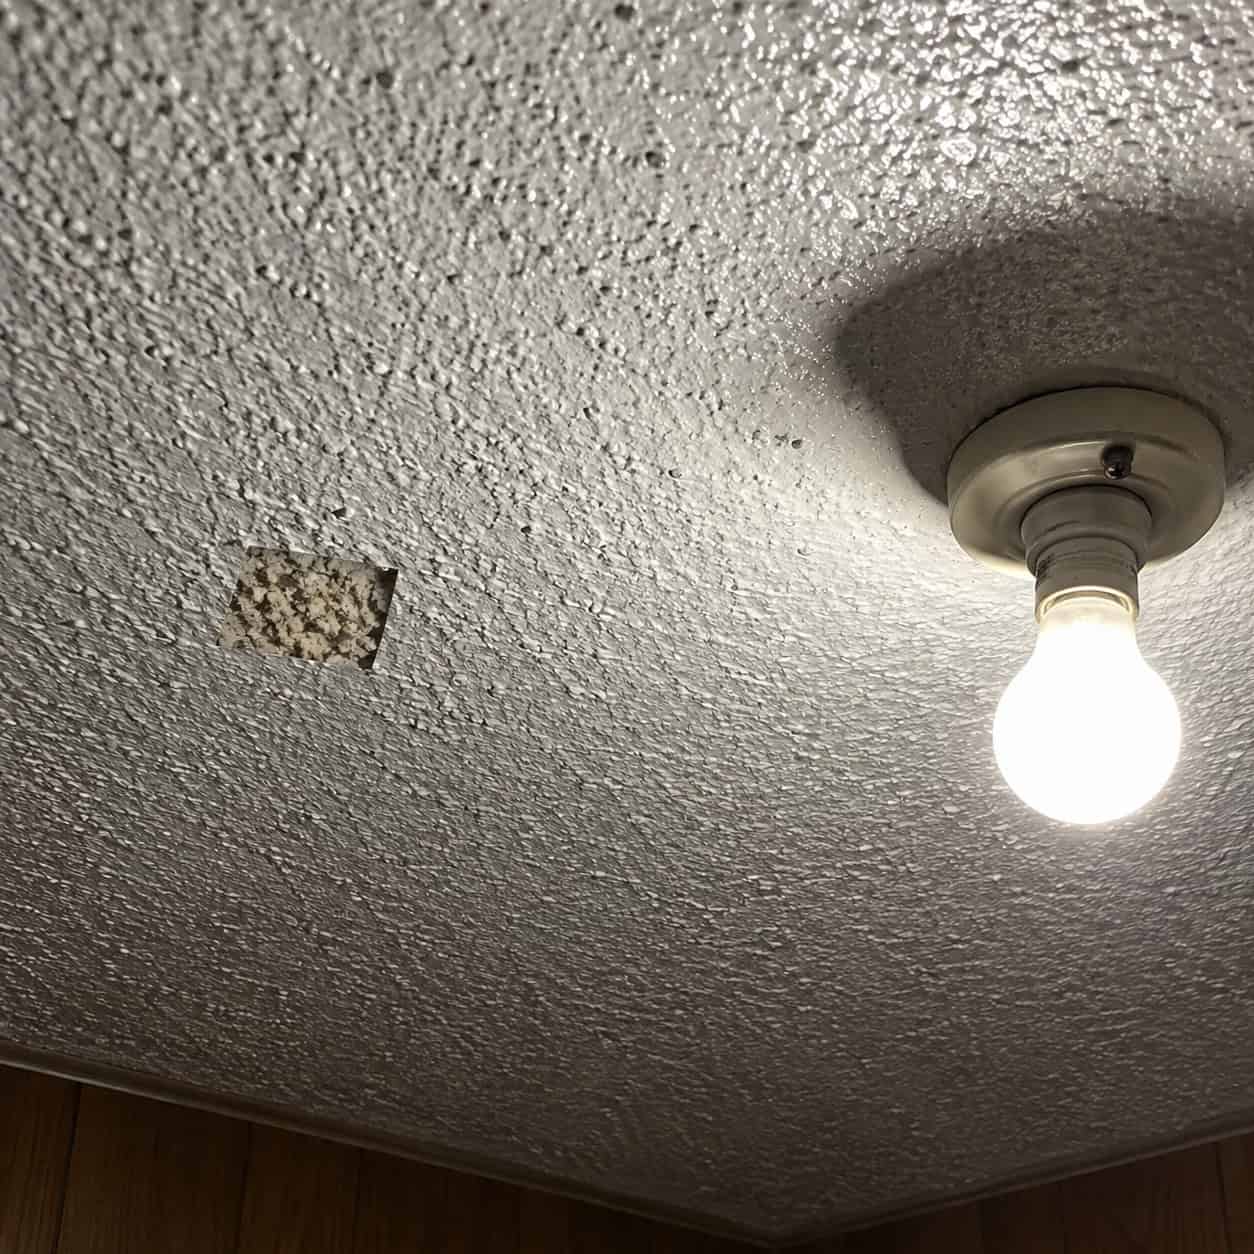
Two separate problems, and the second one is serious.
First, the practical one: spray texture is soft and porous, and paint soaks in and glues it down. Unpainted texture scrapes off wet with a six-inch knife in an afternoon. Painted texture has to be sanded or skim-coated over, which turns a cheap job into an expensive one.
Second, the real issue. Acoustic ceiling texture installed between roughly 1945 and 1980 frequently contained chrysotile asbestos. Manufacturing continued into the early 1980s as existing stock was used up, so the cutoff isn’t clean.
Intact, painted-over texture sitting on a ceiling is generally not hazardous. Disturbed texture is. Scraping, sanding, drilling, or demolition releases fibers that stay airborne for hours.
Test before anything touches it. A certified lab analyzes a small sample for roughly forty to a hundred dollars, and collection has to be done wet to avoid making dust in the first place.
If it tests positive, you have two legitimate options: leave it undisturbed and encapsulate it with a coating applied by airless sprayer so nothing abrades the surface, or hire a licensed abatement contractor who will contain the room under negative pressure and remove it properly.
Never dry-scrape a pre-1980 textured ceiling. Not for ten minutes, not in one corner, not “just to see.”
18. Painting Hardwood Floors
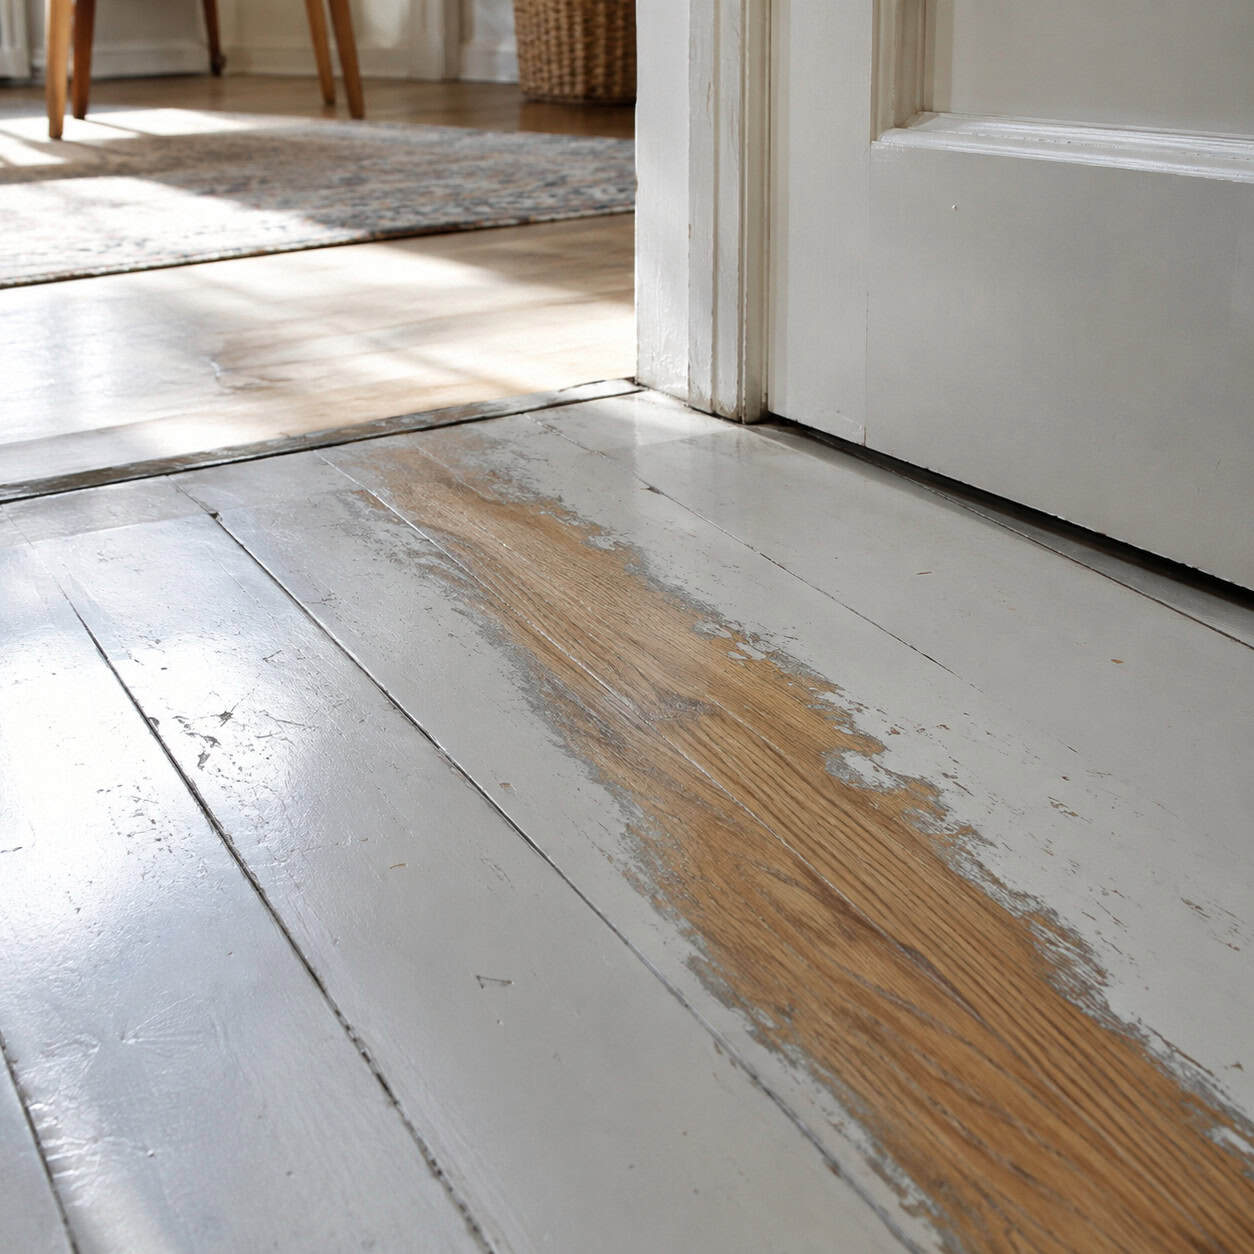
White painted floors photographed beautifully from about 2015 to 2021. They hold up for roughly one winter.
Traffic lanes wear through at doorways and in front of the sink first, and because paint wears rather than fades, the failure is a hard-edged gray patch you can’t blend.
The bigger cost comes later. A painted floor has to be sanded to raw wood before it can ever be stained and finished, and paint gums up belt sander abrasive fast enough that floor crews charge a premium for the job.
Stain and poly on hardwood. Save enamel for porch boards and basement stairs.
19. Painting Over Chalky, Mildewed Siding
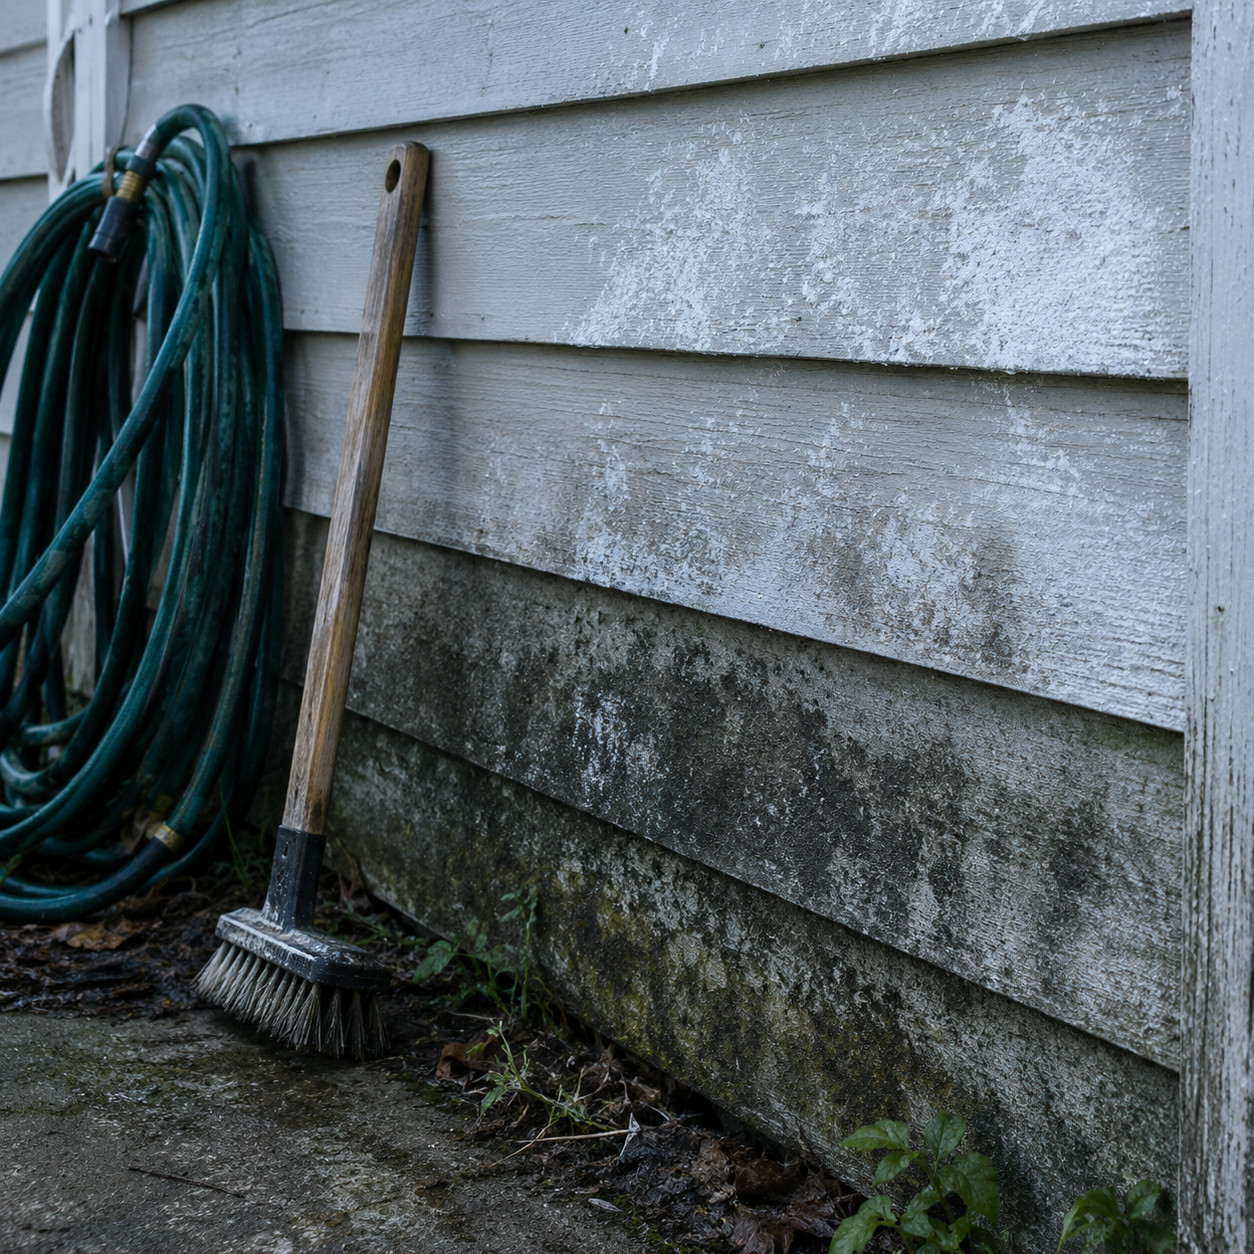
Old exterior paint chalks — the binder breaks down under UV and leaves a loose powder on the surface. Rub your palm on sun-facing siding and look at it.
New paint applied over that bonds to the chalk, not to the house. The whole system lets go in a year or two, taking the old coating with it.
Mildew is worse, because it keeps growing under the new film.
Wash with a cleaner containing bleach or a dedicated mildewcide, scrub the shaded north side where growth is heaviest, rinse thoroughly, and let it dry a full two or three days. Crown Paints puts inadequate surface prep at the top of its exterior failure list, and that matches what every painter will tell you.
20. A Deep Saturated Color in a North-Facing Room
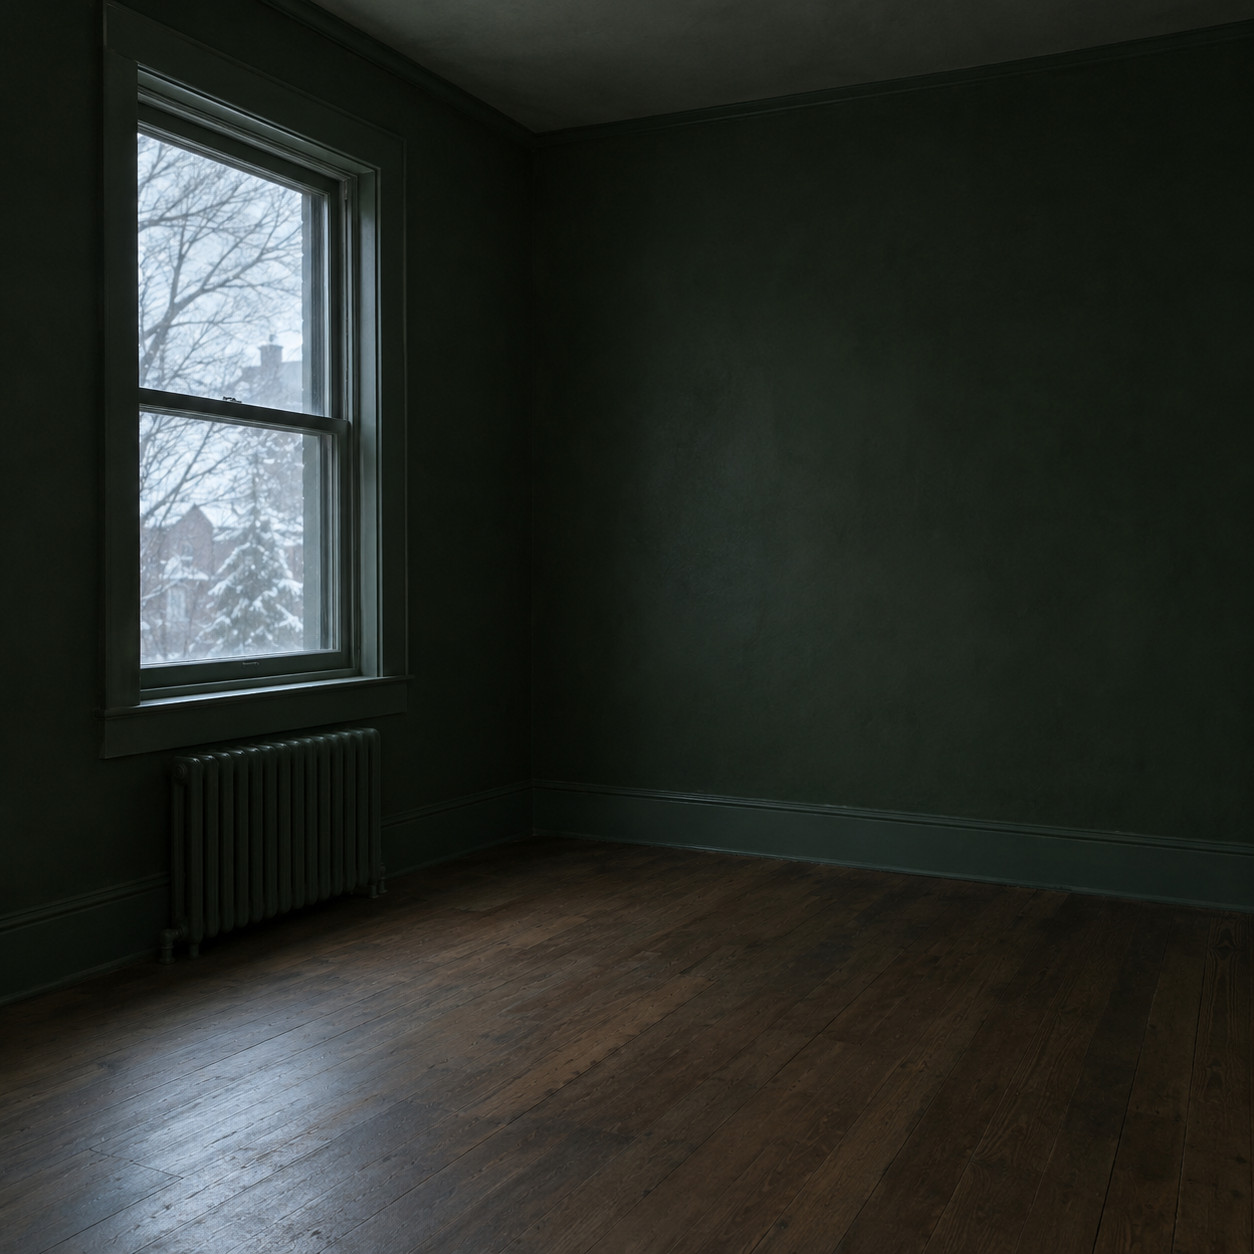
North light is cool, indirect, and remarkably consistent — which sounds nice and isn’t.
It strips warmth out of pigment. A rich forest green that glowed in the showroom goes flat and muddy. Saturated navy turns gray. The room reads cold from November through March.
Push warmer and about one shade lighter than you think in north rooms. Colors with a yellow or red base survive that light.
Save the moody saturated tones for south and west exposures, where direct sun has the intensity to carry them.
21. Porch-and-Floor Paint on a Garage Slab
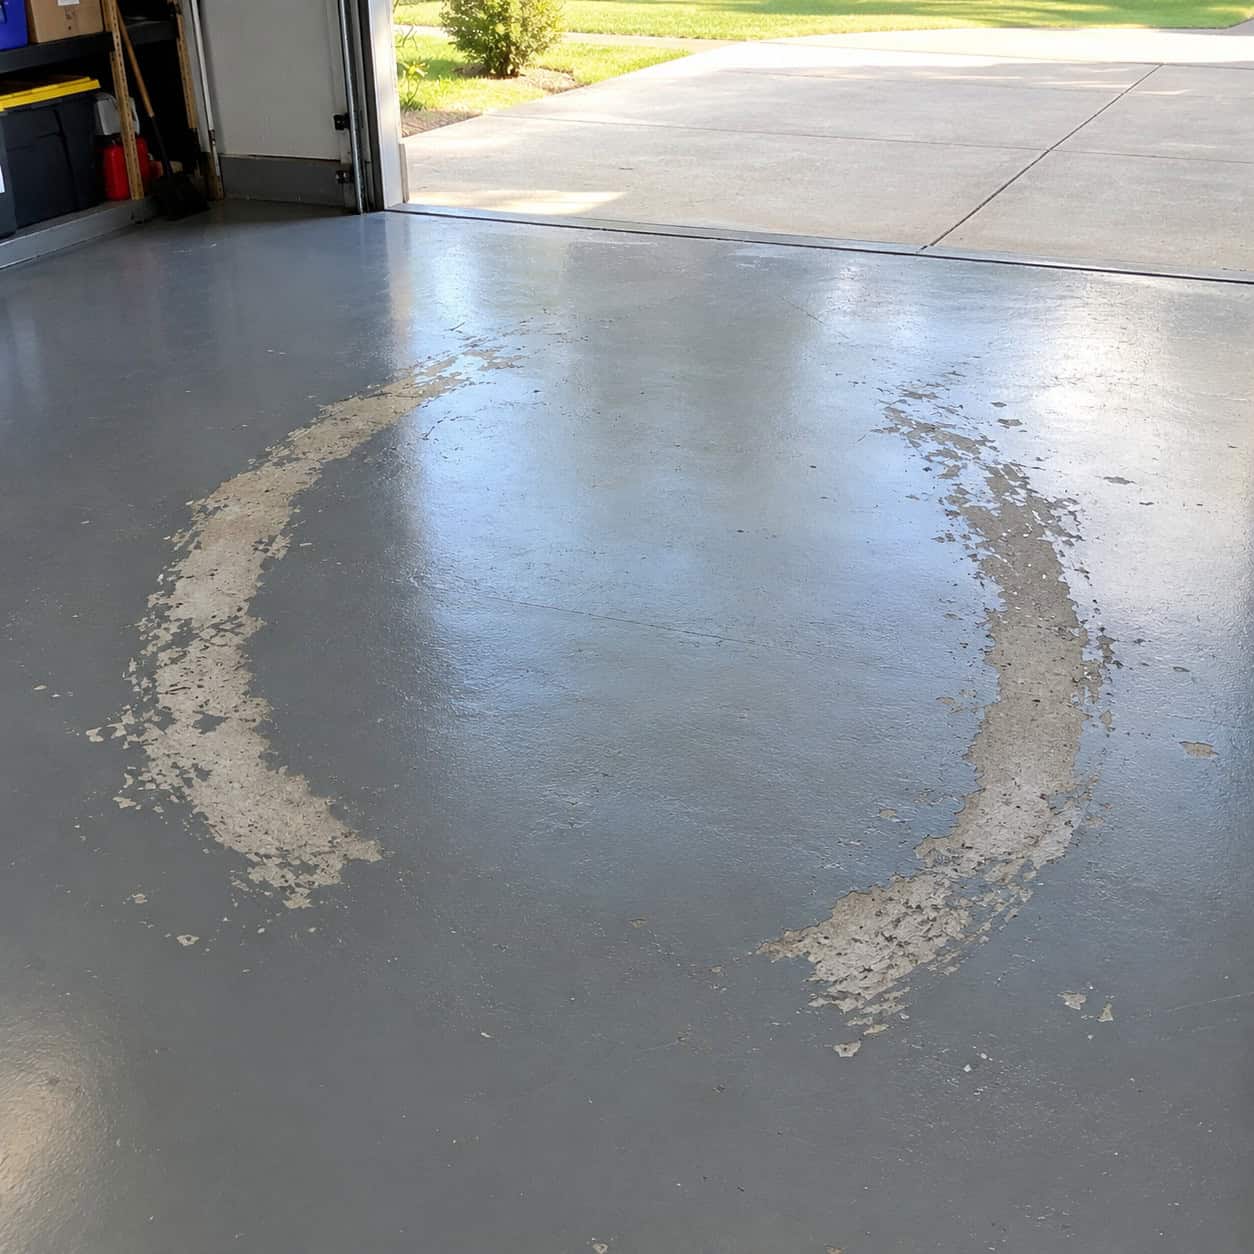
Hot tire pickup. That’s the actual industry term, and it describes exactly what you’ll see.
Drive in on a July afternoon, park, and let the tires cool against the latex film. The hot rubber softens the coating and bonds to it. Back out the next morning and the paint comes up with the tire in perfect ring-shaped patches.
Concrete also needs mechanical adhesion that porch enamel can’t achieve on a sealed, troweled slab.
Grind or acid-etch to open the surface, then use a two-part epoxy or a polyaspartic coating. Expect to spend real money and to keep the car off it for several days while it cures.
22. Skipping Shellac Primer Over Knots and Cedar
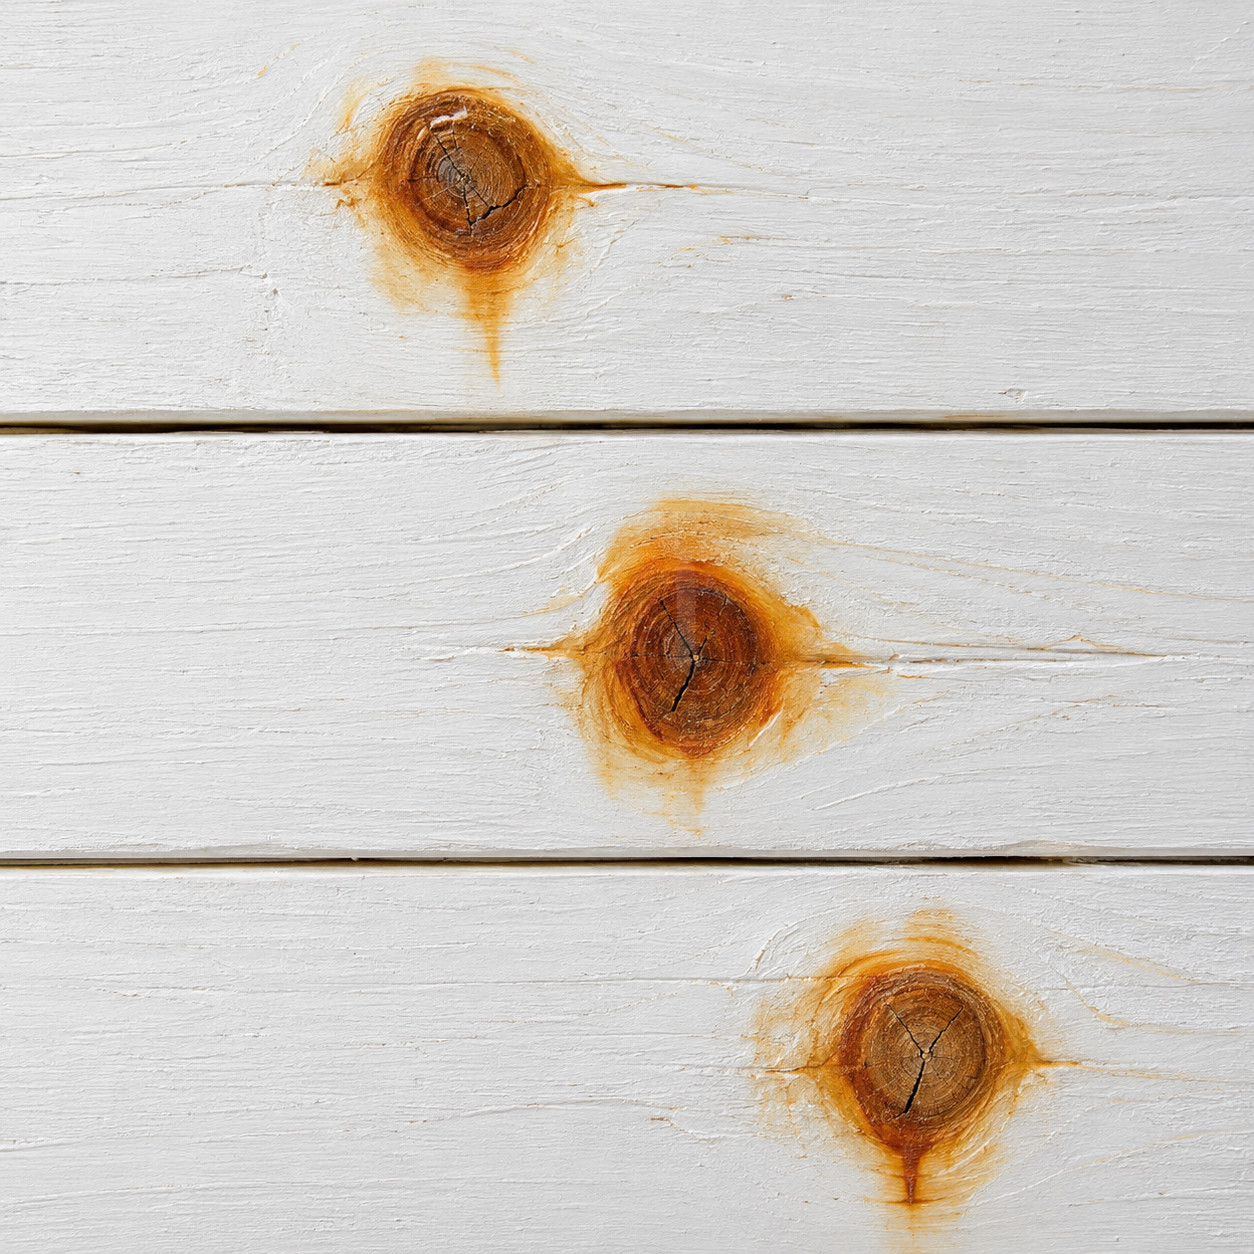
Pine knots contain resin. Cedar and redwood contain water-soluble tannins and extractives. Both bleed through white paint.
The timing is cruel. The job looks flawless for about three months, then amber rings appear exactly over every knot, usually on the sunniest wall first.
Latex stain blockers slow it down. Shellac stops it.
Spot-prime the knots at minimum, or prime the whole board if you’re painting cedar siding or a knotty pine ceiling. One extra product, one extra hour.
23. Fresh Paint Over Flaking Pre-1978 Paint
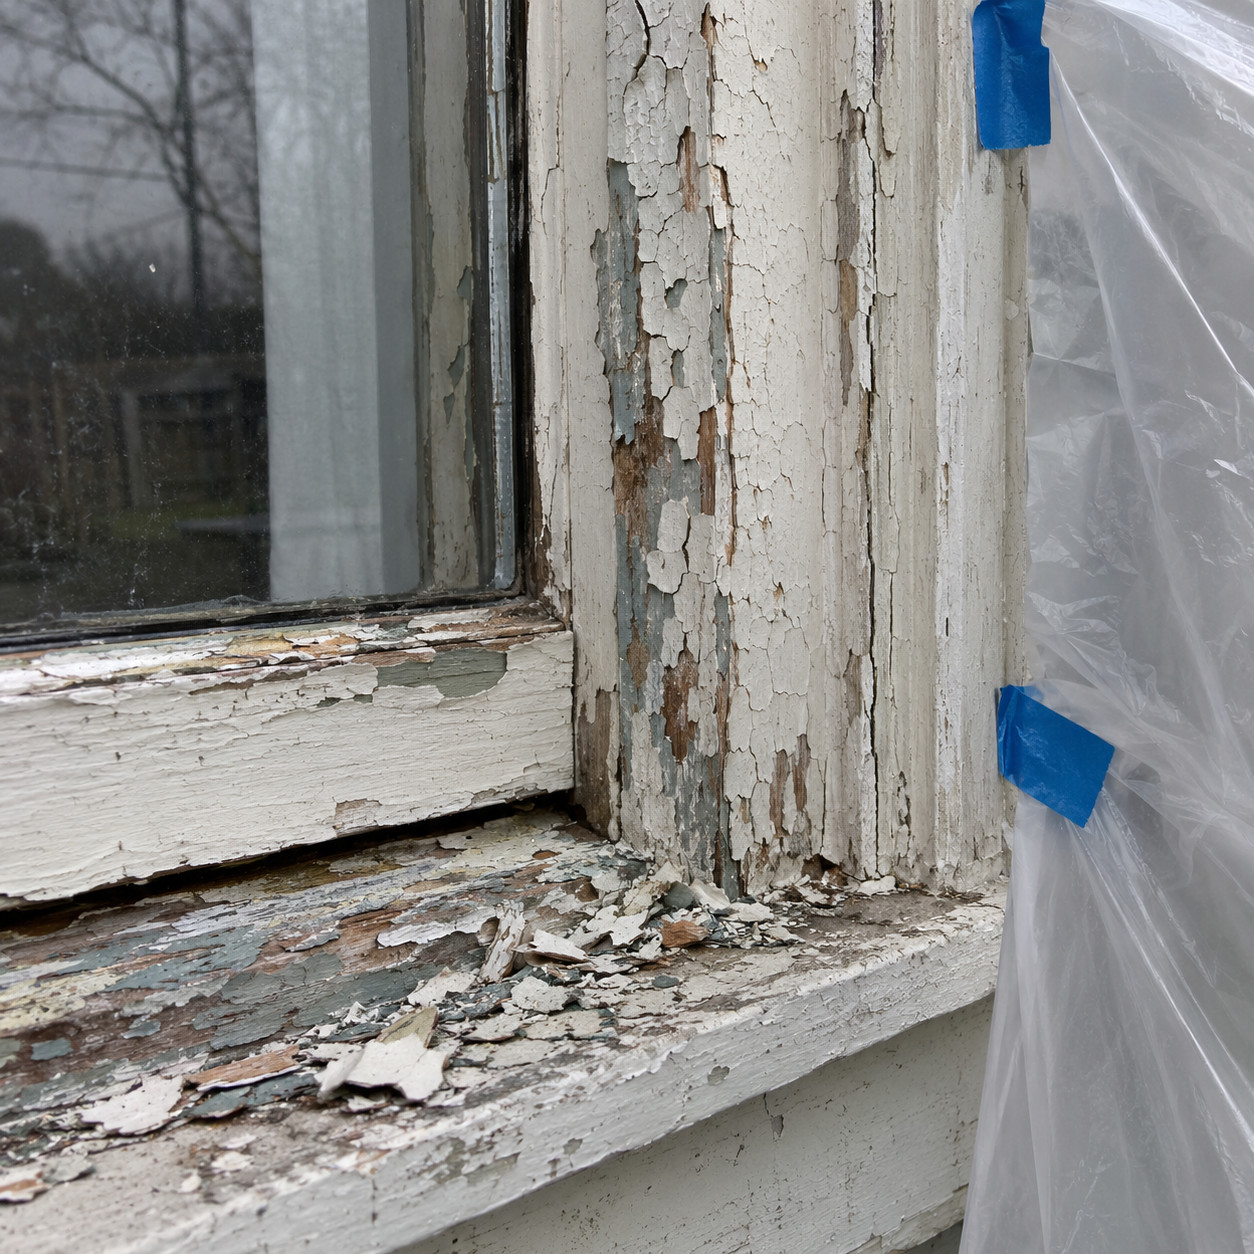
Lead-based paint was banned for residential use in 1978. If your house predates that, assume lead is somewhere in the stack until a test says otherwise. The EPA estimates most homes built before 1940 contain it.
Painting over actively failing lead paint accomplishes nothing. New coating bonds to the loose layer beneath, and when that layer releases, everything comes off together — now with chips scattered through the yard where kids and dogs are.
The far bigger danger is how people prep. Dry sanding, power sanding, scraping, or open-flame heat stripping on lead paint produces fine dust and fumes that are genuinely dangerous, especially to children under six and pregnant women. A single power-sanded window casing can contaminate a room.
Test before you start. Lab-analyzed swab kits run under fifty dollars; a certified inspector with an XRF gun gives you a definitive, room-by-room answer.
If it’s positive, the options are encapsulation or removal. Encapsulants are specialized elastomeric coatings — not regular paint — that bond to and seal the lead layer, but they only work over a stable, well-adhered surface. Flaking paint has to be addressed first.
For removal, hire a contractor certified under the EPA’s Renovation, Repair and Painting rule. They’ll use plastic containment, HEPA vacuums, wet methods, and proper disposal. That certification is a legal requirement for paid work on pre-1978 housing, and the firm should hand you documentation without being asked.
Do not wing this one. It’s the single most consequential item on the list, and it’s the reason a lot of otherwise competent DIYers call somebody.
24. New Drywall with No PVA Primer
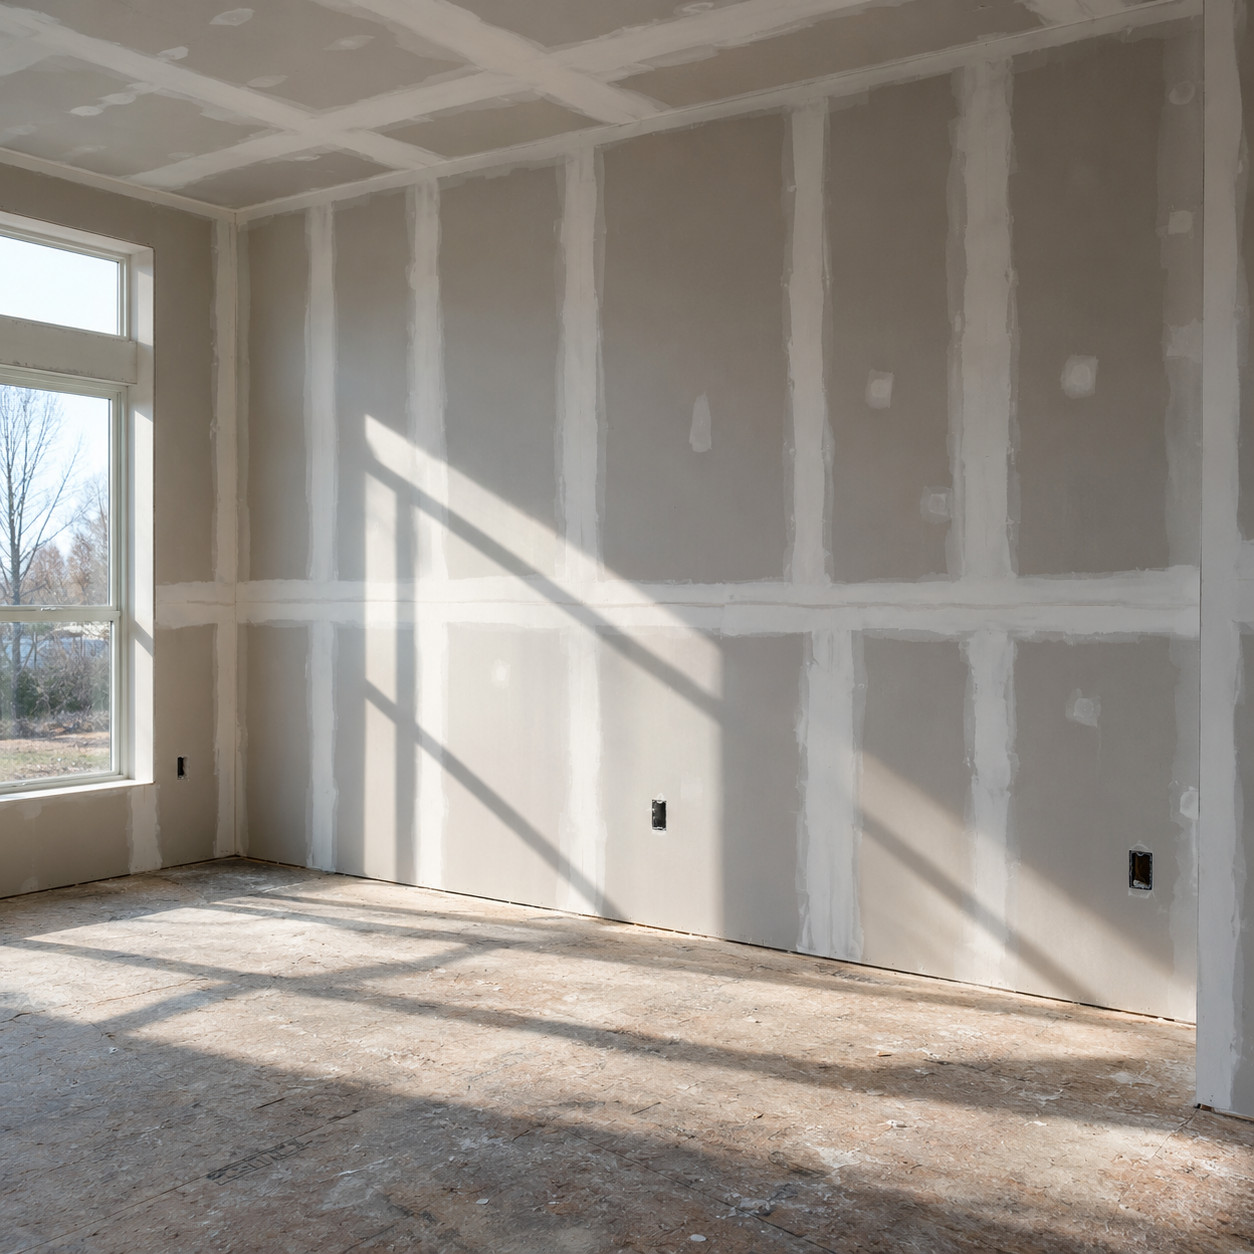
Raw drywall paper and dried joint compound absorb paint at completely different rates. Compound is thirstier.
Put color straight over both and the topcoat flashes — the sheen changes everywhere there’s a seam or a screw patch. In sidelight, every taped joint becomes visible, permanently, for the life of the paint.
PVA drywall primer equalizes the porosity for about twenty dollars a gallon.
In a room with a big window and long raking light, pros go further and roll a high-build primer or skim-coat the whole surface to a Level 5 finish first.
25. Thick Latex on Old Double-Hung Sashes
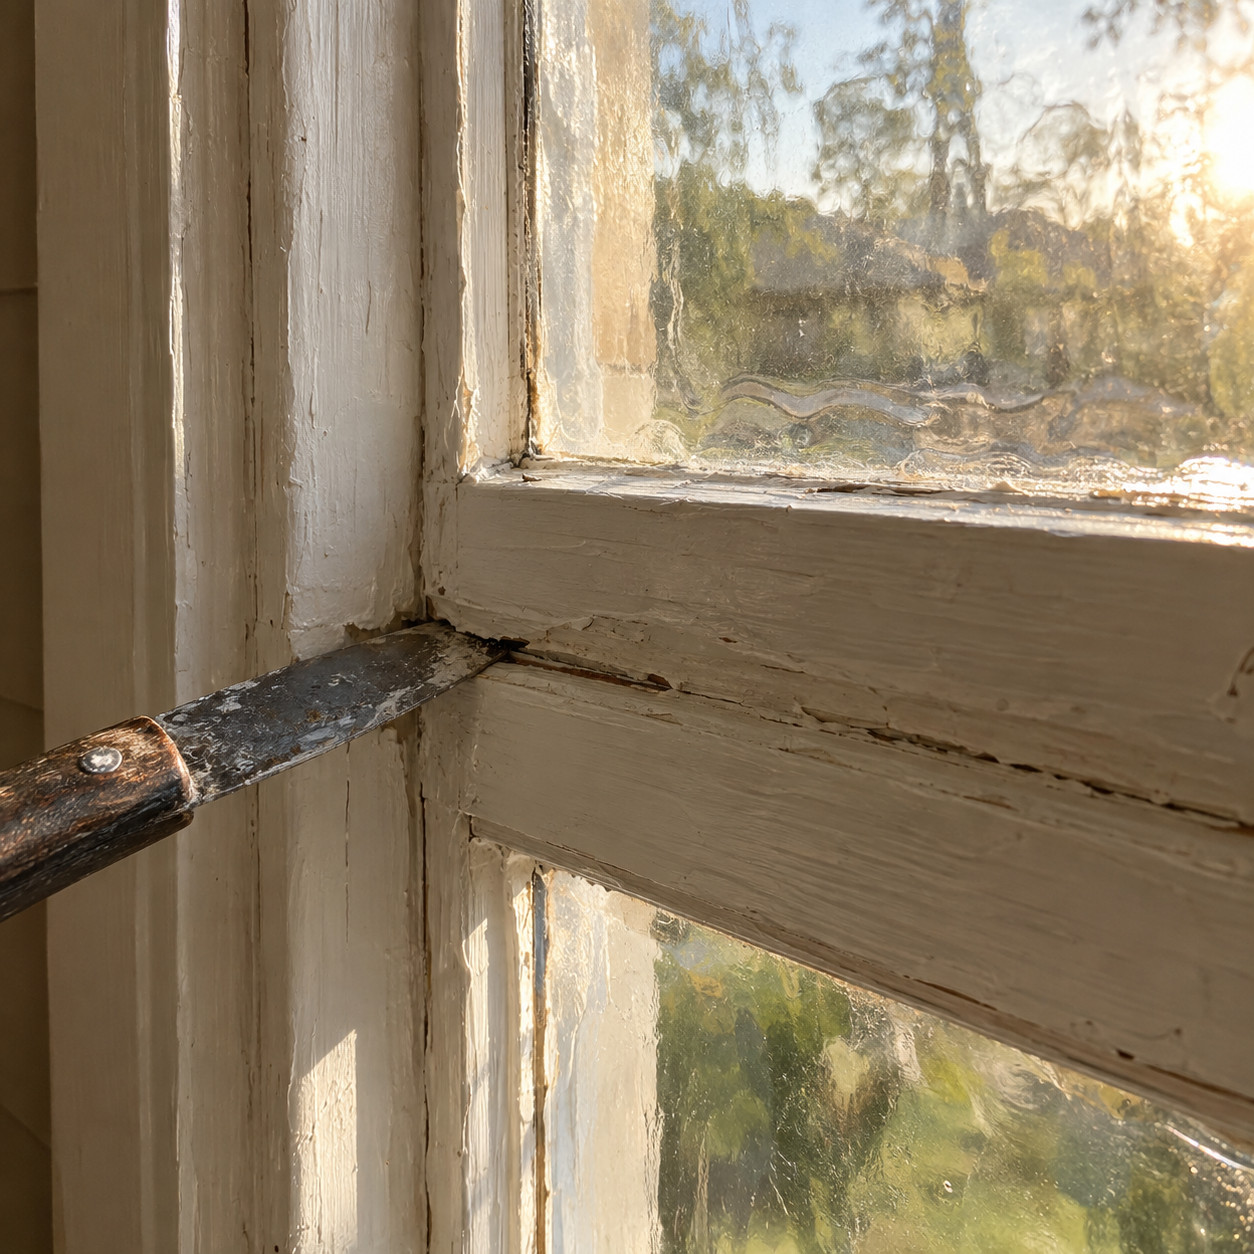
Original wood windows from the 1890s through the 1940s were built to be taken apart and serviced. Acrylic paint undoes that.
Gummy latex in the sash channels and over the parting bead glues the window shut. On the exterior, thick films bury the angled glazing putty line and trap water against the glass edge.
Strip the tracks down to bare wood and leave them unpainted or waxed. Keep films thin on the sash faces.
Use an enamel that cures genuinely hard, and break the paint seal with a putty knife before it fully sets — not six months later with a pry bar.
26. A Black or Near-Black Exterior
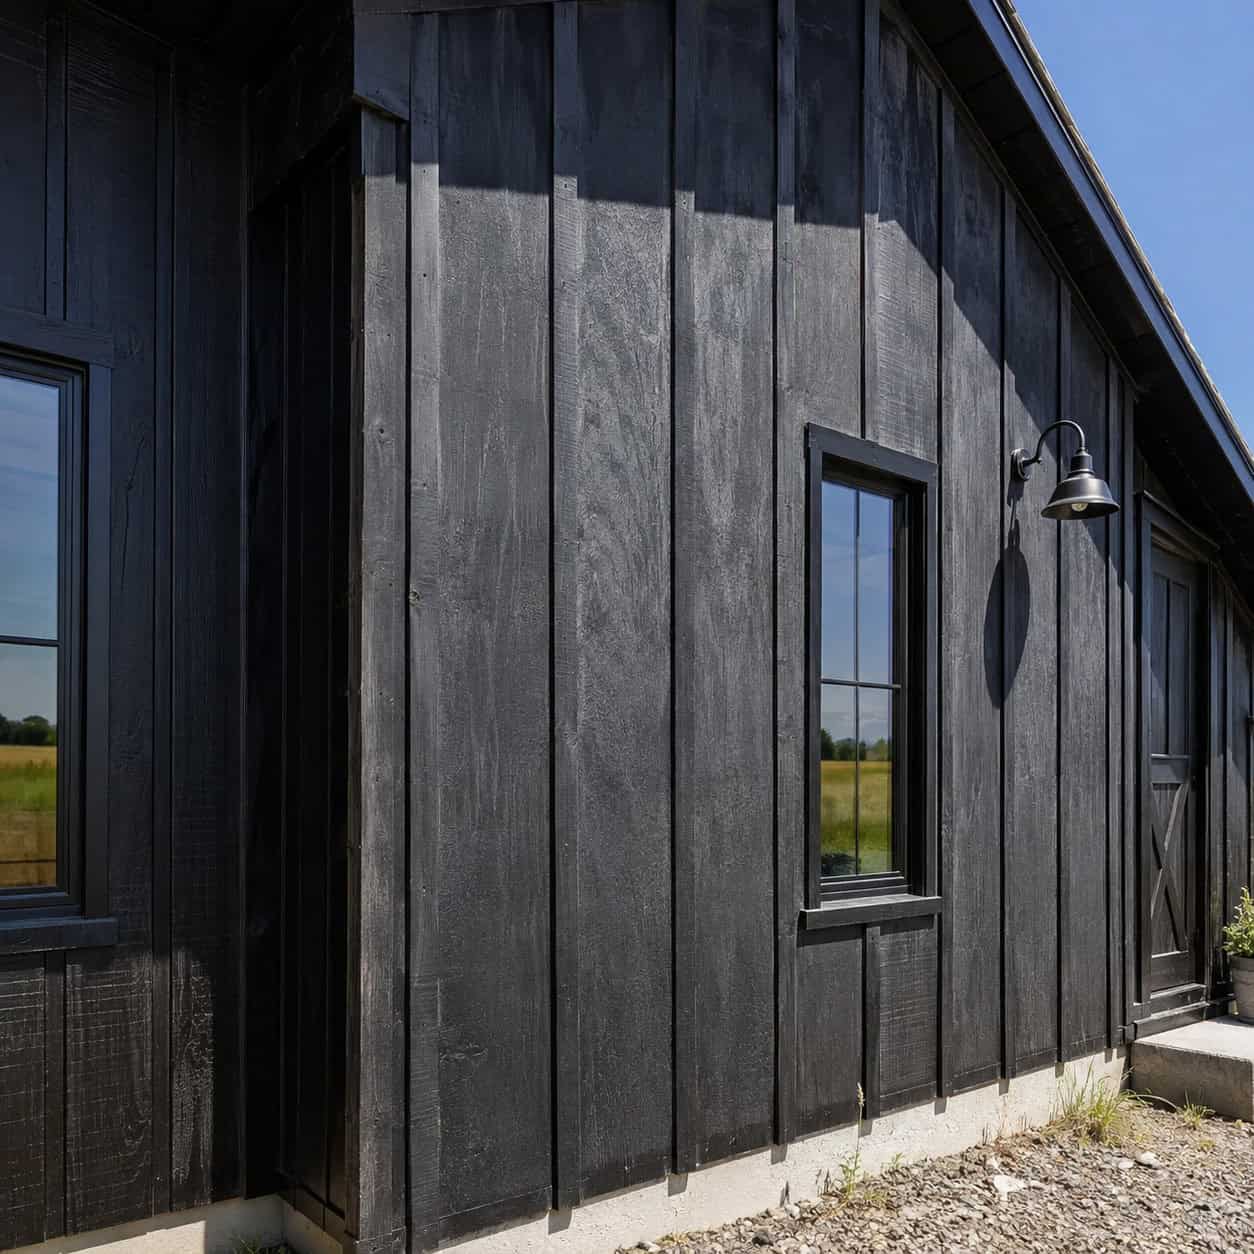
Black houses had a real run from about 2017 through 2024. The problems show up on schedule.
Deep organic pigments are the least UV-stable colorants available. South and west walls fade and chalk noticeably faster than north walls, so the house goes patchy before it goes bad.
Surface temperatures on a dark wall can run 30 to 50 degrees hotter than a light one, which stresses siding, caulk joints, and anything with a sealant.
Pros put black on trim, windows, and doors where it’s dramatic and easy to refresh. Body color stays a warm mid-tone that fades gracefully.
27. Countertop and Tile Refinishing Kits
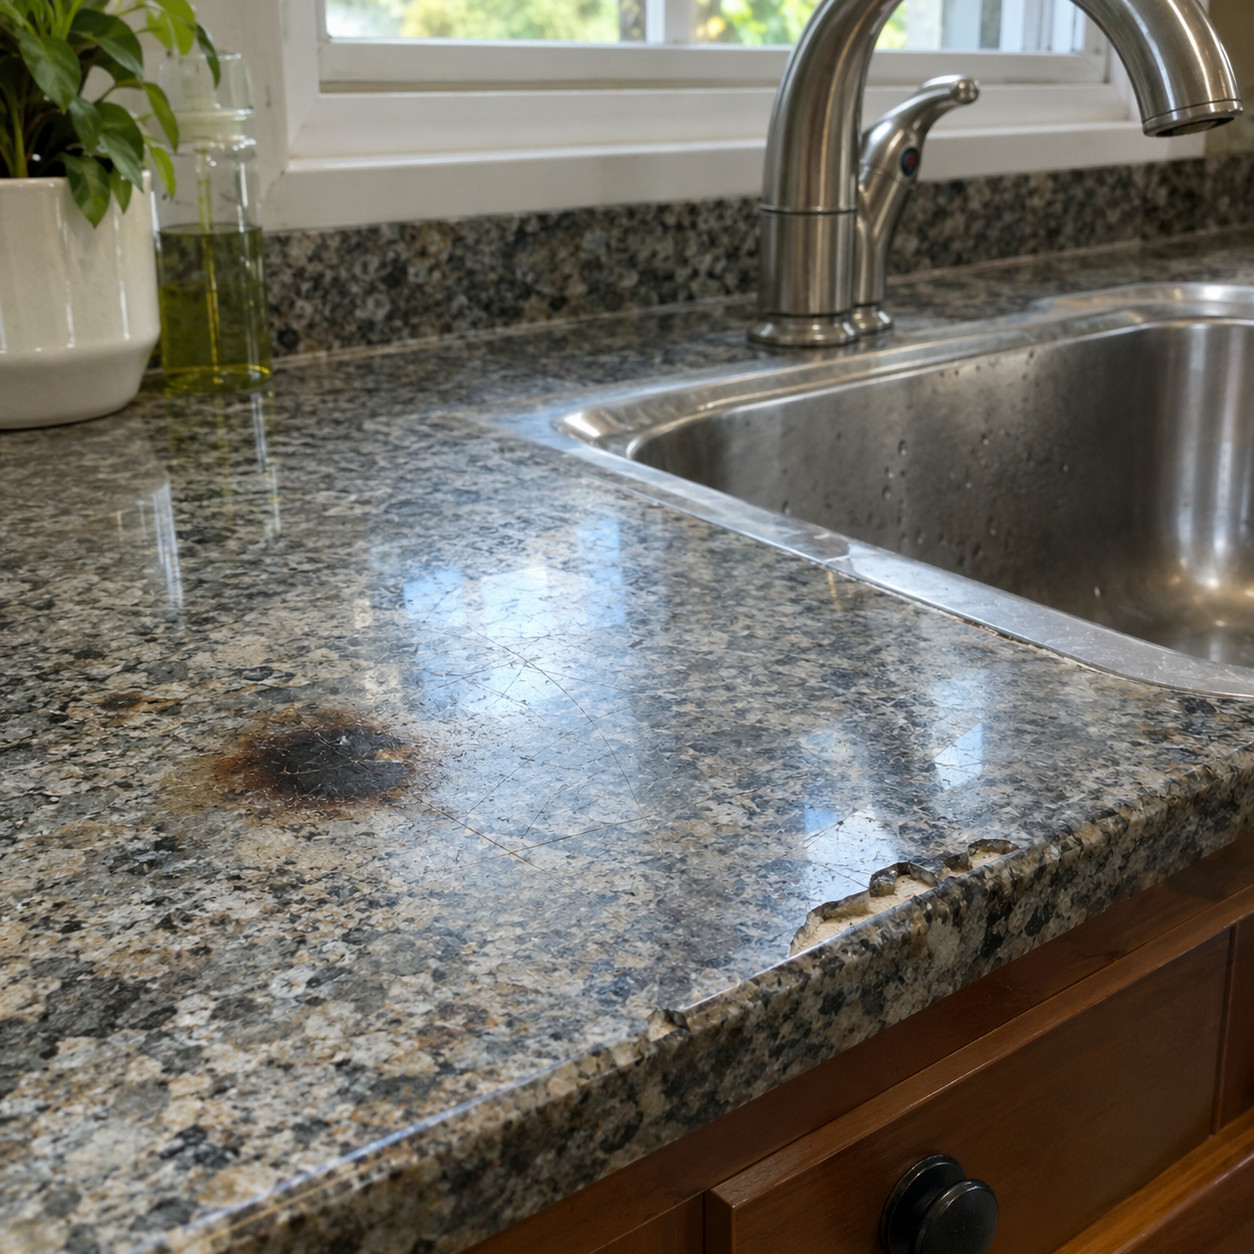
Eighteen months. That’s the number painters quote for a big-box epoxy countertop kit, and it’s generous.
The failures are predictable: chipping at the sink edge where water sits, scorch marks from a pan straight off the burner, and a web of knife scratches that catch light. Tub kits peel at the drain.
The kits aren’t a scam exactly — they buy time if you’re selling in a year and the existing surface is hideous.
As a permanent answer, bank the three hundred dollars toward a real surface, or hire a refinisher who sprays and heat-cures in place. It’s worth reading through the countertop choices people regret before you commit either way.
28. Contractor-Grade Paint to Save Twenty Dollars
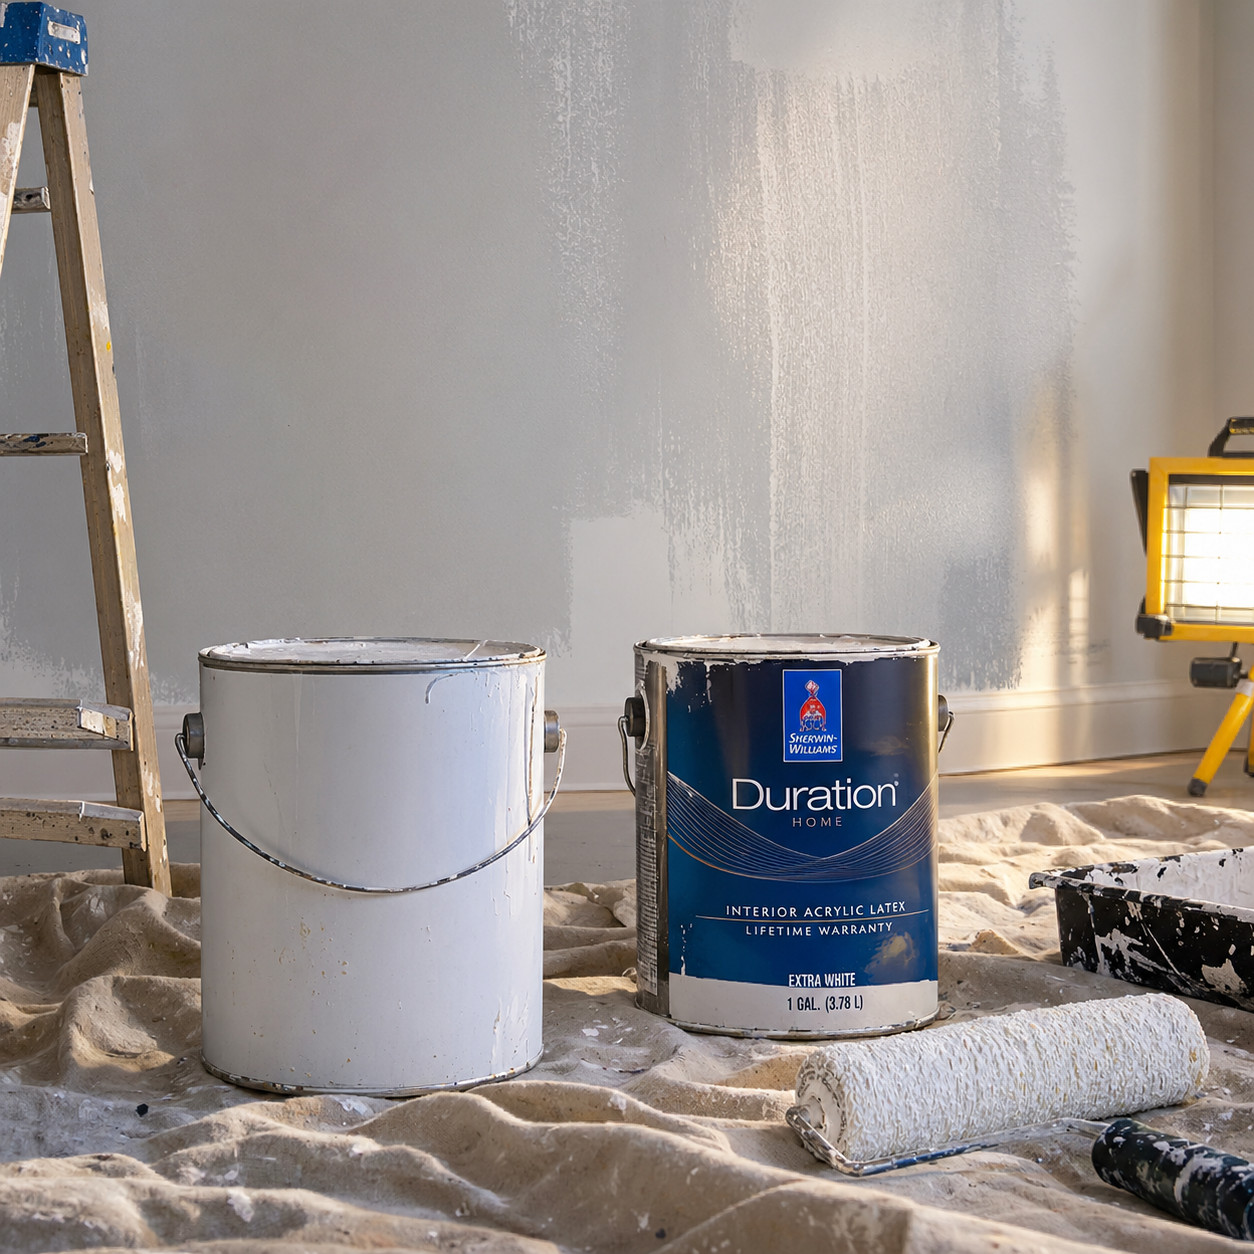
The gap between builder-grade and premium paint is solids content — the pigment and resin left on the wall after the water evaporates.
Cheap paint runs low on both. That means weak hide, so you’re applying three coats where two would do, and poor scrub resistance, so it burnishes and stains.
Price it honestly. A thirty-dollar gallon that needs a third coat costs more in labor and time than a sixty-dollar gallon that covers in two.
Buy premium 100% acrylic. Save the coat.
Here’s how the real cost actually breaks down on a single average room:
| Contractor-Grade | Premium Acrylic | |
|---|---|---|
| Cost per gallon | $28 to $35 | $55 to $75 |
| Coats to full hide | Usually three | Usually two |
| Scrub resistance | Burnishes early | Washes clean |
| Typical repaint | 4 to 6 years | 10 to 12 years |
| Best use | Rentals, closets | Anything you live in |
The cheap gallon only wins when you’re painting something nobody touches.
29. Painting Too Late in the Season
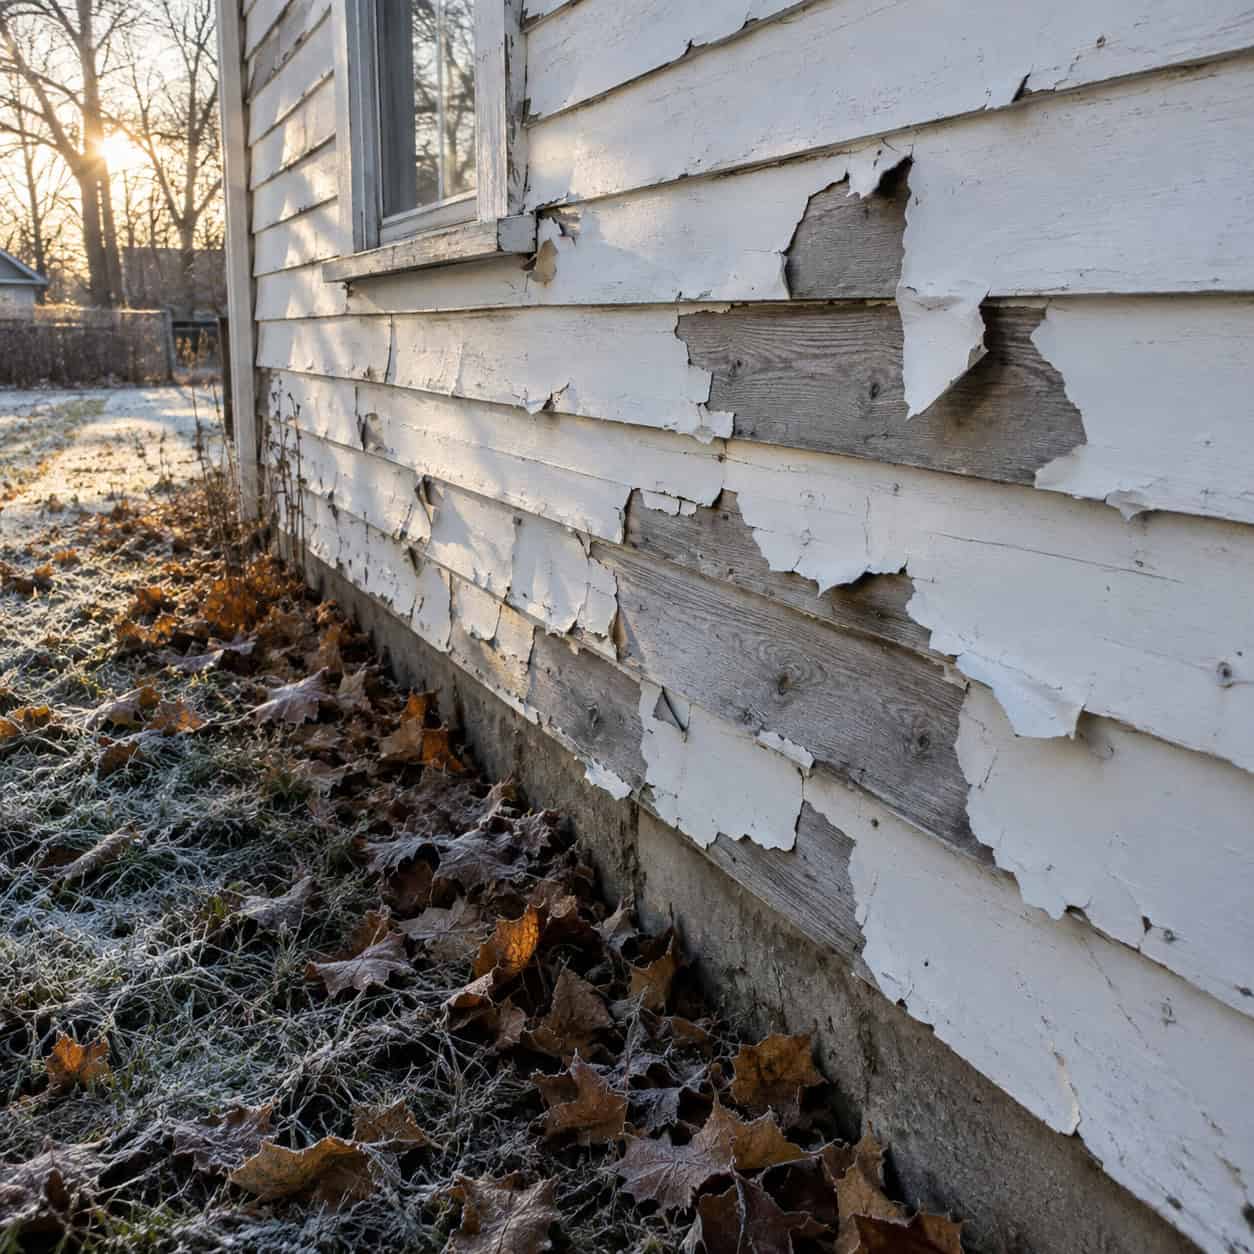
Acrylic paint doesn’t just dry. It coalesces — the resin particles have to fuse into a continuous film, and that chemistry stops below a minimum temperature.
Most exterior acrylics need 50°F, with some low-temp formulations rated to 35°F. That’s surface temperature, not the number on your phone. A north wall in shade can run fifteen degrees colder than the air.
Dew is the other killer. Paint applied at 4 p.m. in October may still be soft when moisture condenses on it at dusk, and that film never properly forms.
It looks completely fine in November. It peels in May, and you won’t connect the two.
Stop painting at least four hours before sunset in fall, and check the overnight low — if it drops below the product’s minimum, the job is still curing when the temperature crashes.
30. The Single Bold Accent Wall
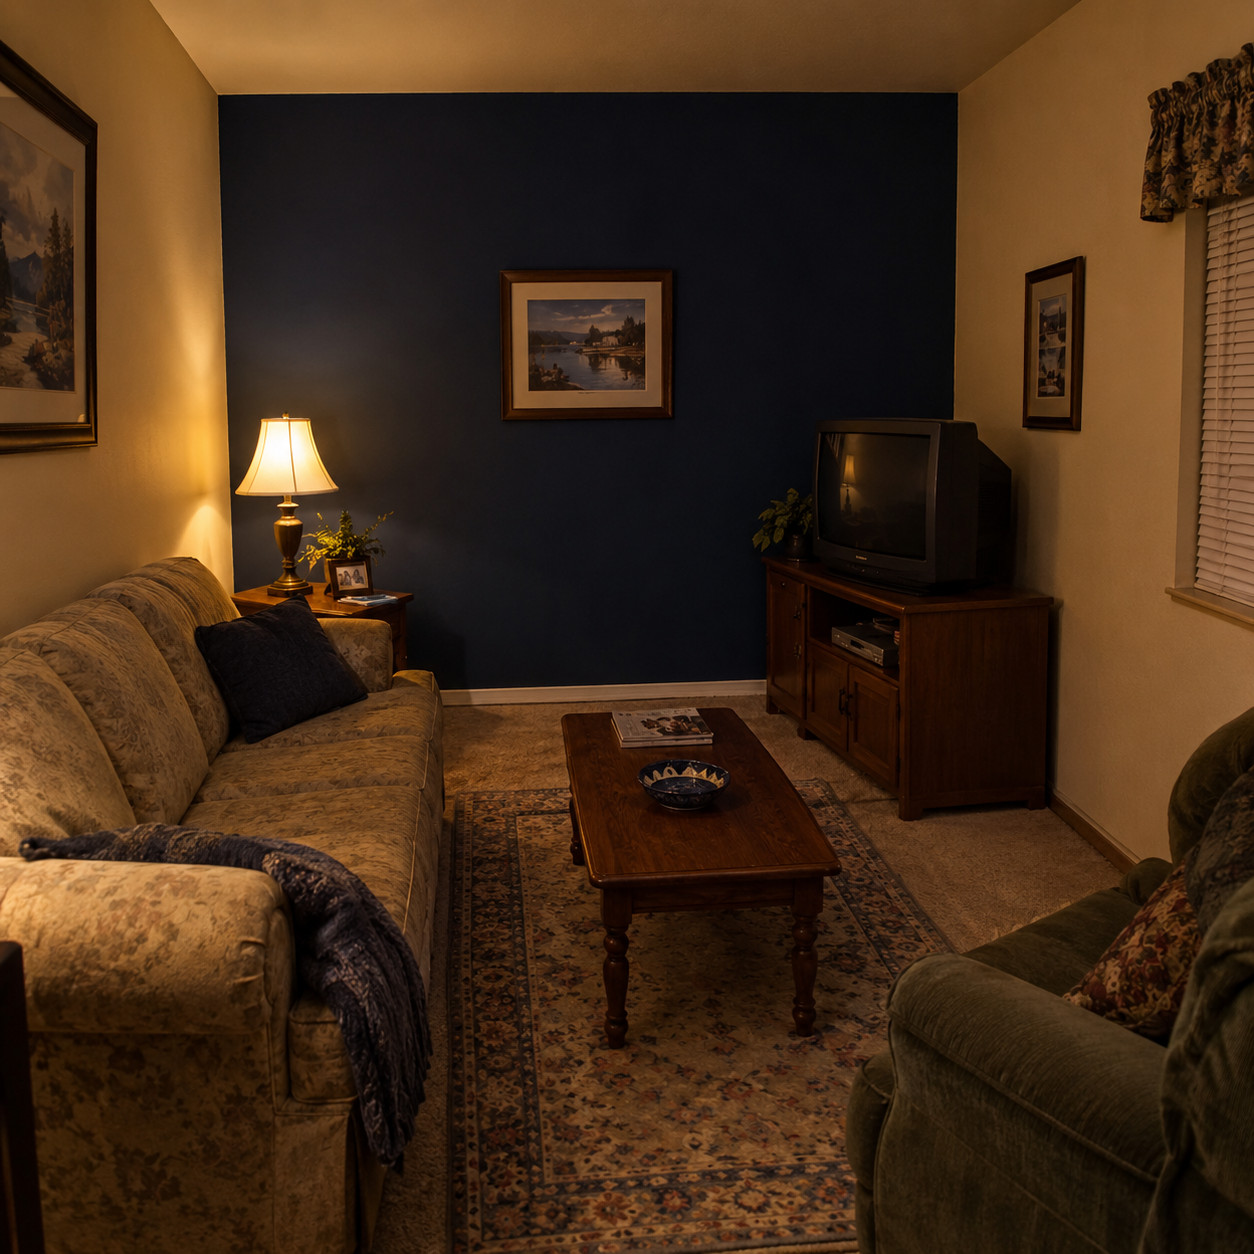
One dark wall in a room of beige was the defining move of 2005 through 2018. Painters now list it among the most-requested do-overs.
A dark accent wall eats light and visually pulls forward, which shrinks the room instead of adding depth. And covering it later takes three coats plus a tinted primer.
The current approach is color drenching — walls, trim, and ceiling in the same hue, often a softer version of the color you were going to use as the accent. The room reads enveloping rather than interrupted.
If you want one wall to be the feature, make it a real feature. Paneling, board and batten, or wallpaper gives it a reason to exist.
31. White Paint Over Original Stained Woodwork
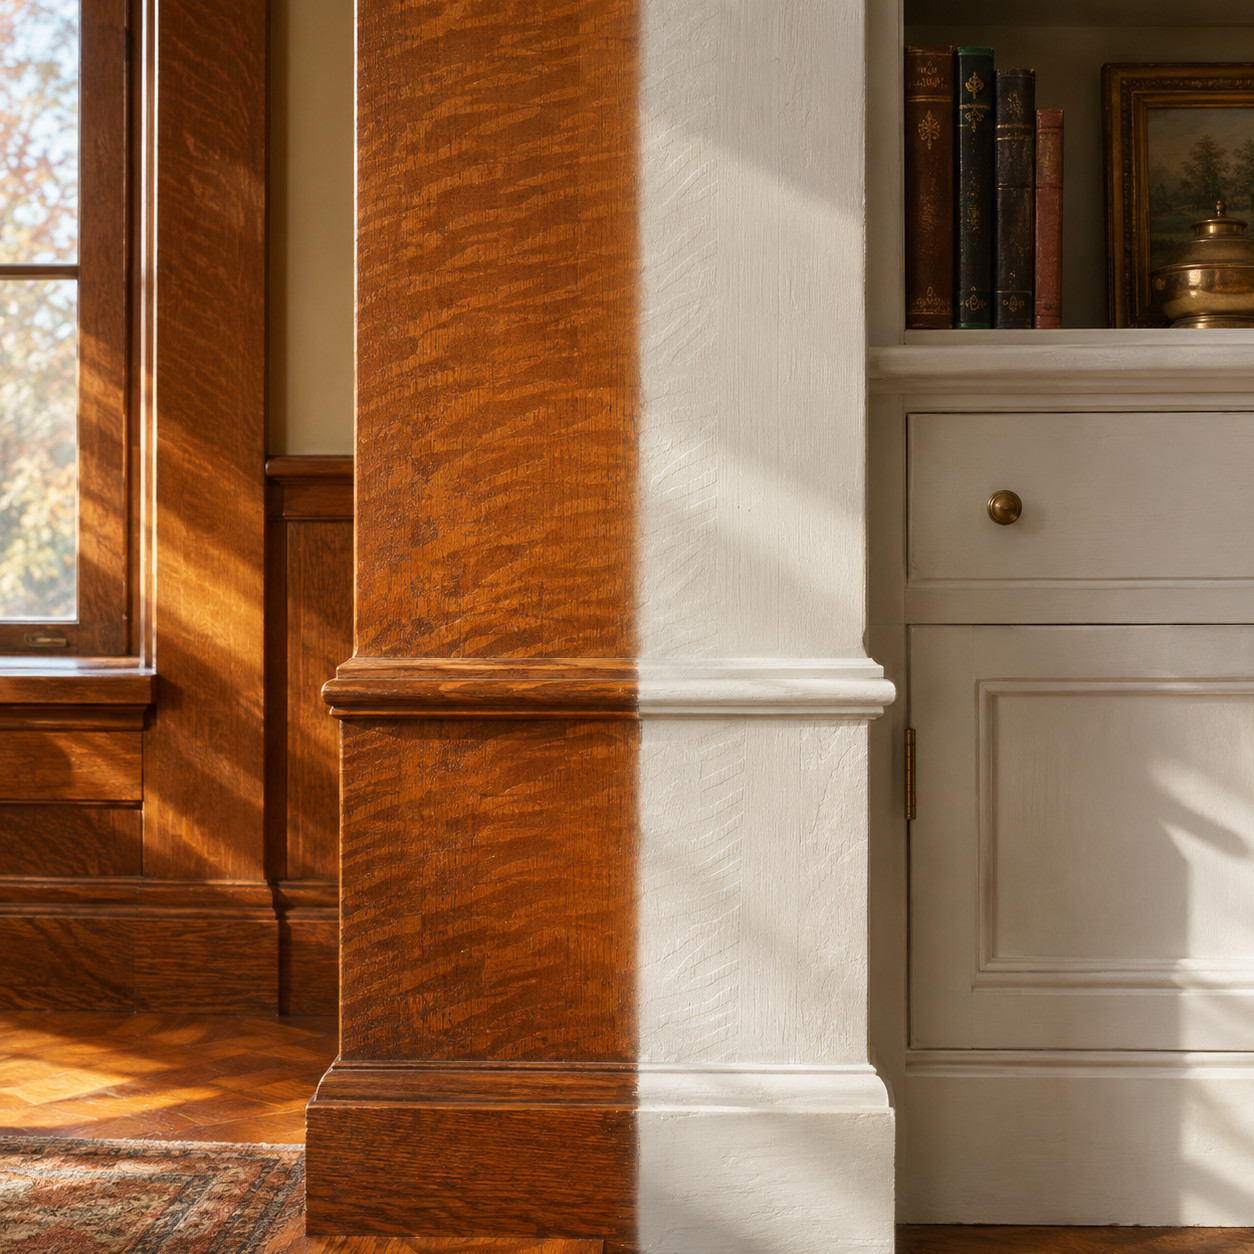
This is the one nobody gets back.
Quarter-sawn oak, chestnut, gumwood, old-growth fir — trim milled between 1890 and 1930 came from timber that doesn’t exist commercially anymore. The ray fleck in quarter-sawn oak alone would cost a fortune to reproduce today.
Painting it takes a weekend. Stripping it back takes a professional refinisher, a thousand dollars a room on the low end, and it still won’t look the way it did, because the original shellac and 90 years of patina don’t come back with it.
If the trim is dark and heavy, try this first: paint the walls a warm light color, change the lighting, and live with it for a full year. Nine times out of ten the wood stops reading oppressive once the walls stop fighting it.
Still want it white? Strip and repaint one closet interior and see how you feel after.
32. The All-White Kitchen
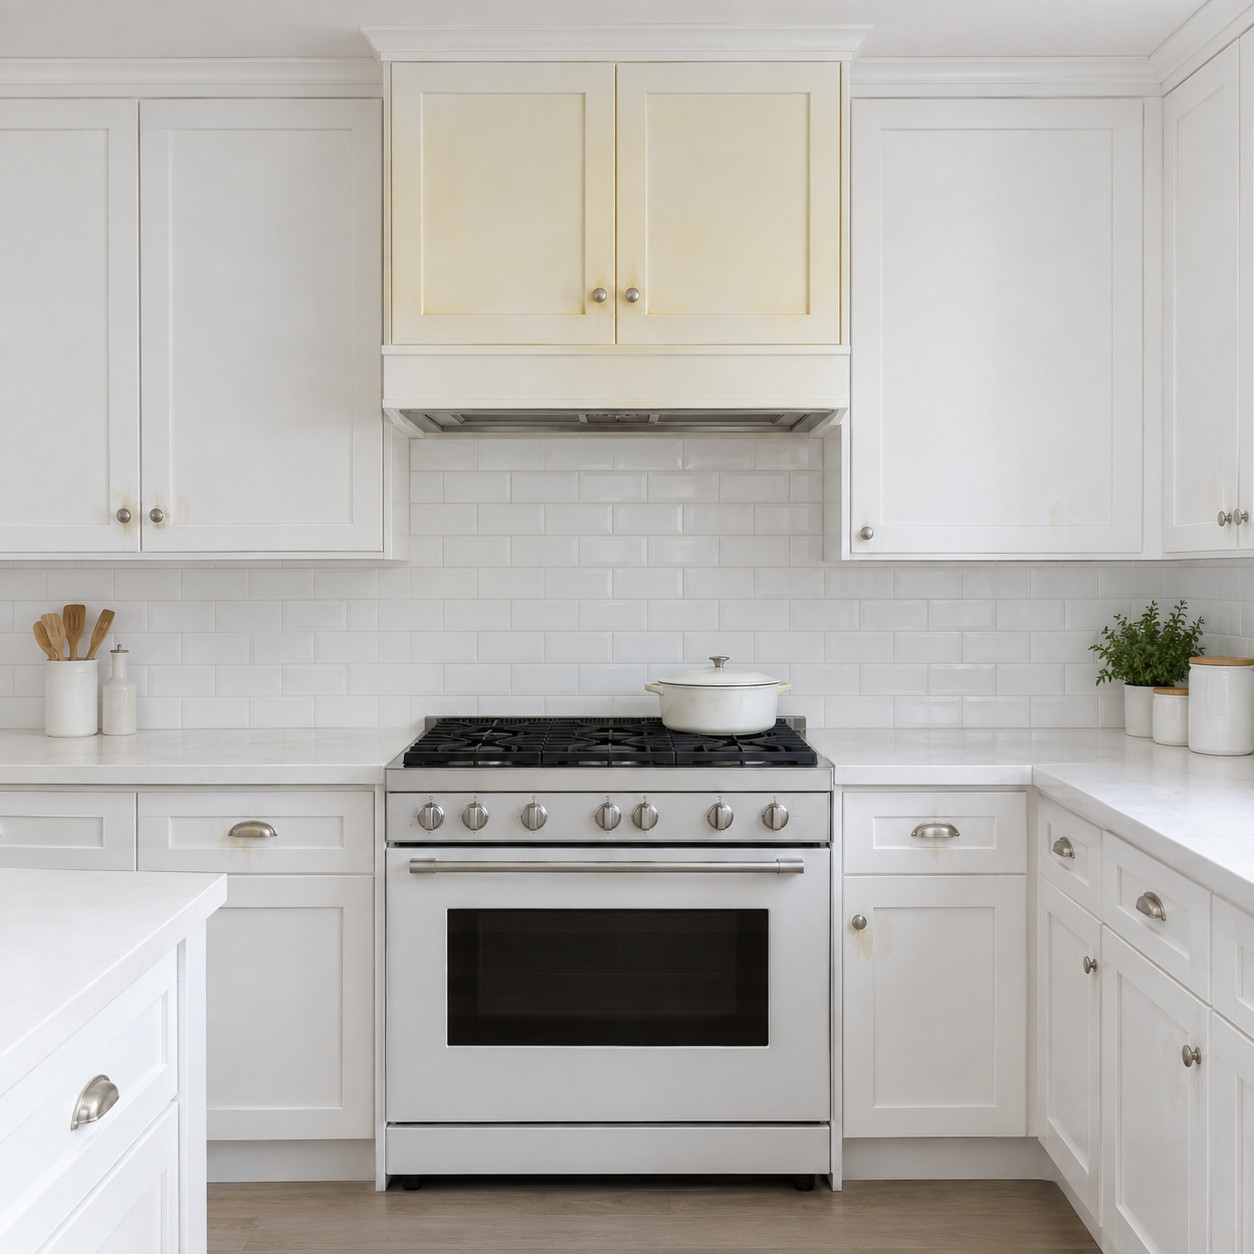
White kitchens dominated from roughly 2014 through 2022, and the backlash is already in progress.
The practical issue is that white cabinet enamel shows everything — grease fingerprints at the pulls, coffee splatter near the pot, the yellow shift that white paint takes on above a gas range.
The aesthetic issue is that an all-white kitchen has no hierarchy. Nothing recedes, nothing anchors, and the room photographs better than it lives.
Pros are grounding kitchens with wood or a mid-tone color on the lower cabinets and keeping white up top, where it still bounces light. It dates slower and hides more.
33. Painting the Brick Fireplace Black
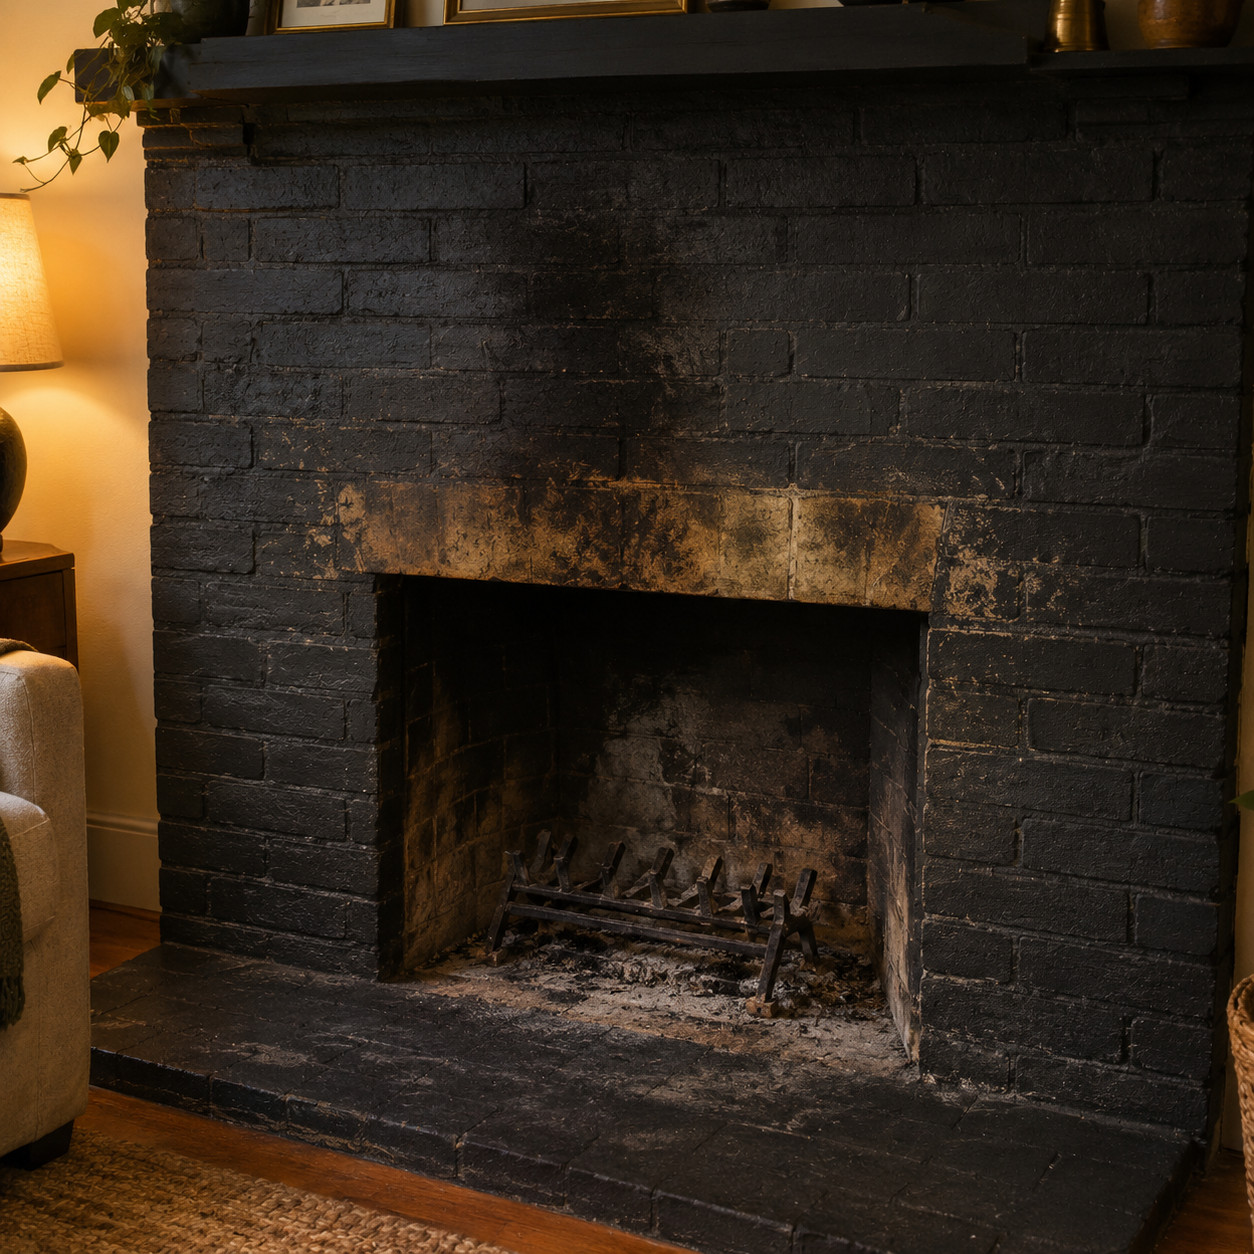
The moody black hearth ran hard from 2018 to 2023, and the mechanics are different from exterior brick — an interior firebox surround isn’t dealing with freeze-thaw.
What it is dealing with is heat and soot. Latex near a working firebox scorches and yellows, and the matte black that looked velvety in the showroom turns blotchy where smoke rolls out.
If the brick is a mid-century orange that fights everything in the room, limewash is the smarter move. It’s breathable, it softens the color without erasing the texture, and it can be adjusted or removed with water and effort.
Full-coverage black paint on brick is a one-way door. Be sure.
And if you’re weighing a bigger renovation, the same five-year math applies to the features homeowners regret most.
Paint is forgiving right up until it isn’t.
Almost everything on this list comes down to the same thing: somebody matched a product to a look instead of to a surface. The paint did exactly what it was formulated to do. It just wasn’t formulated for that job.
Spend the extra hour on prep and the extra thirty dollars on the right can. You’re not buying paint. You’re buying the next ten years of not thinking about it.