

This project was built and designed by Chris from A Glimpse Inside.
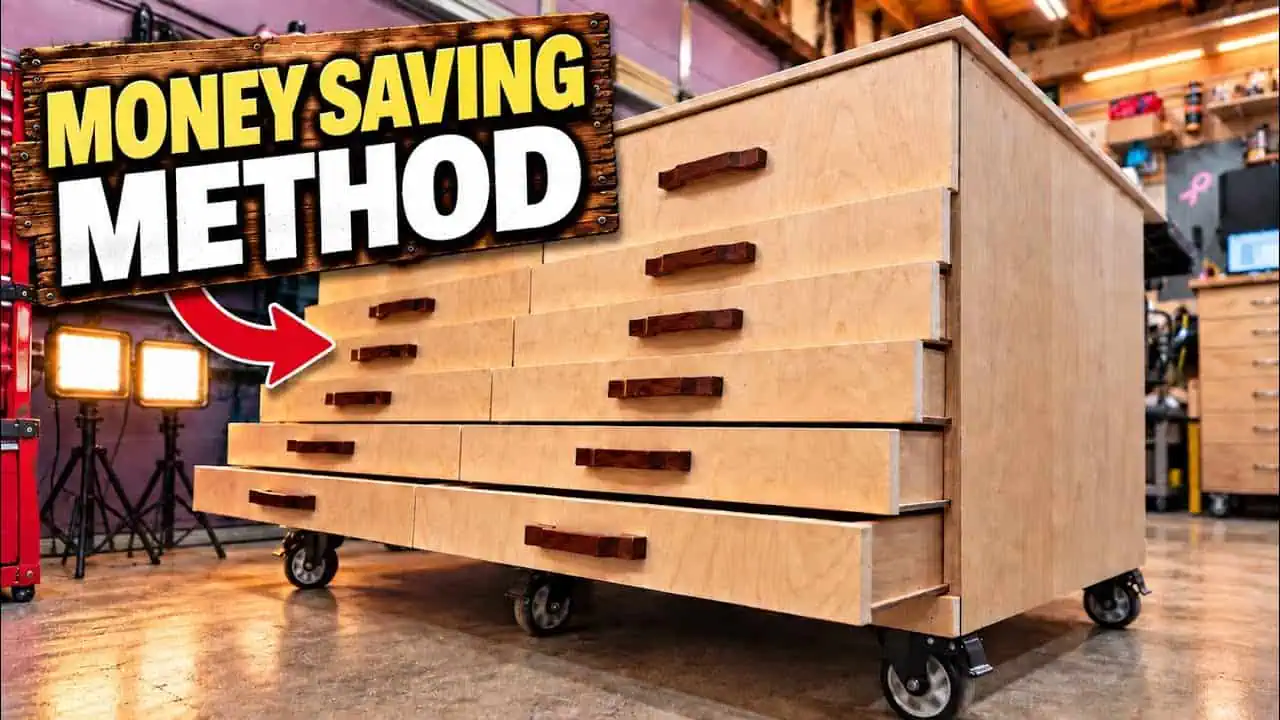
Chris set out to build a rolling workshop cabinet almost entirely from plywood, skipping traditional metal drawer slides altogether. The build started in his old shop in Jacksonville, Florida, and was finished up months later after a move to North Carolina, giving the video a bit of a two-part feel as the project traveled with him.
Watch the full video and subscribe to A Glimpse Inside:


Design and Drawer Concept
The whole idea behind this cabinet was to avoid buying drawer slides entirely. Chris explained that hardware can easily double or triple the cost of a project like this, especially when a large number of drawers are involved. Beyond the cost savings, he also liked the idea of being able to pull a drawer completely out whenever he wanted, rather than being limited by the travel of a slide.
Instead of metal hardware, thin plywood strips were used as built-in runners on the bottom of each drawer box. These strips ride in grooves cut directly into the cabinet carcass with a CNC machine, creating a simple but effective sliding mechanism using only wood.
Chris also mixed up drawer depths throughout the cabinet. Most of the drawers are shallow, intended for flat items like squares, rulers, and hand tools, while a few deeper drawers were included for bulkier items such as a belt sander and hand planer. He noted that this ratio is entirely up to personal preference and can be adjusted based on what someone plans to store.
Building the Carcass
The plywood panels were pre-cut on the CNC and assembled with a combination of glue and small nails. Chris pointed out that glue does most of the structural work in this kind of joint, but warned that the assembly needs to be handled carefully before the glue sets, since a single wrong move can pop a joint apart before it has time to cure.
After building one half of the cabinet, a second matching half was assembled separately. The two large sections were then joined together using long pipe clamps to keep everything aligned, followed by screws alone, with no glue needed between the panels. Screw heads were countersunk so they wouldn’t interfere with the drawer runners riding in the grooves.
For anyone planning a similar workbench or shop cabinet, Chris recommends building in smaller sections and joining them into one larger unit, which makes assembly far more manageable than trying to build one giant carcass all at once.
Adding Mobility
To make the cabinet easier to move around the shop, Chris added extra support blocks to the base and mounted a set of casters using metal fasteners. He used a stash of caster wheels he had picked up years earlier, arranging six total with a pair in the center for added support under the middle of the cabinet.
This kind of setup is a good reminder that keeping a small supply of casters or hardware on hand can come in handy for future shop projects, even if they aren’t part of the original plan.
Walnut Drawer Faces and Pulls
To break up all the plywood, Chris brought in a couple of walnut boards that had been gifted to him, which were used to make custom drawer faces and integrated pulls. He designed his own curved profile for the pull area, inspired loosely by an Asian pagoda-style edge, and cut it out using a laser-cut cardboard template to keep the shape consistent across every drawer.
The drawer faces were attached with screws only, no glue, using the template to keep pull placement uniform on both the large and small drawers. Chris also made an effort to match wood grain from board to board across the drawer faces, admitting that while most people won’t notice this level of detail, it’s the kind of touch that other woodworkers tend to appreciate.
During the move between shops, movers accidentally dropped the cabinet, which damaged some of the grain matching Chris had carefully planned. Rather than starting over, he repaired the drawer faces as best he could and pressed on, a good reminder that even carefully planned details sometimes need to flex around real-world mishaps.
Finishing the Pulls and Drawers
After shaping and sanding the walnut edges to get a smooth, rounded feel on the pulls, Chris applied a clear matte spray finish instead of his usual hard wax oil. The process involved several light coats, with a short dry time and a light hand-sanding between each layer, along with wiping down dust with mineral spirits between coats.
This method produced a smooth, attractive finish on the pulls in about half a day, and Chris noted it’s a simple, inexpensive option worth trying for smaller detail pieces like this.
Building the Outfeed Table Top
With the cabinet essentially complete, Chris turned the top surface into an outfeed table for his table saw. A plywood top faced with maple veneer was rounded over on all edges and sanded smooth before installation, aiming for a surface that wouldn’t catch or splinter material sliding across it.
A layer of Baltic birch was added on top and secured with countersunk screws around the perimeter, both for rigidity and to raise the surface height slightly to match his table saw. Some of the drawers had to be pulled out temporarily to access mounting points from underneath, and the height was fine-tuned until the outfeed surface lined up properly with the saw table.
Why This Approach Works
This build is a good example of how a shop cabinet doesn’t need expensive hardware to function well. By using plywood runners instead of purchased slides, Chris kept costs down while still ending up with drawers that pull out fully and operate smoothly. The added walnut details show that even a heavily utilitarian shop piece can include some visual interest without much extra effort.
Please support Chris by visiting his website: https://aglimpseinside.org/

Matt’s Take
These are my personal thoughts and tips based on my own experience in the shop. This section is not written, reviewed, or endorsed by the original creator of this project.
Skipping metal slides for wood-on-wood runners is a neat approach, and it’s worth knowing this isn’t a new idea either—plenty of old shop furniture and even antique dressers used solid wood runners in grooves long before slides were common. The key to making them work smoothly is consistent stock thickness and a little wax or paraffin on the runners. It cuts down on friction and keeps things gliding instead of sticking, especially in a shop where sawdust and humidity swings are part of daily life.
On the glue-versus-screws question for the drawer faces, that’s a smart call for a shop cabinet. Screws let you pull a face off later if a runner ever needs adjusting or a drawer box gets racked out of square, which happens eventually with daily use. If you’re building something similar, I’d suggest waiting to permanently attach any drawer faces until the whole cabinet has settled for a few days, since plywood carcasses can shift slightly as glue cures fully.
The caster placement is worth paying attention to as well. A heavy plywood cabinet loaded with tools can get surprisingly top-heavy, so that center pair of casters isn’t just a nice touch, it’s genuinely helping distribute weight and keep the middle from sagging over time. For anyone building a mobile cabinet like this, locking casters on at least two corners are worth the extra few dollars so the whole thing doesn’t roll away while you’re leaning on it.
Lastly, that spray finish approach on the walnut pulls is a good one to keep in your back pocket. Wipe-on finishes are great for larger surfaces, but for small detail work like curved pulls, a light spray coat dries faster and avoids pooling in the curves, which is an easy mistake to make with oils on shaped edges.