

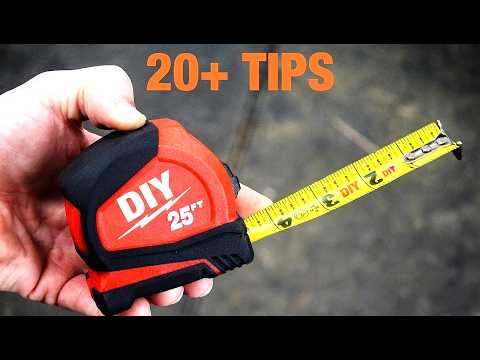
Clinton from Specific Love Creations shared the woodworking tip featured in this video.
A tape measure seems like one of the simplest tools in the shop, but there’s a surprising amount of nuance packed into that little metal case. Clinton walks through more than twenty tricks that go far beyond basic measuring, covering everything from accuracy checks to using the tool as an improvised square, compass, and plumb line.
Watch the full video and subscribe to Specific Love Creations:
Accuracy and Consistency
Clinton starts by pointing out something many woodworkers overlook: not all tape measures read exactly the same. Slight manufacturing variances or wear over time can cause two tapes to disagree by a small fraction of an inch. Because of this, he recommends sticking with a single tape measure for the duration of a project rather than switching between several.
He also explains the wobbly end hook, which often gets mistaken for a defect. That slight movement is intentional, allowing the hook to shift the thickness of itself so the tape can give an accurate reading whether measuring from an outside edge or butting up against an inside surface.
For situations where precision really matters, such as furniture or small projects, Clinton suggests skipping the end hook altogether. Instead, start the measurement at a clean number like the one-inch mark, take the reading, then subtract the starting point from the total. This removes any doubt about whether the hook is behaving correctly.
Working With Long or Awkward Measurements
When a tape measure is stretched out over a long span, it naturally starts to sag, which can throw off the reading by a noticeable margin. For long stretches, Clinton recommends having a second or third person gently support the tape underneath at one or two points to keep it straight.
He also shows how to figure out a tape’s “stand-out” length, meaning how far it can extend on its own before drooping. Knowing this number ahead of time is especially useful when working from a ladder, since it tells you whether you’ll be able to reach a measurement without climbing down to reposition.
For awkward materials like pipe, rebar, or glass where a nail can’t be used to anchor the tape, a simple binder clip clamped in place gives the hook something firm to catch onto.
Working solo often means the tape slips loose mid-measurement. Clinton shows how the small slot in the end hook, normally meant for a nail, can be used with a thumbtack pressed into the workpiece to hold the tape in place while measuring alone.
Layout Tricks Beyond Basic Measuring
One of the more surprising uses Clinton demonstrates is turning a tape measure into a makeshift compass. By placing a small nail through the slot in the hook and pivoting the tape around it, it’s possible to draw clean arcs or circles at whatever radius is needed.
He also shows a method for marking a straight cut line without a square. By aligning a pencil against a specific measurement on the tape and dragging both together across the board, it’s possible to scribe an accurate line parallel to the edge.
Finding the exact center of a board can be tricky when the total measurement isn’t an easy number to divide. Clinton shows a simple trick of aligning the tape between two numbers that are easy to split in half, which avoids fumbling with awkward fractions.
For measuring around round objects like posts or pipes, wrapping a string or rope around the item and then measuring the string is far gentler on the tape than trying to bend it around a curve.
Hidden Features on the Tape Itself
Many tape measures double as a square, and Clinton checks several examples against a known square to demonstrate that this isn’t always reliable. It’s worth testing your own tape before trusting it for this purpose, since some are accurate and others are noticeably off.
He also explains the small number printed on the back of the sliding hook, which represents the housing’s width. This number can be added to an inside measurement to calculate an inside corner-to-corner distance without kinking the tape into a tight space.
The markings along the blade itself carry extra information for builders. Black squares mark foot intervals, a red square highlights the 16-inch mark common for stud and joist spacing, and a black diamond marks 19.2 inches for certain engineered spacing requirements.
A tape measure can also double as a plumb bob. By holding the blade against a top surface and letting it hang down, then comparing the distance at the top and bottom, it’s possible to get a rough visual check on whether something is vertical.
Maintenance and Care
Letting the blade snap back forcefully might seem harmless, but Clinton warns it can wear out the internal spring, bend the end hook out of shape, or even cause a nasty cut if a finger gets in the way. Allowing the tape to retract with a little resistance protects both the tool and the user.
Moisture, sap, and sawdust buildup are common culprits when a tape measure starts to rust or jam internally. Keeping it stored somewhere clean and dry goes a long way toward extending its lifespan.
If a tape ever starts retracting weakly, it may simply need to be pulled all the way out and allowed to rewind, which can reset the internal spring tension. And after any hard drop, it’s worth checking the hook for bending and rechecking a few measurements to confirm the sliding adjustment still reads accurately.
A Tool Worth Understanding Better
What stands out across all of these tips is how much extra functionality is packed into a tool most woodworkers take for granted. From acting as a makeshift compass to revealing hidden stud-spacing marks, a tape measure offers a lot more than a simple length reading.
Taking the time to understand these small details can prevent costly measuring mistakes and even eliminate the need for extra tools on the job.
Watch the full video and subscribe to Specific Love Creations:

Matt’s Take
These are my personal thoughts and tips based on my own experience in the shop. This section is not written, reviewed, or endorsed by the original creator of this project.
The tape measure is one of those tools that gets picked up a hundred times a day without much thought, so it’s easy to see why so many of these tricks fly under the radar. I’ve been using tapes for years and still learned a thing or two watching this rundown. The “true zero” trick, starting at the 1-inch mark and subtracting, is one I use constantly for fine furniture work where a sloppy hook reading can throw off a whole joint.
One thing worth adding: not all tapes are created equal when it comes to blade quality either. Cheaper tapes tend to have thinner blades that kink or crease easily, which can actually throw off your stand-out length over time. If you’re doing a lot of layout work, especially reaching across a sheet of plywood or working solo on a ladder, it’s worth spending a little extra on a tape with a wider, stiffer blade. Something in the 1-inch width range holds its own weight much better than the narrow 3/4-inch tapes.
On the safety side, that snap-back warning is worth taking seriously. It’s a small thing, but a fast-retracting hook moving at speed has genuinely drawn blood on more than one job site. Get in the habit of guiding it back with your thumb.
Lastly, the stud markings are worth memorizing rather than relying on in the moment. Knowing at a glance that the red diamond means 19.2 inches saves you from doing math with a pencil behind your ear.